Showing posts with label DIY embellished tote bag. Show all posts

Slice of Citrus Tote

Thursday, June 2, 2011


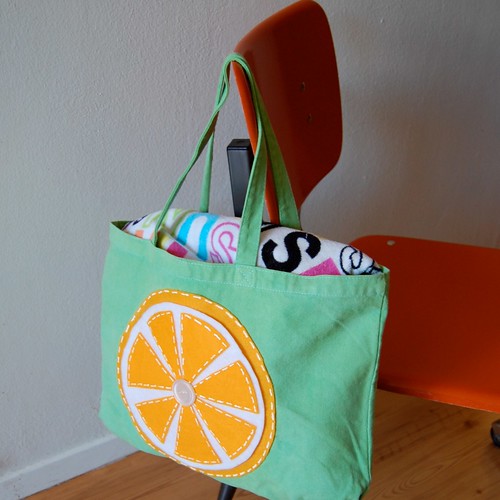
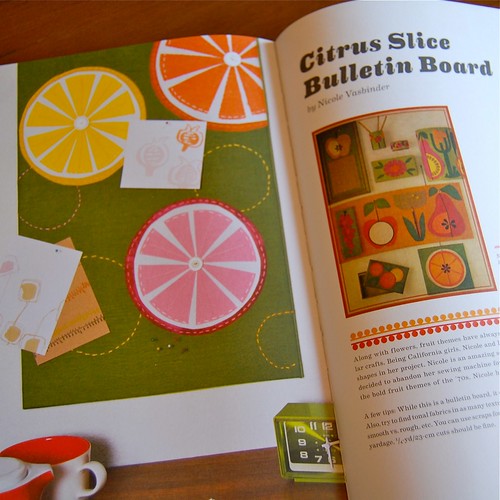
Recently when I interviewed Cathy Callahan about her book Vintage Craft Workshop: Fresh Takes on Twenty-Four Classic Projects from the '60s and '70s I was inspired by the Citrus Slice Bulletin Board made by Nicole Vasbinder. Summer is here and I was in need of a new bag to take to the pool and those big orange slices came to mind.
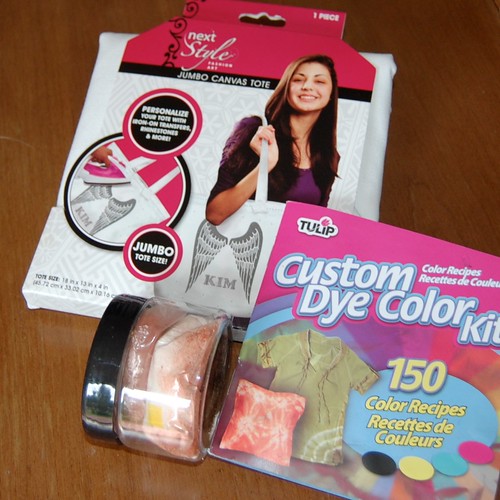

SUPPLIES
2 White Buttons
Tulip Custom Dye Color Kit
Orange Felt
Salt
Tulip Tote
White Felt
Tub for Dying
Aleene's Fabric Fusion Glue
Scissors
Tulip 3D Fabric Paint
Cardboard
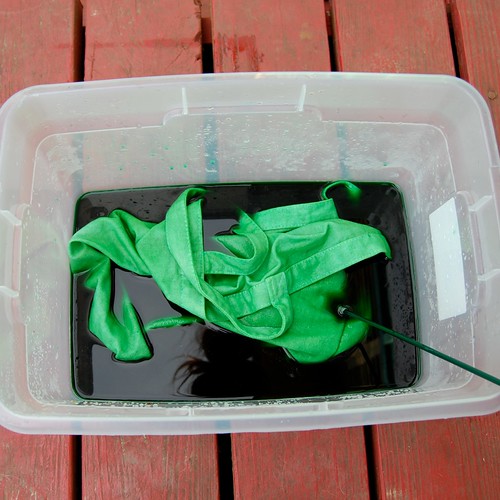

The first thing I did was wash my tote bag. Any time you are going to dye anything if it is brand new be sure to wash it first. Once the tote was washed I put it in a tub with salt and water. I love being able to pick from about a bazillion shades of green when I use the Custom Dye Kit. Follow the dying directions then wash and dry your new green tote bag.
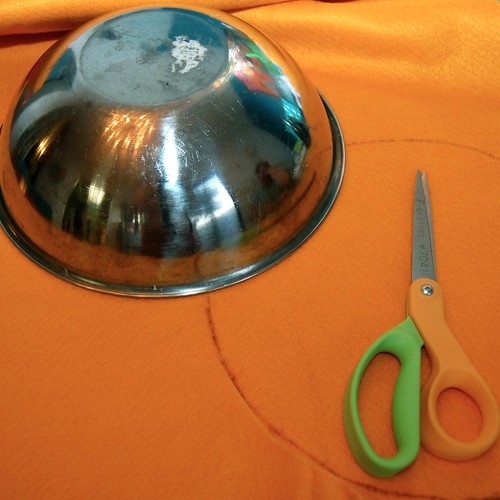

While the tote was dying I cut out my felt using various bowls and cups as my guide. You will need...
1 large orange felt circle
7 large pie shaped pieces of orange felt
1 large (but not as big as the orange one) white felt circle
2 small orange circles
1 small (smaller than the orange circle) piece of white felt
1 small rectangular piece of orange felt
8 small pie shaped pieces of orange felt
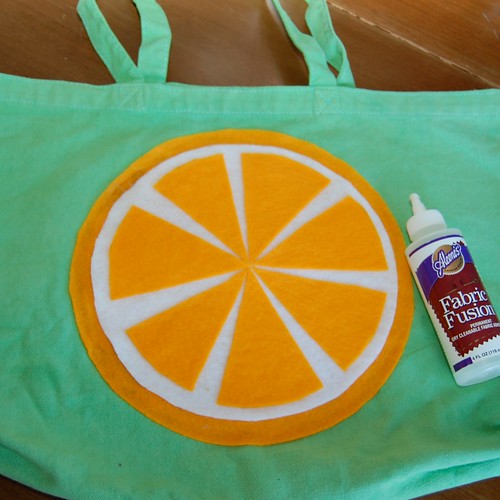

Once all my pieces were cut out I put together the large orange slice that was going on my tote bag using Fabric Fusion Glue. Next I glued the orange slice to my tote bag.
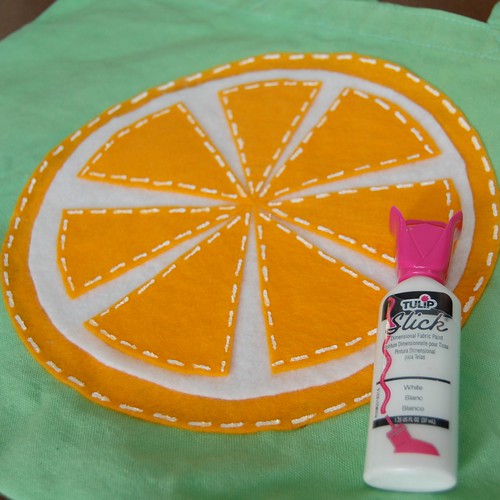

Sure I could have actually gone around the edges of my orange and embroidered, but why when you can get the same look in a lot less time with fabric paint. Just paint little dashes and presto looks like you spent hours stitching.
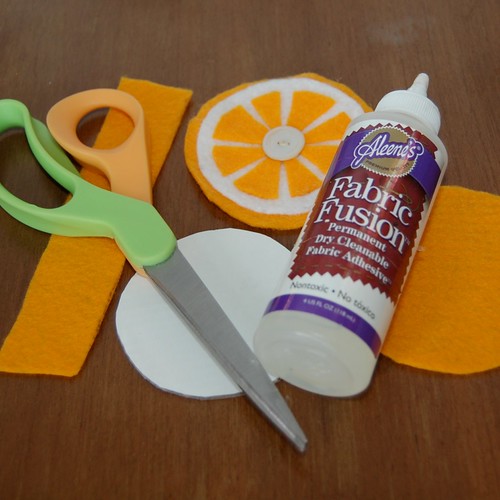

Using the smaller pieces of felt I cut out I made a key chain. I made the small orange slice the exact same way as before. You want a piece of cardboard slightly smaller than your orange. Sandwich the cardboard between the two small orange circles. Fold your orange felt rectangle in half and stick the loose ends in your cardboard felt sandwich. Use Fabric Fusion Glue around the edges and pinch to seal.


All that was left to was glue a small white button in the center of each citrus slice. I already have my bag packed with towels and sunblock, can't wait to hit the pool with my new bag!


Check out more I Love to Create projects by Jennifer Perkins right here.


Visit us on Facebook!
Craft on! Click here for today's daily giveaway!

CRAFTY CINEMA: Eat Pray Love

Friday, August 13, 2010


In the best-selling book, author Elizabeth Gilbert travels to Italy, Indonesia and Bali in pursuit of inner happiness. The page-turner struck a nerve with women everywhere and has now been made into a motion picture starring Julia Roberts. While exotic and entertaining to read and watch - reality is that not all of us are able to go to such lengths for our own self-discovery. We have to find bits and blocks of paradise within our everyday lives. To me, this is where crafting comes in. My dream is to go to India someday, but until then, I'll have to settle for renting Bollywood movies and incorporating the beloved culture into my decor and style.

India and Indonesia were the inspirations for this tote. First off, I chose a tote because it is the ultimate travel companion. Between shopping and sightseeing, you need a carry all to hold all your treasures! For the background, I wanted an Indonesian batik-effect, and for the top, I celebrated Indian henna art. I felt guilty for leaving out Italy (a place that I did get to visit!), so I added "vini, vidi, vici," (I came, I saw, I conquered).

Materials List


Instructions

1. Cover work surface with plastic. Prewash tote and iron flat.
2. Arrange the chunky yarn on top of the canvas tote and make it swirled all over. Spray with lime green fabric paint. Make sure it is saturated very well.
3. Remove the yarn and spray the yellow over the open spaces where the yarn was. Let dry for four hours.
4. Use the Black Tulip 3D Fashion paint to draw henna designs all over the tote. Let dry for several hours.
5. Color in various areas with red marker.

Miscellaneous Notes

Henna designs can be found on internet.

ILoveToCreate Teen Crafts: Totally 80s Pollack Inspired Tote Bag

Tuesday, May 11, 2010

ILoveToCreate Teen Crafts
How To Make a:
Totally 80s Pollack Inspired DIY Tote Bag

Margot Potter The Impatient Crafter™
“Mom crafted, kid approved.”

Sometimes you make crafty gold and sometimes you make...this purse, but whatever you do, own it fully and more importantly, enjoy the journey. By the end of several hours of earnest crafting, I was convinced I was staring at a full on craft fail. Then the buzzer sounded and I was staring at this tote bag, thinking...really, Madge? Is this your teen craft project for this week?!

All in all, this just might be a bit of a hot mess, but Avalon came home from school and absolutely loved it. Who knew?! I have to remind myself sometimes that my focus here is 'teen crafts', which means the projects can be quirky! This has definitely got a modern art meets the 80s appeal. It’s fun to let all propriety go and squeeze paint with abandon on a canvas. I can see why Jackson Pollack enjoyed it so much. In this case, the canvas is a tote bag and the paint is Tulip dimensional fabric paint. It’s the perfect medium for this kind of design because it won’t run and stays dimensional after it dries. After layering on paints, I carved out some floral shapes with the tip of a paint tube and embellished them with metal chain and the foil side of some old faux gemstones. Aleene’s glues make it easy to stick just about anything to just about anything else! The floral trim is from Prym-Dritz, I gave it an edge using a Tulip Fashion Graffiti Big Phat marker.

I think other teens will dig this too. (Yeah, I said dig it.) Send them outside with some canvas totes, markers, stencils, trim, adhesives and a bin full of fabric paints and sprays and let them make some glorious messes of their own!


Materials

Fuchsia Canvas Purse
Raveled Rosettes Fabric Trim
Tulip Fashion Graffiti Big Phat Marker
Tulip
Dimensional Fabric Paint Metallic Silver, Matte Black, Slick Fuchsia
Ranger Alcohol Ink Mixative Silver
Aleene’s Liquid Fusion Glue
Aleene's Jewel-it Glue
Flat back silver faux gems or the foil side of old faux gems

Tools
Scissors
2 pairs chain nose pliers


1. Layer Dimensional Fabric Paints on canvas by squeezing the tubes about 8 inches from canvas and moving the paint stream into circles and lines and squiggles. Keep making layers until you’re pleased with the results.


2. Use the tip of one of your paints to carve floral swirls out randomly.

3. Squeeze and shake silver mixative over paint layers randomly. Squeeze into the center of your carved floral areas (a little goes a long way.) Allow the paints to dry.


4. Use the marker to darken the frayed edges of the flower trim.


5. When the paints have dried, use Aleene’s Jewel-it to add gems to center of carved flowers.

6. Place chain around flower to determine length needed. Remove segment from core chain using pliers. Add a line of glue around flower and glue down chain. Repeat for each flower.

7. Glue the flower trim across the top of the purse using Liquid Fusion Glue. Allow to embellishments to dry.