Showing posts with label Scribbles fabric stamp pads. Show all posts

Feather-stamped Tee and Bag

Tuesday, November 5, 2013

When I was young I had a collection of rubber stamps.  The only thing I ever used them for was making cards.  However, with the I Love to Create products, I use stamps in so many different ways.  I carved this feather stamp and used it on a couple of projects here to show you how you can make use of any stamp you might have.
Read more »

Fingerprint Balloon Pillow

Tuesday, June 4, 2013
I long time ago I came across a cute poster with a bike that had balloons tied to it.  I thought it would make a great pillow and our pillow covers are really worn out.  Here's how it came out.


I started with a blank pillow cover which I found at Ikea.  It was a few dollars and it has a nice zipper in it which is great for washing.  I created a freezer paper stencil of a bike.  (If you've never tried freezer paper stenciling I have a how to video HERE.)  You cut the paper and then iron it onto the fabric to seal it on.  I usually use paint with these stencils, but I thought I'd go for fabric markers this time around.


With a stencil it's super easy.  Even if you color out of the lines, it won't show because the stencil is forgiving.


Peel it off and your image is perfect.  After I removed the stencil I added a few lines for balloon strings.


Then colored my finger with Tulip fabric markers and stamped it to create ballooons.


I also use the Scribbles fabric stamp pads to get a wider variety of colors.  The finger stamping is really easy.  You can't do it incorrectly.


And here's the finished pillow.


 I think it would make a cute shirt as well.


Fun With Fabric Stamp Pads

Tuesday, October 2, 2012
The other day I spent some more time playing with the Scribble Fabric Stamp Pads.  They are pretty versatile and they make a really easy project.


Today I'm going to show you two things I did with them.  

Scribbles also carries a ton of really cute foam stamps you can use with them.


I like press the stamp pad onto the stamp (instead of the reverse) so I can see what I'm doing.


I also recommend checking the stamp before you stamp it down to make sure you have enough ink on it.  Gently wipe the edges of the square so they don't mark up your project.


First, I created a personalized baby gift with them.  I stamped a burp cloth and a onesie...


...and then I wrapped it up for a super easy baby gift.


With the stamp pads you can also use any rubber stamps you have.  I have a thing for cute stamps and so I got out some of my own to use on a little library tote for the boys.  (I got both of these from Anthropologie a few years ago.)


And here's the bag front and back.


The stamping is kind of a nice, instant-gratification craft that anyone can do.  It's easier and faster than sewing or freezer paper stenciling.  Plus if you have (or make your own) stamps, you can use them over and over again.


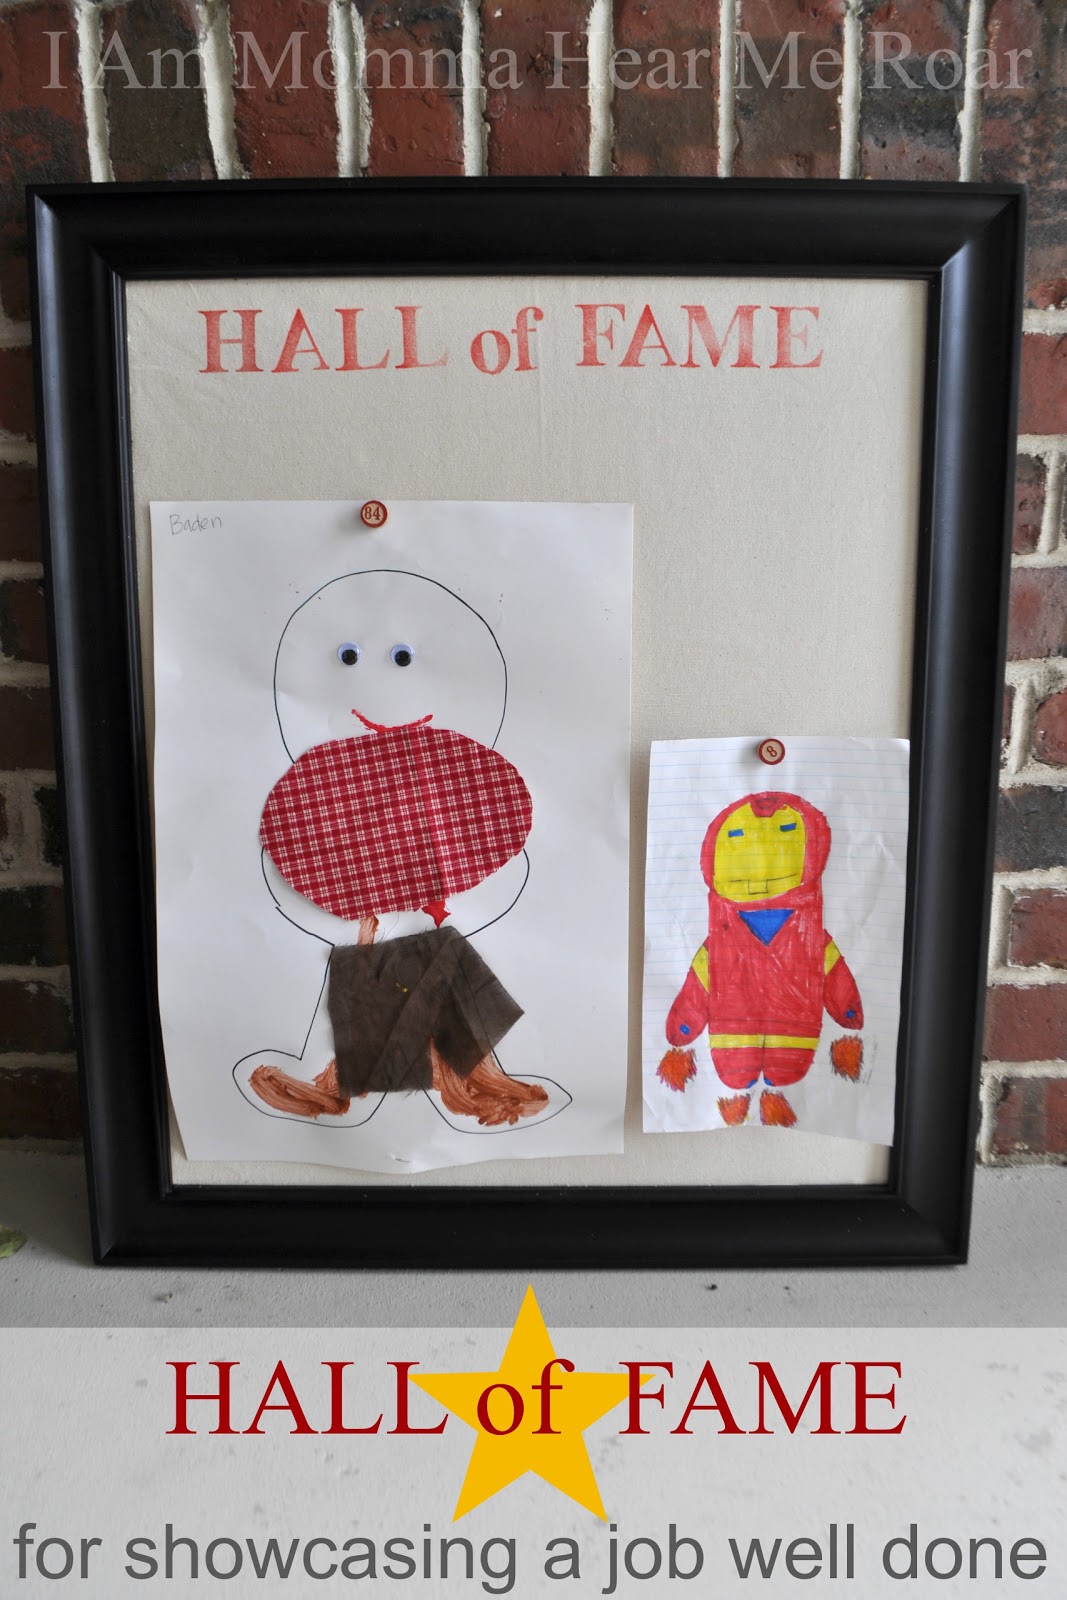
"Hall of Fame" Board

Tuesday, September 4, 2012
Now that both of my little guys are bring projects home from school I wanted a prominent place to put their work on display.  So, I made this "Hall of Fame" board so we can hang those cherished items for a while.


I purchased a bulletin board first.


And then I cut some fabric to cover the bulletin board - just to give it a more finished look.  


After ironing the fabric I used a little bit of Aleene's Tacky Spray to attach the fabric to the bulletin board and then I tucked the edges of the fabric into the frame with a butter knife.


Then I used the new Scribbles Fabric Stamp Pads and the Scribbles Alpha Stamp Kit to write "Hall of Fame" on the fabric.


Now it's ready to hang anything special.


DIY Clothing Labels

Tuesday, August 7, 2012
I've always thought it would be fun to have some type of clothing label to put on the clothes I've made for my boys, but personalized labels can get kind of pricey.  Well, Scribbles recently came out with these new fabric stamp pads and they come in lots of colors.  I have about a billion projects planned for these guys.


So, I made my own stamp to create these little clothing labels.


I got out an eraser to make the stamp and I drew on the letters backwards.  Then I used a craft knife to carve out the negative space.


Once you stamp it on the ink pad you can see if you've cut away enough of the eraser.


I left my edges a little higher because I liked the look of the slight outline around the word "ROAR."


You can vary the look of the stamp, depending on how well you covered it with the fabric stamp pad.  I liked the aged look here.


To create my little labels I just stamped it on some knit fabric, cut it out, and.... 


.....sewed it on in a fun messy way.  Knit fabric doesn't fray so I left the edges.  You could make more formal looking labels by using a ribbon or any fabric with the edges tucked and sewn under.


I experimented with stamping the label in other places.  I liked the look of it just up one sleeve.


Since you can change the fabric, the color of the fabric stamp pad, or the location of the label you can come up with a ton of different looks.  Be sure to heat set the stamp when you're done (which is done by placing a cloth over it and ironing it).


And now the clothing has that extra personal touch.