Showing posts with label aleene's fabric stiffner. Show all posts

MAYA IN THE MOMENT: Stiffened Embroidery Floss Friendship Bracelets

Wednesday, March 21, 2012
Hmmm, how did she get those in perfect circles? Read on and see!
 I have to say, this project was a BIGGIE for me. Why? Because I outsmarted my mom, LOL! My mom is The Crafty Chica, crafts are her life. I saw her trying to make bracelets from embroidery thread and water bottles, but she was going about it the wrong way. She had too many layers going on, it didn't work, and she gave up on the idea. I stepped in and saved the day!

The key was to use less thread and use it in a single layer - it worked! I've been wanting to make embroidery floss friendship bracelets lately but didn't have time. I'm glad I waited because this method is fast, different and very colorful and fun!

 Here is what you need:
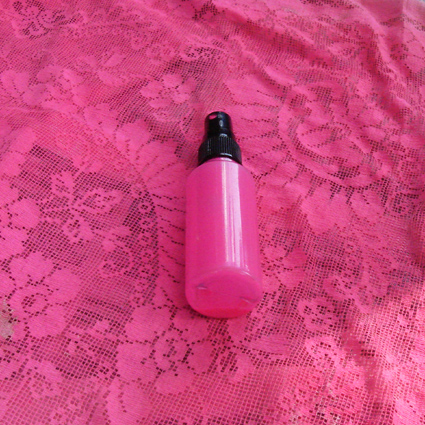
Aleene's® Stiffen-Quik™ Fabric Stiffening Spray
Embroidery Floss
Water bottle
Wax paper
Scissors
 Wrap the thread around the water bottle. Try to keep it in a flat even layer.

Line your work area with wax paper. Spray generously with the Stiffen Quik all over the floss. Rub your finger over the end of the floss to seal it. Make sure it is super-duper wet!

 Let it dry for a couple hours (I waited over night). Cut the bottle and carefully remove the newly-stiffened bracelets.
This is what they will look like. I discovered that even though they are stiff, they are kind of flimsy. This is where the reinforcement comes in! 
 Choose a contrasting color of floss and tie it at one part of the bracelet. Wrap and wind it all around the bracelet. Use a bit of glue to seal the end.

 Here's a closer look at the process! Super easy!

 Here it is, one finished!

 This is my finished batch - minus a few that I already gave away. That's when you know it's a good project, when you want to share it!

See the fourth one in from the left? I used sewing thread! It worked too! You can also separate the embroidery floss if you want a thinner look. I love the bold and bright color scheme!

I hope you liked my new project! Come join me at my Facebook page!

The 'Put a Bird on It' Brooch - An Ode to Portlandia

Friday, January 13, 2012


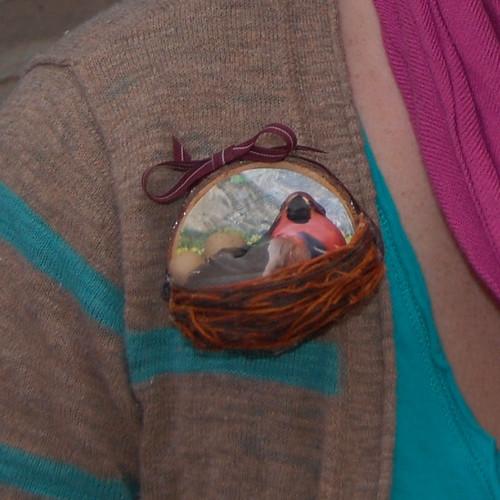
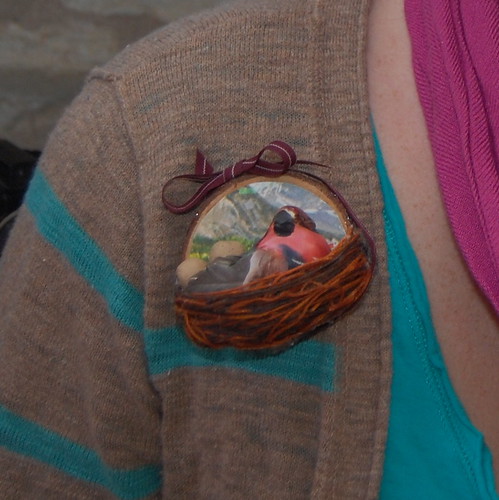
If you are looking for some stellar television to add to your list of much watch shows, might I suggest Portlandia. I was skeptical with a dude from Saturday Night Live and a chick from Sleater Kinney - and then I watched it - and then I fell in love. I have always heard that Austin and Portland are sister cities and after watching the skits on this show I believe it. One of my fave segments was entitled "Put a Bird on It". As we all know good craft trends die hard and this feathered favorite appears to be here to stay. In celebration on Portlandia's second season starting I am making my ode' to the show. The 'Put a Bird on It' brooch.


SUPPLIES
Wooden Disc
Scissors
Aleene's Liquid Fusion Glue
Collage Pauge
Forest Picture
Hot Glue Gun
Collage Pauge Decoupage Medium
Faux Bird
Faux Eggs
Embroidery Thread
Aleene's Fabric Stiffener and Draping Liquid
Vasaline
Small Bowl
Pin Back
Ribbon


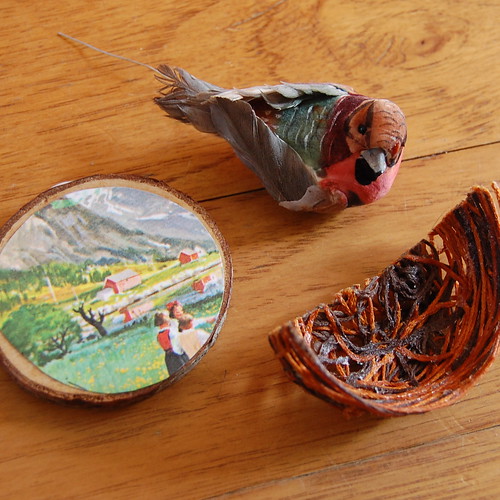
This whole idea came to because I started thinking about making a nest out of embroidery thread. I used a small plastic bowl and lubed that sucker up with petroleum jelly to act as a release. Next I cut long strands of brown embroidery thread. One by one I began dipping the thread in fabric stiffener and wrapping it around my bowl. Once you have it looking like a nest leave it to dry.


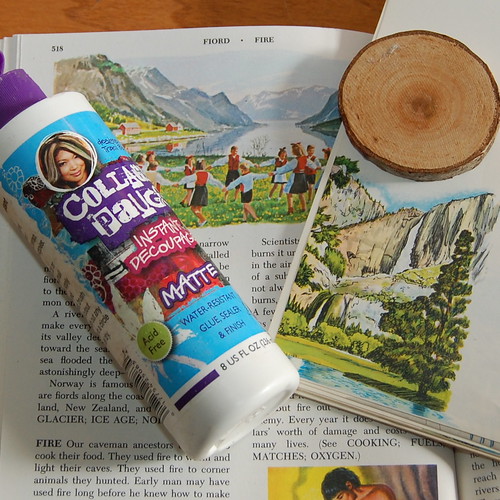
While your nest is drying you can work on the backdrop. I used a small wooden disc. I found an image from a vintage book of a forest that I cut out and decoupaged onto the wood.


Next I cut my nest in half. At this point I was not sure if I was going to go with shoe clips or brooch. I only had one bird so brooch won. I'll save the other half of the nest for another project.


Using a combination of Liquid Fusion Glue and a Hot Glue Gun I attached the half nest to my collaged backdrop. Once the nest was in place using Liquid Fusion I put my bird and her eggs in the nest. I also added a ribbon around the edge to cover up some messy glue spots. Last but not least, I glued a pin back to the wood.


I am totally smitten on the way everything turned out. Portlandia was right everything looks better when you put a bird on it.

I leave you with the video clip that inspired it all - Put a Bird on It!


Visit us on Facebook!
Craft on!

Crafty Chica's Fabric Patchwork Fanner

Friday, May 13, 2011
 Here in my hometown of Phoenix, the hot weather is making its way over. That means you have to think crafty in any way possible to keep cool. Aside from air conditioning at every opportunity, fans and water misters, I'm also loading up handheld fanners. But instead of buying boring ones, I'm making my own set to keep on the patio for outdoor BBQs, patio reading sessions, etc.

 The main ingredient is Aleene's® Stiffen-Quik™ Fabric Stiffening Spray.
 You'll also need:

- Assorted fabric pieces
- Clothes lines, clothes pins or freezer paper on a flat surface.
- Sewing machine or glue
- Tulip® Fashion Glitter™ Shimmer Transfer Sheets for embellishments
 - two long sticks
 - Aleene's® Original Tacky Glue®

 Cut your swatches and set them on a flat surface. You can also pin them up on a clothesline. Spray generously with the fabric stiffener.

 Cut into strips. Using a rotary cutter makes it a lot easier! Sew into panels and then cut out two circles shapes, about 8" in diameter, each.

 Spray again with the stiffener.

 Both pieces should be SUPER soaked. You want them super stiff so they will work great as a fan.

 Let the two pieces dry. You can let them air dry on a flat surface like I did, or hang to dry. 
NOTE: You don't have to be as elaborate as this when it comes to making the round pieces. I wanted to have fun and use contrasting fabric. You can use one solid piece of fabric to make your two circles without all the patchwork. Just make sure you add a lot of stiffener!

 While those are drying, cut up your pieces of the Shimmer Transfer Sheets. Peel away the top coating. 
- Back to the fabric pieces - once they are dry, add Tacky Glue to both sides of the stick and set it between the two pieces. Make sure to leave enough for a handle! Also, add some glue around the backing of one of the sides. Press together and sew the edges. Sew all around the edges. 
 Once its dry, iron on the shimmer sheet shapes you cut out earlier! 
 Here is Maya, already putting my new fanner to good use!
Here is the other side of the fan!


Visit us on Facebook!
Craft on! Click here for today's daily giveaway!

Crocheted Poinsettia Brooch

Wednesday, December 16, 2009
DSC04383

Materials
Worsted Weight Sparkly Yarn
Size US G Hook
Tapestry Needle
Glittered Holly Berries (cut from decorative floral bouquet)
Pearl Pin (optional)

Abbreviations
ch=chain
sc=single crochet
dc=double crochet
tr=triple crochet
hdc=half-double crochet

Directions
Large Petals (Make 5):
Ch 8. Sc in 2nd ch from hook, hdc, dc, tr, dc, hdc, sc. Tie off.

Small Petals (Make 5):
Ch 8. Sc in 2nd ch from hook, sc, hdc, dc, hdc, 2sc. Tie off.

Finishing:
Sew large petals together in a star formation. Do the same with the small petals. Center small petal bunch on to of large one; tack in place to create flower.

Using your finger, spread a liberal amount of Fabric Stiffener over flower. Shape and let dry.

Use Fabric Fusion to glue glittered holly berries to center of flower. Let dry.

Pin to your favorite bag, coat or beanie!

Crocheted Poinsettia

Never crocheted before? No problem! Check out my How-To section for tutorials.

(Holiday) Craft.Rock.Love,
Vickie

P.S. Make a Candy Striper felted purse to go with your sparkly Ponsettia Brooch--get the pattern here!

Sparkly Bow Necklace

Thursday, December 10, 2009

DSC04326

While visiting family last month, I flipped through a copy of Elle Magazine and came across the Kate Spade Bow Necklace. It made me smile in all of it's kitschy glory; also inspiring me to create a less-blingy, more affordable, ribbon version. I think the result is an adorable, vintage-style bit of sparkle that makes the perfect accessory to wear to those holiday parties. Here's how to make your own!

DSC04310

Materials
60" Chain
1, 9 ft. Roll of 3/8" Wide Ribbon
9, 6mm Jump Rings
1, 12mm Lobster Clasp
Jewelry Pliers & Cutters
Scissors
Needle & Thread
5, Lucite Shank Buttons

How-To Make Bows
Make 3 large versions and 3 small (made by just pulling the loops tighter as you go).
  • To make these bows, make a loop as if you were creating a hope ribbon (you know, the ones for supporting our troops, breast cancer awareness, etc.). (Photo 1)
  • Without cutting the ribbon, make another loop that points in the opposite direction. Begin hand-tacking with needle & thread. (Photo 2)
  • Make 3rd & 4th loops, perpendicular to the last set. Hand-tack. (Photo 3)
  • Continue in this manner, creating 8 loops total and hand-tacking as you go, until bow has a "filled-in" look (Photo 4)
mosaic80c7afb503efa37b062a422db3fe827321f1424c
  • Brush-on a layer of Aleene's Fabric Stiffener to each bow. Let dry.
  • Use jewelry cutters to snip shanks off of 3 buttons. Use Liquid Fusion to adhere buttons to the centers of the large bows. Let dry.
Bold
DSC04330

How-To Assemble Necklace
  • Double chain, so it's tiered at desired lengths. Snip off excess.
  • Use jump rings to secure the ends of the two tiers of the chain together. Attach lobster clasp to one of the jump rings.
  • Link the two chains together towards the top of the necklace by attaching a jump ring to a button (with shank left on) and then hooking them both on to the chains. Repeat on opposite side.
  • Pierce a jump ring through each bow, and attach them evenly to both tiers of chain.
  • Wear, sparkle & enjoy!
DSC04329

Craft.Rock.Love...for the holidays!,

Hooptastical Earring Holder

Thursday, August 27, 2009

If you have as many pairs of earrings as I do, jewelry storage is an important issue. I personally wrangle my jewelry in several different ways. You might remember our 3 day post we did on jewelry displays that included: How Ya Hanging Jewelry Displays, Flickr Favorites, Journey Through a Jewelry Box and Make Your Own Jewelry Display. Today for I Love to Create I have a lacey addition to the collection.


Supplies:
Liquid Fusion GluePiece of Lace
Tulip Fabric Spray Paint
Wooden Embroidery Hoop
Crafty Chica Little Chica Paint PackSponge Brush
Scissors
Aleene’s Fabric Stiffener & Draping Liquid


Lace to Dye For
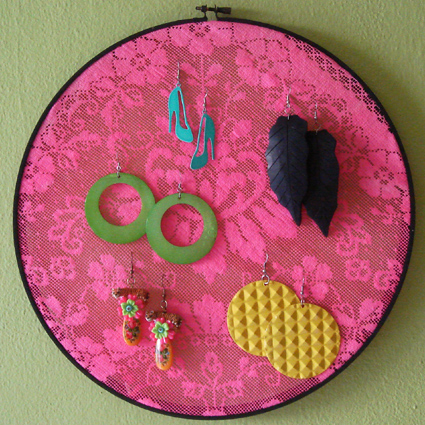
You want to choose a lace that small holes throughout the design that you can hook your earrings into. My mother was kind enough to donate some old curtains she had to this project. A quick trip to the thrift store and you will be lace endowed in no time. Take your lace outside and lay on newspaper. Spary lace with Tulip Fabric Paint making sure to coat evenly. I was particulally smitten on these neon shades.


Hoop Hop Hooray
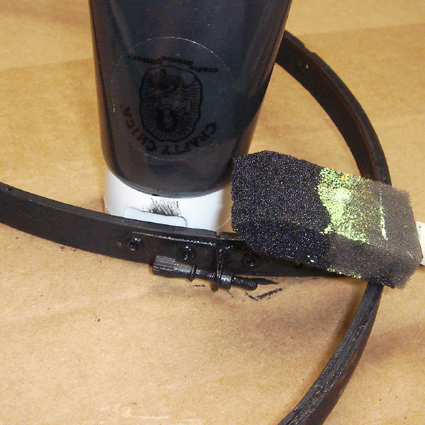
Cheap wooden embroidery hoops come in all shapes and sizes. Choose based on how many earrings you have to display. I painted my wooden hoop with black Crafty Chica paint and sponge brush.


Stretch It, Stretch It Good
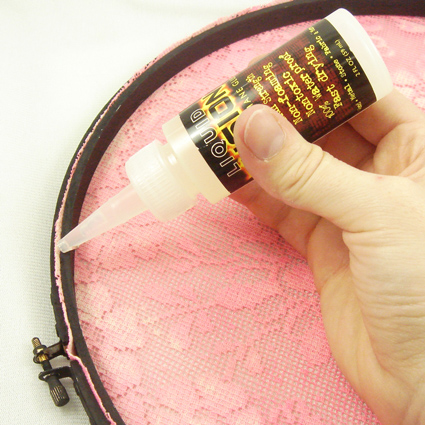
Once your dyed lace and painted hoop have dried it’s time for the two to join forces. Stretch your lace across your embroidery hoop and tighten. Using your scissors trim the excess fabric. I added some Liquid Fusion glue to make sure the fabric didn’t slip in the hoop. I then coated the lace with a coat of Aleene’s Fabric Stiffener & Draping Liquid to make the lace extra sturdy.


Beam With Pride
Once everything has dried all that is left to do is hang your new snazzy jewelry holder on the wall and hook your earrings into place. I mean really screen in a picture frame is so last year, it’s all about the neon lace.

xo,
Jen
Naughty Secretary Club

Darling Doily Dishes

Thursday, August 20, 2009

While reading through Crochet Adorned by Linda Permann (don’t forget to enter to win a free copy!) a lacey bowl project caught my eye. The book has full instructions on how to crochet your own doily and a recipe for a sugar starch to make your flaccid doily hard as a rock. Always one to take the easy way out I thought to myself: now why couldn’t I take pre-existing doilies and some Aleene’s® Fabric Stiffener & Draping Liquid and do the same thing? Better yet I could toss in some Tulip Fabric Paint and make white doilies any color that I wanted. This week for I Love to Create that is exactly what I did.


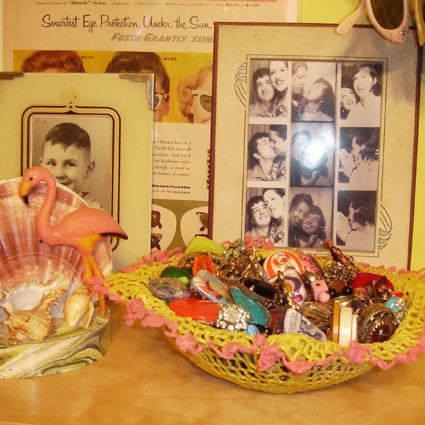
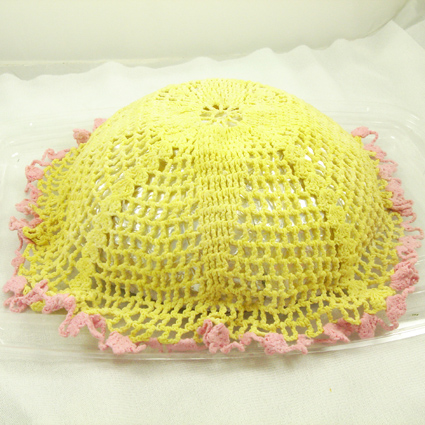
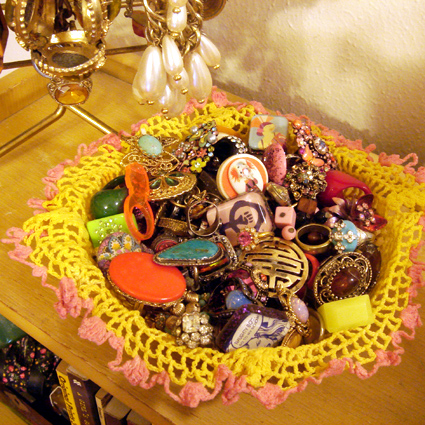
I actually made two bowls. The first one using a vintage yellow doily with pink trim.

SUPPLIES
Doilies
Aleene’s Fabric Stiffener & Draping Liquid
Bowl
Foil or Plastic Wrap
Rubber Gloves


First I found the perfect bowl to use as my mold, which just so happened to be one of my salad bowls. Not wanting to get glue all over something I eat from I wrapped the bowl in foil. Plastic wrap would have worked as well. Next following the instructions on the bottle I put on my rubber gloves and completely saturated the doily in Aleene’s Fabric Stiffener & Draping Liquid. I then draped the doily over my bowl and allowed to dry overnight.


The next day I gently peeled my crocheted dish away from foil wrapped salad bowl. I was surprised by how stiff the bowl was. It was strong enough to hold all of my rings, and that is a lot of rings.


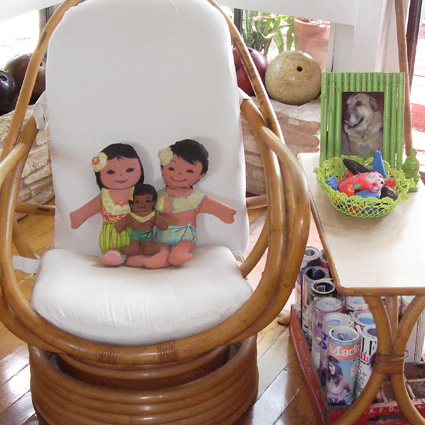
For the second bowl I snagged a white doily from a pillow, dyed it green and gave my vintage water gun collection a new home.


SUPPLIES
Doilies
Aleene’s Fabric Stiffener & Draping Liquid
Bowl
Rubber Gloves
Tulip Soft Fabric Paint


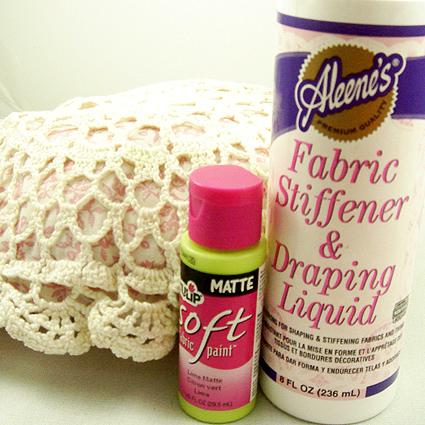
First using a seam ripper I removed the doily from the pillow. Doilies are readily available at thrift stores and most craft stores carry them as well. Unlike the other bowl where I just saturated the doilie in Aleene’s Fabric Stiffner & Draping Liquid I also added a squirt of Tulip Soft Fabric Paint in to match the color of the walls in my game room. They have so many colors to choose from you could make your bowl match any room.


I then coated my doily until the fabric was saturated and the color was even. I used a large bowl as my mold and draped my doily over the bottom and allowed to dry overnight.


Doilies come in all shapes and sizes so you can make any size bowl you want. With the help of a little fabric paint you can also make them any color you want. Think of the possibilities: clocks, lamps and more oh my!

Xo,
Jen

P.S. Be sure to check out the Naughty Secretary Club blog for more crafty goodness.