
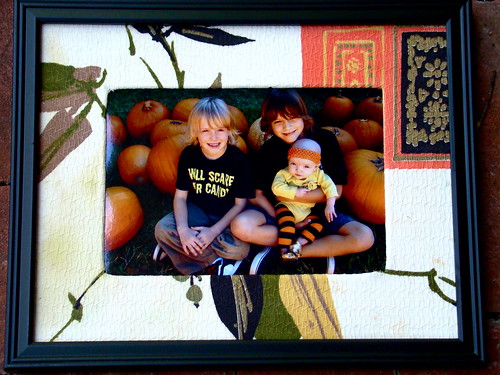
 As I mentioned in my Cute As a Button tutorial, I'm a big fan of customizing frames to coordinate with the colors found in the photographs they display. Recently I decided to turn several family photos taken at our local pumpkin patch, into a hallway focal point by covering each frame mat with vintage fabric and grouping the frames on the wall. Fortunately, I already had a great piece of '60's cloth that used the same orange, green & black found in the pictures as part of it's design. With the help of some of Traci Bautista's Collage Pauge and about 1 1/2 hours worth of time; my otherwise run-of-the-mill frames became anything but. Here's how!
Materials
Frame with Plain Mat
Photo Coordinating Fabric
Sponge Brush
Ruler
Marking Pen
Scissors
How-To

- Using a ruler and marking pen, draw around mat onto fabric adding about 1/4" on each side. Draw an "X" (from corner to corner) on the fabric that peeks out from the center of the mat.

- Cut out fabric along the lines you've drawn including, the center "X".

- Brush a liberal layer of Collage Pauge glue over the mat front. Center fabric over mat, and smooth over with fingers.

- Flip mat over. Fold center pieces of fabric over through the center and over the mat back. Cut excess fabric and glue down.

- Fold the fabric edge over the mat back; glue down. Let dry.

- If you're not using glass over your mat & picture then cover the fabric mat with a layer of Collage Pauge to protect it. If you are using glass you can skip this step but please note that you'll have to be sure to choose frames that have enough depth to accommodate both glass & fabric layers.

- Repeat process for each frame in your grouping. Hang frames in a cluster and enjoy!
Hanging Tip: Begin with your center photo first, then build around it. My rule of thumb is to have the edge of each surrounding frame begin at the center point of either the top, bottom or sides of the center photo.
Craft.Rock.Love,


