I'm Totally Crushing on Ryan Gosling's Scorpion Jacket from the Movie Drive

Tuesday, February 28, 2012

Hey Girl.

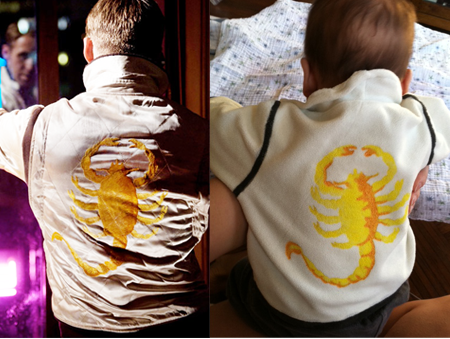
As one popular Tumblr ode to Ryan Gosling says, he's "your favorite sensitive movie dude-turned-meme." Another Tumblr puts it more bluntly. And a recent video by Gosling doppelganger Joey shares "How to Look Like Ryan Gosling." Which got me thinking about snagging Ryan Gosling's style. Forget the hoodie and well-groomed 5 o'clock scruff. I mean, did you see that embroidered scorpion jacket he wore in Drive? (Ahem, in case you can't tell them apart, that's Ryan on the left.)


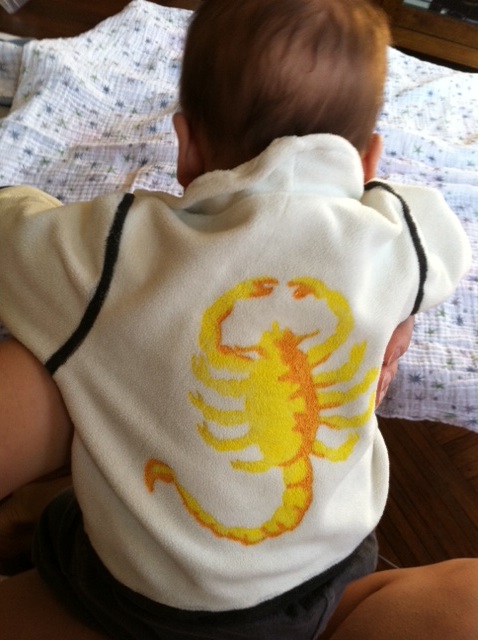
You can actually buy it -- oh, but making it would be so much more fun. And so I set out to make some sweet scorpion threads inspired by that original jacket -- no satin quilting, no embroidery, just a white jacket from a thrift store and some fabric paint. And since my favorite new sensitive dude happens to be pint-sized, I've decided to make it in miniature for my little gosling. (Note: These instructions can produce a version for a full-sized goose as long as you start with a full-sized jacket!)
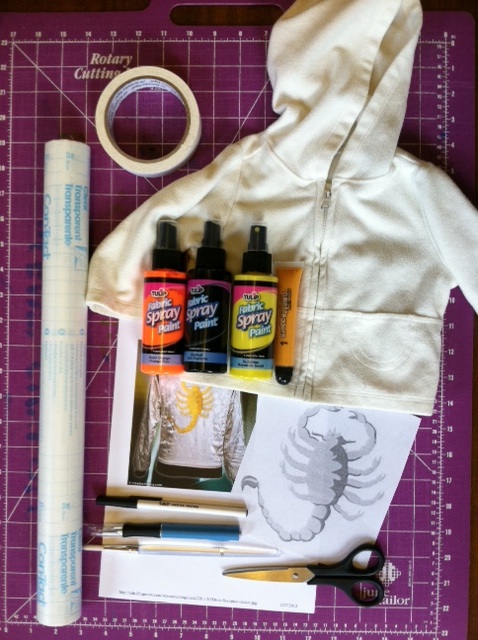
Materials:
-White
zip-front jacket or sweatshirt
-Pen
-Contact paper
-Craft knife and cutting mat
-Masking tape
-Yellow fabric paint, brush or spray on (for scorpion)
-Orange fabric paint, brush or spray on (for highlights)

-Black fabric paint, brush or spray on (for trim)
-Paint brushes (optional)
-Sewing machine threaded with white thread (optional)
-Scissors (optional)


Make it:
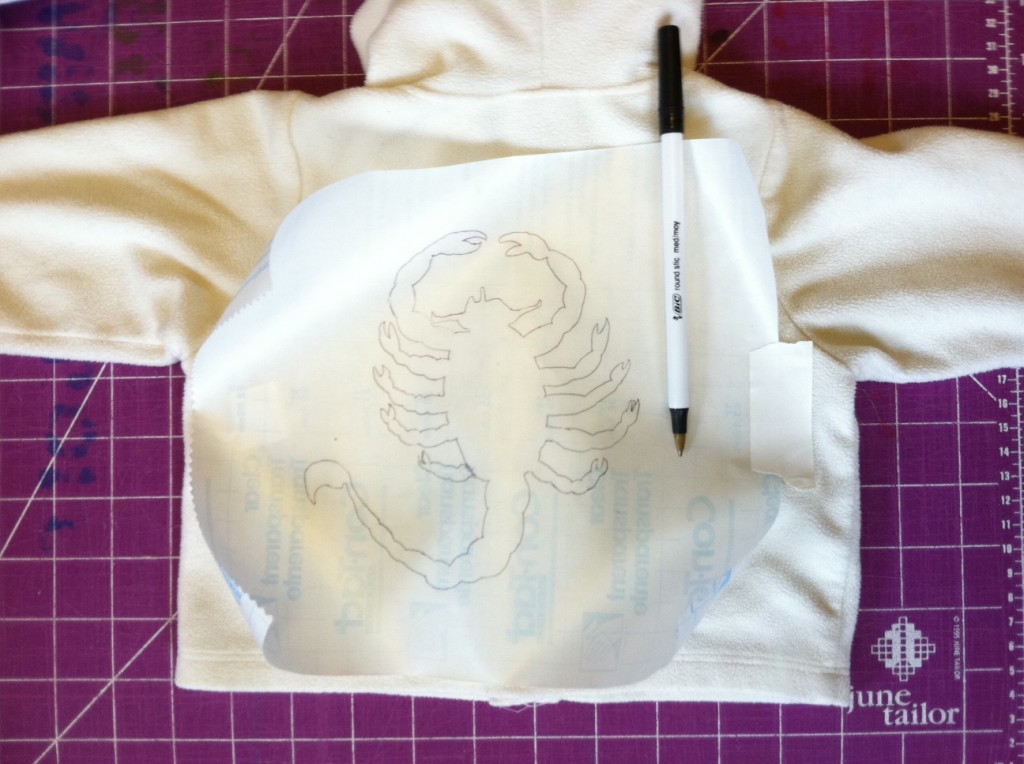
1. Lay the jacket flat and measure the approximate dimensions of the back panel. Cut a piece of contact paper to those dimensions. Draw or trace the outline of a scorpion onto the paper.
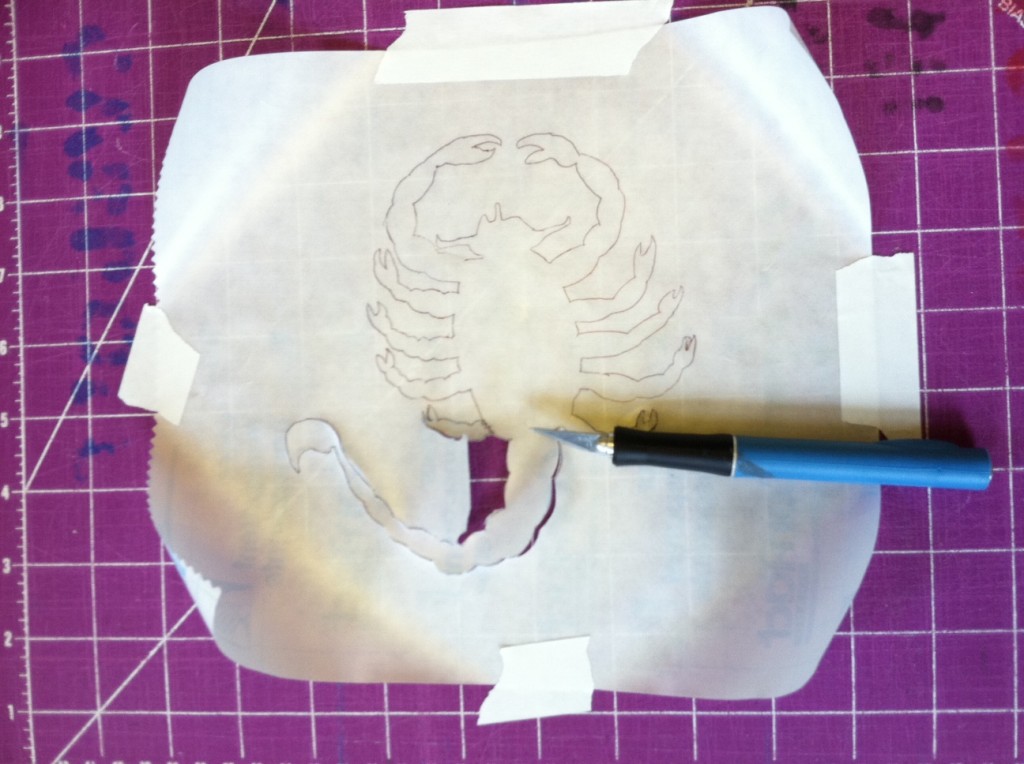
2. Use the craft knife and cutting mat to cut out the contact paper stencil.
3. Peel off the paper backing of the contact paper and press the stencil onto the back of the jacket.
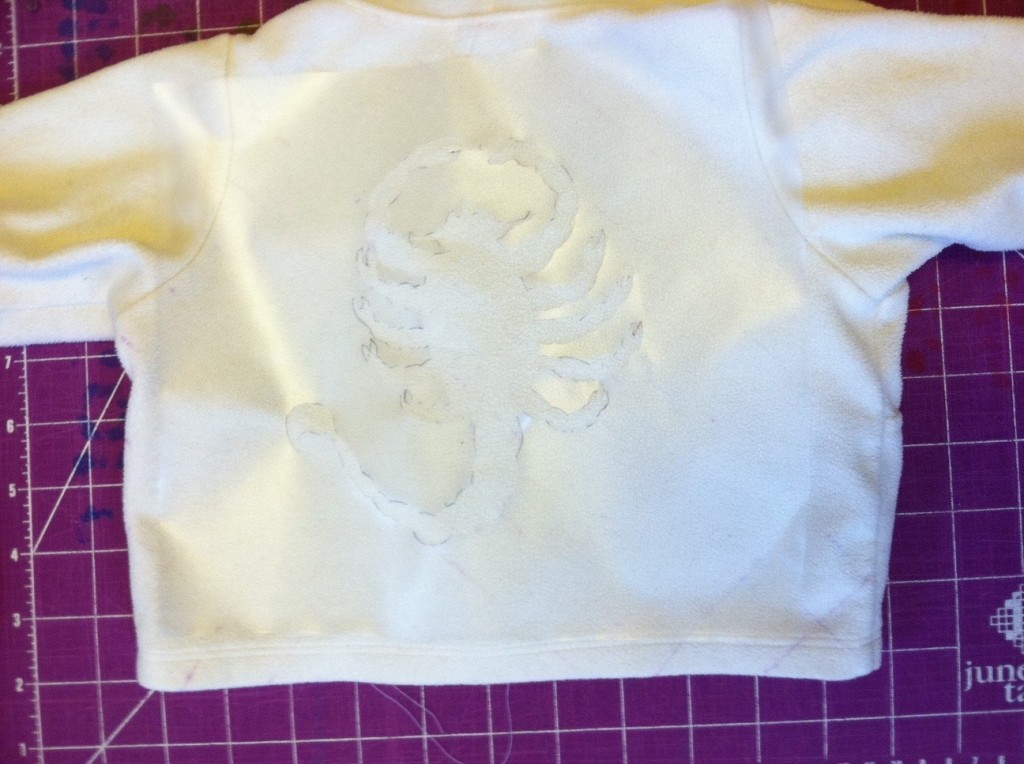
4. Paint the entire scorpion shape with yellow paint. (Use fabric spray paint or paint it on with a brush for more precision.)

5. Paint some highlights on the scorpion with orange paint to show the shadows.
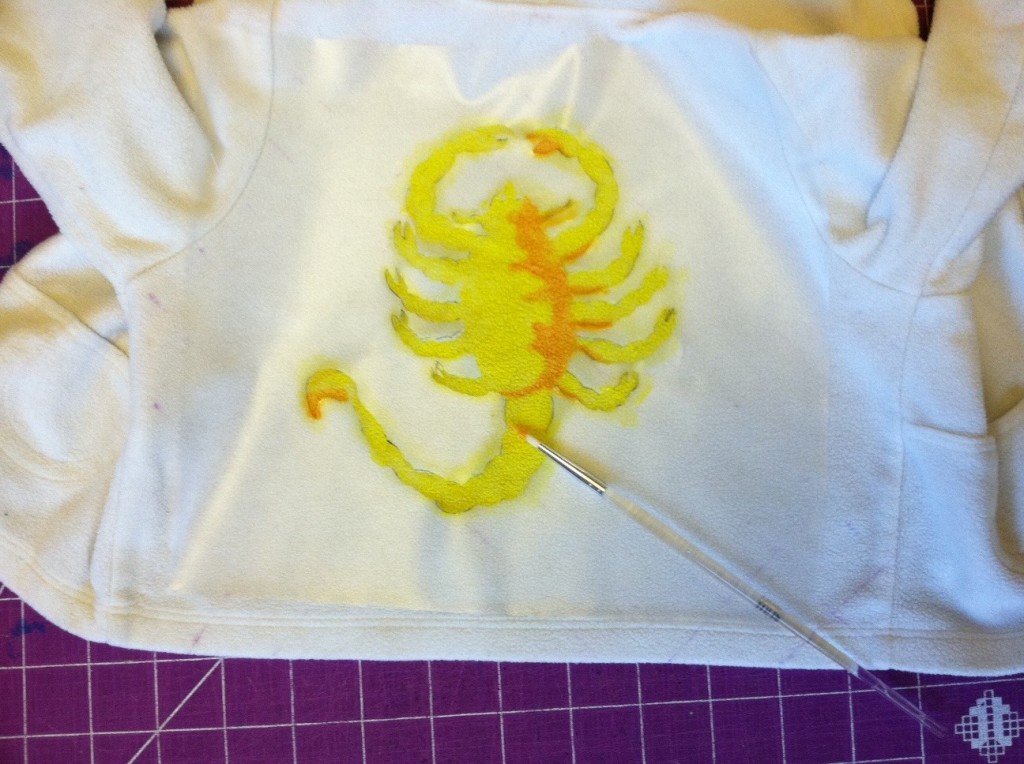
6. Line the bottom edge of the jacket, the sleeve ends, and the shoulder seams with masking tape and paint them black.
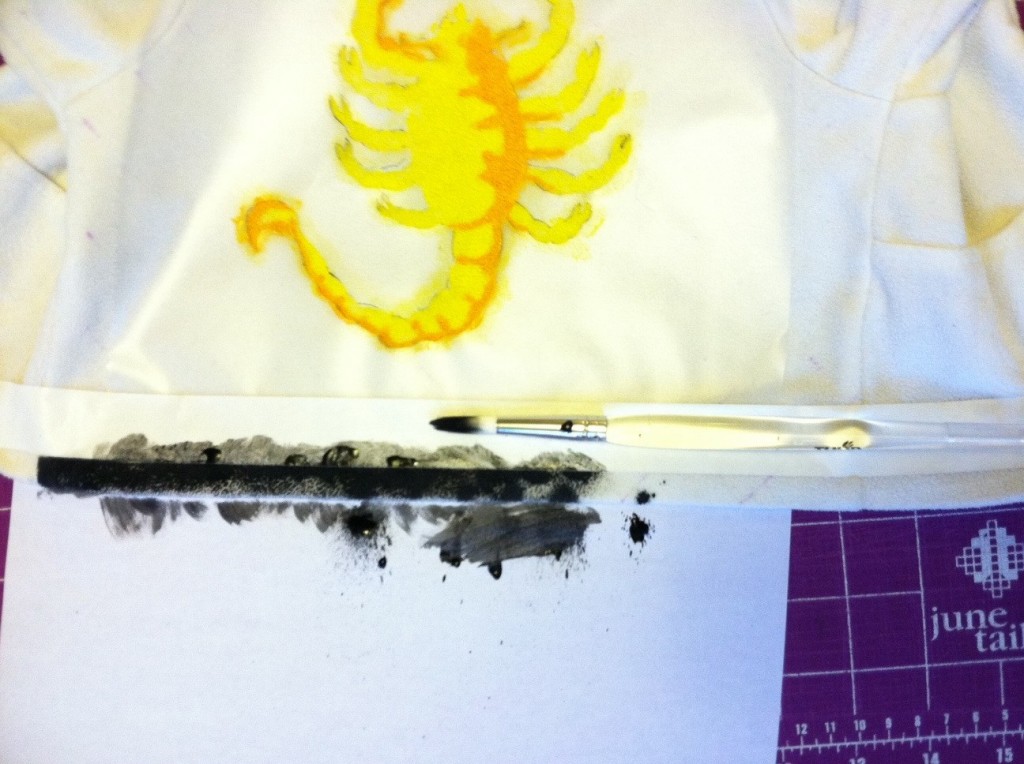
7. Let the paint dry completely and carefully pull off the tape and stencil. Optional: If the jacket has a hood, cut and hem it to create a collar. (Hey, we're going for authenticity here!)
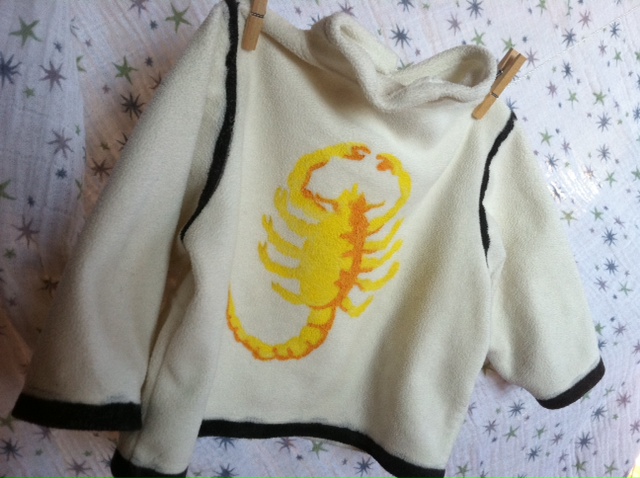
8. Try the jacket on your littler driver. Okay, so he can't even hold his head up yet, but he sure knows how to grip the wheel! Next up: Get him a driver's license...in 16 years.


Photo of Ryan Gosling via FirstShowing.

Visit us on Facebook!
Craft on!
Crafty Cinema: 'The Hunger Games' Face Painting & Body Art

The Hunger Games-inspired facepainting. My 'tribute' to Katniss Everdeen: Half my face is painted with foliage for hiding in the woods; and the other has flames to go with her initial on-screen debut where she shows off the amazing dress that Cinna makes for her! My husband painted the Mockingjay on my chest because we ran out of room on my face!
I'm a book geek. 
Last year I became addicted to The Hunger Games trilogy. Think of a teenage version of Survivor – with the twist being that only one person will be left breathing at the end of the series. The story is vivid, emotional, multi-layered and features flamboyant people from “The Capitol” who tattoo, paint their faces and bodies in elaborate designs. They even sport huge, crazy wigs, implant whiskers and permanently embed gems into their skin. Anything goes for the sake of fashion! The author leaves the ultimate vision up to the reader’s imagination, and that was enough for me to get creative. 

And with the movie coming out later this month, I put my vision into action using Tulip Body Art!
Click here to see the actors on their mall tour this week.

Body art inspired by people who live at The Captiol. Jewel-toned mosaic blocks with an embedded crystal. This is my friend, Dania from http://LaBeautyPie.com.

I recently gathered some fellow Hunger Games friends and we painted our faces inspired by the characters. The first three are what we think some of the Capitol designs could look like, bold and bright, contrasted by shimmery gold and jewel-tone accents.

The final image is my tribute to Katniss Everdeen, our heroine. Half my face is painted with a forest/jungle theme to help her blend in with her surroundings while the game is being played. The other half is decked out in flickering flames – in honor of her title as “the girl on fire.”
My Katniss-inspired camouflage. See? I told you I was a geek!


More Capitol-inspired designs. Lots of gold accents, like the character of Venia!

Basic painting with glittery designs!

Supplies:


Lotion
Makeup wipes
Cup of water
Paper towels

Directions:

Version 1:
1.     Wash your face and apply a thin layer of lotion.
2.     Choose a stencil and apply to skin, press down with fingers so there are no gaps.
3.     Dip the sponge in water and then rub in Body Art paint until you get a smooth and creamy consistency.
4.     Dab the paint over the open areas of the stencil.
5.     Continue until stencil is covered. Peel away stencil.
TIP: If you want to add glitter, before removing stencil, add Tulip body Art Adhesive and use brush to add glitter.

Version 2:

1.     Wash your face and cover it with a thin layer of lotion.
2.     Choose a foundation color.
3.     Dip a sponge in water and rub it in the make up until you get a smooth and creamy consistency. Smooth it on around your face, avoiding the eyes and mouth areas. Let dry.
4.     Use one of the brushes and begin to draw out your design shapes using a base color – for example, if you are painting leaves, use green.
5.     Use the darker colors for shading and contour.
Visit us on Facebook!
Craft on!

Crafting with Food. That's Yummy! Cool2Craft TV

Friday, February 24, 2012

It's super cool! Cool2Craft TV February 27, 2012: That's Yummy - We're heading to the kitchen for this week's creative inspiration! EcoHeidi Borchers is making fruit themed stickers with Aleene's Tacky Sticker Sheets and Aleene's Magnetic Tacky Dots, Tiffany Windsor is creating a Pasta Art Box with Aleene's Fast Grab Tacky Glue, Savannah Starr adds a splash of glitter to a Make-Up Brush Holder featuring Aleene's Fabric Fusion Peel & Stick Tape and Candace crafts a yummy look of chocolate Candy Ring. It's a terrifically tacky and creatively cool show! 

It’s easy to watch the Cool2Craft TV Channel right from your computer. Airing Monday February 27, 2012 9am Pacific/10am Mountain/ 11 am Central/ Noon Eastern. Go to http://cool2craft.com and find the Livestream player and chat box. See you Monday! 

Visit us on Facebook! Craft on!

Fabric Scrap Shoes

Thursday, February 23, 2012


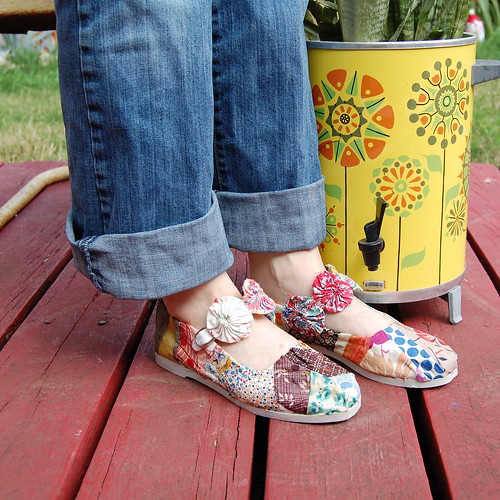
This is not my first time at the shoe making rodeo. Typically I have made pairs for my children (booties and chucks), but from time to time I whip up a pair for myself (whale slip ons and cameo mary janes). After a recent trip to Nordstrom where I was eyeballing a pair of colorful Toms I had new shoes on the brain. Today over at BlogHer I spotlighted the most adorable pair of Toms made to look like owls and it sealed the deal - I must make myself some new shoes.


SUPPLIES
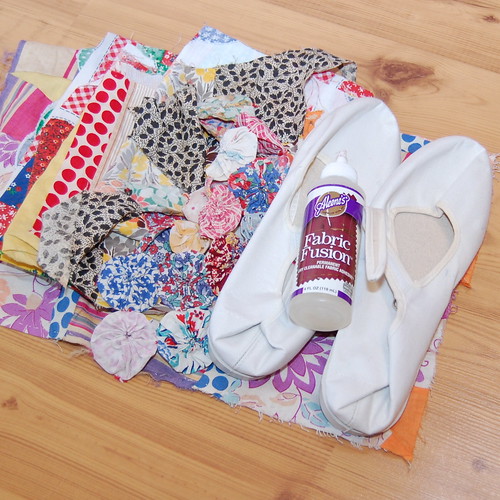
Plain Shoes (I got mine from Pearl River)
Quilting Yo-Yo's
Fabric Scraps
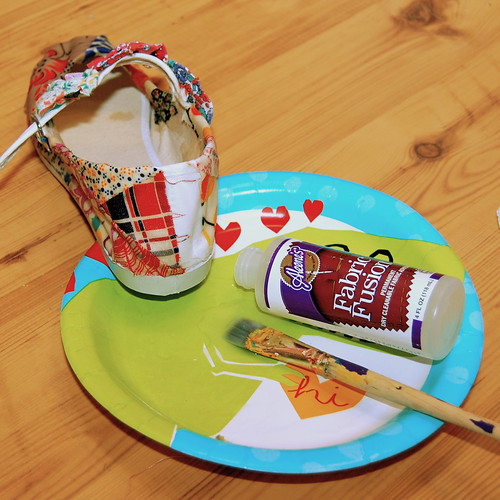
Fabric Fusion Glue
Paint Brush
Scissors
Water


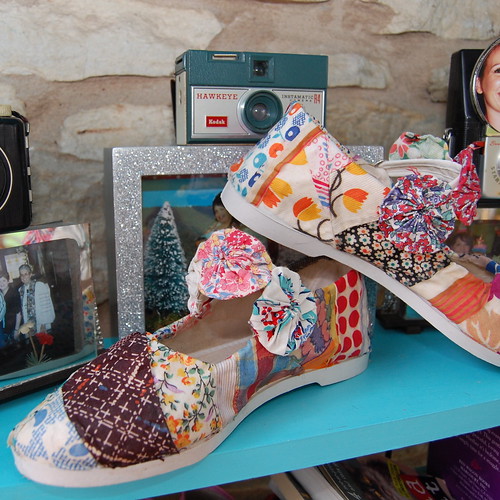
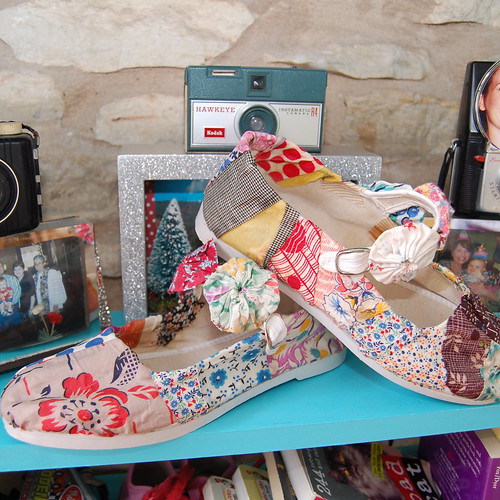
The first thing I did was raid my stash of fabric scraps. I don't hardly sew a lick, but nothing gets me more excited than coming across a bag of vintage quilting fabric scraps at a flea market. I have used the scraps to make ping pong ball necklaces, bracelets and more. Anywhoo, get your scraps together. The more random the better as far as I am concerned.


Using Liquid Fusion glue I started attaching my scraps to my plain white shoes. I diluted my glue with water and applied it with a paint brush. I would trim, glue and brush as I went. There is no right or wrong way. The more wet the fabric is the easier it is to mold to your shoes.


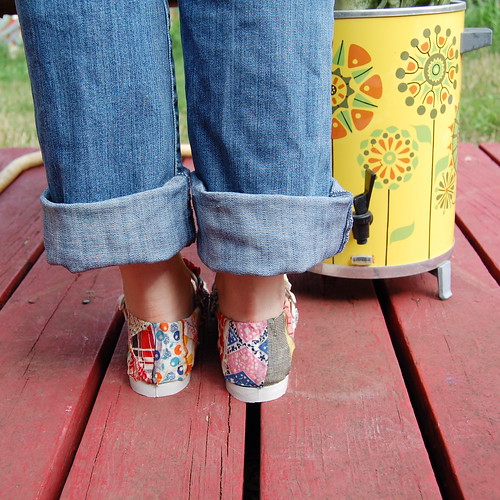
One tip is to fold the strips over the edges of the shoes to give it a nice finished look.


Rather than covering the straps in scraps I opted for some vintage quilting yo-yo's that I had.


After the shoe is completely covered how you want it allow the shoes to dry completely.


After the shoes are dry they might be a little stiff. A few rounds in the washing machine and some everyday wear should help with that.


I could have spent $40 at the mall, but I like my own custom quilted pair of shoes even better.

Visit us on Facebook!
Craft on!

iLoveToCreate Retrofabulous Teen Crafts: The Original Hip Hip Easter Card

Wednesday, February 22, 2012
Visit us on Facebook!
Craft on!
The Original Hip Hip Mixed Media Easter Card Copyright Margot Potter for iLoveToCreate

iLoveToCreate Retrofabulous Teen Crafts
The Original Hip Hip Easter Card
Margot Potter
"These ARE your grandmother's crafts. Ya gotta problem with that?!"

It's hard to believe, but it's true.  Easter is on the way and Peter Cottontail is not far behind! Miss Avalon is buried in school projects and Miss Mom decided to make what she calls a "retrofabulous" holiday card. Avalon approved heartily, so we're calling this a vintage inspired teen craft. This wonderful image is from the turn of the last century when anyone behind the wheel of a horseless carriage, let alone a rabbit, was truly a sight to see. The original postcard was scanned, the image cleaned up and extracted from the background and new text was added. Ya gotta love technology! I'm sharing the image here for you to download, for PERSONAL USE ONLY. (That means, please don't make something from this image and sell it.)

Aleene's AWESOME dry adhesives make it so easy to whip up fun filled holiday cards in the blink of an eye. Why not make your own "retrofabulous" Easter cards for your friends and family? It's a great way to use up those old trims, buttons and scrapbook papers.


Materials
Coordinating Scrapbook Papers (I used Me and My Big Ideas Mambi Sheets)
Simplicity large orange rick rack trim
One large green or coordinating color button accent
Image and text for front and inside of card (Hippity, Hoppity, Happy Easter) printed. (I used Modern #20 font sized to 26pt.)
Aleene's Tacky Dot Runner
Aleene's Tacky Line Roll

Tools

Fiskars Paper Cutter
Fiskars ShapeCutter Templates (circles for the scalloped edge and brackets for the interior background)
Fiskars ShapeCutter Tool and Mat
Bone folder

1. Print your images and text. The image will be cut to 5"h x 4"w.


2. Use paper cutter to cut image and text. Interior text should be 2.5"h x 2"w.

3. Yellow background paper should be cut to 6"h x 4 3/8"w. Add scalloping to the left edge of the yellow background paper with ShapeCutter template and tool.

4. Cut a strip of striped paper (after using ShapeCutter template and tool to add scalloping to the left edge of paper.) The strip should be 6"h x 3/4"w at the widest scallop.

5. Cut dotted orange cardstock to 6 3/4" h x 5 1/2" w. Fold in half and use bone folder to crease edge.

6. Cut the rick rack trim to fit top and bottom of yellow cardstock, 4 3/8"w.

7. Use wire nippers to cut shank from back of button.

8. The elements are layered as follows: Yellow cardstock, rabbit image centered on cardstock, striped edge on right side of rabbit image, rick rack on top and bottom of yellow cardstock and button in lower left corner. Use Tacky Dot runner for paper elements and Tacky Line roll for trim and button.

9. For the interior, cut a piece of striped paper to frame the text. Striped paper should be 2.5"h x 3" w. Use ShapeTemplate to cut a bracket big enough to fit layered papers. Layer these and attach to inside center of card using Tacky Dot runner.


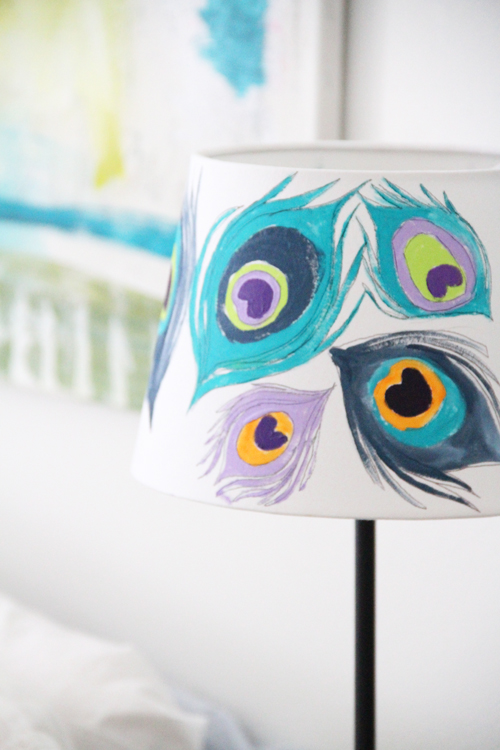
painted peacock lampshades

Tuesday, February 21, 2012
IMG_2855
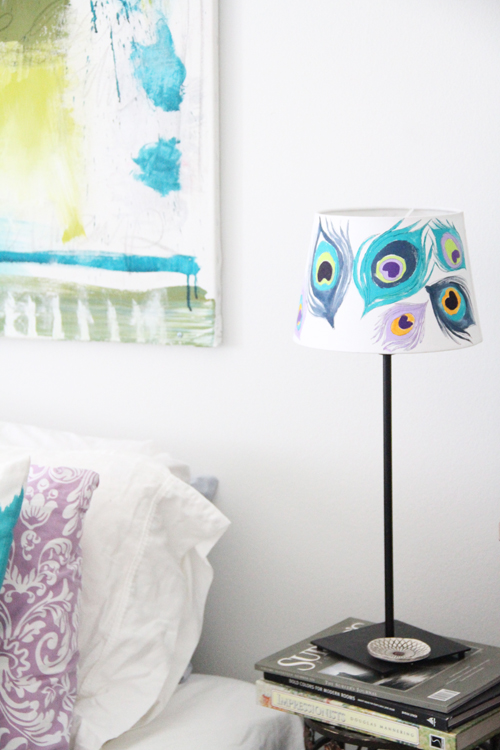
Recently I decided to replace the lampshades in our bedroom and of course I had to somehow put a creative spin on them!

IMG_2834
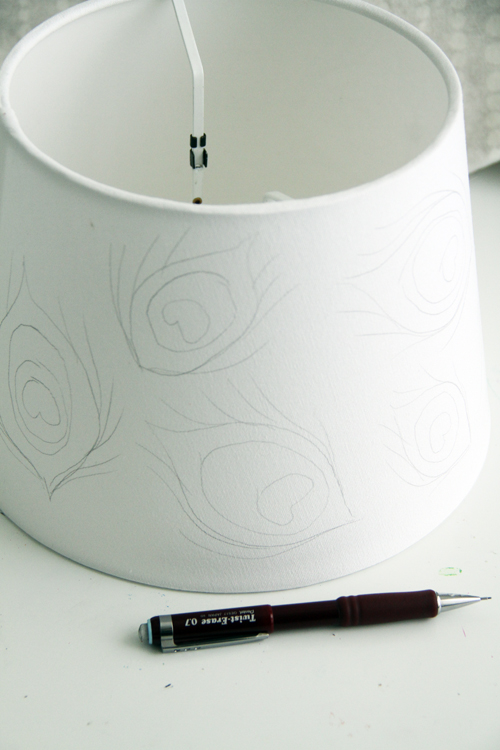
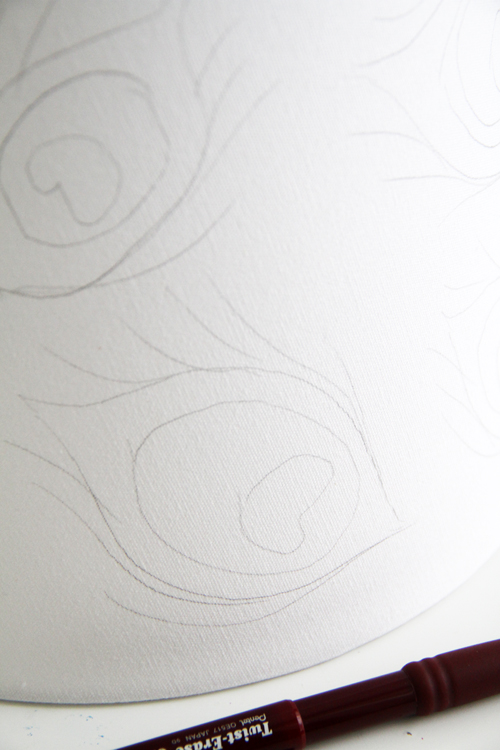
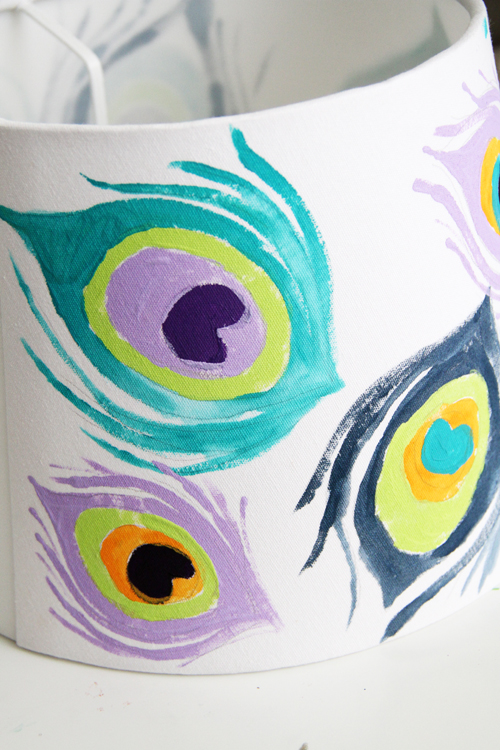
I started with two plain lampshades and lightly sketched out my designs- of course I picked peacock feathers.

IMG_2835
I heart feathers!

IMG_2837
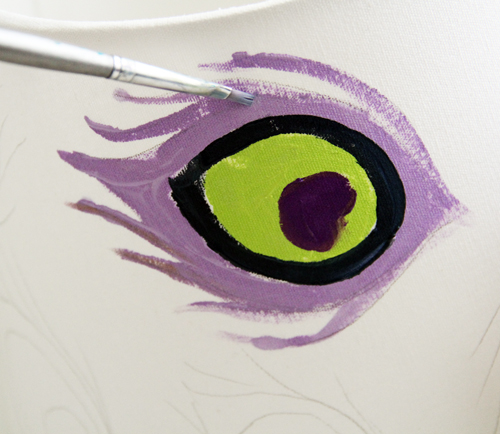
Using Tulip Soft Fabric Paint I filled in each feather with paint.


IMG_2838
IMG_2830IMG_2839IMG_2832
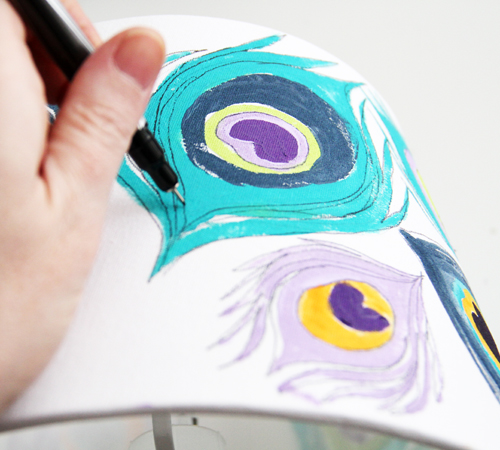
Once the paint was dry, I used a fine tip permanent marker to add a few lines and details.

IMG_2868
And voile! New lampshades!

IMG_2848
IMG_2857
alisa-burke


Visit us on Facebook!
Craft on!
Learn new crafting techniques! Cool2Craft TV Monday February 20, 2012

Friday, February 17, 2012
It's super cool! Cool2Craft TV February 20, 2012: Jewelry - We love to create jewelry and we have some fun new projects to share with you this week! Tiffany Windsor is creating Stamped Newspaper Earrings with Aleene's Double Stick Tacky Sheets, EcoHeidi digs into the vintage Aleene's Big Book of Crafts to create a Bread Tags Charm Bracelet, Savannah Starr is crafting a Chunky Triple Bracelet with tissue paper and Aleene's Tacky Glue and Candace Jedrowicz doubles up with a Tissue Box Pendant and Coffee Cup Rim Bracelet. It's a terrifically tacky and creatively cool show! 

It’s easy to watch the Cool2Craft TV Channel right from your computer. Airing Monday February 20, 2012 9am Pacific/10am Mountain/ 11 am Central/ Noon Eastern. Go to http://cool2craft.com and find the Livestream player and chat box. See you Monday! Visit us on Facebook! Craft on!
Fabric Fireplace Screen

Thursday, February 16, 2012


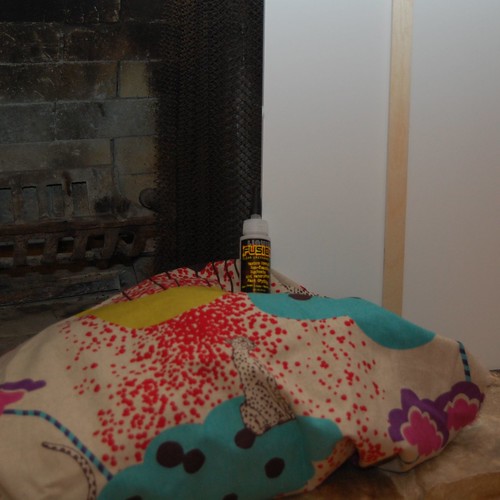
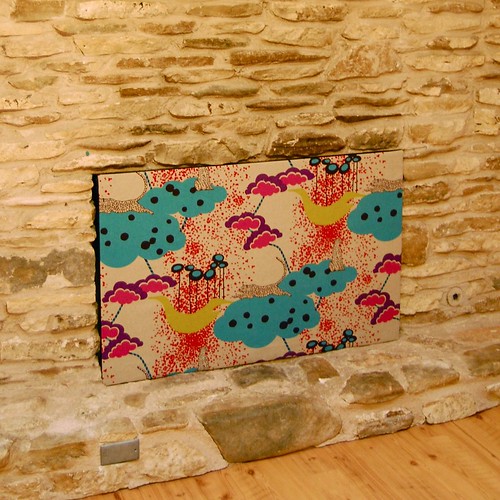
My fireplace has long been the bane of my home decorating existence. The fireplace is made of stone and has no mantle. The stone is very textured making it hard to hang anything. Living in Texas we don't have fireplace weather very often. That being the case 364 out of 365 days I stare at an empty soot covered hole. Finally, this past weekend my mother and I came up with a solution. Using some of the fabric I had leftover from Tallulah's bedroom we created a fabric covered fireplace screen.


SUPPLIES
Foam Board
Liquid Fusion Glue
Fabric
2 thin flat boards
Strips of magnet
Measuring Tape

The first thing I did was measure my fireplace. I then used those measurements to cut my foam board to the size I needed.


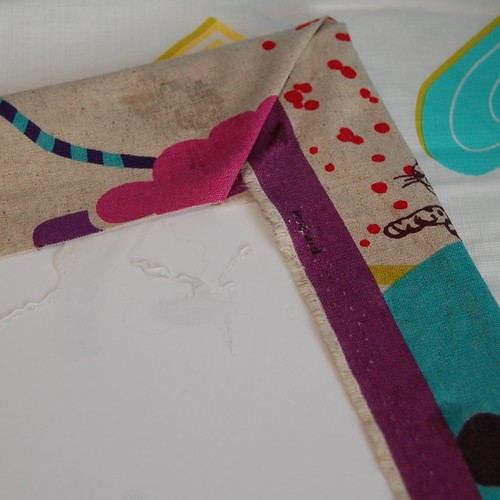
After I ironed the fabric (well ok, after my mom ironed the fabric) we wrapped the foam board like a package.


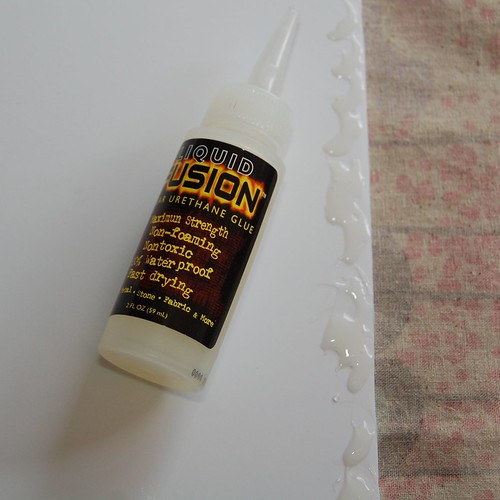
We used Liquid Fusion Glue to adhere the fabric to the board.


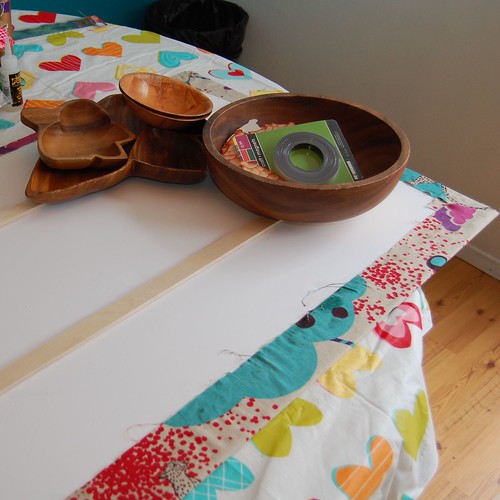
I didn't want to use wood board for fear one of my kids would pull the screen down on them. There is an existing piece of metal in the fireplace that houses the chainmail screen. I thought attaching a piece of lightweight foam board with magnets would be my best bet. However, with foam board I run the risk of one of those same kids pushing on the screen and breaking it in the middle. To prevent this we glued two thin boards across the back with Liquid Fusion Glue.

Using Liquid Fusion Glue we attached the magnet tape to the upper backside of the foam board. The magnet tape has sticky on the back, but it sucks and needed some extra help.


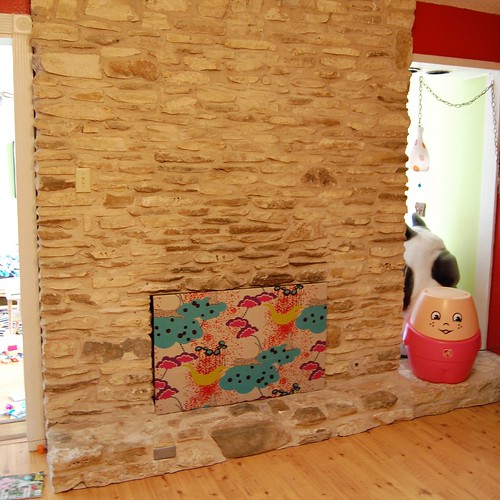
Most people hang art over the fireplace, I put mine in the fireplace. The colorful fabric print is busy enough that I'm not sure I need to hang anything else. Maybe I can finally be at peace with my stone fireplace thanks to my new fabric screen. It has only taken me 10 years to get here. Now why didn't I think of that sooner.

Visit us on Facebook!
Craft on!