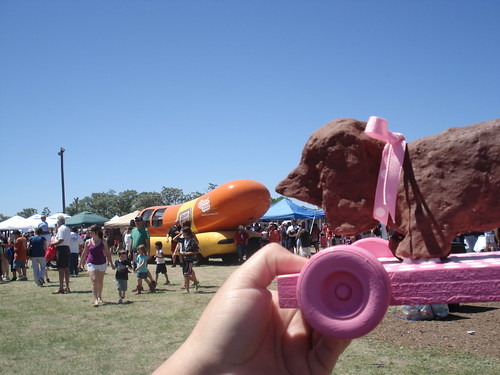
When you think of Austin events like SXSW and ACL probably come to mind. A lesser known gem happens right down the road from Austin that blows both of those festivals away. I'm talking about the Buda Weenie Dog Races. To commemorate Tallulah's first visit to the races I made her a weenie dog pull toy that she can race any day of the year.
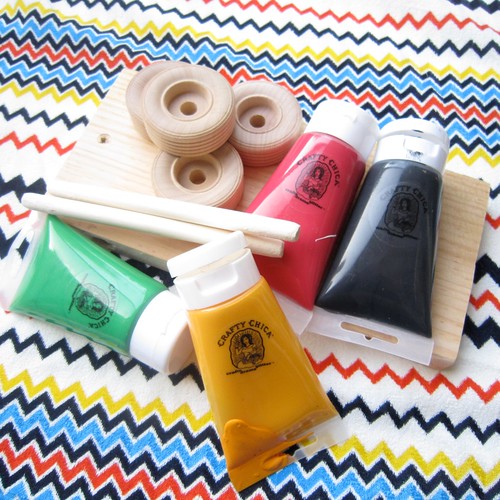
SUPPLIES
Pen
Scissors
Aleene's Tacky Glue
Wooden Dowel
Wooden Wheels
String
Small Wooden Bead
1" thick piece of wood
Crafty Chica Little Chica Paint Pack
Household Drill
Husband
Cardboard Box
Paint Brush
Sandpaper
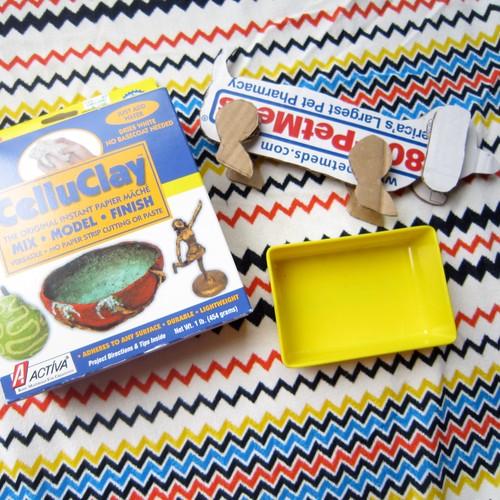
Celluclay Paper Mache
Water
Quarter
Dremel Tool
Ribbon
4 Screws
Screwdriver
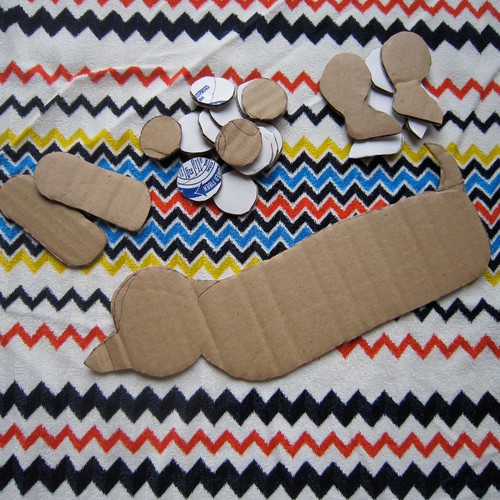
CARDBOARD WEENIE
Draw a profile of a weenie dog onto a piece of cardboard. You can find applique pictures online if your freehand skills are not up to par. Also remember you can make your pull toy any animal your little heart desires. Next cut out 2 ears, 4 legs and 18 quarter sized circles.
ARMS, LEGS and EARS
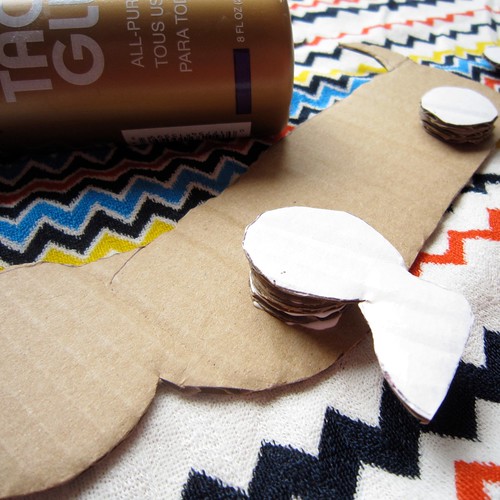
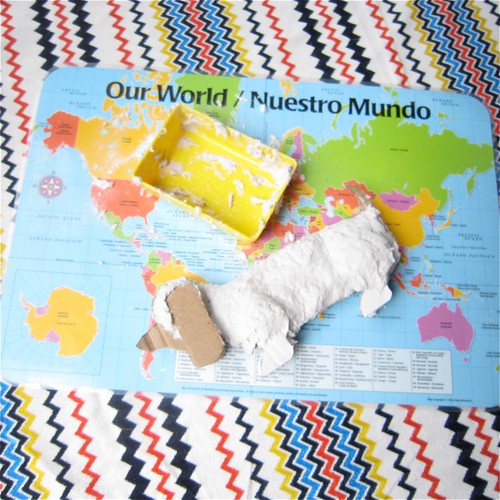
One side at a time you need to glue stacks of 3 circles on the two leg spots and ear spot. Use Aleene's Tacky Glue between each disc and limb.

Allow to dry completely and then flip over and do the same thing.
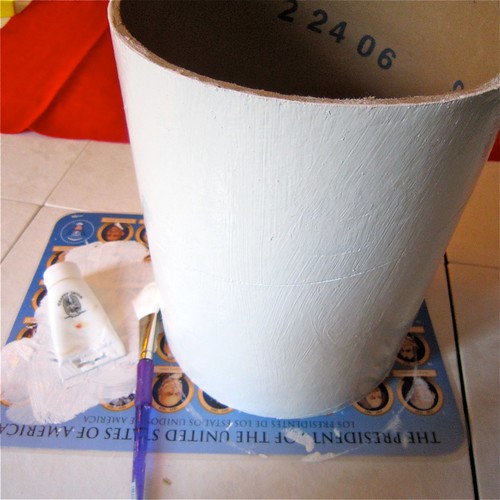
PAPER MACHE PARTY
Once the glue has dried completely mix up a batch of Celluclay Paper Mache.
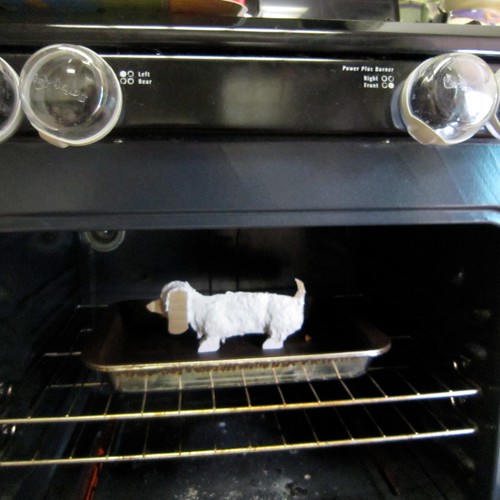
I worked in small batches and put my dog on a cookie sheet in the oven at 200 degrees to speed up the drying process. I did a section at a time to build up his body.

PETTABLE PUPPY
Let your paper mache weenie dog dry completely. For me this meant overnight and a few hours in the oven. When the dog is dry lightly sand him with sandpaper to smooth out any rough spots.
FINISHING TOUCHES
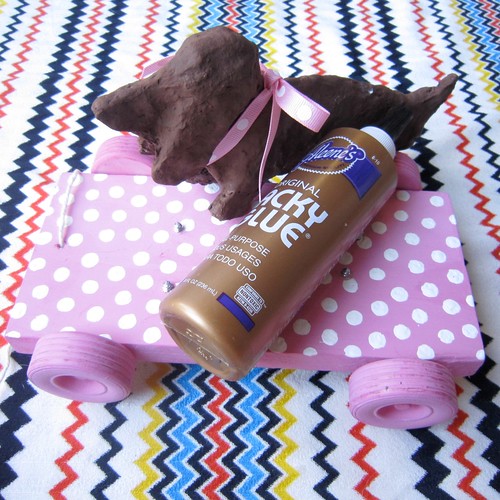
Once your puppy is smooth to the touch paint him brown. For a little added bonus I tied a pink ribbon around his neck that I glued in place with a little Aleene's Tacky Glue. He was the belle of the ball at the Weenie Dog Races.
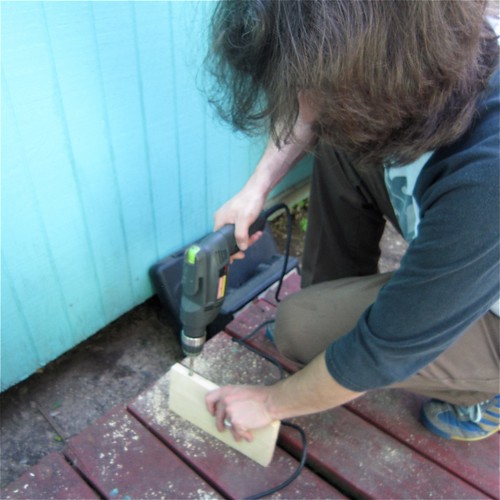
THE BASE
This is where the husband comes in handy, not that I could not have done this by myself. My fabulously handy husband Chris offered to do the "heavy lifting" in the project. You will need a rectangular piece of wood for your base thick enough to run a dowel through. Depending on what size dowel you have drill two holes that size through your wood. What size wheels you get will also depend on the size dowel you have. We used a Dremel tool to sand the tips of the dowel so they fit into our wheels a little better. We also used another dab of Aleene's Tacky Glue to make sure the wheels stayed in place.
WOOD ADORNED
Plain wood will just not do. Gather up your Crafty Chica Little Chica Paint Packs and get to adorning. I mixed my red and white to get pink. I used a trick the Crafty Chica herself taught me on an episode of Craft Lab which is to use the end of a pencil to create a polka dot effect with your paint.

MAKE IT PULLABLE
Once your paint has dried go back with your Dremel and drill a small hole in the front center of your wooden base. Using 1ft of yarn or thread tie a small wooden bead to one end of your string and attach the other end to the base of your toy. This is how you will pull the toy.
PUT IT ALL TOGETHER
Getting the legs on your paper mache wiener dog even is tricky business. Using small screws I attached the legs to the wooden base. I also added more Aleene's Tacky Glue under each paw.

Lucky for me when I started looking for instructions on pull toys good ole' Martha Stewart pulled through with advice. I tweaked the original design a bit and love the daschund I ended up with. I'm pretty smitten with the little guy and more importantly Tallulah is too.