Firecracker Tie Dye Patriotic T-shirt

Friday, June 29, 2012

Just in time for the 4th of July, we've made a super cute Firecracker popsicle-inspired top!  After doing our research, we found out some people call them Bomb Pops or Rocket Pops! Firecracker pops are so iconic and remind us of summer days and trips to the ice cream truck.  I'm always a sucker for nostalgia, so wearing a firecracker pop shirt if right up my alley!  I enlisted the help of our awesome designer Lauri Eaton and she whipped up this shirt in minutes (minus drying time).  This DIY is just about as easy and fun as eating a Firecracker popsicle!

Firecracker Tie Dye Patriotic T-shirt

What you'll need:

Tulip One-Step Tie Dye in red and royal blue
Tulip Dye Zip Ties
Tulip Surface Cover
– 100% white cotton shirt
– Pliers

What you do:

1. Wet or dampen your cotton t-shirt; wring out any exess water.


2. Lay shirt on surface cover. Cinch the shirt into three different sections and use pliers to pull zip ties tightly on bottom and top section as shown above.


3.
Mix Tulip Tie Dyes and shake well.  Squeeze red dye and saturate top part of shirt.  Squeeze dye about a half inch from the cinched zip tie.  The dye does bleed and will seep to this section eventually.  Do the same with the blue dye at bottom.  Also make sure to turn over and make sure you get all areas on the other side of the shirt.

4. Roll and wrap in Tulip Surface Cover and let sit 6-8 hours.

5. Rinse under faucet to remove excess dye. Rinse until water runs clear.

6. Leave rubber bands on shirt and machine wash in large load setting.

7. After washing, remove rubber bands. Machine dry.


So what did you call this treat? Firecracker, Bomb Pop, or Rocket Pop?

Patriotic Projects You Can DIY

I'm going to start with a disclaimer: none of these patriotic garments is a DIY project - they all can be bought at whatever retail store they are sold at. But here's the deal... WHY BUY WHEN YOU CAN DIY? These all look handmade but they cost way more than if you made them yourself. Let's get inspired by what's out there selling in our favorite stores, but let's make our own!

Flag biker jacket from Topshop

You can make it using Tulip Soft Fabric Paint and a star stencil.
Dip-dye top by Lucky Brand
You can make this by dipping your white tee into Tulip One-Step Tie Dye. So simple!

Festival top by Lucky Brand

You can paint this by cutting out stars and ironing them on. 
All you need are Tulip Fashion Glitter Sheetsa star template, an iron, and a pair of scissors.


Flag printed shorts from Topshop

You can make this using Tulip Soft Fabric Paint and a star stencil. If you don't have a steady hand to paint stripes, use painters tape.

 Heart flag tunic by Free People

You can make this using Tulip Fashion Glitter Shimmer Fabric Paint, a star template, and painters tape to make stripes.

 Flag tee shirt by Lucky Brand

You can make this using Tulip Fabric Spray, some tape and some star stickers -- just spray right over the top of the tape and stickers with paint, then remove to reveal your patriotic design.

 Patchwork denim shorts from Urban Outfitters

Create these by cutting up old denim to make square patches. Fray the edges and useAleene's Fabric Glue to apply them to your rockin' festival-inspired shorts! How easy is that?!


Okay, so these tie-dye shoes from Urban Outfitters might be less than DIY-able, but they are really cool and would look great with any of the Independence Day DIY's you may be wearing!

Great Outdoors - Cool2Craft TV


It's super cool! Cool2Craft TV July 2, 2012: Great Outdoors! The Cool2Craft design team is sharing a fun collection of great outdoors inspired craft ideas this week! EcoHeidi Borchers is crafting a Birdhouse Fairy Cottage featuring Aleene's Super Thick Tacky Glue, Tiffany Windsor is creating Upcycled Whimsical Yard Art featuring Aleene's Outdoor Adhesive, plus much more!
 
Learn new techniques, chat with us while watching the show and ask questions about all your favorite Aleene's products!  It’s easy to watch the Cool2Craft TV Channel right from your computer. Airing Monday July 2, 2012 9am Pacific/10am Mountain/11 am Central/ Noon Eastern. Go to http://cool2craft.com and you'll see the Livestream player and chat box. See you Monday! Can't make the live show? No problem, you can drop by anytime 24/7 to watch the show!

Visit us on Facebook!
Craft on!

4th of July Bomb Pop Shirt

Thursday, June 28, 2012

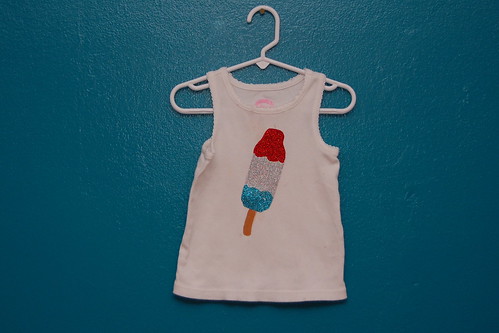
Nothing says 4th of July like a Bomb Pop. Well ok maybe fireworks say it more, but Bomb Pops are cuter. I mean come on. Add glitter to the yummy equation and then pop this top on my kid and the cuteness will be unstoppable. Let me tell you how you can make your own in about 20 minutes.

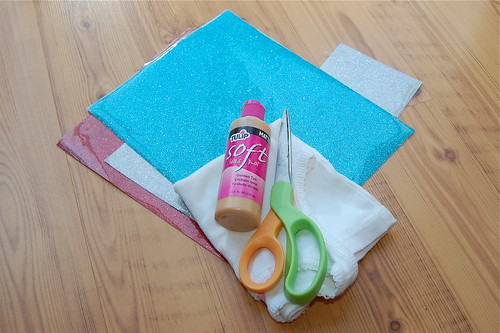
SUPPLIES

T-Shirt

Tulip Fabric Paint (the shad of a stick)

Paint Brush

Iron

Tulip Fashion Glitter Shimmer Sheets

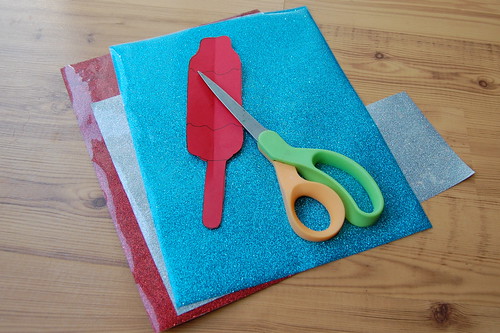
First I drew a picture of a Bomb Pop on a piece of paper to use as my pattern.

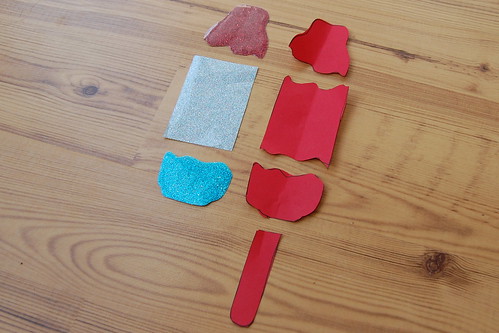
Next I cut my pattern into 3 parts. I then used the pattern parts to cut the shapes out of silver, teal and red Shimmer Sheets.

Once my shapes were cut out I placed them on my shirt where I wanted. Place a thin piece of fabric on top of the image and using a hot iron press.

The last thing to do is to paint on a popsicle stick and let it dry. I can't wait to show Tallulah her new spiffy 4th of July Bomb Pop shirt when she gets up tomorrow.

***This is a sponsored post by I Love to Create - I was compensated & given free supplies. Mama has gotta pay the bills somehow and really who in their right mind would say no to free craft supplies***

MAYA IN THE MOMENT: Dyed Tuxedo Striped Jeans

Wednesday, June 27, 2012
 I recently purged heaps-o-clothes from my closet. I had clothes from when I was in grade school, but I didn't want to part with them. I hardly had any room to live in my room, I had so many clothes. So I packed them up in bags and donated them.

But jeans...that's another story. I hate to part with jeans that I like and ones that fit well! But I felt that with my new room makeover, I need to makeover some jeans too! So I did something fun and dyed a boring pair with teal and fuchsia tie-dye!

My finished jeans! The teal really gives them new life!
SUPPLIES:
Tulip One-Step Tie-Dye Kit in NEON
A plastic table liner
A spray bottle with water
A pair of jeans

 STEP ONE: Dampen the jeans. You can put them through the wash and take them out while they are damp, or you can use a spray bottle with water. Because denim is so thick, you really need to make sure they are wet so the dye will soak in and spread evenly.


 STEP TWO: Mix the fuchsia bottle - just add water and shake. Draw a thick line down the sides of the jeans. Flip them over and do the other side too. Just along the outside of the leg.

 STEP THREE: Now mix and add the teal. You'll need tow bottles for this, one for the front and one for the back. Inside the kit there is an extra packet of teal dye. Make sure the pants are wet and then after you add the dye, rubs your hands up and down the pant legs to make sure the dye is evenly coated all over the denim. Flip the pants over and do the same.

 STEP FOUR: Wrap them up in the plastic bag, and let them sit overnight or for six hours. Wash in the machine in cold water and dry as usual!

Thanks for checking out my project! Please come visit me on my Facebook page! http://facebook.com/mayainthemoment


iLoveToCreate Teen Crafts: Carnival Canvas Covered Notebook

Carnival Canvas Covered Notebook
Avalon Potter (a.k.a. NGC-New Generation Crafter) for iLoveToCreate
"Teen crafted, mom approved."

Avalon has been obsessed with tribal prints all summer, from ikat to Native American to African inspired patterns and chevron, she's been showing me pictures of bedding, bags, clothes, shoes all emblazoned with an array of colors and patterns.  I trust a teen to know what's really cool and she's a really cool teen.  She wanted to make something fun to express her new found love of all things 'pattern-y', and we remembered Claudine Hellmuth's fabulous sticky back canvas.  By covering a basic notebook with layers of painted and embellished canvas, she made a truly fabulous one of a kind work of art.  This is so much fun to do with the vast array of paints from Tulip and Scribbles brands and with school just around the corner, a great way to help your teen personalize their supplies!

Materials
Notebook with hardback cover
Sticky back canvas
Decorative tape
Tulip 3-d fashion paint
Tulip fabric markers
Scribbles brush on fabric paints
Scribbles fabric paint brushes
Tulip sponge pouncers

Tools
Scissors

Cut canvas to fit cover of book, leave a 1" edge, cut edge at corners, fold over book cover and press to remove any bubbles on front of book.  Add a decorative tape accent to left side of canvas to conceal edge.


Create three strips of canvas. Peel and press on notebook at top, center and bottom edge.  Paint each stripe and the spaces in between a solid color and allow to dry.

Make two rectangular mini-canvas accents using dimensional paint in patterns, press together and adhere to front of notebook.

Use markers and paints to make a variety of patterns along strips. 

4th of July Platter - and a Sprinkles Cupcake Giftcard Giveaway!

Tuesday, June 26, 2012
4th of July cupcakes courtesy of Sprinkles.
The 4th of July is only a week away, but it's not too late to make some snazzy platters to hold your goodies. Here are two ideas of plates to create at your local paint-on-pottery shop! Special thanks to Sprinkles for donating the cupcakes for the photo - check the bottom of this post to enter in a giveaway!

You'll need to select some Duncan bisque, I went with an oblong platter and a large square one. And then you'll need Duncan Concepts Underglazes in red, white and blue. Brushes and Pure Brilliance Glaze are needed too. You can find all the product details here. 

 Base coat your platters as desired. I went with all white for one of them, and red and blue for the other. The contrast is nice once they are fired, they'll compliment each other!

 I used thin tape down the center of the platter and then used a Tulip Sponge Pouncer to create dots. For the outside, I used the tip of the paintbrush and made a hecka lot of polka dots!

 For the second platter, I used a Tulip Flexible Stencil and applied white paint with the pouncer. When you're finished, coat with two layers of Pure Brilliance and then fire at Cone 6.

GIVEAWAY: Leave a comment sharing what you'll be crafting up for the 4th of July and we'll draw one name on Friday to win a $20 gift card to Sprinkles Cupcakes

T-shirt Confetti Necklace!

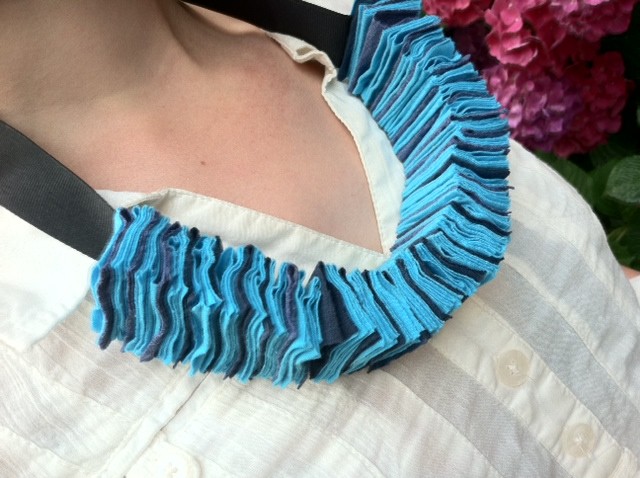
Interestingly, the inspiration for this festive, soft, Fourth of July necklace came from south of the border -- while I was on vacation in Oaxaca, Mexico, we happened upon a small gallery where I spotted an orange folded paper bracelet made by women in a local artist collective. The paper was so soft and fibrous, it reminded me of fabric. So when I set to re-imagining that bracelet stateside in my Generation T workshop (as a necklace of fabric and glue!), I was pleased that the results are even cozier -- a wonderfully celebratory accessory fit for a summer barbecue! (I was intentionally playing it subtle with the shades-of-blue color palette, but a bold red, white, and blue color scheme would really pop.) And it's comfy, too, for when the sun goes down and it's time to snuggle up and watch the fireworks.
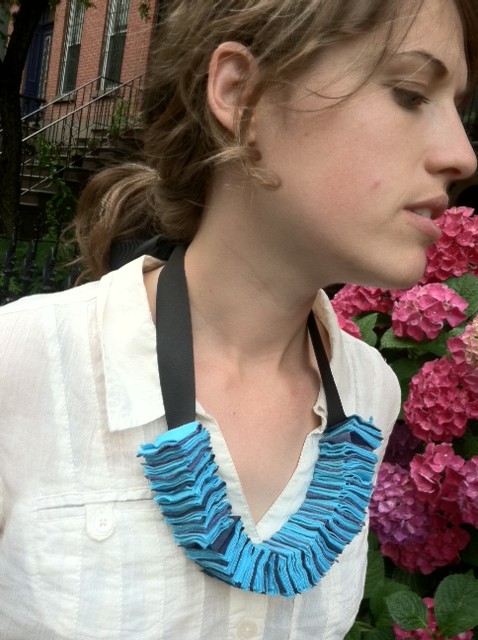
Materials:
-T-shirt scraps (sleeves work well!), including one long one to use as the fastener
-Rotary cutter and cutting mat
-Quilting ruler
-Aleene's Fabric Fusion glue
-Ribbon (optional, in place of the long piece of T-shirt scrap to fasten the necklace)
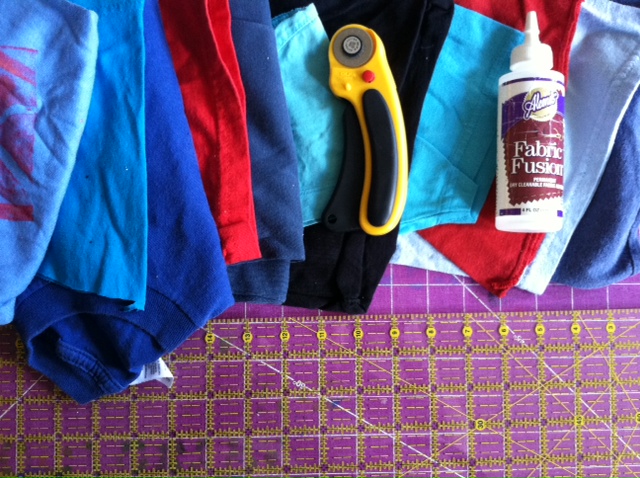

Make it:
1.
Cut 1 1/2"-wide strips from the T-shirt scraps.
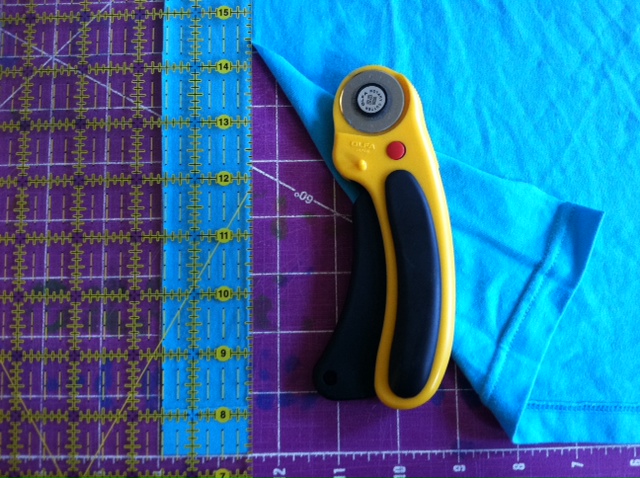
2. Cut the strips into 2" pieces to make rectangles that are 1 1/2" x 2". (I cut about 124 rectangles in two different colors to make an approximately 9"-long necklace segment.)

3. Lay one of the rectangles flat, wrong side up, and spread a thin line of glue slightly off-center and parallel to the short ends. Fold it in half so that the glue line retains the crease. Let the glue dry and repeat for the remaining rectangles.
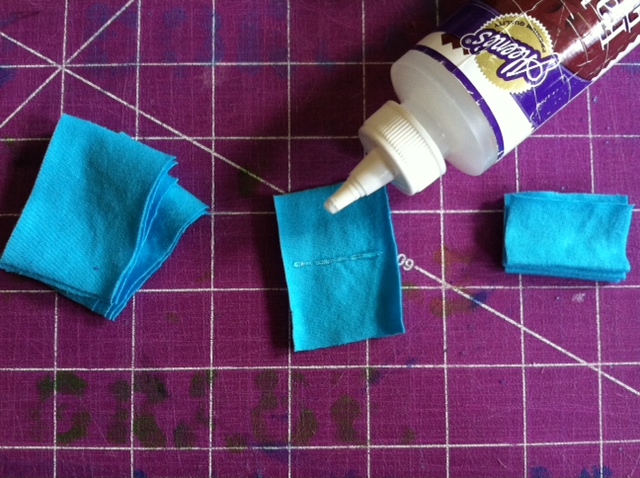
4. Squeeze a thin line of glue close to the folded edge of one of the rectangles and press another folded rectangle over it.
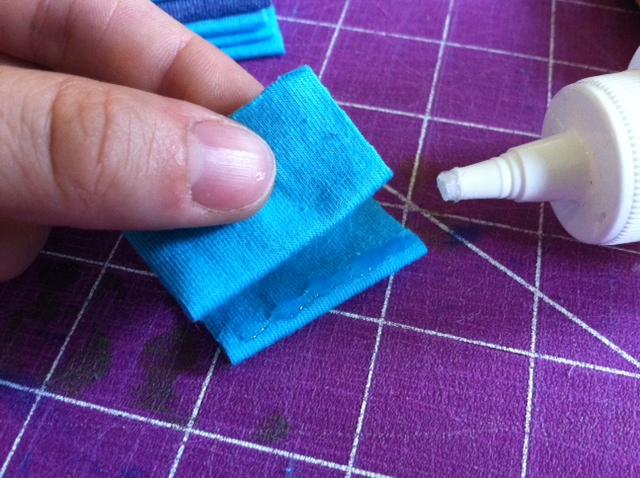
5. Repeat step 4 as many times as needed, to attach more rectangles together and create the necklace piece. (Arrange different colors to create a pattern!) Reserve two folded rectangles to use in step 7.
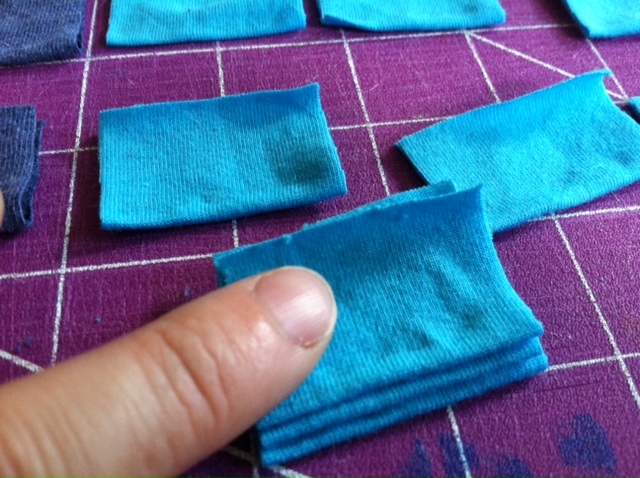
6. Let the necklace piece dry, then touch up any gaps as desired.
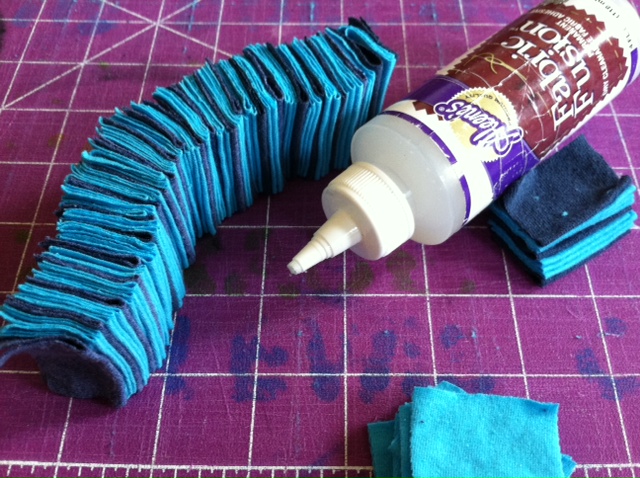
7. Spread glue along the end of a long T-shirt strip or ribbon (shown here), and center and press it along one of the spare rectangles from step 5.
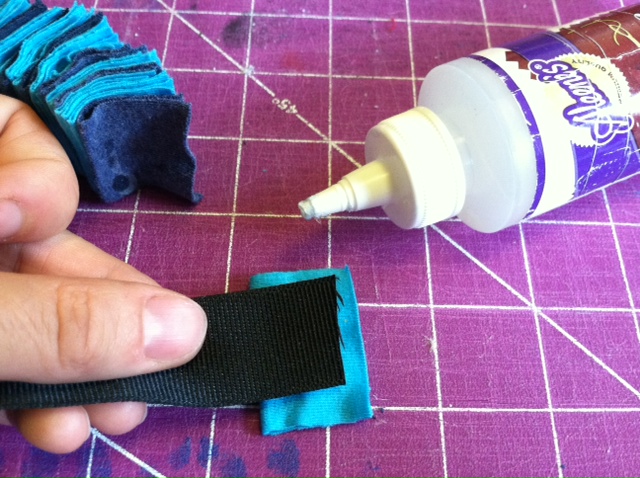
8. Then add more glue to the ribbon and press it against one end of the necklace piece, aligning the T-shirt rectangles (the ribbon end should be sandwiched in between T-shirt material). Repeat on the opposite end of the necklace piece. Let dry completely. Then snip the T-shirt strip or ribbon in the middle so you have two ends for tying.

9. Tie the ends in a bow at the back of your neck.
Variations:
-Experiment by making smaller rectangles for a more delicate piece (you can make a necklace this way, or, I made an accompanying bracelet using 1" x 1 1/2" rectangles).
-Use chain in place of the fabric fastener. (I like the idea of an all-white necklace piece with a gold tone chain.)
-Try wearing it as a headpiece! (My sister's boyfriend tied the necklace around his head as a joke, but with the right messy up-do, it could be quite the statement piece.)

-Play with color: Make the red-white-blue version mentioned above, use the color scheme from your favorite sports team to wear to the next game, or craft a rainbow to brighten your day!

Tune in later this week over at Generation T to see the second necklace I made using the scraps left over from this one--super easy, super fast, and also no-sew (no-glue, even!).