Easy Peasy Hairpins

Tuesday, January 31, 2012
Today's project is super, duper easy and fun.  We're going to make/embellish some hairpins.  


This is a great project to do with younger people as well because it's really easy.  (While my son won't be wearing one, he was really excited to help make them.)  The reason for this project is that I've been wanting to wearing my hair (not my makeup) like these pictures I found on Pinterest.


Then I saw these clips at Anthropologie and while I was tempted to get some, I figured making them would be inexpensive and easy.


So I purchased some hairpins and clips at Hobby Lobby and I also stopped at an antique shop and picked up some vintage earrings.  I invited my crafty friend over and we worked together.  It's a good project to do with a friend, because there are two hairpins to make from each earring set - one for each person.


After the supplies were assembled we broke out the secret weapon - Aleene's SUPER Gel Adhesive.  I love this glue.  It holds so well - even metal to metal.  What I like about it the most is that it has a little brush in it just like nail polish.  (Let's just say I've had some bad encounters with little tubes of super glue and there's still evidence on my kitchen table.)  This stuff is way easier to use because of the brush.


I used some wire cutters to snap off the back of the earrings.


We brushed on some adhesive and added the earrings.  


You only have to hold the pin to the earring for a minute or two until it's really on there and dry.


This clip was originally blank on top, but I happened to have little leaf beads that fit right in it, so I glued them on.


Buttons also work well for this project.  You just have to use ones that don't have a loop on the back.  I had my assistant select some for me.


I am excited to wear them now.  The redish-brown one looked so cute in my friend's blonde hair.


It's a great five minute project with fun results.


Thanks for stopping by.


Scenes from Day 2 at the iLoveToCreate booth at the 2012 Craft and Hobby Tradeshow

Monday, January 30, 2012
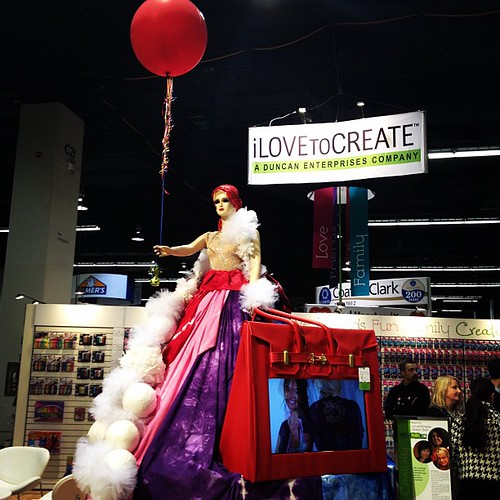
Our Lady Creativity featuring a Birkin bag made with vinyl by @pattiewack
Our Creativity mannequin proudly displaying her red balloon!

Another fun and busy day on the tradeshow floor at the Craft and Hobby Assocation Winter Show for 2012. Here's some of the fun photo action in our All you Need is... booth!

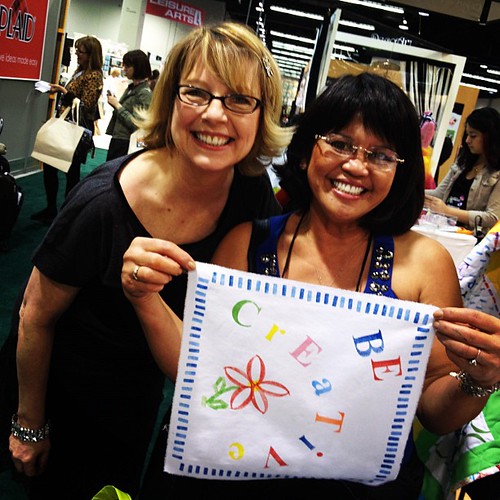
Be Creative
Pattiewack and her designer friend show off a quilt square using our new Scribbles Fabric Stamps! We are putting together quilts to be auctioned off for various Boys and Girls Club nationwide!

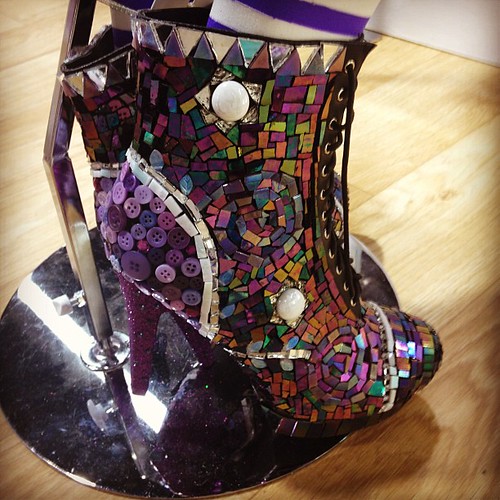
Mirrored Mosaic shoes by @tiffanywindsor and @heidiborchers! #chashow
Tiffany Windsor and Heidi Borchers created these amazing mosaic shoes using Aleene's adhesives!

photo
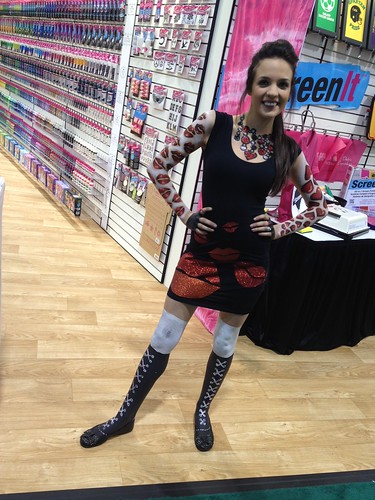
Savannah Starr shows off her cool Tulip Body Art painted look at the end of Day 2. Look at those awesome shoes and necklace painted by Hope Perkins. LOVE!

Ashley Hackshaw of Lil Blue Boo in the house! #chashow
Blogger Ashley Hackshaw of Lil Blue Boo was in the house and meeting with friends and fans in the Bloggers' Lounge!

Visit us on Facebook!
Craft on!
iLoveToCreate Retrofabulous Crafts: Red Queen Choker

Visit us on Facebook!
Craft on!
Red Queen Choker Copyright 2012 Margot Potter

iLoveToCreate Retrofabulous Crafts
Red Queen Choker
Copyright 2012 Margot Potter

My grandfather quoted endlessly from Alice in Wonderland.  I grew up loving the Alice books and the many movie versions.  I even got to play the Duchess once in a Children's Theatre production, which was wicked good fun!

Doilies have always held a place near and dear to my heart, in fact the first Valentine I gave my husband was handcrafted with a paper doily.  This idea popped into my brain a couple of weeks ago and from there I scouted out supplies and through a process of trial and error figured out how to make this choker.  Which I adore.  I am wearing it to the upcoming tradeshows.  It would be perfect for a Valentine's party, don't you think?

It is made of paper, so of course one should not wear it in the shower, the swimming pool, the ocean or in a rainstorm.  It's not meant to last forever, so it will need to be handled with care.  You could make this with lace, but I wanted that classic paper doily look.  These little doily flowers are fun too, I think you could use them for all sorts of clever crafts.  Nothing says vintage Valentine quite like a paper doily! It was so easy to put this all together with Aleene's Fabric Fusion Peel and Stick Sheets!


Materials

11 3 1/4" round paper doilies
22 1'x1 1/4" felt hearts
40 10mm silver plated jump rings
2 silver plated swivel lobster clasps
2 silver plated pinch bail ear wires
34 gauge silver or gold Artistic Wire
Aleene's Fabric Fusion Peel and Stick Sheets

Tools
Wire cutters
2 pairs chain nose pliers
Scissors
1/16" hole punch (I used my Crop-a-dile)


1. Cut out the center of the doilies. Use 34 gauge wire threaded into every fourth or fifth hole in frame around open center to gather the doily together into a "flower." Once you have the holes threaded, grasp both wire tails and gently pull the doily into a flower. Take your time, be gentle and don't mangle it all by rushing!


2. Twist wire tail ends together using chain nose pliers. Cut off excess with wire cutters. Make 11 of these.

3. Use hole punch to punch holes in right and left upper center of each heart.

4. Place hearts on Aleene's Peel and Stick Sheets. Cut around heart, peel off adhesive backing and sandwich the doilies between two hearts. Make sure the hearts are lined up properly so it's easy to link together later!

5. Use 4 10mm jump rings to connect each doily heart. (To learn how to properly attach jump rings with tension, visit my Crafty Quickies on YouTube!) Attach two jump rings on the outside edge of the first and final heart in your chain. Repeat for front and back of design. This will prevent the necklace from flip-flopping when worn.

6. Add the clasps to the final jump ring on the first doily heart in each chain. This is how the necklace is connected, having both stabilizes the design when worn.

7. To make earrings, repeat the process of making two doily hearts. but only pierce one hole in each heart so the ear wires can attach. Use pinch bail earrings inserted in the hole of each heart, or you can opt for jump rings and French wires.

Red Queen Tiara Copyright Margot Potter

(PS: I made this matching tiara, using a pattern for wrapping the crystal from my book Sparkletastic and Aleene's Dry Adhesives to put it all together. I cut the hearts and layered them behind the crystal loops and added a half doily behind it to hide the adhesives.  I kept it really simple, but you could distress the papers and add glitter to make it super, duper over the top!)

iLoveToCreate at the 2012 Craft and Hobby Association Show

Sunday, January 29, 2012
The Tulip Love mannequins made by @betseyjohnson designer Charlene Pack!
Mannequins decorated with Tulip® Fashion Art products by Betsey Johnson designer Charlene Pack.

Today was the first day of the 2012 Craft and Hobby Association Tradeshow! We were so, so excited to share our creativity and tradeshow booth with all our friends, customers, buyers and fans! We want to share with you all the exciting action that took place on this first day! It was a whirlwind of activity.

Our theme is All you need is...Love, Family, Friends, Fun, and Creativity. Within our booth are all graphics and visual elements that touch on this theme. It was VERY important to us that we really tell a fun and inspiring story with our brands that touched on these points throughout our booth!

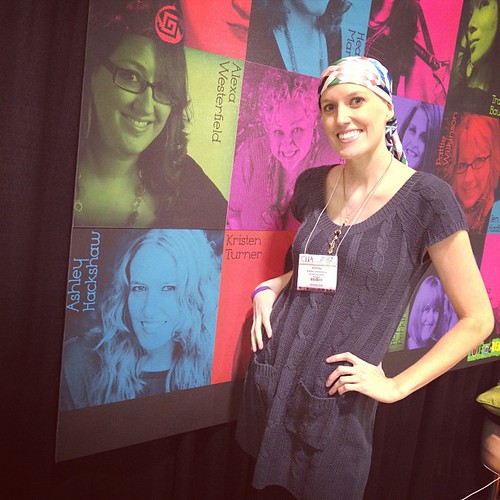
Our Color Connection Wall
The color connection wall was a visual smorgasbord. We really worked hard to create a lot of eye candy moments in the booth!

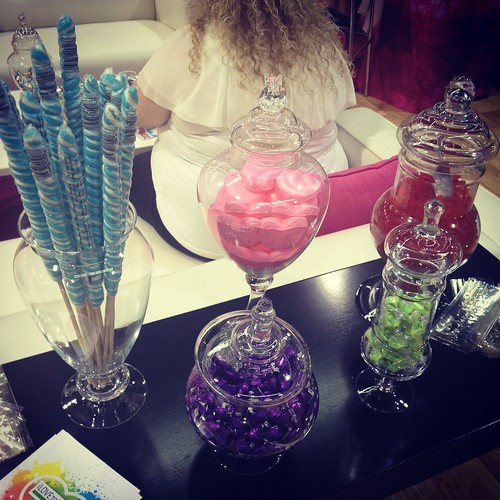
Candy in our booth
Speaking of candy, we also had that in the literal sense too!

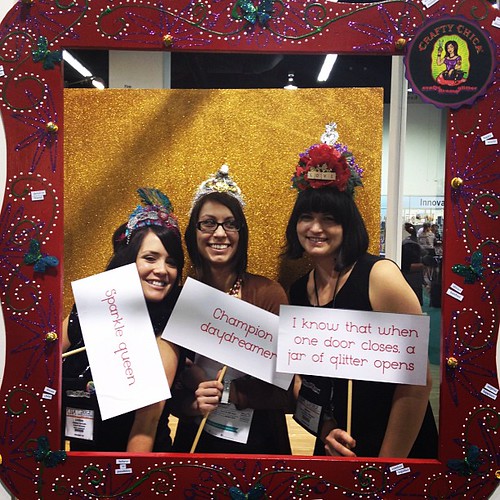
Lindsey, Brandi, and Lauren in our @craftychica  photo booth! #ilovetocreate #chashow
Fun was had by all who stopped by our Crafty Chica photo booth. Look at all the glitter and super cute crowns!

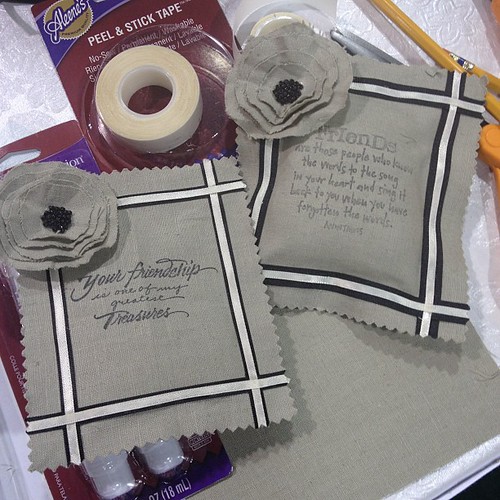
Aleene's Make&take hosted by Tiffany Windsor! Cute lavender sachets with friend quotes!
Tiffany Windsor and Heidi Borchers made this pretty lavender sachet with heartwarming friendship quotes using Aleene's adhesives.

@dollarcraft Heather Mann at the Bloggers' Lounge! #chashow
Attendees and fans got creative with their favorite bloggers in the iLoveToCreate.com Blogger's lounge. Heather Mann of Dollar Store Crafts, Crafterminds, and Décor Hacks was one of our superstar bloggers who joined us today!

We'll be back tomorrow with more live updates from the show. More crafty goodness coming your way!

Visit us on Facebook!
Craft on!

Learn New Crafting Techniques! Monday January 30, 2012: Black & White

Friday, January 27, 2012

Cool2Craft TV for January 30, 2012: Black & White - Join hosts Tiffany Windsor and Heidi Borchers and special guests Savannah Starr and Candace Jedrowicz for a new episode of Cool2Craft TV. This week's show theme is Black & White. Today's featured projects are super cool! EcoHeidi will show you how to make a mosaic mirror featuring Cool2Cast and Aleene's Original Tacky Glue, Candace Jedrowicz is tiling a shadow box, Savannah Starr is using Aleene's Quick Dry Tacky Glue to create the vintage Aleene's Look of Enamel and Tiffany is crafting a Scrapbook Candle Cover with Aleene's Tacky Dot Singles and Aleene's Super Thick Tacky Glue. It's a terrifically tacky and creatively cool show!

It’s easy to watch the Cool2Craft TV Channel right from your computer. Airing Monday January 30, 2012 9am Pacific/10am Mountain/ 11 am Central/ Noon Eastern. Go to http://cool2craft.com and find the Livestream player and chat box. See you Monday!

Visit us on Facebook!
Craft on!
Ahh Shucks You Painted Me Chucks for Valentines Day

Thursday, January 26, 2012


I'm one of those mother's that lives to dress my kids in theme. Valentine's Day is no exception. Novelty Valentines T-shirts are a dime a dozen, but shoes cute enough for Cupid are something special. Here is how to make your own.


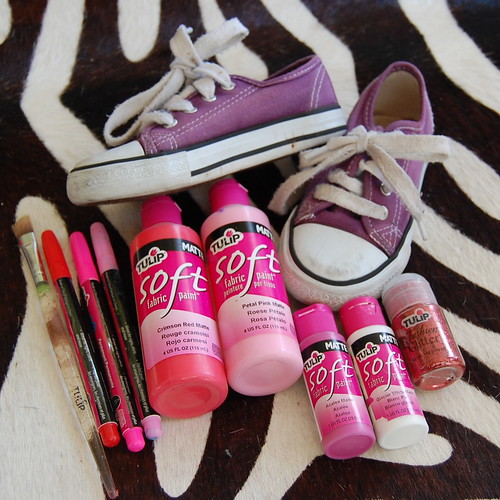
SUPPLIES
Tulip Soft Fabric Paint
Paint Brush
Canvas Tennis Shoes


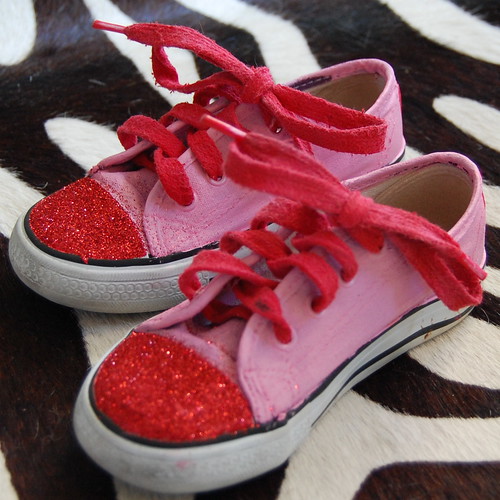
The first thing I did was paint the purple shoes pink. If you already have a pair of canvas shoes in the color you want you can skip this step. However, with just two coats of Tulip Fabric Paint the purple was gone and it was all about the pink.


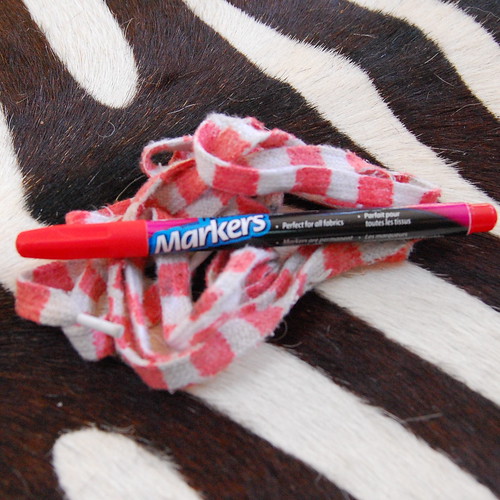
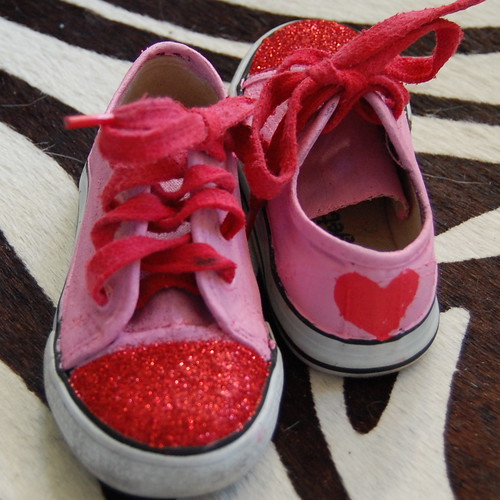
I could have left the shoe laces white, but why when they look so much cuter red. I know, I know this picture implies that I painted them striped with a red fabric marker. I did at first, but then later went back and used red spray paint.


Next I painted the toes of my shoes red and while the paint was wet I coated them with red glitter. I also added a little heart to the back of each shoe.


Now Tallulah can celebrate Valentines Day in style. Heck they were so easy to whip up I might make the whole family a pair.

Visit us on Facebook!
Craft on!

iLoveToCreate Teen Crafts: I Heart U Valentine by Avalon Potter

Wednesday, January 25, 2012
Visit us on Facebook!
Craft on!
iLovetoCreate Teen Crafts
I Heart U Valentine
Avalon Potter
"Teen crafted, Mom approved."

My mom has been making super cute Valentine's lately, so I decided to make one of my own! I love this pretty pink patterned paper and there were some left over scraps from the glittered gift bag she used for another project. You can use whatever papers you like, maybe even recycle some old Valentine's or use book pages...it's up to you. Aleene's adhesives make it easy to make wonderful projects super fast!

Materials
Patterned paper for heart
Gold glittery paper for arrow point and feathers (you can use gold paper and add Tulip glitter if you like!)
Pale pink cardstock
Black and white patterned paper for arrow staff
Small white doily for background
Aleene's Tacky Sticker Sheet
Aleene's Acid Free Tacky Glue

Tools
Fiskars Graduate Heart Shape Template System (Or hand cut a heart)
Paper friendly scissors
Craft knife
Ruler
Computer and printer to print out I (Heart Icon) U.

1. Print out I (Heart Icon) U on a computer. The heart icon is a less than symbol followed by the number 3.   I used a French Script MT and sized it at 48. 2. Cut out the large heart and small heart using the template and shape cutter. The large heart is the largest on the template and is 3.5"x3.75". The small heart is 1"x1". 3. Use scissors to cut the arrow shaft to 4"x1/4". Cut the arrow feathers to 3/4"x1 1/4". 4. Cut out words and cut a frame out of the pink paper as a background. 5. Cut a small slit a little bigger than 1/4" diagonally using the craft knife at the top and bottom center of heart. The distance between the two slits should be about 2.5". This is where your arrow will go.


6. Thread arrow into slits.


7. Attach doily to back of heart using sticker sheet.  Attach arrow point and feather with Aleene's Tacky Glue and allow to dry overnight.

8. Layer words and frame and attach to center of card.  (Write your sentiments on the back of the Valentine.)

How-to: Iron-on Glitter Toddler Tee!

Tuesday, January 24, 2012
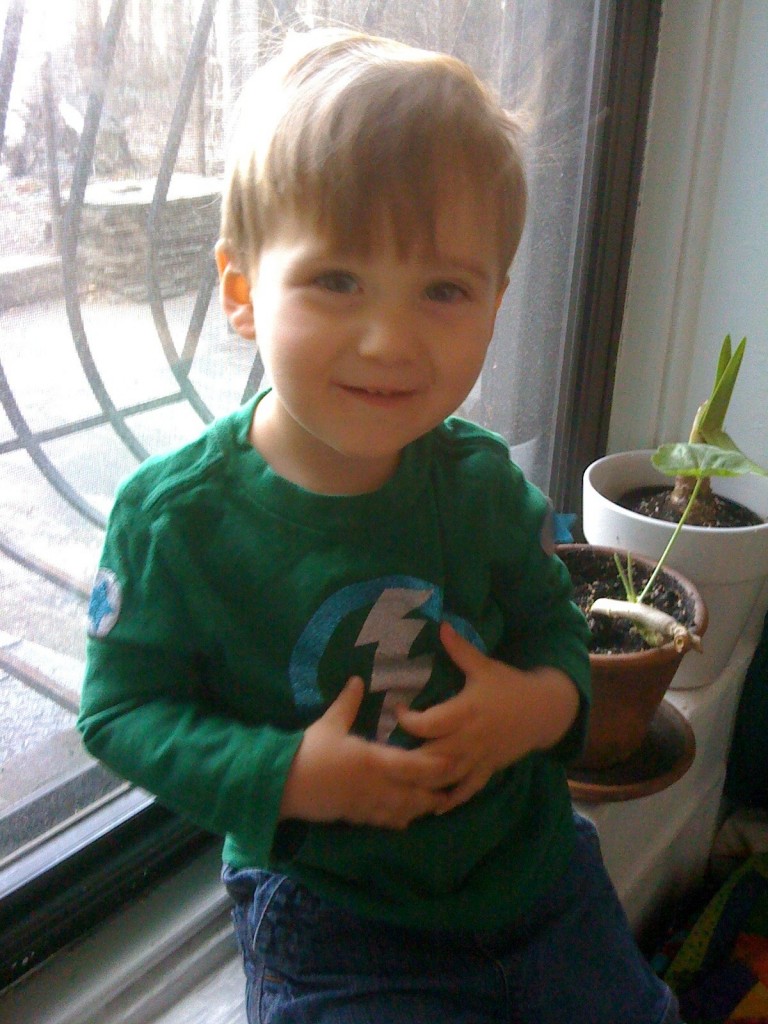
I missed posting an iLoveToCreate project last month because I got a little distracted by a rather big DIY project of my own (more projects relating to my newest muse in the coming months, but in the meantime...). I recently attended a little boy named Caleb's 2nd birthday party and was inspired to make something -- something superhero-inspired for a super little guy! And since I'm obsessed with these iron-on glitter sheets, how about some fun, sparkly T-shirts?

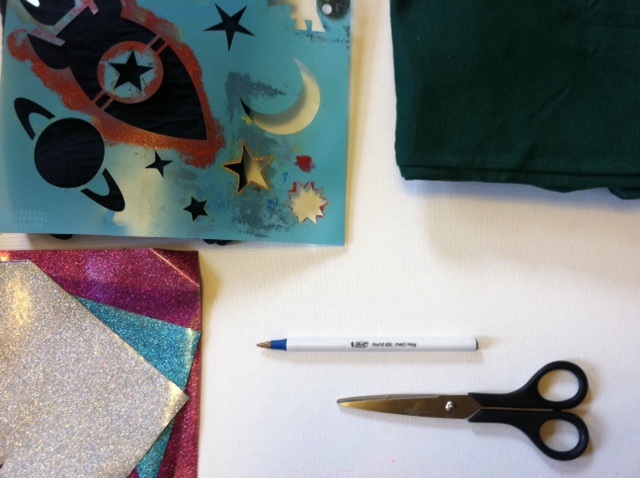
Materials:
-Stencils and other household objects to trace

-Ballpoint pen

-Tulip Fashion Glitter Shimmer Transfer Sheets
-All-purpose scissors
-Toddler T-shirt(s)
-Pressing cloth
-Iron

Make it:
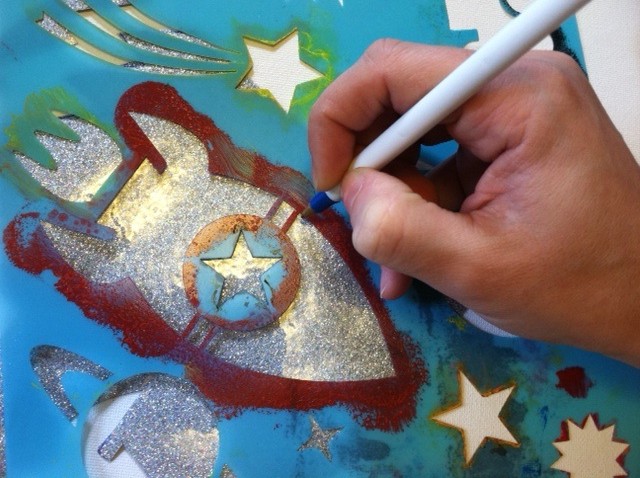
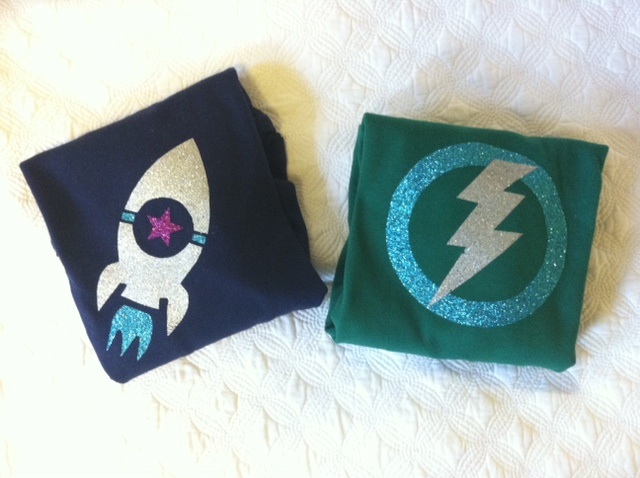
1. Select a stencil and trace the parts of it onto the desired color glitter transfer sheets. (Silver for the body of the rocket ship, purple for the star decal, blue for the stripe and the flame. Extra stars in blue!) Alternately, trace household items (like different size bowls, jars, tupperware lids, bottle caps, etc.) to create basic shapes like circles and rectangles.

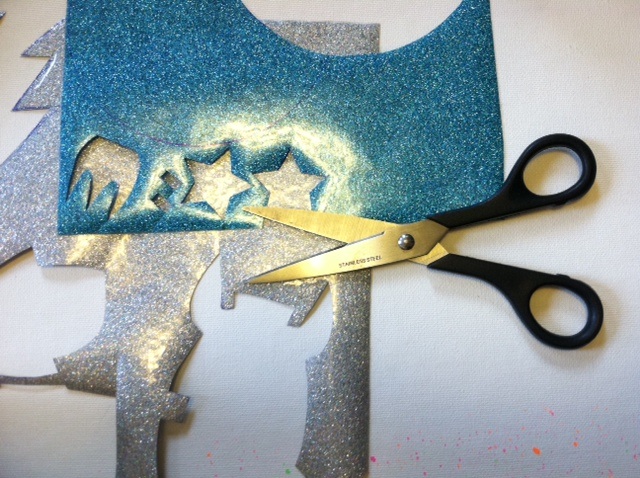
2. Cut out all of the shapes and peel off the top layer of plastic before arranging the shapes on the front of the shirt.

3. Use the warm iron and pressing cloth to press on one piece of the design at a time (so that none of the pieces shift accidentally as you're applying them). Iron on any sleeve decorations separately so you can lay that portion of the fabric flat when you're working on it.

4. Then fold them, wrap them, and tie a ribbon in a bow...

5. ...and gift them to a cute little toddler you know!

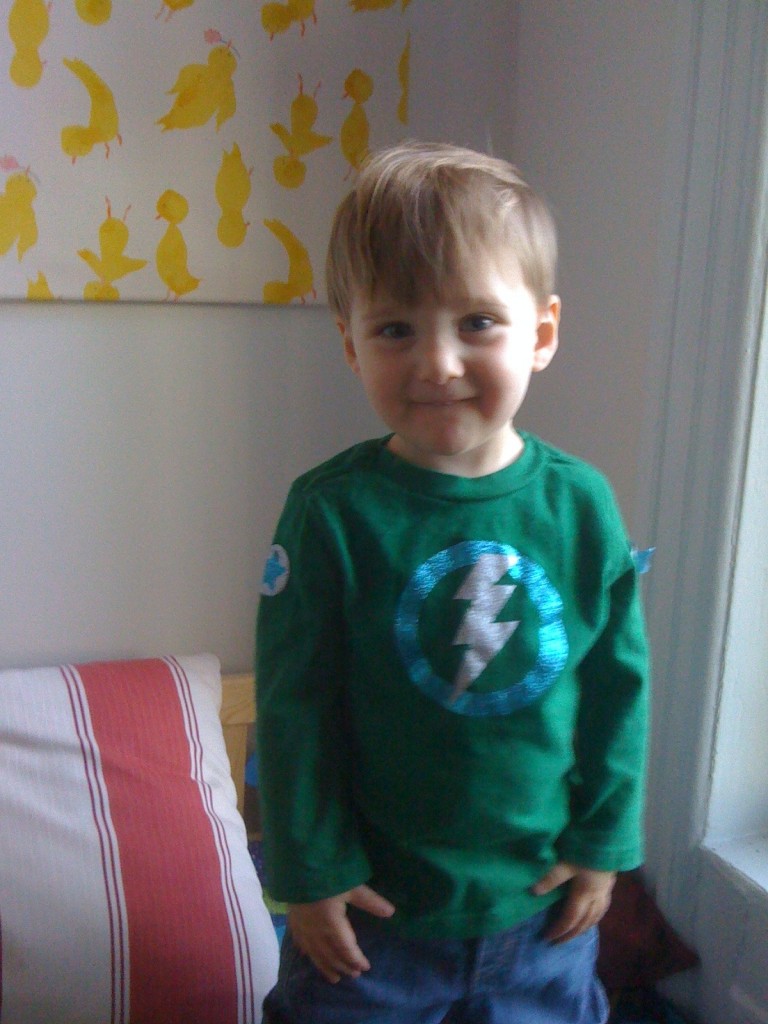
(Caleb's mom reports that he loves wearing them, and points often to the sleeves, identifying the "stahs.")


Visit us on Facebook!
Craft on!