Showing posts with label mixed media jewelry. Show all posts

Five Fab Flower DIY Jewelry Projects

Monday, May 20, 2013

Over the years I've made a host of floral themed DIY projects for iLoveToCreate.  Perhaps it's driven by my allergies to pollen, but I have a long standing affinity for using flowers in my designs!  Here's a virtual bouquet of five fab flower DIY jewelry projects from me and my lovely daughter Avalon, all created with an array of pollen free DIY craft products from iLoveToCreate!

You can use chipboard, grungeboard or wood to make similar designs. Tulip Fabric Paints and Aleene's adhesives work on an endless variety of mediums.  These pieces were all very inexpensive to make, but they look very chic when worn.

Follow the links below to the step by step tutorials!
Pink Splash 3-D Spinning Flower Bangle Margot Potter for iLoveToCreate
Floral Stacked Bib Necklace Margot Potter for Avalon Potter for iLoveToCreate
Mod Girl Chipboard Necklace Margot Potter for iLoveToCreate
Pretty Poppies Pin Avalon Potter for iLoveToCreate

Do you love floral themed crafts?  Would you wear mixed media jewelry like this?  We'd love to see your creations!  Join us on Facebook and share your creativity!  Tune in this Wednesday, I'm working on a fun new tie dyed t-shirt floral jewelry DIY I think you're going to love!

Find more DIY fashion inspiration at DIY Doyenne!


How-to Make a DIY Collar Necklace

Monday, January 7, 2013
I Love.  Love.  Love collar necklaces!  I've been brainstorming how to make my own for a while now and I finally dove in and got it done.  It turned out even better than I had hoped, even Avalon was smitten!  When my teen is cheering on a craft project, I know I'm in the sweet spot!  Woot! 

This would look stunning on canvas, denim, linen...don't limit yourself to felt or to a black background.  Change it up to suit your style, darling.

DIY Collar Necklace
Margot Potter for iLoveToCreate

Materials
Black felt (2 sheets)
Acrylic rhinestones in various sizes
2 black grommets
Black button with shank and flat top
1" segment silver plated chain
2 10mm silver plated jump rings
Aleene's Fabric Fusion peel and stick sheets
Aleene's Fabric Fusion glue
Aleene's repositionable Tacky Spray
Aleene's Glass and Bead adhesive
Template (4 copies)

Tools
Fabric scissors
2 pairs chain nose pliers
Tracing pencil in white

Hand draw a Peter Pan style collar shape to fit your neck.  It needs to meet in the center and wrap around to back in a crescent shape as in picture. Make four copies of template.  Spray back with adhesive, position, cut out.  You'll need two facing left and two facing right!  Remove templates carefully.

Use Fabric Fusion sheets to adhere two layers together for both sides of necklace.  I traced and cut, using several sheets.  Peel sheet backs and attach. 

Use a grommet setter to set grommets on both sides of back of necklace.

Sew button attaching two front portions together.

Use Fabric Fusion adhesive to attach acrylic rhinestones, there is no pattern here, just scatter them!

Glue gem to button center. Attach jump rings, chain and clasp to back using chain nose pliers.

iLoveToCreate Tori Spelling Inspired Pin This Necklace

Monday, July 16, 2012
iLoveToCreate Tori Spelling Inspired ‘Pin This’ Necklace
Margot Potter
“These are your grandmother’s crafts...ya gotta problem with that?”

My design process is a very intuitive one.  I see things, they spark ideas and off I go to figure out how to turn the ideas into reality.  Not everything works out the way it is in my mind, but that’s part of the fun of design.  These vintage wooden clothespins were part of an Estate Sale haul from several years back.  I knew there was a design in these, but what, I didn’t know.  Watching Craft Wars, I’ve been utterly charmed by Tori Spelling’s large scale whimsical necklaces.  This week I was going to make a Pop Craft Challenge inspired Dog Toy box, but honestly I was running out of time and feeling stressed until I stumbled on these clothespins, pictured Tori’s jewelry and it all came together.  My vintage craft magazines are filled with found object jewelry like this and I find it all such fun.  I am seriously smitten with this design. I can not wait to wear it to the big Craft and Hobby Association show I’m attending this week.  You could do something similar using clip style clothespins or golf tees would make a smaller scale but equally delightful design. 

Materials
11 ½”x4” vintage wooden clothespins
8 10mm crystal SWAROVSKI ELEMENTS rounds
2 sterling or silver plated dapped French ear wires
2 sterling or silver plated EZ Crimp ends
2 silver tone or black size 2 crimp tubes or beads
.018 49 Strand Beadalon wire
2 metal loop topped craft screws
10.5” segment gun metal textured cable chain
Gun metal lobster clasp
Crafty Chica Paints: red, black, white
Aleene’s Spray Acrylic Sealer matte finish
Aleene’s Turbo Tacky Glue

Tools
2 pairs chain nose pliers
Mighty crimp tool
Flush cutters
Electric drill with 1/16” bit
Marker

Mark and drill holes in clothespins.  There is a hole in the center top of each (these are drilled side to side so the pin leg opening will hang forward on the wire.)  The second side to side drill hole is at the sides just above the top of the pin leg opening.  Repeat for 9 of your clothespins.

Make a small hole in the center top of two clothespins; these will be threaded with the loop top screws to create the earrings.

Paint all clothespins.  There top drilled pins are red.  Make three more red, three black and three white.  This will take several coats drying in between.  You can also sand in between coats.  Use a foam brush to paint and a small detail brush to reach inside of the pin legs.  Paint all sides.

Once pins are completely painted and dried, seal with spray sealer and allow to dry.

Cut a 10” segment of beading wire.  Thread an EZ Crimp end on one side, secure with Mighty Crimp tool.  We have a video that shows you how to do this here.

Thread 9 clothespins on the wire alternating colors.  Thread wire into a second EZ Crimp end.  Use chain nose pliers to grasp and pull wire through end pulling the clothespins taught, but not too stiff.  Use Mighty Crimp tool to secure wire, use flush cutters to cut off excess wire tail.  Thread a second wire into the lower hole opening on the outermost clothespin.  Thread on one of your crimp tubes, use chain nose pliers to compress tightly.
Slide a bead on the wire, thread into the next pin and repeat this process until you reach the final bead.  Thread the wire into the 9thclothespin, add a crimp tube, tighten wire to remove any slack and compress tube with chain nose pliers to secure.  Cut off excess wire with flush cutters.

Attach a jump ring to one of the EZ Crimp ends.  Repeat on the other side, adding the chain.  Finish by attaching a jump ring to the open end of your chain and add the clasp before securing closed.

To make earrings, thread a loop top screw into the pre-drilled opening.  Dab a little bit of Tacky Glue on the screw before inserting.  Use chain nose pliers to push and turn loop into opening until it is completely embedded.  Use chain nose pliers to attach ear wires loop tops by opening the loop on the earrings, sliding them into the loop and securing closed.

iLoveToCreate: Burnt Offerings Decoupage Necklace

Monday, June 18, 2012

iLoveToCreate Retrofabulous Crafts
Burnt Offerings Decoupage Necklace
Margot Potter

In 2009 I published a book called Beyond the Bead.  It is by far my favorite book.  I had a blast making beads and components out of all sorts of wonderful things I found in the aisles at the craft and hardware stores.  One of the projects in the book used old book pages, wooden craft stars and a wood burning tool to create the look of aged and burned charms.  I loved making it, I love wearing it and I thought I'd share it with you.  I've seen some similar projects making the rounds on Pinterest, but this is my version from a few years ago.  Aleene's Collage Pauge is an amazing medium with endless uses and here you can see how nicely it seals the old paper to create charms that look fragile, but are tough and durable.  Add a little Aleene's sealer spray and you've got a necklace that will last a lifetime.

Materials
Old book pages
Wooden craft stars
Traci Bautista Aleene's Collage Pauge Matte
Aleene's Spray Acrylic Sealer Matte
Tiny key charms
Crystal beads
Aged brass chain
Clasp
10mm gold tone or aged brass jump rings

Tools
Chain nose pliers
Bent nose pliers
Wood burning tool

Attach paper to star using Collage Pauge. Make all five stars at the same time, cutting the paper around them after they dry with scissors. 

Seal the top of the star with decoupage medium, after it dries repeat. Turn star over and repeat the process 
for the opposite side.  

Use a wood burning tool to CAREFULLY burn the edges of the stars and add some burned areas in the centers. Work in a ventilated area, take your time and be careful, the tool gets very hot. Did I mention it gets hot? Because it does. So be careful. After burning, spray with Aleene's Spray Sealer in matte.

If your stars are not pre-drilled, use a 1/16" drill bit to drill a hole at the top of one point on each star. Attach the stars and the charms and beads to the chain using jump rings and your bent and chain nose pliers.


Visit us on Facebook!
Craft on!

iLoveToCreate: Retrofabulous Mini-Frame Pendants

Monday, June 4, 2012

iLoveToCreate Retrofabulous Mini-Frame Pendant 
Margot Potter 
"These are your grandmother's crafts, ya gotta problem with that?"

Making these miniature wearable paper artworks is easy peasy and a ton of fun.  Old book pages make great collage backgrounds and you can find images in Dover Books titles or do this with upcycled new magazine pages for a more modern look.  No matter how you do it, Aleene's Dry Adhesives and Jewelry Glue make this a breeze!


Materials
Miniature Frame (HHH Enterprises)
Tiny metal Tim Holtz idea-ology flower
4mm crystal AB SWAROVSKI ELEMENTS round
Old book page
Red construction paper
Artistic Wire mesh black
Aleene's Tacky Tape Runner
Aleene's Tacky Sticker Sheets
Aleene's Jewelry and Metal Glue
Chain
Clasp
Jump rings

Tools
Chain nose pliers
Small scissors
Pencil
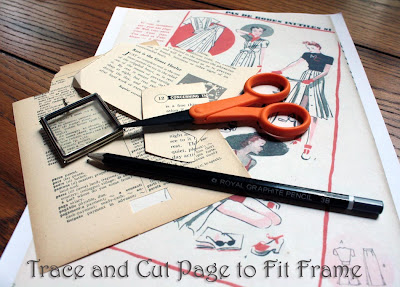
Trace background paper to fit frame and cut with small paper scissors. 

Cut out and adhere tiny collage elements using Aleene's dry adhesives.

Use Aleene's Jewelry and Metal glue to attach flower and crystal.  (Be sparing, a little goes a long way!)

Cut a small section of mesh and tie a bow, pull mesh tubing on both sides to create bow shape.


Visit us on Facebook!
Craft on!
Wednesday, April 25, 2012
Visit us on Facebook!
Craft on!

iLoveToCreate Teen Crafts: iLoveMom Glass Vial Necklace 
Margot Potter for Avalon Potter 
“Mom crafted, teen approved.” 

I’ve used these glass vials in a variety of jewelry making projects over the years. They’re like miniature works of art. You can put all sorts of things inside of these, beads, glitter, printed messages...whatever makes you smile. This is the perfect way to tell Mom how much you love her with a one-of-a-kind, handcrafted wearable work of art! It’s so easy to make these with Tulip Fashion Glitter and Aleene’s glue; you’ll find yourself looking for reasons to make more! I made some matching earrings using some smaller glass vials using the same techniques for a fun, fast and fabulous jewelry set just for mom.

Materials 
Miniature glass jar with cork top
Thin ribbon for accent
One large puffy and four small flat felt hearts in pink and white
Tulip Fashion Glitter in multi medium crystal
Screw eye
Ball chain necklace
2 ear wires
2 jump rings
Aleene’s Quick Dry Tacky Glue
Aleene’s Stop Fraying
Aleene's Collage Pauge Matte

Tools 
2 small paintbrushes
Chain nose pliers
Scissors
Computer and printer

Pour a small amount of glitter into vial. Add felt hearts, use end of paintbrush to position them in vial.  Add a small amount of glue around edge of cork stopper, insert into vial top. Use paintbrush to remove any excess glue.

Add a small amount of glue to screw eye, use chain nose pliers to screw into center top of cork stopper. Allow all glue to dry.


Take a small ribbon and tie in a bow around rim of jar. Use Aleene’s Stop Fraying on ends of ribbon. Allow to dry.


Use a typewriter font to print xoxo, x and o in 10pt. Cut out using scissors and decoupage to front of jars with Collage Pauge and a small paintbrush.  Thread screw eye with ball chain necklace.  Use smaller jars with glitter and ribbon to make matching earrings. Attach a jump ring and ear wire to top of stopper, repeat for second earring.

(Blogger was compensated for this post.)

iLoveToCreate Retrofabulous Crafts: Red Queen Choker

Monday, January 30, 2012
Visit us on Facebook!
Craft on!
Red Queen Choker Copyright 2012 Margot Potter

iLoveToCreate Retrofabulous Crafts
Red Queen Choker
Copyright 2012 Margot Potter

My grandfather quoted endlessly from Alice in Wonderland.  I grew up loving the Alice books and the many movie versions.  I even got to play the Duchess once in a Children's Theatre production, which was wicked good fun!

Doilies have always held a place near and dear to my heart, in fact the first Valentine I gave my husband was handcrafted with a paper doily.  This idea popped into my brain a couple of weeks ago and from there I scouted out supplies and through a process of trial and error figured out how to make this choker.  Which I adore.  I am wearing it to the upcoming tradeshows.  It would be perfect for a Valentine's party, don't you think?

It is made of paper, so of course one should not wear it in the shower, the swimming pool, the ocean or in a rainstorm.  It's not meant to last forever, so it will need to be handled with care.  You could make this with lace, but I wanted that classic paper doily look.  These little doily flowers are fun too, I think you could use them for all sorts of clever crafts.  Nothing says vintage Valentine quite like a paper doily! It was so easy to put this all together with Aleene's Fabric Fusion Peel and Stick Sheets!


Materials

11 3 1/4" round paper doilies
22 1'x1 1/4" felt hearts
40 10mm silver plated jump rings
2 silver plated swivel lobster clasps
2 silver plated pinch bail ear wires
34 gauge silver or gold Artistic Wire
Aleene's Fabric Fusion Peel and Stick Sheets

Tools
Wire cutters
2 pairs chain nose pliers
Scissors
1/16" hole punch (I used my Crop-a-dile)


1. Cut out the center of the doilies. Use 34 gauge wire threaded into every fourth or fifth hole in frame around open center to gather the doily together into a "flower." Once you have the holes threaded, grasp both wire tails and gently pull the doily into a flower. Take your time, be gentle and don't mangle it all by rushing!


2. Twist wire tail ends together using chain nose pliers. Cut off excess with wire cutters. Make 11 of these.

3. Use hole punch to punch holes in right and left upper center of each heart.

4. Place hearts on Aleene's Peel and Stick Sheets. Cut around heart, peel off adhesive backing and sandwich the doilies between two hearts. Make sure the hearts are lined up properly so it's easy to link together later!

5. Use 4 10mm jump rings to connect each doily heart. (To learn how to properly attach jump rings with tension, visit my Crafty Quickies on YouTube!) Attach two jump rings on the outside edge of the first and final heart in your chain. Repeat for front and back of design. This will prevent the necklace from flip-flopping when worn.

6. Add the clasps to the final jump ring on the first doily heart in each chain. This is how the necklace is connected, having both stabilizes the design when worn.

7. To make earrings, repeat the process of making two doily hearts. but only pierce one hole in each heart so the ear wires can attach. Use pinch bail earrings inserted in the hole of each heart, or you can opt for jump rings and French wires.

Red Queen Tiara Copyright Margot Potter

(PS: I made this matching tiara, using a pattern for wrapping the crystal from my book Sparkletastic and Aleene's Dry Adhesives to put it all together. I cut the hearts and layered them behind the crystal loops and added a half doily behind it to hide the adhesives.  I kept it really simple, but you could distress the papers and add glitter to make it super, duper over the top!)

The 'Put a Bird on It' Brooch - An Ode to Portlandia

Friday, January 13, 2012


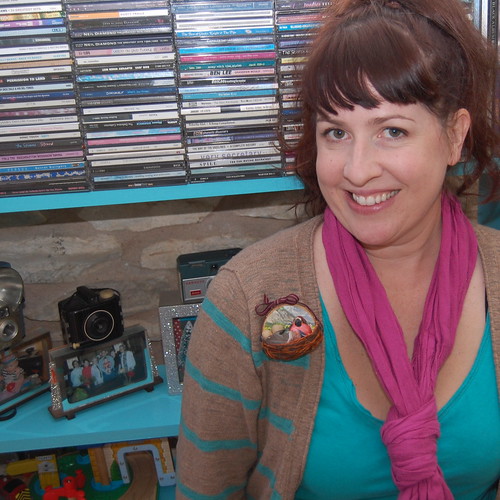
If you are looking for some stellar television to add to your list of much watch shows, might I suggest Portlandia. I was skeptical with a dude from Saturday Night Live and a chick from Sleater Kinney - and then I watched it - and then I fell in love. I have always heard that Austin and Portland are sister cities and after watching the skits on this show I believe it. One of my fave segments was entitled "Put a Bird on It". As we all know good craft trends die hard and this feathered favorite appears to be here to stay. In celebration on Portlandia's second season starting I am making my ode' to the show. The 'Put a Bird on It' brooch.


SUPPLIES
Wooden Disc
Scissors
Aleene's Liquid Fusion Glue
Collage Pauge
Forest Picture
Hot Glue Gun
Collage Pauge Decoupage Medium
Faux Bird
Faux Eggs
Embroidery Thread
Aleene's Fabric Stiffener and Draping Liquid
Vasaline
Small Bowl
Pin Back
Ribbon


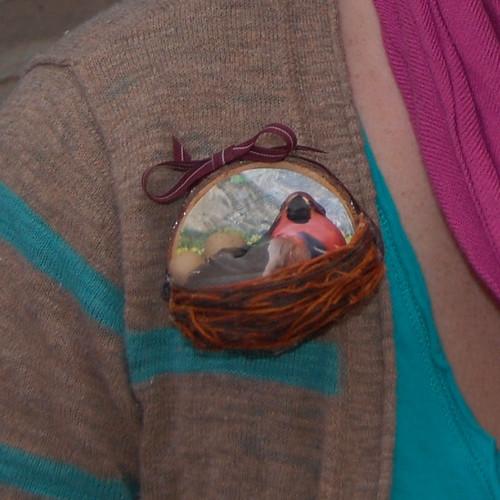
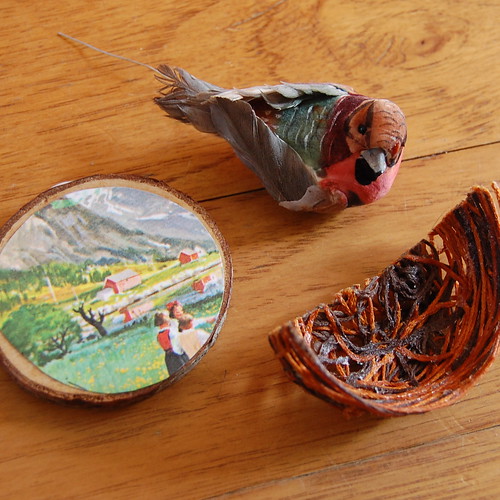
This whole idea came to because I started thinking about making a nest out of embroidery thread. I used a small plastic bowl and lubed that sucker up with petroleum jelly to act as a release. Next I cut long strands of brown embroidery thread. One by one I began dipping the thread in fabric stiffener and wrapping it around my bowl. Once you have it looking like a nest leave it to dry.


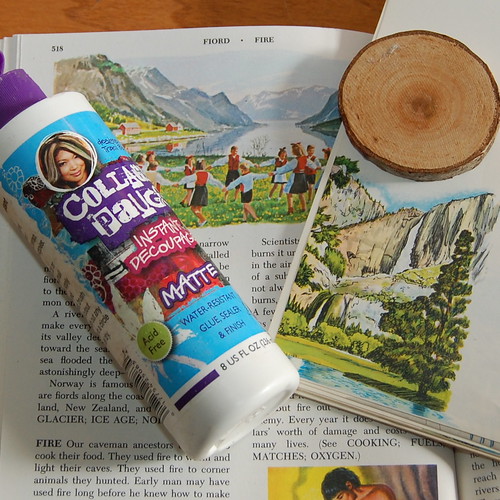
While your nest is drying you can work on the backdrop. I used a small wooden disc. I found an image from a vintage book of a forest that I cut out and decoupaged onto the wood.


Next I cut my nest in half. At this point I was not sure if I was going to go with shoe clips or brooch. I only had one bird so brooch won. I'll save the other half of the nest for another project.


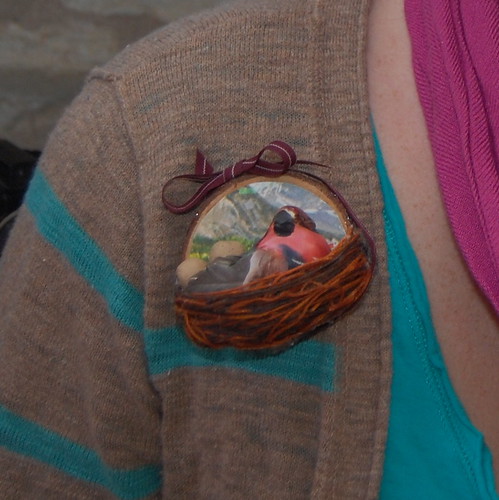
Using a combination of Liquid Fusion Glue and a Hot Glue Gun I attached the half nest to my collaged backdrop. Once the nest was in place using Liquid Fusion I put my bird and her eggs in the nest. I also added a ribbon around the edge to cover up some messy glue spots. Last but not least, I glued a pin back to the wood.


I am totally smitten on the way everything turned out. Portlandia was right everything looks better when you put a bird on it.

I leave you with the video clip that inspired it all - Put a Bird on It!


Visit us on Facebook!
Craft on!