Showing posts with label valentine's crafts. Show all posts

DIY Valentine's Gift Box

Monday, February 4, 2013

I am really feeling the love for Valentine's DIY this year.  This DIY Valentine's Gift Box is a quick and easy way to personalize a gift for someone you love.  The idea is to write 365 reasons why you love them and tuck them into this pretty little box.  Then they can pull out a reason every day to remind them that they're loved. 

Yup, I'm corny like that.  How about you?

If you just aren't that into writing 365 actual reasons why, you can just let the box speak for itself and tell them that you love them every day of the year.  Tuck in a little decoupaged jewelry for fun!  I have the tutorial for the jewelry over on The Impatient Crafter blog.  You can get the 411 on the DIY box here.


You'll need a small kraft paper heart shaped box and some layered Valentine's themed napkins, pull off the top layer and use that.  These were tissue paper, I got them at Michaels.  Decoupage the lid with and the sides of the bottom with the paper and Collage Pauge matte.  

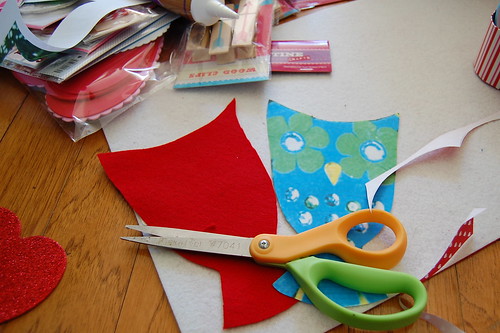
Use scissors to cut off excess paper, it's okay if it's a little messy, we'll cover it up! 

Brush on a thin layer of white acrylic paint, wipe off with a wet paper towel for a white washed finish.  Use Tacky Glue to attach lace ribbon trim around edge of top and bottom of box.  Allow to dry.

Brush on a layer of Collage Pauge sparkle.  Allow to dry.

Glue on some faux gems using Tacky Glue. I used my friend Kellie DeFrie's new Crystal Katana tool for easy bling application without getting sticky fingers!

Print 365 using Barbershop Font.  Cut out, attach to cardstock using Aleene's Tacky Dot Runner.  Attach cardstock to box lid with Tacky Glue.

Brush on a layer of Collage Pauge sparkle, it will dry flat, don't worry!


Glue some Lion Brand red sparkly bonbon yarn around edge of numbers and top of inside box edge using Tacky Glue. Allow to dry!  Tuck some handcrafted decoupage jewelry into your fabulous new DIY Valentine's Gift Box for a little extra added DIY awesome!


DIY "You Complete Me" Heart T-shirts!

Tuesday, January 22, 2013
The best thing to make for your best pal on Valentine's day? The sweetest thing for your sweetie? I call it the "You Complete Me" Tee. Part friendship charm necklace, part Pinterest inspiration (these gloves!), each T-shirt in this pair appears, at first look, to be decorated with an abstract design when it's without its match. When the two shirts are reunited, however, they form a heart. Awww...


Materials:

-2 plain T-shirts (preferably light in color)
-scissors
-empty file folder (or other large
piece of card stock)
-marker
-Tulip Fabric Spray Paint (in red!)
-plenty of newsprint to protect your work surface

Make It:

1. Lay the folder flat and use the marker to draw half of a heart along one of the long edges. (Note: I had to make an adjustment later on to accomodate the dimensionality of the human body--so don't be afraid to make a particularly bulbous heart in order for it to "read" when the shirts are side by side.)


2. Cut out the half-heart template and line it up along the side of the torso of one of the shirts (under the sleeve). Mask the rest of the T-shirt (and use newsprint to protect your work surface), and spray paint the half-heart.


3. Carefully remove the stencil from the T-shirt, let it dry, and then flip the template to paint the other side of the heart on the other T-shirt. Then, when both the T-shirts and the stencil have dried, repeat the process to complete each heart on the back of the shirt. (And don't worry if the paint seeps under the stencil a bit -- like relationships, it might get a bit messy at times!)


4. Let it dry completely, wear it, and go find your best bud. (And don't forget to make sure you stand on the correct side--and bend your knees or stand on your tiptoes, if necessary!)


Thanks to my friends Michael and Helen (who thematically appropriately identify as members of Camp Friendship Basketball League!) for modeling! 
 

Make a Valentine's Cupcake Wrapper Flower Bouquet

Monday, January 21, 2013
You can make a Valentine's Cupcake Wrapper Flower Bouquet in a flash!  It's super simple to turn printed cupcake wrappers into a whimsical bouquet with a few quick steps and Aleene's Dry Adhesives!  These also make a do ra ble pins and card embellishments.  Make a whole bouquet or hand them out instead of Valentine cards this year!  Cheap and Easy Crafts?  I've got you covered!


Make a Valentine's Cupcake Wrapper Flower Bouquet
Margot Potter for iLoveTo Create
You will need red and white polka dot cupcake wrappers (72 large, 72 small, each flower is made of two stacks of six in alternating colors and coordinating prints. I scored mine at Michaels) Cut petals from matching cupcake wrappers, four for each flower. Red cardstock makes the center of each flower, two for each. Green bamboo or painted wooden sticks for stems. Print "i love you" in Sweetie Pie font size 12 in various languages, four phrases per flower.
The small flowers are stapled into two stacks of six. The larger are two six stacks back to back for a total of 12 wrappers, you need to staple the larger wrappers twice, leaving just enough room for the stem to slide inside.
Each flower has a punched red tag in the center, on both sides!
Cut 4 leaf shapes per flower.
Write 'i love you' in Sweetie Pie font in several languages. I used English, French, German, Japanese, Spanish and Italian.Cut out words leaving a small border.
Cut fringe around edge of wrappers, make sure it isn't so thin it's fragile or so thick it's clunky.
Use Aleene's Tacky Dot Runner to attach two leaves at top left on both sides of each flower.
Use Aleene's Tacky Dot Runner again to adhere the smaller cupcake layer on both sides.
Now attach your punched center and printed "i love you's"with the Tacky Dot Runner.
Insert your sticks in between staples in flower centers, fluff fringe using fingers to bend it. Take your time so you don't rip the fringe!

Now make a half dozen, tie with a ribbon and...
SHAZAM!

Whoooo Loves You? Owl Themed Box of Valentine's Candy Tutorial

Thursday, January 17, 2013

You can't think of Valentine's Day without a box of chocolates coming to mind. Too bad the boxes these days ain't got nuthin on the frilly boxes of yesteryear. I love the look of vintage Valentine candy boxes, so much so today for I Love to Create I decided to make my own.

SUPPLIES

Craft felt

Heart shaped boxes of chocolate

Scissors

Craft Paper

Aleene's Tacky Glue

Paint brush

Valentine's stickers

Carnival tickets

This project is inspired by some felt owl ornaments that Karen of Midwest Maude fame made for Issue #2 of Kids Crafts 1-2-3. Sure issue #3 of Kids Crafts 1-2-3 is out at Walmart and chocked full of fun Valentine projects, but I never got a chance to make these owl ornaments. Whoooo loves you? The owl Valentine greetings are endless.

The first thing I did was cover my box. I traced the lid on a piece of paper, cut it out and glued it to the top of my box. I applied Tacky Glue all over the lid and spread it evenly with a paint brush.

If you can eyeball the owl image good for you. I cropped the picture and blew my owl up and printed it out to use as a template. Using said template I cut out two owls in pink and red.

Using Tacky Glue I attached my owls to the chocolate box. I used some fun felt flower stickers for the eyes. Sure they were stickers, but I went ahead and added some Tacky Glue for good measure.

Tacky Glue and a few strategic gem stones gave my owl a little sparkle.

Using a hot glue gun I added some foil trim around the edge of my box.

I must admit I dumped all the candy out and glued my boxes shut. A) The candy had peanuts and I can't have that around with Baxter's allergy. B) I'm on a diet. I love the way they turned out. Check out another version of the box on BlogHer.

iLoveToCreate Retrofabulous Crafts: Red Queen Choker

Monday, January 30, 2012
Visit us on Facebook!
Craft on!
Red Queen Choker Copyright 2012 Margot Potter

iLoveToCreate Retrofabulous Crafts
Red Queen Choker
Copyright 2012 Margot Potter

My grandfather quoted endlessly from Alice in Wonderland.  I grew up loving the Alice books and the many movie versions.  I even got to play the Duchess once in a Children's Theatre production, which was wicked good fun!

Doilies have always held a place near and dear to my heart, in fact the first Valentine I gave my husband was handcrafted with a paper doily.  This idea popped into my brain a couple of weeks ago and from there I scouted out supplies and through a process of trial and error figured out how to make this choker.  Which I adore.  I am wearing it to the upcoming tradeshows.  It would be perfect for a Valentine's party, don't you think?

It is made of paper, so of course one should not wear it in the shower, the swimming pool, the ocean or in a rainstorm.  It's not meant to last forever, so it will need to be handled with care.  You could make this with lace, but I wanted that classic paper doily look.  These little doily flowers are fun too, I think you could use them for all sorts of clever crafts.  Nothing says vintage Valentine quite like a paper doily! It was so easy to put this all together with Aleene's Fabric Fusion Peel and Stick Sheets!


Materials

11 3 1/4" round paper doilies
22 1'x1 1/4" felt hearts
40 10mm silver plated jump rings
2 silver plated swivel lobster clasps
2 silver plated pinch bail ear wires
34 gauge silver or gold Artistic Wire
Aleene's Fabric Fusion Peel and Stick Sheets

Tools
Wire cutters
2 pairs chain nose pliers
Scissors
1/16" hole punch (I used my Crop-a-dile)


1. Cut out the center of the doilies. Use 34 gauge wire threaded into every fourth or fifth hole in frame around open center to gather the doily together into a "flower." Once you have the holes threaded, grasp both wire tails and gently pull the doily into a flower. Take your time, be gentle and don't mangle it all by rushing!


2. Twist wire tail ends together using chain nose pliers. Cut off excess with wire cutters. Make 11 of these.

3. Use hole punch to punch holes in right and left upper center of each heart.

4. Place hearts on Aleene's Peel and Stick Sheets. Cut around heart, peel off adhesive backing and sandwich the doilies between two hearts. Make sure the hearts are lined up properly so it's easy to link together later!

5. Use 4 10mm jump rings to connect each doily heart. (To learn how to properly attach jump rings with tension, visit my Crafty Quickies on YouTube!) Attach two jump rings on the outside edge of the first and final heart in your chain. Repeat for front and back of design. This will prevent the necklace from flip-flopping when worn.

6. Add the clasps to the final jump ring on the first doily heart in each chain. This is how the necklace is connected, having both stabilizes the design when worn.

7. To make earrings, repeat the process of making two doily hearts. but only pierce one hole in each heart so the ear wires can attach. Use pinch bail earrings inserted in the hole of each heart, or you can opt for jump rings and French wires.

Red Queen Tiara Copyright Margot Potter

(PS: I made this matching tiara, using a pattern for wrapping the crystal from my book Sparkletastic and Aleene's Dry Adhesives to put it all together. I cut the hearts and layered them behind the crystal loops and added a half doily behind it to hide the adhesives.  I kept it really simple, but you could distress the papers and add glitter to make it super, duper over the top!)

iLoveToCreate Retrofabulous Crafts: No Kiddin' Around Upcycled Valentine

Monday, January 16, 2012
Visit us on Facebook!
Craft on!
No Kiddin' Around Upcycled Valentine Margot Potter for iLovetoCreate

iLoveToCreate Retrofabulous Crafts
No Kiddin' Around Upcycled Valentine
Margot Potter


Today's Retrofabulous Craft is another upcycled vintage Valentine idea. I took new scrapbook paper, a glittered gift bag from Christmas, red cardstock and combined them with a section of a vintage card. You can substitute any used Valentine here, it's a great way to re-purpose them! I had a blast making layered hearts with the Fiskars paper cutter and Aleene's dry adhesives made putting it all together a breeze! No waiting for glue to dry. I added some Tulip Beads in a Bottle gems for dimension using Aleene's Acid Free Tacky Glue (I recommend this for paper crafts.)


Materials
Red cardstock
Black and white striped or patterned papers
Small doily
Gold glittered gift bag (or just use Tulip Glitter on gold paper for the same effect.)
2 Red Tulip Beads in a Bottle Studs and Crystals
Aleene's Tacky Dot Runner
Aleene's Acid Free Tacky Glue

Tools
Fiskars Graduated Hearts Shape Template (or measure and hand cut graduated hearts)
Fiskars Interchangeable Scalloped Edge Punch
Bone folder
Paper cutter

1. Cut red cardstock to 7"x11".

2. Fold card in half to 7"l.x5.5"w. Use bone folder to make a sharp crease in edge.


3. Use edge punch on top edge of card.


4. Cut out layered hearts with papers.

5. Cut out your layered hearts. Before you cut, make sure you center the image you want to use! I stacked the 4" heart followed by the 3.5" heart and finally the 3" heart for the center heart. The top right heart stack is 1", 1.25", 1.5" and 2". The bottom left heart stack is 1", 1.5" and 2". For inside of the card stack 1.5", 1.25" and 1" hearts.

6. Print out your sentiments. I wrote "No kiddin' around, Valentine." and "I love you." using a vintage style font.

7. Layer a doily and the center hearts using Aleene's Tacky Dot Runner. Add the top right and bottom left heart stacks. Attach a faux gemstone using Aleene's Tacky Glue to the center of the top and bottom heart stacks. Allow to dry.

8. Cut out your sentiment and layer it on one of your papers, cut and adhere to bottom right of card front using Aleene's Tacky Glue Runner.


9. To make the inside of the card, stack your hearts and add the sentiment to the center.