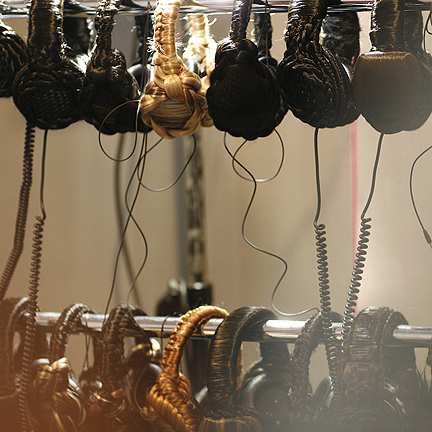
First there was Princess Leia and her cinnamon roll style hair-do. Years later came the Limi Feu spring/summer 2009 runway show and their amazing hair covered headphones. Then with a Boom Boom Pow Fergie is all over MTV wearing her own spikey hairphones. I thought to myself, mommy like. The problem, I don't wear headphones. What I do wear are ear muffs.

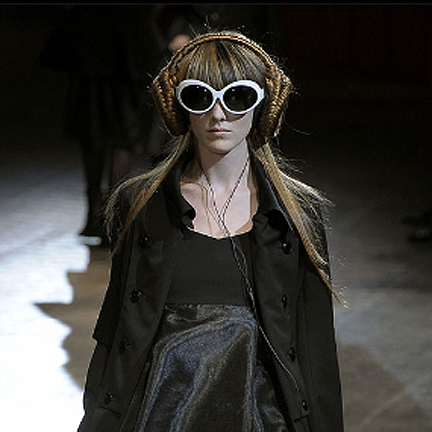

As you know ear muffs are typically not the most stylish looking of warming accessories and I set out to change that. Inspired by the hairphones and with a wink and a smile I hope to keep your ears not only warm, but also in vogue with today's I Love to Create project.
SUPPLIES
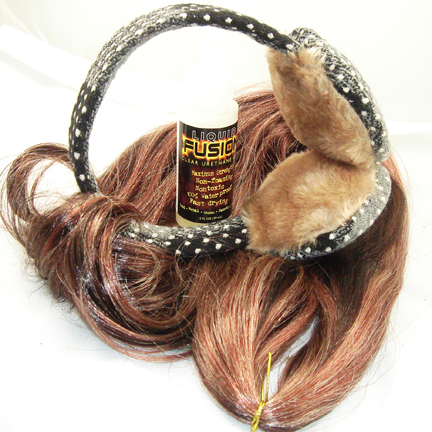
Tracks of Hair
Liquid Fusion Glue
2 Plastic Doll Faces
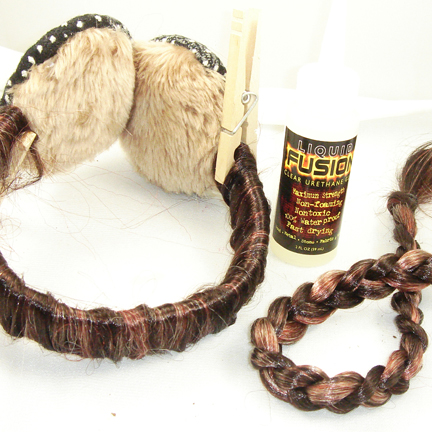
Aleene's Hot Glue Gun
Clothes Pins
Small Rubber Bands
Scissors
Ear Muffs
All Hair and Ear Muffs are not Created Equal
First you need to choose your hair. I opted for a red/brown shade to match my real hair. I also went with cheap synthetic hair. This is the exact same fake hair you would use to put in extensions (read about my escapades with fake hair here and my sister Hope's how-to guide for installing a weave here). The hair comes in tons of colors and if you wanted to pay more money you could even buy human hair.
Once you have your hair, next you need ear muffs. Look for ear muffs that don't collapse or fold up like a sandwich. If you had to you could make a pair from foam and a hairband.
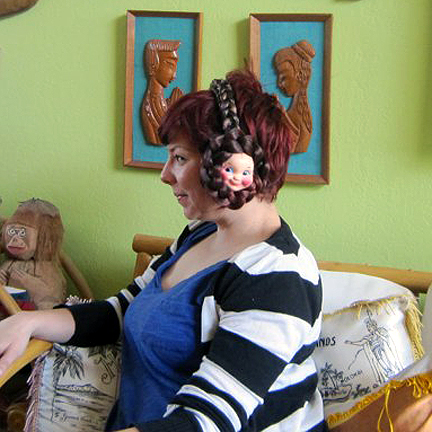
The first step is to coat the band of the ear muffs with Liquid Fusion Glue on top and underneath. Take a portion of the hair and wrap the headband. Use clothes pins to secure the ends.
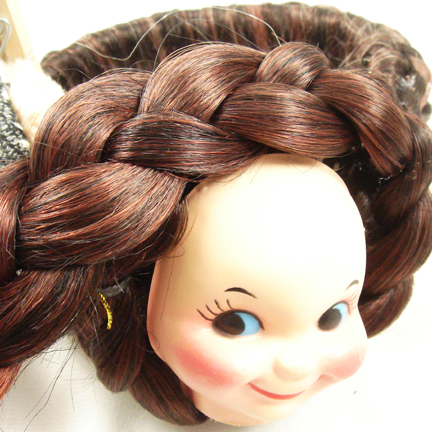
Creepy Vintage Doll Heads Make Everything Better
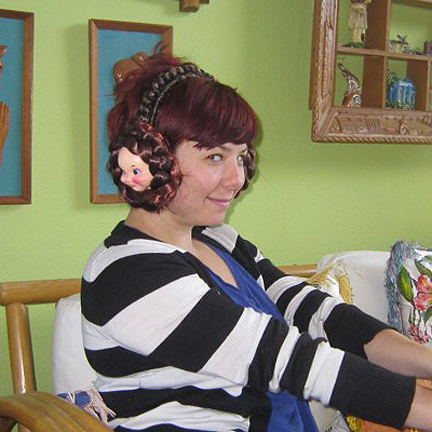
The next step was a happy accident actually. As I was braiding, wrapping and gluing hair to the earmuffs I started to realize that I did not have enough hair for the job. Suddenly I thought back to some crocheted doilies I had recently purchased at the thrift store with creepy doll heads in the center. I rushed to my stash of doll parts and there smiling back at me were two of the exact same vintage doll head halves. They fit perfectly in the center of my ear muffs and added just the right amount of kitsch to my couture hairphones.
I used Aleene's hot glue to attach the braids for the most part. However, I went back through with Liquid Fusion Glue to anchor down all the ends. Hold in place with clothes pins and allow to dry overnight.
All that is left to do is wait for a chilly day. I never thought I would say this, but I kinda can't wait for our next cold snap just so I can wear my hair muffs.

If you liked this post, I got a feelin' your gonna like these posts too...
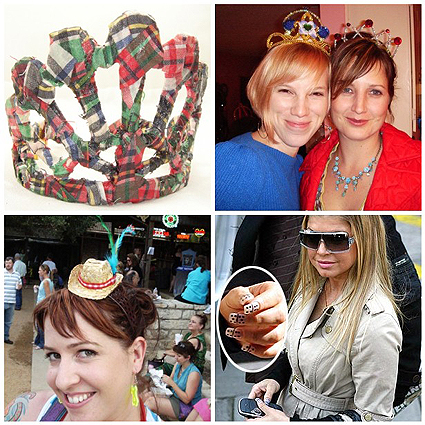
Tartan Tiaras
New Years Eve Pipe Cleaner Tiaras
Cowgirl Hat Headbands
Fergaliscious Domino Nails