Showing posts with label new years eve. Show all posts

CRYSTAL DIY: 13 Ways to Bling in 2013!

Friday, December 28, 2012
Sparkle and New Year's go together like cake and frosting - there can't be one without the other.

Since it the weekend, and New Year's Eve is on Monday, there is plenty of time to embellish something fabulous, festive, and best of all fashionable!

First of all, you'll need to stock up on supplies. Visit your local craft store, go to the fashion art aisle and pick up:

Tulip Glam It Up Crystals
Tulip Crystal Heatsetting Tool
Tulip Tweezers

Once you have those, you're set to crystal up anything and everything. Here are some ideas!

1. Evening Clutch by PattieWack. Take a plain black clutch, pin on a brooch or silk flower and add crystals at random!

2. Shoes! Use a pair from your closet archives or buy a new pair. Here are directions for these!

Photo credit: Cat Morley.
3. Name choker. This is from the wonderful Cat Morley at Cut Out + Keep. to make this, you'll need some wood or acrylic letters, glue them together, or if you're lucky, find a name pendant ready-to-go.

4. Sculptural choker. Use stuff felt to cut out a sculptural choker design and then accent it with crystals and micro glitter! This one is by yours truly!

5. Knitted Earrings by Vickie Howell. What a clever way to liven up an old pair of hoops!


6.  Crystal Ribbon Headband by Gabriela Delworth! This has to be the easiest and fastest way to brighten up your outfit - in a boho glamor kind of way!

7. New Year's Eve Sparkle Mittens by MayaInTheMoment. Anything goes, right? You can pick up a pair of gloves at most any department store. An hour of gluing and you're ready to rock!

8. Frilly Feather Sparkle Earrings! Take a pair of store bought feather earrings or make your own and add a row of tiny crystals!

Other ideas to add crystals: :
9. To the top of a black sweater.
10. To a pair of black or white leggings.
11. A headband.
12. A scarf.
13. A fabric wristcuff.
Happy New Year!!


MAYA IN THE MOMENT CRAFT: New Year's Eve Sparkly Mittens

Tuesday, December 27, 2011
 Here is a bonus craft that I wanted to share before New Year's Eve - Sparkly Mittens! This is for you ladies who plan to wear some glitz on your fancy night out - maybe to the movies, or a party or a street festival. Why not glam  up your gloves too? It's super easy!
 You'll need some gloves - I bought a package of two at Target, they were on clearance! Next you'll need:
a Tulip® Cordless Heat Setting Tool™
Tulip® Glam-It-Up!™ Iron-On Crystals™ 
Tulip® Glam-It-Up!™ Fashion Art Tweezers™ 

You'll also need something to slip your gloves over while you add the crystals - like a soup can. This is so that the crystals won't come off when you stretch the gloves to insert your hands. You want to glue the crystals on while the gloves are stretched.
 
 You'll want to pick up the crystals one-by-one with the tweezers, set in place and then use the heat tool to apply them.


 For the white gloves I used Tulip® Glam-It-Up!™ Iron-On Studs! 
 Like what you see, come visit me on my blog - MayaintheMoment.com. You can also like me on Facebook or subscribe to my videos on YouTube!

Visit us on Facebook!
Craft on!

Crafty Chica's NYE Celebratory Hair Comb

Friday, December 31, 2010

I have this thing about New Year's Eve.If i'm going to go out, I'm going to go out with some major sparkle. Ringing in the New Year is one of those over-the-top opportunities to scootch out of your comfort zone. So go big!


Supplies:

Aleene's® Original Tacky Glue®
Crafty Chica® Chunky Glitters™

 (SciFi Silver)
Chipboard numbers
Glittered ribbon, about 12-15" long
Clothespins
Plastic haircombs (medium)
Any other desired embellishments


Directions: Coat the letters with the Tacky Glue and then coat with glitter, set aside to dry. Fold the ribbon three times and glue the edges so it has a tapered bottom. Add glue to affix the ribbon to the front of the comb. Add the numbers, and then the embellishments. Use the clothespins to hold everything in place until the glue dries.

I know this is big and gaudy, but it is much classier than a huge pair of plastic 2011 fake eyeglasses, don't you think? You can actually carry on a serious conversation while wearing this!

Happy New Year!

Visit us on Facebook!
Craft on! Click here for today's daily giveaway!

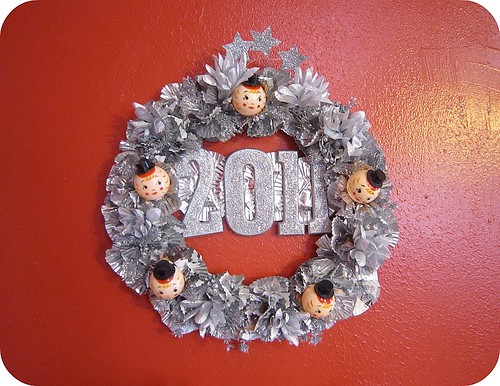
Cupcake Lined New Years Wreath

Thursday, December 30, 2010


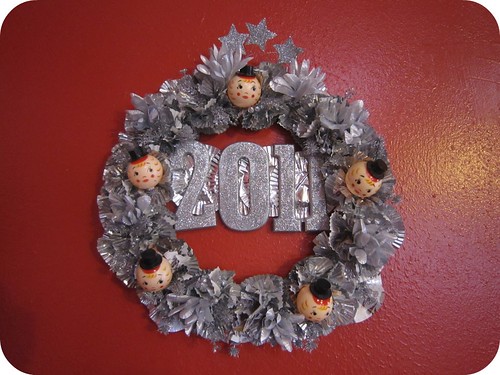
I have been on a bit of wreath making kit as of late and don't think for one minute I am going to let New Years Eve slip by without it's own wreath.  Time to bust out the cupcake wrappers, glitter and Homecoming Mum supplies - just trust me.


SUPPLIES
Foil Cupcake Liners
Faux Flowers
Hot Glue Gun
Plastic Baby New Years Dolls
Wooden Numbers
Scissors
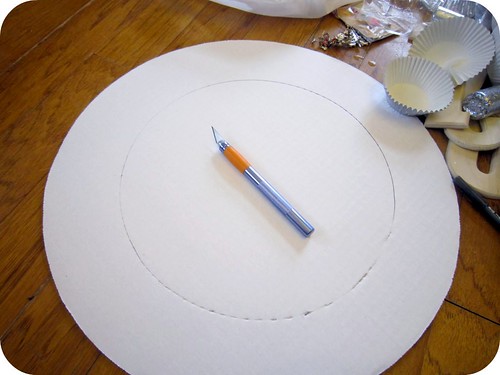
Cardboard Cake Board
Craft Knife


Recently I had a wreath making party with my friends Vickie and Noelle.  We had trouble locating blank wreath bases like we wanted so that clever Vickie scored us some cake boards to cut into wreath shapes instead.  I decided to steal this idea for my New Years wreath.  Cake Boards come in various sizes, choose which size you like best.  I went with a 16" diameter.  Use a bowl or small or mug to trace the inner circle of the wreath and a craft knife to cut out the circle.


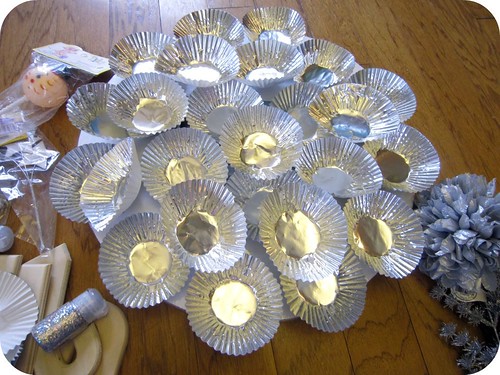
Foil cupcake liners are the sparkly secret weapon of this wreath.  Foil cupcake liners are white on the inside so you will need to turn several inside out.


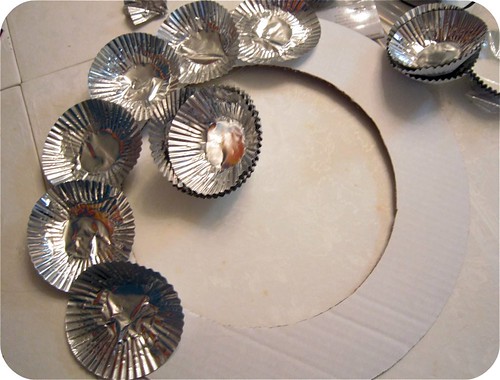
Using a combination of hot glue gun and Liquid Fusion Glue my mother and I attached the cupcake liners to our new cake board base.  At first we just covered the cardboard in flat liners and then went back and added more folded and tweaked cupcake liners.


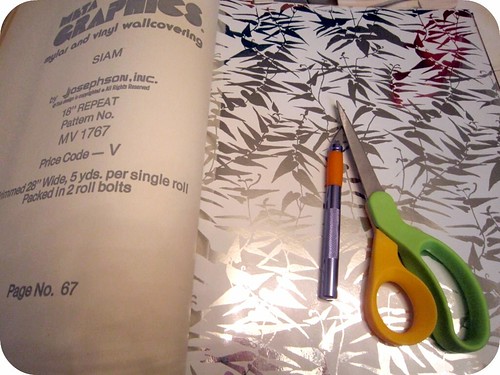
Along with cupcake liners we embellished the wreath with mirrored wall paper flowers, vintage doll rattles with top hats like Baby New Year, various Home Coming mum tid bits and whatever sparkly silver goodness we could find.


Once the wreath was totally filled in with silver ruffles a strip of cardboard left over from the cake board was added across the center of the wreath.


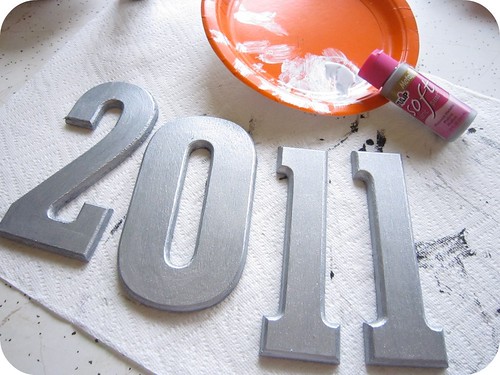
Tulip Fabric Paint says it is for fabric, but between you and me it works on wood too!  We painted the numbers 2011 silver and allowed to dry.


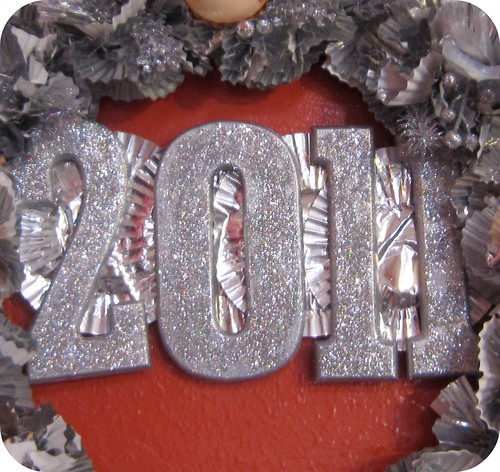
Once the paint was dry we coated the numbers with a thin coat of Liquid Fusion Glue and sprinkled with Tulip Fashion Glitter in Silver.


All that was left to do was add the silver glittery numbers to the center of the wreath.  Next year I will just pop off the 1 and a 2!


Check out more of my I Love to Create Projects.


Craft on! Click here for today's daily giveaway!

DIY New Year's Eve Party Dresses

Tuesday, December 28, 2010
 Get out your palette knife or iron to create fabulous dresses for that special occasion. Tulip® Soft Fabric Paints™ add beautiful color in this easy to apply technique. If glitz is what you want, iron on Tulip® Glam-It-Up! Iron-On Fashion Designs™ and Crystals™ for sparkling effects.

Materials List

  • Tulip® Soft Fabric Paint™

    BI15789 Azalea
    BI15793 Grape
    BI15804 Azure Blue
    BI15806 Platinum
    BI15826 Turquoise
    BI15828 Purple
  • Tulip® Glam-It-Up!™ Iron-On Fashion Designs™

    Design 13
  • Tulip® Glam-It-Up!™ Iron-On Crystals™

    25619 Pink
    26592 AB Crystal
  • Miscellaneous

    •   Palette knife
    •   Tweezers or crayon
    •   Dress, black
    •   Brushes: 2 different handle sizes small and large
    •   Craft heat tool
    •   Sparkle Dress:
    •   Iron
    •   Dress, black
    •   Foil
    •   Palette Knife Dress:
    •   Foil 

    Instructions

    Palette Knife Dress
  • Prewash dress to remove sizing. Do not use fabric softener. NOTE: Check garment care instructions.
  • Squeeze some of each paint color on foil.
  • Place edge of palette knife in one color and scoop up paint.
  • With a scraping motion, move knife back and forth down right side of dress and up to top of dress. Apply remaining colors, referring to photo. Let dry.
  • Apply Crystals randomly, following package instructions. Tip: Use tweezers or crayon to pick up and place Crystals.
  • Wait 72 hours to wash. Follow garment care instructions. To iron, turn garment inside out. Do not dry-clean.
Sparkling Party Dress
  1. Prewash dress to remove sizing. Do not use fabric softener. NOTE: Check garment care instructions.
  2. Iron Fashion Designs on left side of dress, referring to photo for placement and following package instructions.
  3. Squeeze a small amount of each paint color on foil.
  4. Dip nonbristle end of larger paintbrush into paint. Press on points of each star, dipping into paint after each application. Scatter random paint dots. Let dry.
  5. Wait 72 hours to wash. Follow garment care instructions. To iron, turn garment inside out. Do not dry-clean.

Visit us on Facebook!
Craft on! Click here for today's daily giveaway!

Glitz and Glamour Party Heels

Monday, December 27, 2010
  Designed by Allee Marderosian
When you’re getting all dressed up for holiday festivities, don’t forget about your feet! Go glam with a sparkly set of heels all glitzed up with Tulip® Fashion Glitter® and Tulip® Glam-It-Up!™ Iron-On Crystals™.

Materials List

Visit us on Facebook!
Craft on! Click here for today's daily giveaway!

Black Eyed Peas are for Crafting and Eating!

Thursday, December 24, 2009


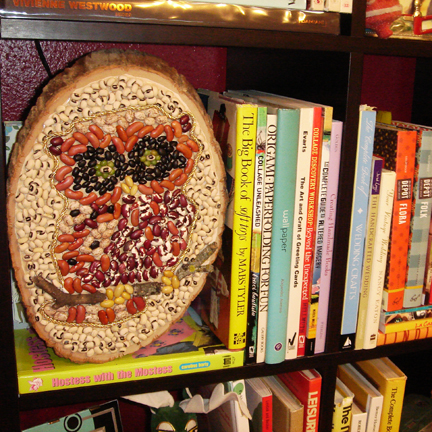
It may be Christmas Eve, but I am already thinking ahead to next week and New Years! In the South we have a tradition involving black eyed peas. Some people eat them on New Years Day to ensure good luck all year long, but my logic was that if you craft with them on New Years Day as well as eat them it might make your new year extra lucky! Grab some dried black eyed peas, Tacky Glue and get ready for an all new I Love to Create Post.


SUPPLIES
Dried Beans
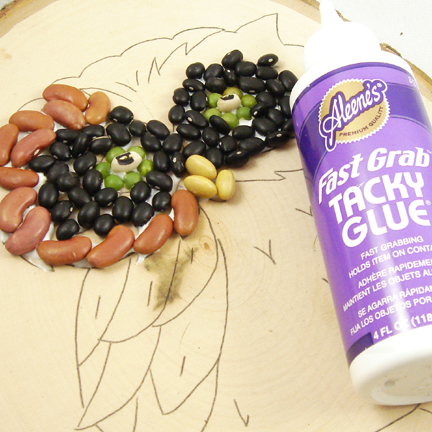
Aleene's Fast Grab Tacky Glue
Wooden Plaque
Sublime Stitching Transfer Paper
Embroidery Pattern
Gold Cording
Pen
Stick


BEAN DESIGN
You want to choose an image that is not terribly detailed to use for your bean art. I found that embroidery patterns work great. I chose this owl from Q is for Quilter in the Hoop Love Embroidery Pool. Using transfer paper and a pen trace your image onto a piece of wood.


BEAN GLUING
One section at a time apply your Aleene's Fast Grab Tacky Glue and your beans. The more beans you use the better since they come in all kinds of colors and will help give your image more depth.

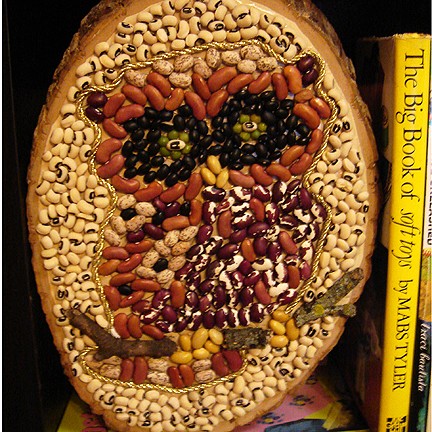
I glued the owl and the stick he is perched on first. Next I went around the edge of the owl and glued down some gold cording.

To ensure good luck in 2010 I filled in the rest of the empty space with more black eyed peas.


With the rest of your black eyed peas try my favorite bean dip recipe.