50 Awesome Tie Dye Projects

Tuesday, July 31, 2012


Here at iLoveToCreate, we do a LOT of tie dye projects!  Everything from curtains to shoes to shirts and more.  We also see a lot of great tie dye projects using our Tulip One-Step Dyes as well that we're quite smitten with!  We've rounded up a great list of 50 smashing projects, from fashion, to kids, to home décor you'll want to try yourself.  So take a look at these super easy ideas!
,

5 pointed start on shirt from Codelphia

Tie Dye cropped, shoulderless shirt by FashionLushxx


Tie Dye Swimsuit Coverup by Pin Cookie


Tie Dye Scarf from iLoveToCreate.com


DIY wave-inspired tank from Boi from Panema
    

Yoga Pants from iLoveToCreate.com

Brush on ombre shirt with Crafty Chica
   

Watercolor tie dye tunic from Alisa Burke    

Popsicle dress by Cheri Heaton
 

Modern Tie Dye Scarf by the Zen of Making 

Ombre maxi dress from PearMama    

Dip Dry dye Tees from Crafts by Amanda 

Tie Dye Apron from a T-shirt from iLoveToCreate.com

Off center tie dye tank from Pet Scribbles


Ombre blouse from Grosgrain Fabulous


Tie Dye Socks with The Metric Child
 

Tie Dye Rainbow Shorts with X Come Moda   


Tie Dye Summer Tote from Prudent Baby

Tie Dye Button Flowers with Haley on Craft Test Dummies 

Tie Dye Clutch from Crafty Chica 

Zipper Pouches from Always Expect Moore 

Tie Dye Hair extensions by the Crafty Chica

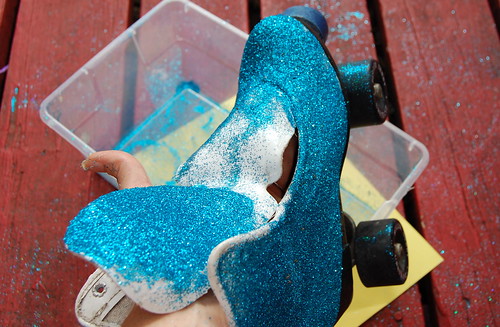
Tie Dye Dropcloth Shoes from Condo Blues 

Tie Dye Lunch Sacks by iLoveToCreate for FaveCrafts

Tie Dye Converse by Allee on the iLoveToCreate blog 


Tie Dye cover up from This Mama Makes Stuff

Tie Dye Puppet Theatre with It’s Overflowing

Tie Dye No-Sew girls dress by Mama Nibbles

Tie Dye heart dresses from Little Pink Monster

How to tie dye with preschoolers with Dollar Craft

Tie Dye Teen Socks with Avalon on the iLoveToCreate blog


Ombre place setting from iLovetoCreate.com

Watercolor flower pillow from iLoveToCreate.com

Modern mermaid Pillow by Aunt Peaches

Ombre wicker basket with The V Spot blog

Tie Dye Wreath from How to Nest for Less

Watercolor Curtains from Mad in Crafts

Embroidery Hoop Tie Dye Art by Inspired by Charm

Tie dye magnetic memo board by Itsy Bitsy Paper Blog

Dyed ombre lamp by TaylorMade

Tie Dye Headboard by Lish

Dreaming in Color Tie Dye Bedding from iLoveToCreate

Sampler Quilt by Always Expect More

Hula Hoop wall art + DIY video from the iLoveToCreate Blog

Tie Dye Towel by Swelldesigner

Tie Dye Drop Cloth Rug by Measured by the Heart

Tie dye ombre wreath by She’s Kinda Crafty

Tie Dye Pillowcase from Angry Julie Monday

Seat slip covers from iLoveToCreate.com


Tie dye embroidery quote with Renewed Upon a Dream


Which of these ideas are you DYEING to try?
       

Craft Wars Party at Casa De Jewels

Monday, July 30, 2012
ILTCJuliannaLogo
Margot Potter

I recently hosted a Craft Wars party in honor of my friend and fellow ILOVETOCREATE Blogger Margot Potter and her hubby Drew in celebration of their appearance on the NEW TLC Show “Craft Wars”, created by our dear friends Cathie Filian and Steve Piacenza. You can catch the show on Tuesday nights at 8:00 p.m. EST. Click her for programming info. 

The Craft Wars Team

Rachele is a College Student studying Fashion Retail, Kim is a Professional Pet Photographer and High School English Teacher, Tess is a College Student studying Photography, Claire is a Teacher, Celia is a Physical Therapy Assistant, Jean is Co-Owner of La Belle Vie Salon, Arielle is a College Student studying to become a Teacher, Billybob our Furry Mascot and for those of you that don’t know I am the one with the Very Poofy Blonde hair and the glass of wine aka “Jewels”.

Imagine Create Live

It all started with some Inspiring words, food and drink.

Craft Wars Products

Then down to the Studio were we gathered some of my most favorite products from ILOVETOCREATE, Spellbinders & Artistic Wire. We also used feathers, straws and back scratchers that we found at the Dollar Store!

Kaileens Wire Wrapped Back Scratcher

Kaileen’s Wire Wrapped Straw infused Back Scratcher. Totally Clever! I cant help but say “Phone Home”, LOL!

Rachele Jewel Stone Earrings

Of course Rachele stole my heart with these out of the box Jewel Stone Earrings embellished with Tulips Glam-It-Up PDA Crystals. She even made the ear wires out of Artistic Wire. Way to go Fashion Student!

Kims Zebra Inspired Goddess Journal

Kim’s Zebra Inspired Jewel Goddess Journal adorned with Tulips Glam-It-Up PDA Crystals,  adhered with Aleene’s Super Thick Tacky Glue

Claires Jewel Goddess

Celia’s Healing Jewel Goddess with Tulips Glam-It-Up PDA Crystals & Artistic Wire

Claire's Jewel Goddess

Claire’s Jewel Goddess with Feathers, Tulip Fabric Markers, Tulips Glam-It-Up PDA Crystals & Artistic Wire

Tess and Jean

Tess and Jean’s Jewel Goddess collaboration using Tulip Fabric Markers, Tulip Glam-It-Up PDA Crystals, Artistic Wire, Feathers and yes a Straw!

Arielle Wicked Goddess

Arielle’s Fabulously Wicked Jewel Goddess. Love how she created these branches using Tulips Fabric Markers and super love the Black Feather with Tulip Glam-It-Up PDA Crystals.

The Winners

At Casa De Jewels everyone’s a WINNER! Thanks to all of my friends who participated and to the wonderful Companies that we love so much, ILOVETOCREATE, Spellbinders and Artistic Wire.

Drew Potter
A HUGE Thank You to Drew Potter for helping out his amazing Wife Margot Potter on the show. You guys didn’t WIN the big prize BUT you WON all of our Hearts! You are our WINNER!

CRAFTY CHICA: Brush-On Ombré Technique

Friday, July 27, 2012
Every time I visit iLoveToCreate headquarters, I see designer Lauri Eaton in action with her paintbrush - she uses it to create all kinds of cool effects with the Tulip One-Step Dye. I finally had a chance to try it out on this summer blouse.

Supplies: Tulip Tie-Dye Kit, bowl of water, wide painter's brush, table cover, gloves, cotton garment.


Here's a video showing how I did it!


LINK

MAYA IN THE MOMENT TEEN CRAFT: Screened & Glittered Tee

My first official t-shirt for my band!
Hi! Not sure if any of you know, but aside from crafting, I'm also a musician. I teamed up with my amazingly talented and handsome homie(check him out!!)- BoiFromIpanema - and we formed a duo called Rhinestone Graffiti.


OK, so we've had one gig so far (on my mom's cruise, lol) - it was spontaneous and we had so much fun that we are doing it again, this time in New York City, next week!

Part of the fun of performing is making and wearing band merchandise! So I used the Tulip ScreenIt to make our first official Rhinestone Graffiti band shirt. I'm the "Rhinestone" half and Jeshua is the "Graffiti."
Print image on paper before burning on the screen.
To use the ScreenIt, you print out a design (or you can draw with a marker) on apiece of copier paper and then use it to burn on to a pre-emulsified screen. You wash the screen,l et it dry and then you are good to go. Watch my video below for a step-by-step process on the printing techniques I used!

I must take after my mom, because I couldn't stop myself from adding glitter and crystals to the end result.

What I love about the ScreenIt is that you can burn a design and then use the screen over and over to make more shirts. I hope to make a dozen more and sell them at our gig!

Here is a video of how I printed my shirt, and below is a video of Rhinestone Graffiti performing "At Last." Hope you like both of them! (Wish us luck at our gig, ok?)


LINK


LINK


Don't forget to come join me on my Facebook page! http://facebook.com/mayainthemoment

Eco Fun - Cardboard Tubes - Cool2Craft TV


It's super cool! Cool2Craft TV July 30, 2012: Cardboard Tubes! The Cool2Craft design team is sharing a fun collection of eco-cool cardboard tube craft ideas this week! EcoHeidi Borchers is crafting a Bumble Bee Noisemaker Wand featuring Aleene's Tacky Glue and Tiffany Windsor is transforming paper towel rolls into Floral Stamped Earrings featuring Aleene's Fast Grab Tacky Glue, plus much more!
 
Learn new techniques, chat with us while watching the show and ask questions about all your favorite Aleene's products!  It’s easy to watch the Cool2Craft TV Channel right from your computer. Airing Monday July 30, 2012 9am Pacific/10am Mountain/11 am Central/ Noon Eastern. Go to http://cool2craft.com and you'll see the Livestream player and chat box. See you Monday! Can't make the live show? No problem, you can drop by anytime 24/7 to watch the show!

Visit us on Facebook!
Craft on!

Glittered Roller Skate Bookends

Thursday, July 26, 2012

Everyone needs a pair of glittered roller skates in their life. They make great bookends, door stops, paper weights, meat tenderizers - they are virtually indispensable around the house. Now that you know you need a pair, let me tell you how to make them.

SUPPLIES

Rollerskates

Aleene's Tacky Glue

Yarn

Tulip Fashion Glitter

Scissors

Paint brush

Cardboard

Tulip Spray Fabric Dye

If you are lucky you will find a pair of vintage roller skates at the thrift store or a garage sale where it is a short walk to your car. I found mine at a hot outdoor flea market, nowhere near my car. However, I knew from the minute I laid eyes on them I wanted to glitter them and make a pair of bookends so it was worth it.

Covering your skates in glitter is really easy. Coat your skates in Tacky Glue and douse the wet glue with tons of glitter. I went with teal.

While your glue is drying dye your laces. I went with a neon pink. I put my laces in a plastic cup and sprayed until saturated.

So now your glue and your dye is drying, let's make some yarn pom poms. Remember when you wore pom poms on your skates? Made doing the Hokey Pokey that much more fashionable. Wrap yarn in whatever color you want around a piece of cardboard 100 times. Slide the yarn bundle off one end. Cinch the bundle by tying a piece of yarn tightly around the center. Now with scissors go in and cut all the loops. You may need to trim your pom pom.

Once everything is dry re-lace your skate. My holes had some glue over them so I used a knitting needle to poke them through. You might also realize you need to go back in and do a bit of glue and glitter touch up once you dust off excess glitter and any bald spots are revealed. I also blew my skates with a hairdryer to get a little more glitter off. Using a piece of yarn or glue attach your pom pom to your skate.

I'm kinda in love with my new skates. I suppose if they were my size I could actually still wear them to the rink. However, I prefer not to fall down in public so I will just keep them on my bookshelf.

How to throw a TIE DYE party!

Wednesday, July 25, 2012
How-to-throw-a-tie-dye-party

Last month, we hosted a fun tie dye party in our backyard for some super creative local high school girls. They had a blast making everything from shirts to shorts to socks. They tie dyed everything, including their hands! Here's a fun guide on how to throw a tie dye party of your own. Tie dye is a great team-building activity to do at slumber parties, birthday parties, and church and club events. Here's how you can plan to tie dye at your next event!

How to throw a TIE DYE party


What you need (based on 6-8 guests):

Tulip Tie Dye Activity Kit (the one shown available at Walmart; other Tulip One-Step dye kits are available at your local craft store)
– 100% natural tshirts, socks, jeans, shorts, etc. (you can supply or have your guests bring their own)
– Extra items to dye if guests forget (optional)
– Plastic bin filled with water for wetting your clothes before dyeing
– Large plastic tablecloths
– 1 or 2 plastic or metal buckets – filled water pitchers
– Snacks and drinks (the more colorful, the better)
– Folding tables
– Weights for weighing down surface covers
– Gallon-sized plastic bags
– Paper towels
– Wet wipes

Read more »

iLoveToCreate: Tres Chic Cupcake Toppers


Avalon and I decided to throw an intimate soiree for #TeamPotter on last night's Craft Wars episode.  Friends and family all live far away, so we just made our own little party with Avalon's best friend and the three of us.  Av had a project due today for iLoveToCreate and I've been playing with my logo and we decided that cupcakes and decorations were in order.  So we made these super cute, super simple cupcake toppers.  You can make your own using permission free fashion images or photos or anything you like!  Aleene's dry adhesives made it easy and fun and we love how these turned out.  I think I may have to make some jewelry out of these!  Tune in next Monday and I'll share how I made the cupcake stand topper with the ruffled lace technique and talk about quick and easy ways to personalize your parties.

Materials
Toile/Damask scrapbook papers in coordinating prints
Black and white fashion image printed to fit in a 2" punch
Large wooden or plastic party picks
Flat back plastic rhinestones
Aleene's Tacky Tape Runner
Aleene's Tacky Dot Roll 1/2"

Tools
Fiskars shape cutter and circle templates (2/5" circle)
Fiskars 2" circle punch


Easy, Breezy Heat Wave Tee

Tuesday, July 24, 2012
This design falls into the category of fashion as necessity: When temperatures push 90 and 100 degrees, there's little else you want to wear besides a T-shirt. But even a tee can seem stifling when you add humidity to the mix. Here's a T-shirt hack that's meant to keep the air circulating--it features a cut-out back and a looser fit. (Of course, a trip to the local ice cream haunt doesn't hurt the cooling plan either!)


I encourage you to dig into your fabric stash to find an unlikely contender for the fabric insert on this one. The fabric I used was originally purchased by my brother from a discount bin to use as a bed skirt. I inherited it when he moved, and my mom and I made curtains to filter the light in my apartment. Now the remnants have been reincarnated as part of this heat-beating T-shirt. What a life cycle! Tip: Check the give of your fabric--you shouldn't have to worry too much about working on the bias (the diagonal of the fabric) since the rest of the T-shirt will have plenty of stretch, but consider your layout before you cut!

Materials:
-regular fit T-shirt
-fabric scissors
-disappearing ink pen
-ruler
-straight pins (optional)
-Aleene's OK Wash-It fabric adhesive (or a sewing machine and thread to match your fabric)


Make it:
1. Turn the T-shirt inside out and lay it face down. Measure and mark about 3 1/2" to 4" in from either edge along the hem. Then draw a straight line from each mark to its adjacent sleeve (at the armpit).


2. Cut along that line through only the back layer. Continue cutting around the sleeve, just inside the seam (again, through only the back layer), along the top shoulder seam, and along the back of the neckband. Continue cutting until the back panel of the shirt can be removed. Set the front of the shirt aside momentarily.


3. Lining up the bottom edges of the fabric pieces, lay the back panel of the T-shirt over the backing fabric and trace the panel, extending the shape on either side to accommodate for the 3 1/2" to 4" wedge that was cut away. (The extra fabric will help create the flare.) Cut out the shape from the backing fabric.


4. Lay the fabric against the front piece of the T-shirt so that the edges of the two pieces line up, right sides together. Use the permanent fabric adhesive to glue the inside edges together. Optional: Use straight pins to hold the fabric edges in place before you glue.)


5. Ease the edges together, pinching and pressing them in place. Then let dry completely.


6. Turn the tee right side out and touch up any gaps along the seams.


7. Layer the tee over a thin tank top if you're feeling demure, or be bold by wearing a colorful, barely there undergarment (the point is to limit the layers of fabric on the skin after all!).


Variations:
-Replace a panel along the top of the sleeve as well.
-Replace a smaller panel in the back of the T-shirt with a cotton crocheted doily.
-Make the flare more exaggerated and fluttery.
-Experiment with different fabrics (silk scarf, old mesh sports jersey, a linen table cloth).


Next up? Though I quite like the subtle contrast in whites (the stark cream with the more ivory gauze), I'm going to experiment with dye the next time I make this design!