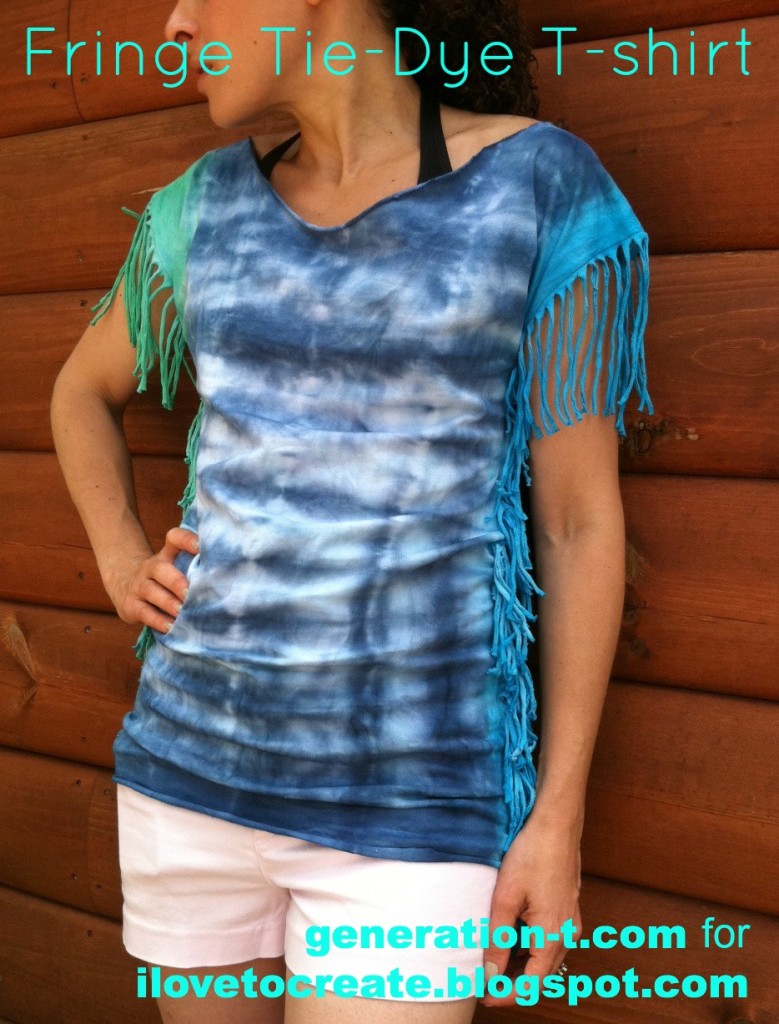
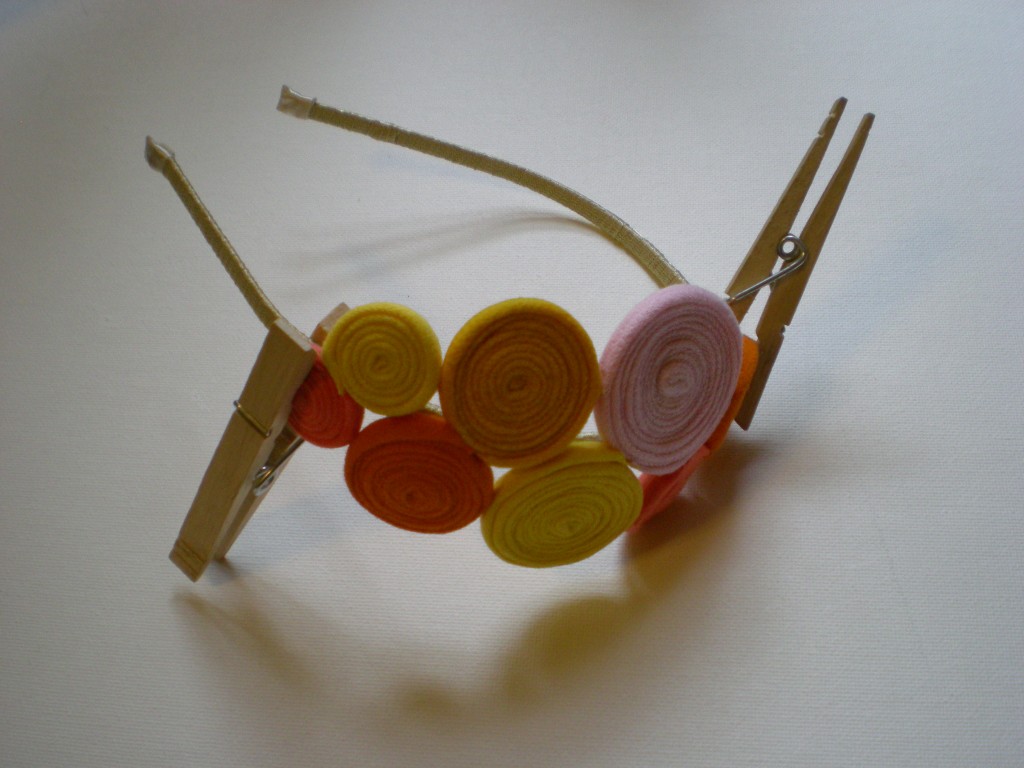
Altered Tie-Dye T-shirt Challenge Featuring Megan of Generation T
Sunday, July 7, 2013 at 3:21 PMEasy, Breezy Heat Wave Tee
Tuesday, July 24, 2012 at 5:30 PM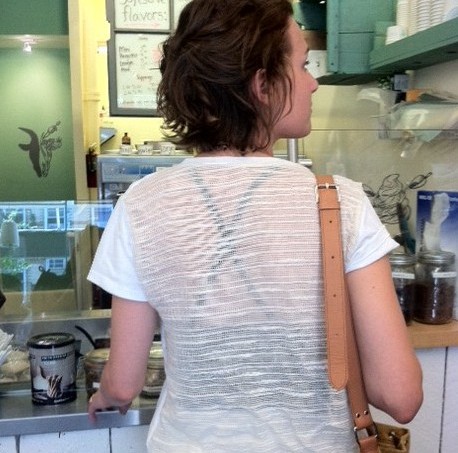
I encourage you to dig into your fabric stash to find an unlikely contender for the fabric insert on this one. The fabric I used was originally purchased by my brother from a discount bin to use as a bed skirt. I inherited it when he moved, and my mom and I made curtains to filter the light in my apartment. Now the remnants have been reincarnated as part of this heat-beating T-shirt. What a life cycle! Tip: Check the give of your fabric--you shouldn't have to worry too much about working on the bias (the diagonal of the fabric) since the rest of the T-shirt will have plenty of stretch, but consider your layout before you cut!
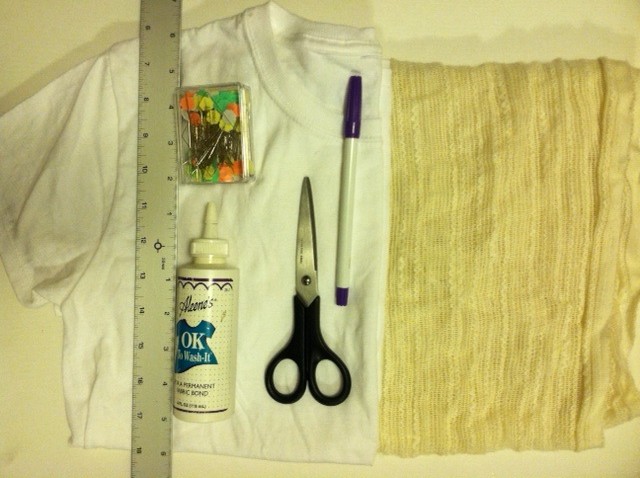
Materials:
-regular fit T-shirt
-fabric scissors
-disappearing ink pen
-ruler
-straight pins (optional)
-Aleene's OK Wash-It fabric adhesive (or a sewing machine and thread to match your fabric)
Make it:
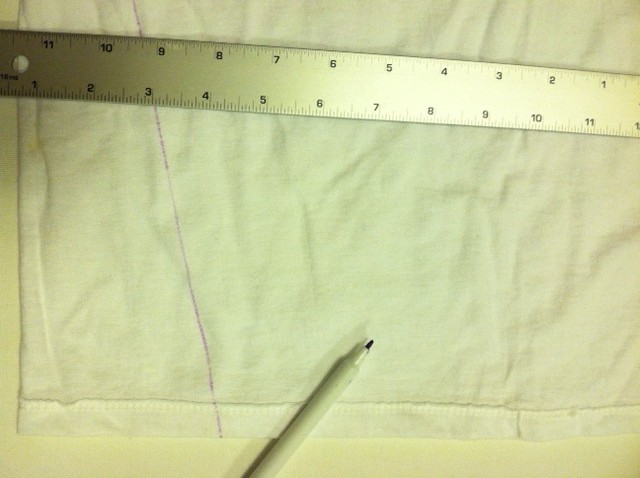
1. Turn the T-shirt inside out and lay it face down. Measure and mark about 3 1/2" to 4" in from either edge along the hem. Then draw a straight line from each mark to its adjacent sleeve (at the armpit).
2. Cut along that line through only the back layer. Continue cutting around the sleeve, just inside the seam (again, through only the back layer), along the top shoulder seam, and along the back of the neckband. Continue cutting until the back panel of the shirt can be removed. Set the front of the shirt aside momentarily.
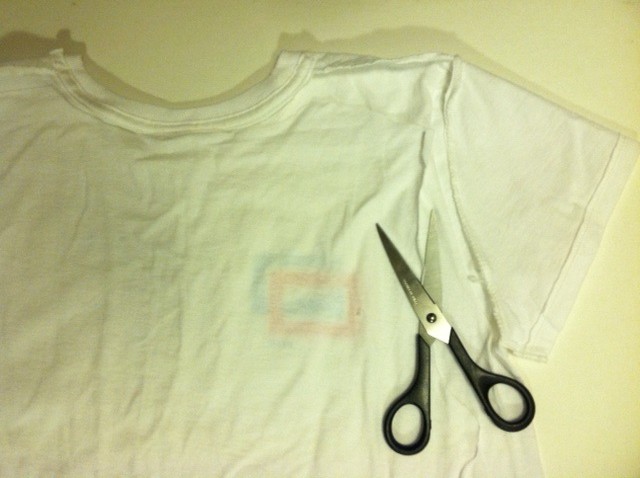
3. Lining up the bottom edges of the fabric pieces, lay the back panel of the T-shirt over the backing fabric and trace the panel, extending the shape on either side to accommodate for the 3 1/2" to 4" wedge that was cut away. (The extra fabric will help create the flare.) Cut out the shape from the backing fabric.
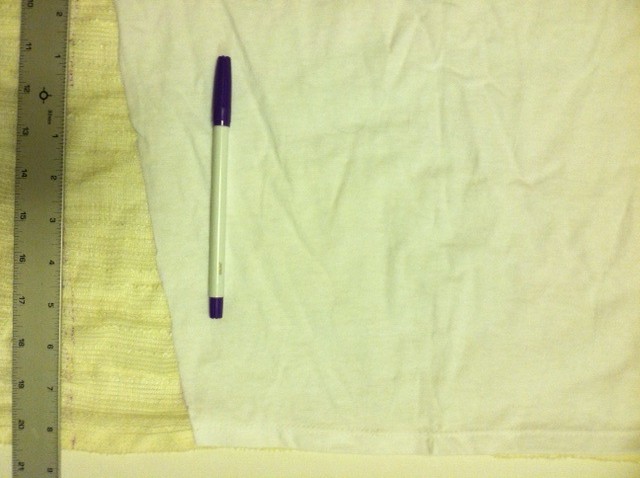
4. Lay the fabric against the front piece of the T-shirt so that the edges of the two pieces line up, right sides together. Use the permanent fabric adhesive to glue the inside edges together. Optional: Use straight pins to hold the fabric edges in place before you glue.)

5. Ease the edges together, pinching and pressing them in place. Then let dry completely.

6. Turn the tee right side out and touch up any gaps along the seams.

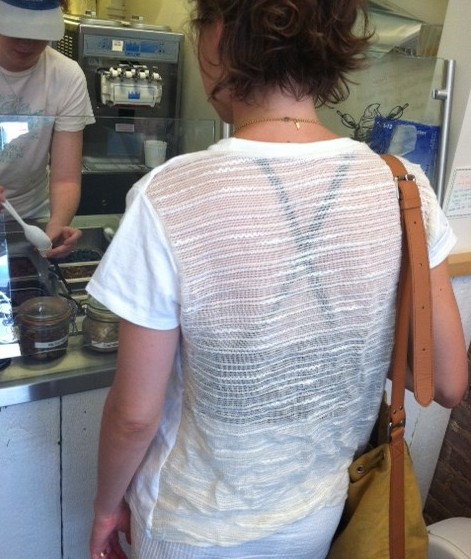
7. Layer the tee over a thin tank top if you're feeling demure, or be bold by wearing a colorful, barely there undergarment (the point is to limit the layers of fabric on the skin after all!).
Variations:
-Replace a panel along the top of the sleeve as well.
-Replace a smaller panel in the back of the T-shirt with a cotton crocheted doily.
-Make the flare more exaggerated and fluttery.
-Experiment with different fabrics (silk scarf, old mesh sports jersey, a linen table cloth).
Next up? Though I quite like the subtle contrast in whites (the stark cream with the more ivory gauze), I'm going to experiment with dye the next time I make this design!

DIY Wave-Inspired Tie-Dye Tank
Monday, July 2, 2012 at 2:29 PMI-Love-the-'80s Fringe Fabulous T-shirt
Tuesday, May 22, 2012 at 9:33 AM
It's springtime, which means one thing to me: T-shirt weather! It's an exciting time over in the Land of Generation T, because as many of you know, it only gets better: After spring comes summer, which means we all get a little more scantily clad -- T-shirts turn into tank tops and tube tops and ooh-la-la! So grab your scissors (to cut away some of that extra fabric, of course), dial up the color (bring on those fabric spray paints), and hop in your fabulous fashion time machine, because fringe is enjoying a bit of a renaissance this season. Last weekend, I dialed back the decades and dug into my craft stash to make some classic '80s-inspired geometric tees.
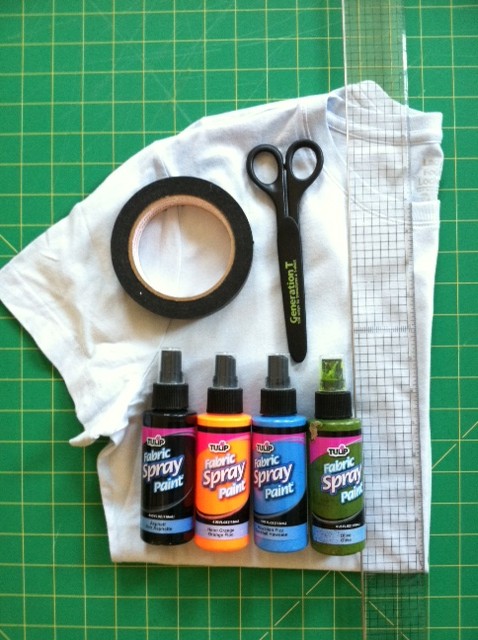
Materials:
-light-colored T-shirt (I used a light blue one)
-ruler
-masking tape
-fabric scissors
-fabric spray paint (variety of colors)
-scrap newsprint paper
Make it:
1. Lay the T-shirt flat. Use masking tape to mark a horizontal line about 8" up from the bottom of the shirt. Find the vertical center of the shirt and apply tape to the chest-region of the T-shirt to create a crisscrossing geometric pattern.

2. Insert the newsprint paper between the layers of the T-shirt to prevent the paint from bleeding through. Then apply fabric spray paint over the taped area. Apply another color or two, then let dry.
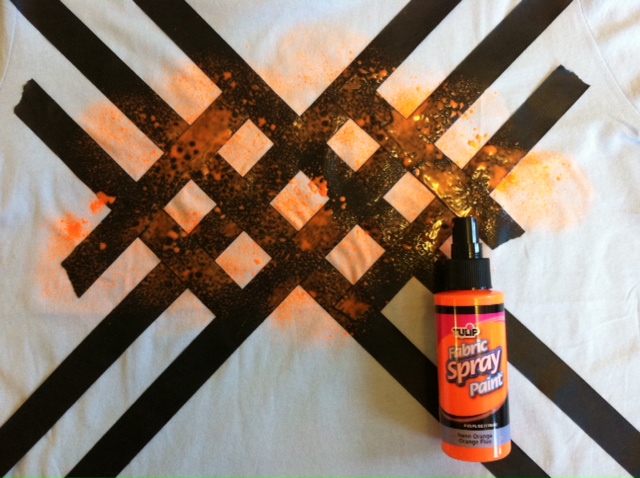
3. Peel back the tape, and then lay down more tape (I cut the tape strips in half, thirds, and quarters to make thinner lines) across your pattern to create a modified plaid pattern. Then spray paint more color!
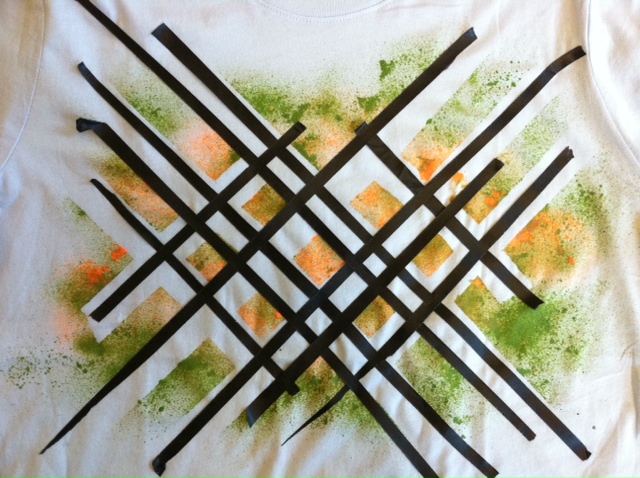
4. Let dry completely before peeling off the tape to reveal your design.
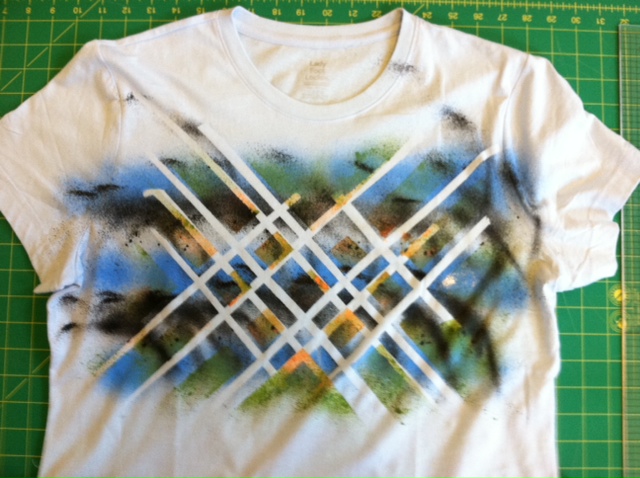
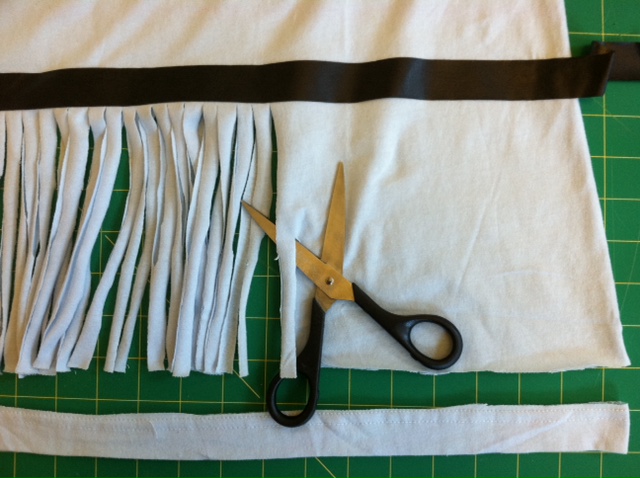
5. Cut off the bottom hem of the T-shirt, just above the stitching. Then, using the tape marker you pressed down in step 1 as your guide, cut 1/3"- to 1/2"-wide fringe from the bottom edge of the shirt.
6. Cut off the sleeve hems, just above the stitching, and cut out the neckband, just below the neckband edge in the front and the back, and about 2" wider on the sides.
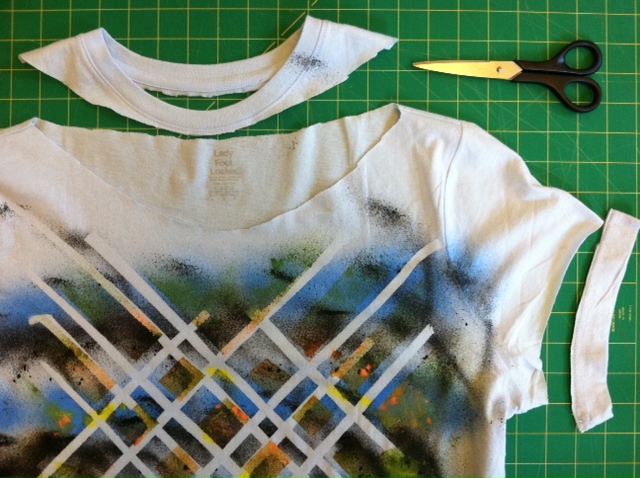
7. Gently tug on the fringe to stretch it out (the fabric edges will curl in). Try it on!

8. Grab up additional T-shirts and experiment with your paint patterns and fringe -- cut it on a diagonal, in a chevron-inspired V-shape, make it long or short!

Then pack a picnic, sling your boombox over your shoulder, and crank up any of the decade's Billboard hits!

Visit us on Facebook!
Craft on!
Chic Shoe Travel Bag from an Old T-shirt!
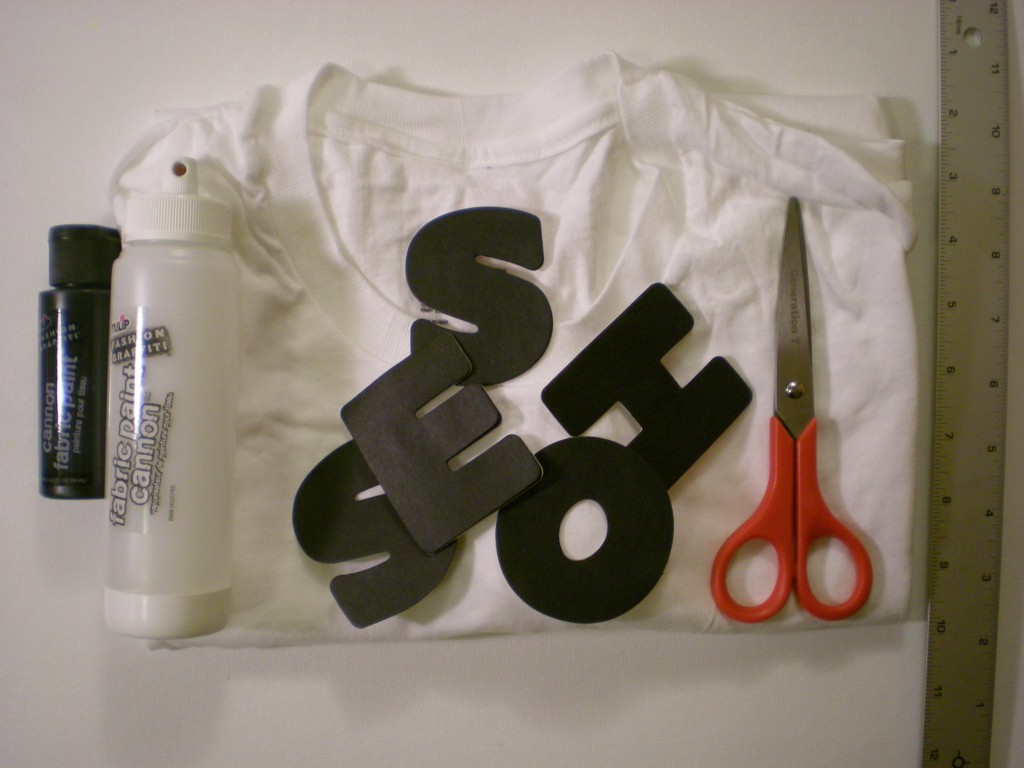
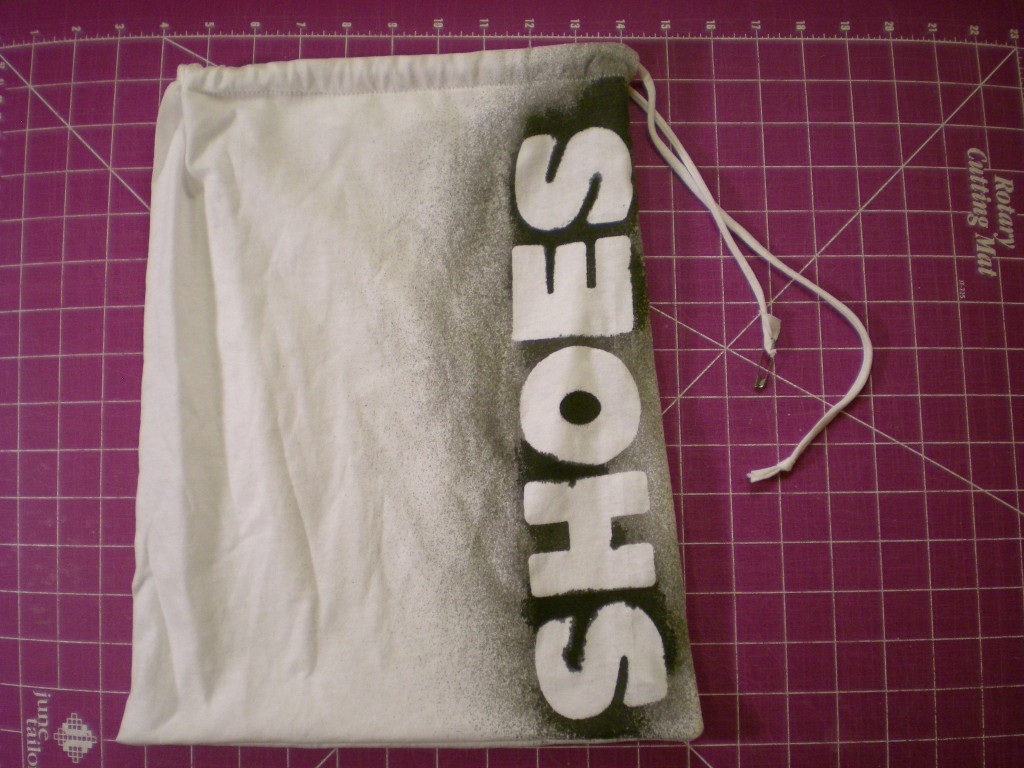
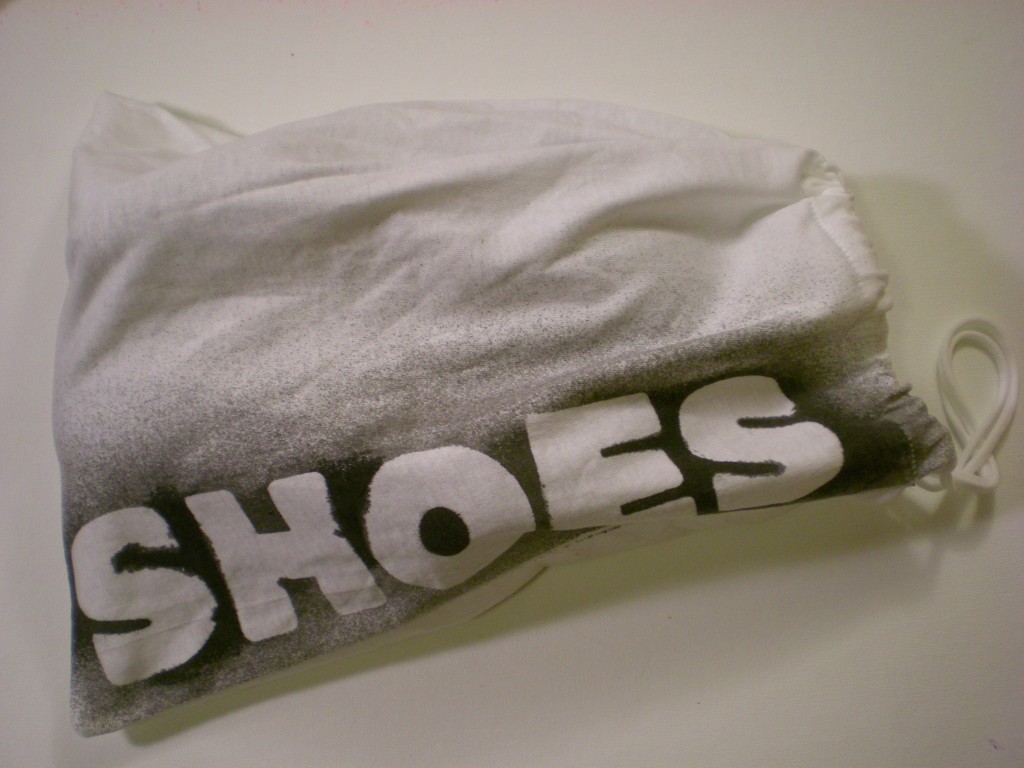
Tuesday, March 1, 2011 at 12:07 PMLet's face it: Shoes get dirty. Really dirty (okay, maybe I'm only speaking for New York sidewalks and streets, but my shoes pick up a lot of filth!). So it's not a particularly charming prospect when I have to pack a suitcase full of nice clean clothes and those dirty shoes. Solution: Here's a simple project that makes use of an old T-shirt, requires very little sewing (you can use the T-shirt hem as the drawstring casing!), and keeps the rest of your wardrobe fresh and clean. And, because the bag is made from an old T-shirt, it's easy enough to toss in the wash when you get home and unpack.
Materials:
-T-shirt (M or larger)
-Ruler
-Scissors
-Sewing machine (with a ballpoint needle and thread), or Needle and thread
-Alphabet stickers (or make your own; I used alphabet sticky notes!)
-Fabric paint and paint cannon (black)
-Safety pin
Make it:
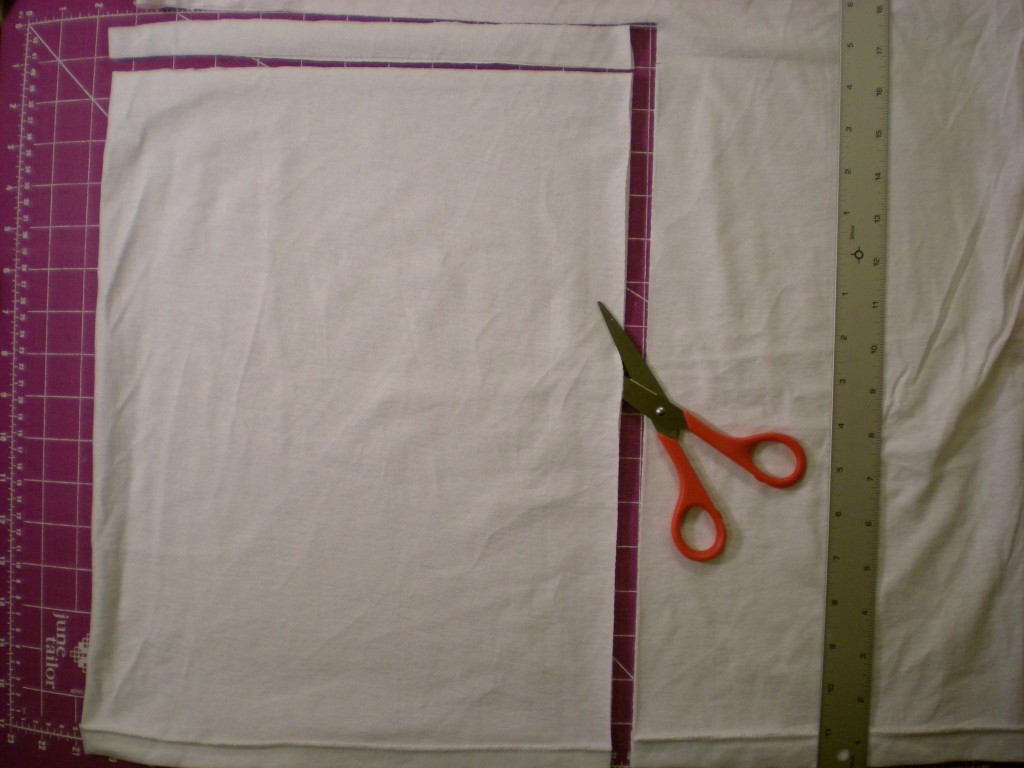
1. Turn the T-shirt inside out and lay it flat. Measure and cut a 12" x 16" rectangle extending in from one side and up from the bottom hem. Cut a 1" strip from the top of the rectangle, through both layers. Set aside the strip.
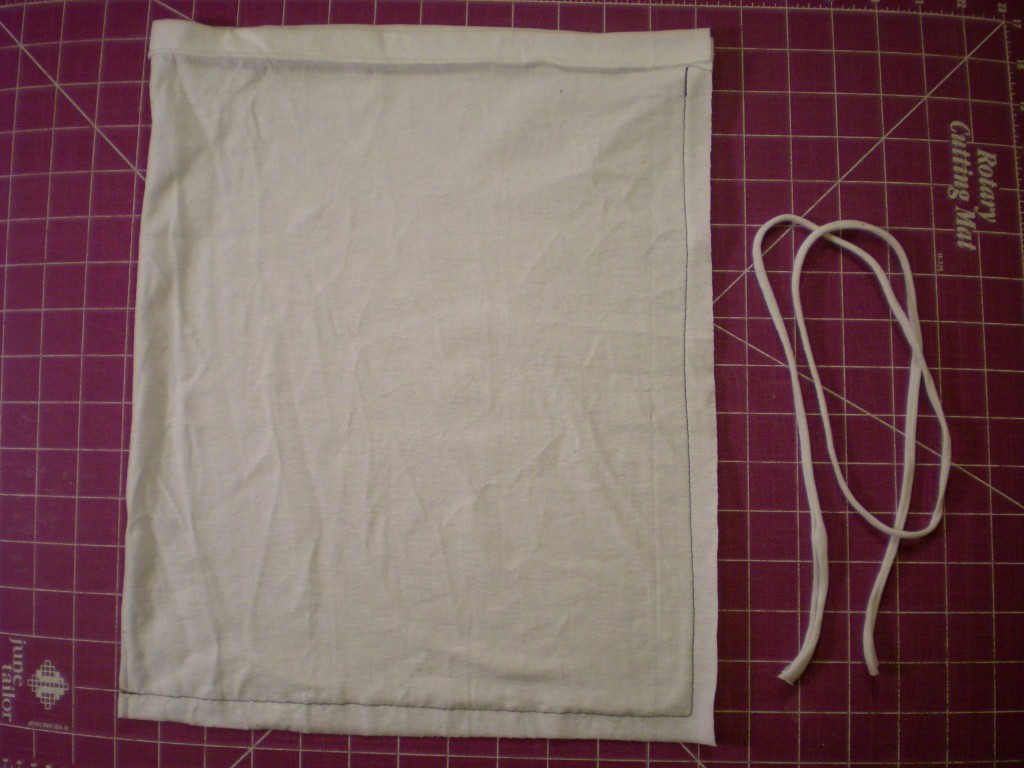
2. Sew a straight stitch along the two cut edges of the rectangle, leaving a 1/2" seam allowance, and stopping at the hem (this becomes the drawstring casing. (I used contrasting thread for visibility, but matching your thread to the fabric color is recommended.)
3. Turn the bag right side out and lay it flat, oriented with the hem (the opening of the bag) at the top. Stretch out the fabric strip to make a drawstring cord and set it aside again. Arrange the letters across the side of the bag.
5. With the fabric paint, spray lightly over the letters and let dry completely. (Paint will seep around the sides of the letters that are not sealed flat, creating a rough-edged look to the lettering.)
6. Carefully peel off the letters to reveal the reverse silhouettes. Attach a safety pin to one end of the cord and draw it through the entire drawstring casing. Remove the safety pin and tie the ends together in a knot.
7. Now spin the globe and buy a ticket! If your shoes are made for walking, this T-shirt shoe bag is made for packing. Bon voyage!
Variations:
-Differentiate your various shoe stashes by making multiple bags--do away with the generic "shoes" label and instead indicate heels, flats, sneakers, and so on.
-Scrap the shoes altogether and use the bag to pack pajamas for a slumber party!

Visit us on Facebook!
Craft on! Click here for today's daily giveaway!
T-shirt Book for Baby!
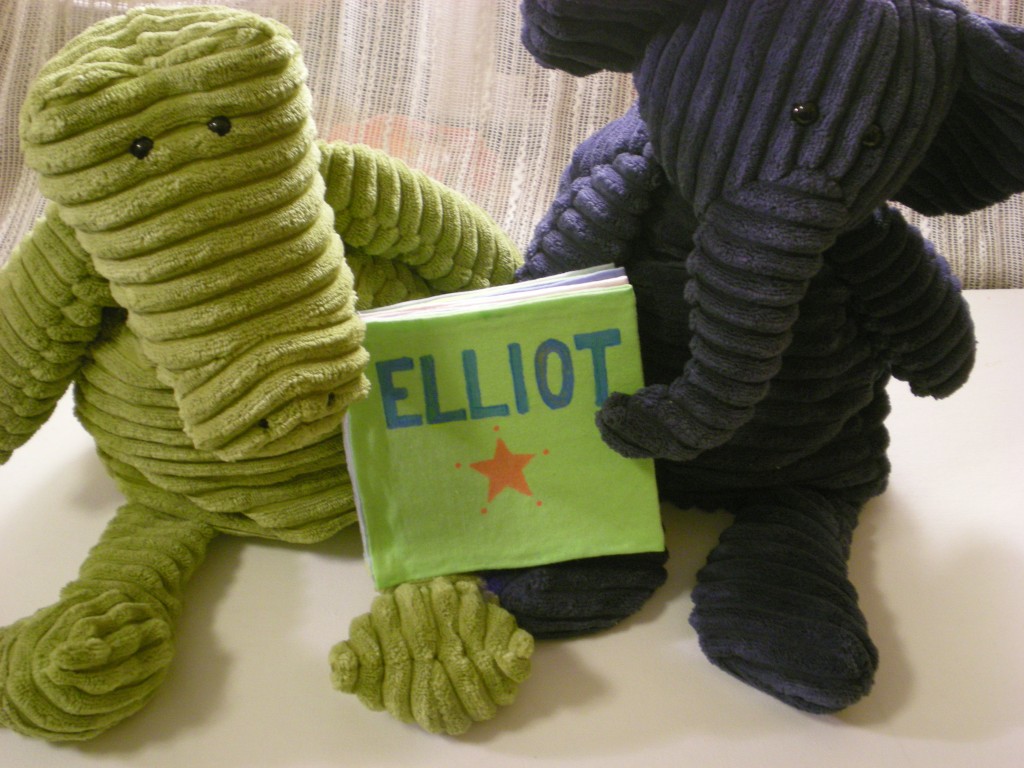
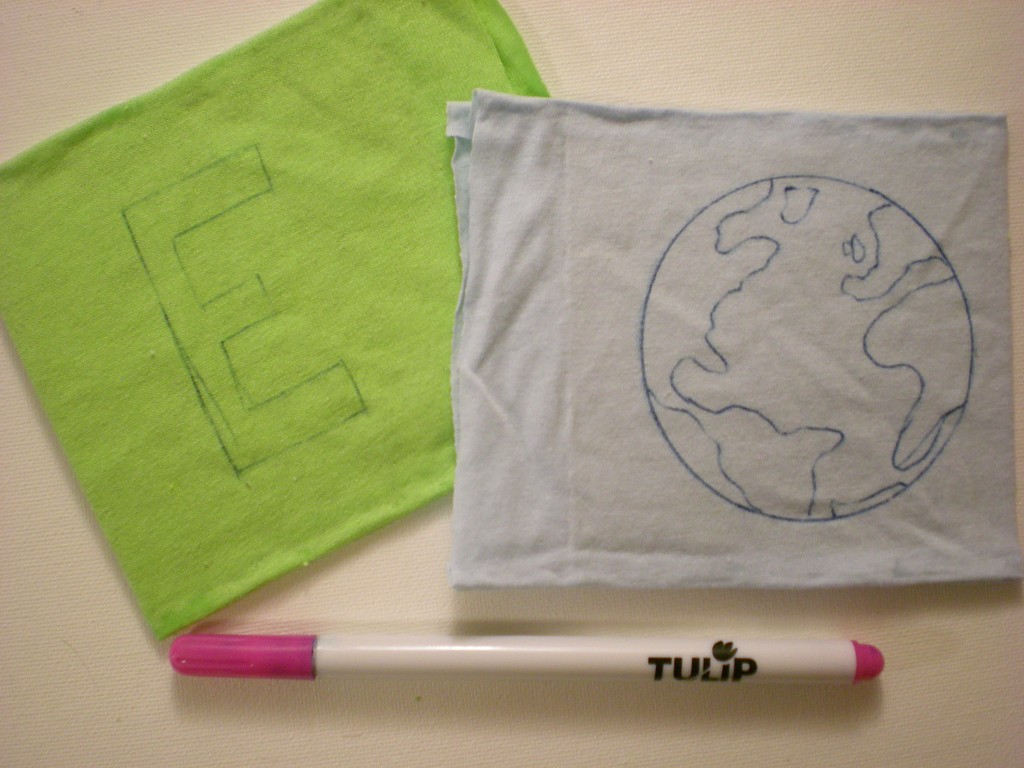
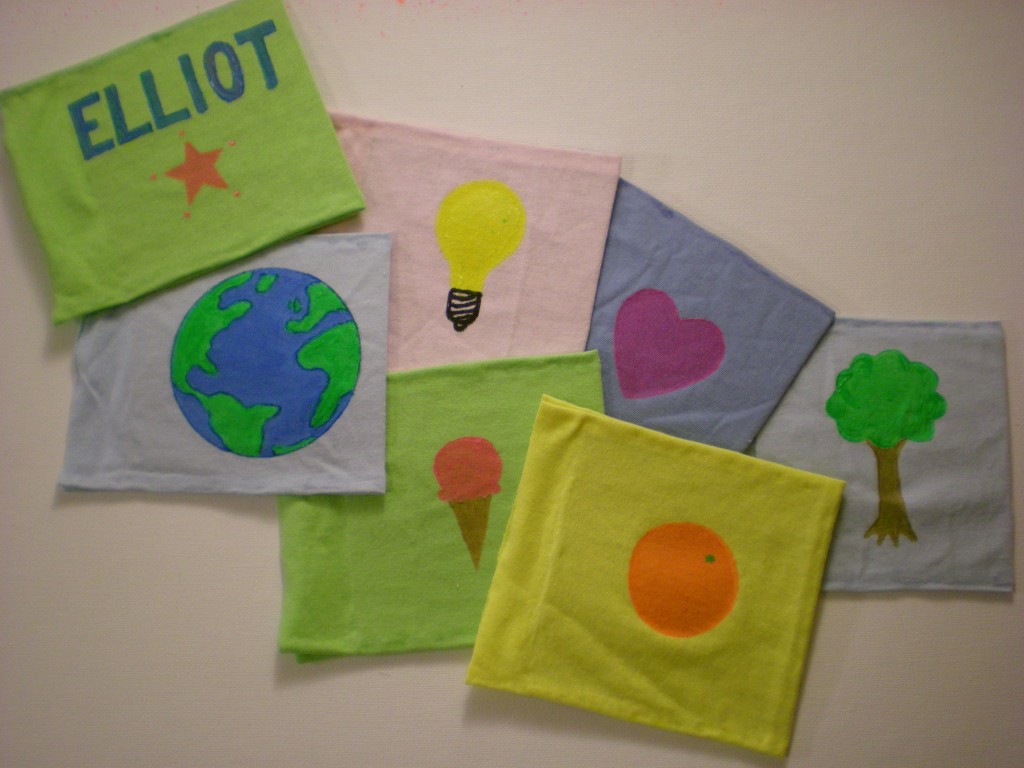
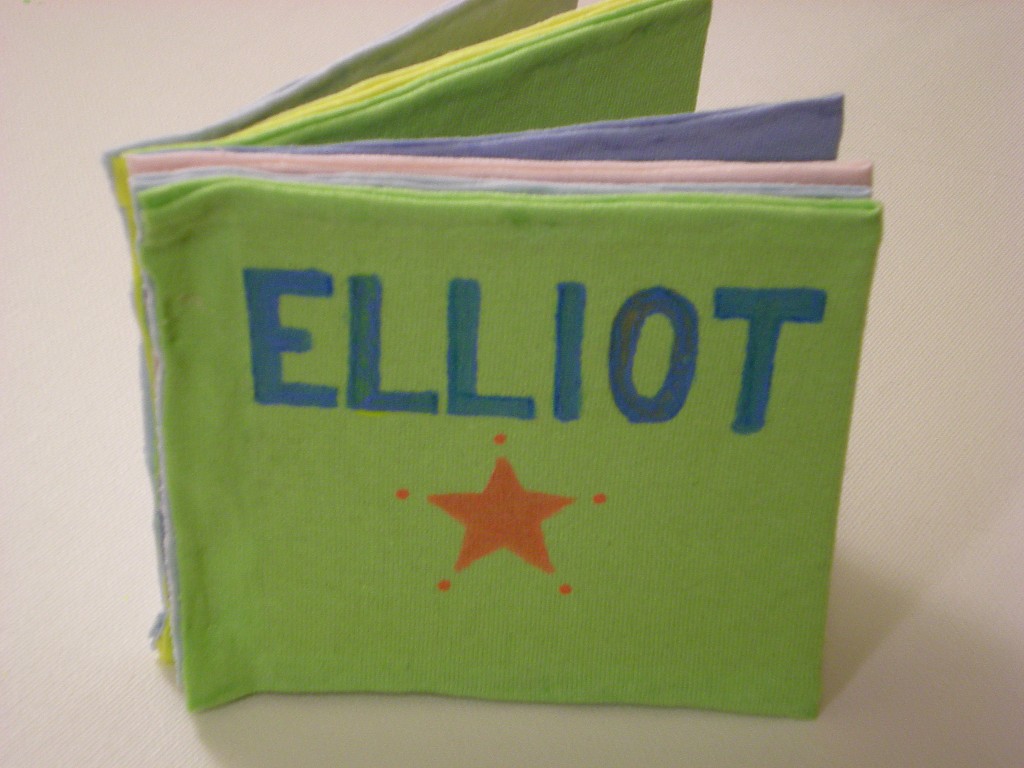
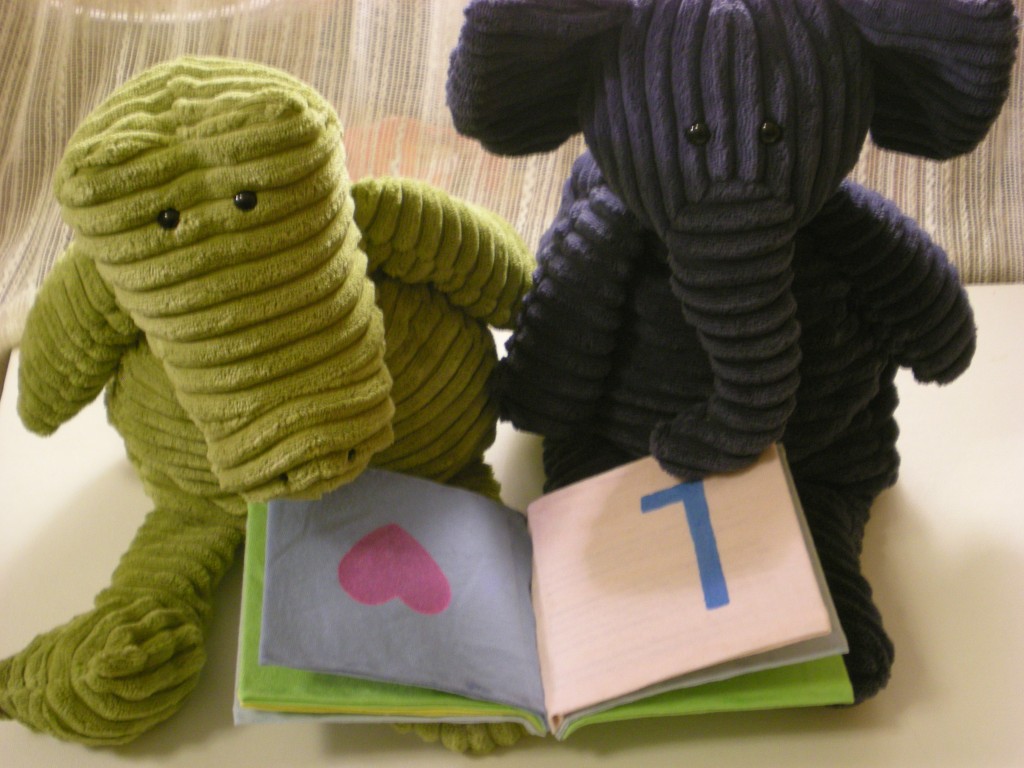
Tuesday, January 25, 2011 at 6:26 AMI like projects that help me use up the scraps that threaten to overwhelm my craft space. I also like projects that can be gifted. So this one's a win-win: The T-shirt Baby Book is perfect for using the T-shirt sleeves that have been cut from another project (like a tank top) and it makes a great baby gift. Did I mention it's personalized? Once I picked the recipient (my friend's new baby, Elliot), I enjoyed figuring out what words to have each letter of his name represent (in other words, what could I illustrate easily?). I settled on: E = earth, L = light, L = love, I = ice cream, O = orange, and T = tree. No pictures of baby Elliot and his new book just yet, so the book is presented by these two cute corduroy pals.
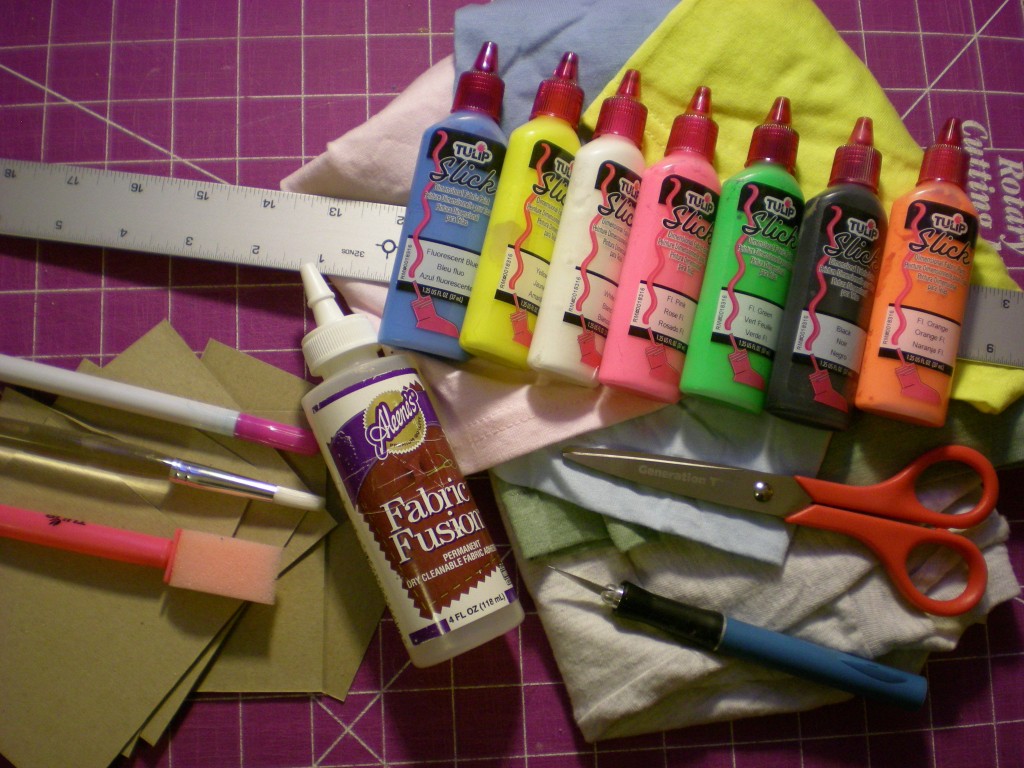
Materials:
-T-shirts or T-shirt scraps (in multiple colors)
-Scissors
-Ruler
-Craft knife
-Cutting mat
-Lightweight cardboard (cereal, snack, or tissue boxes work great!)
-Aleene’s Fabric Fusion Permanent Dry Cleanable Fabric Adhesive
-Tulip 3D Fashion Paint Blazin' Brights (variety of colors)
-Clothespins (optional, for clipping in place while gluing/drying)
Make it:
1. Measure and cut one more 4" x 4" square of cardboard than there are letters in the baby's name. (Example: Elliot has 6 letters, so I cut 7 squares.) Then cut as many 5" x 10" rectangles from the T-shirts as there are cardboard squares.
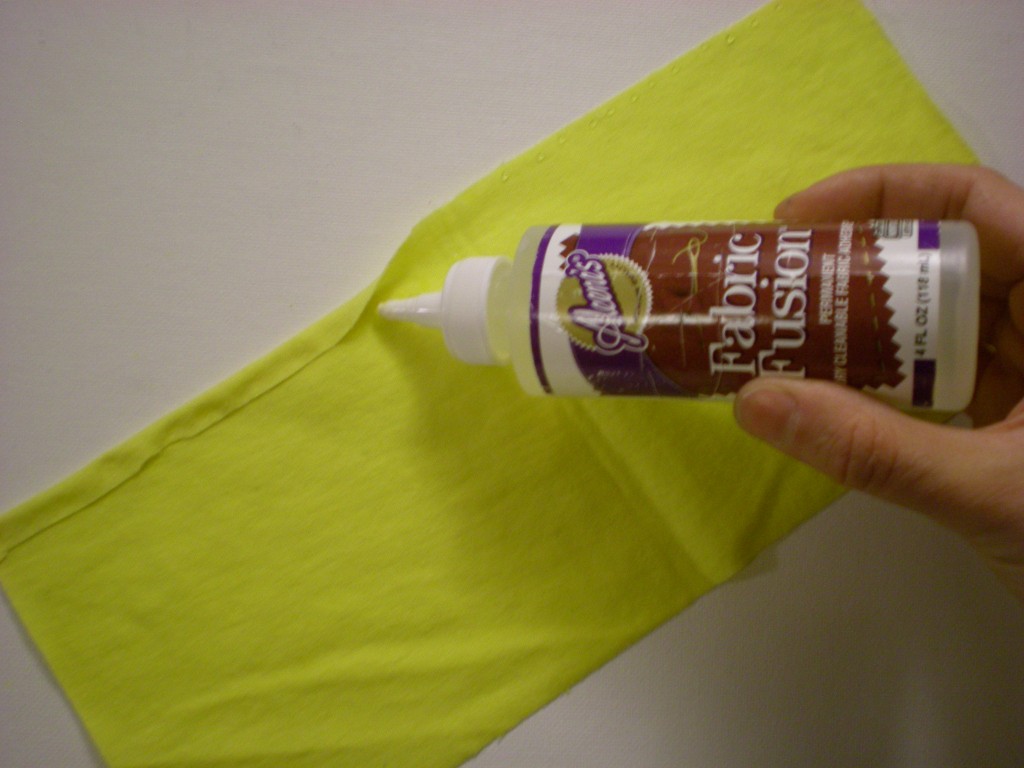
2. Squeeze a small ribbon of glue along one long side of one of the fabric rectangles. Then fold over the edge about 3/8" and press. Repeat on the other long side.
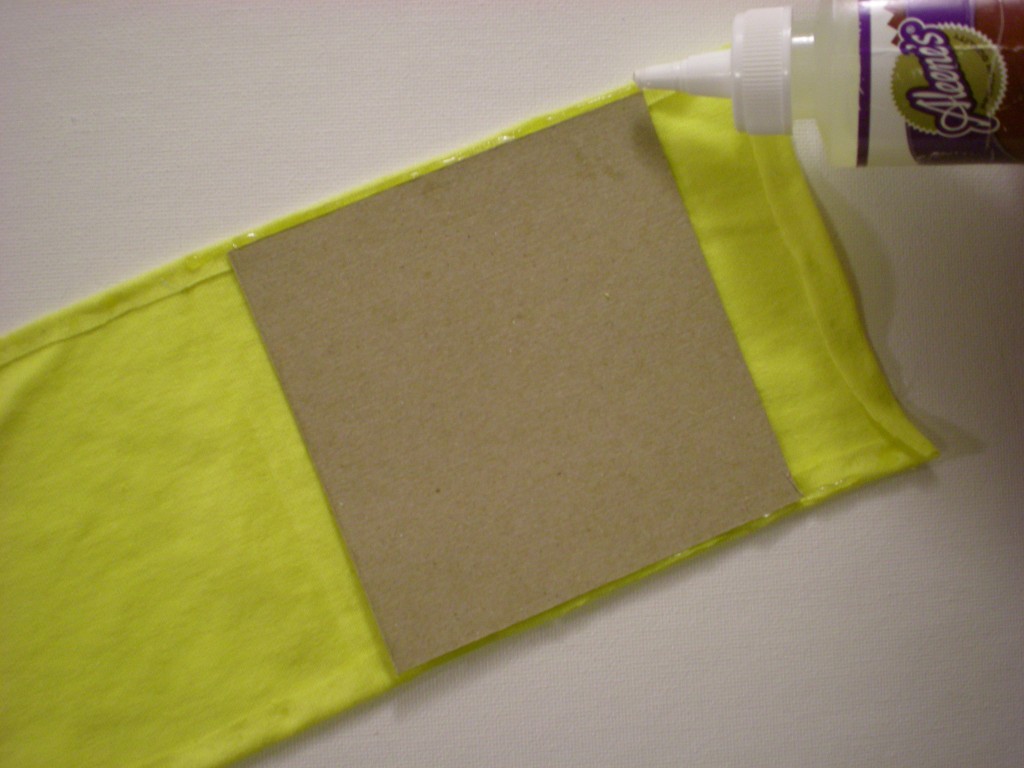
3. Find the center of the rectangle and line up one edge of one of the cardboard squares. Squeeze a small ribbon of glue along the fabric at the top and bottom edge of the cardboard.
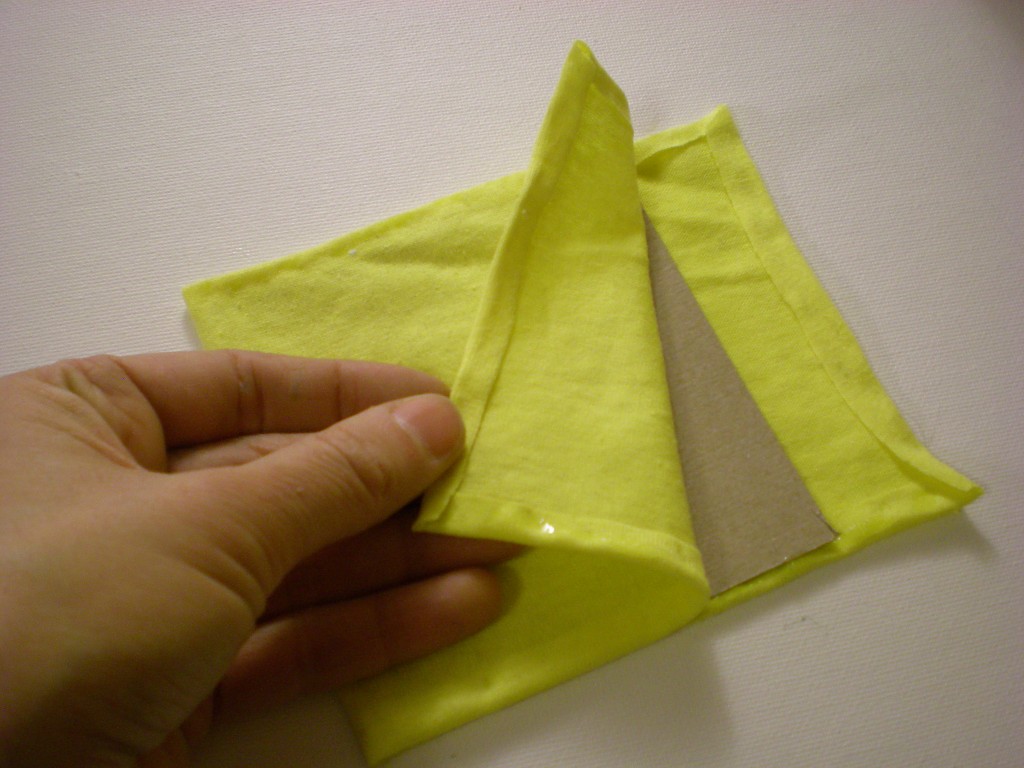
4. Fold the fabric in half, sandwiching the cardboard in between the layers. Press the glue into the edges to seal them. Squeeze another ribbon of glue against the cardboard and between the fabric layers on the open side. Press it closed.
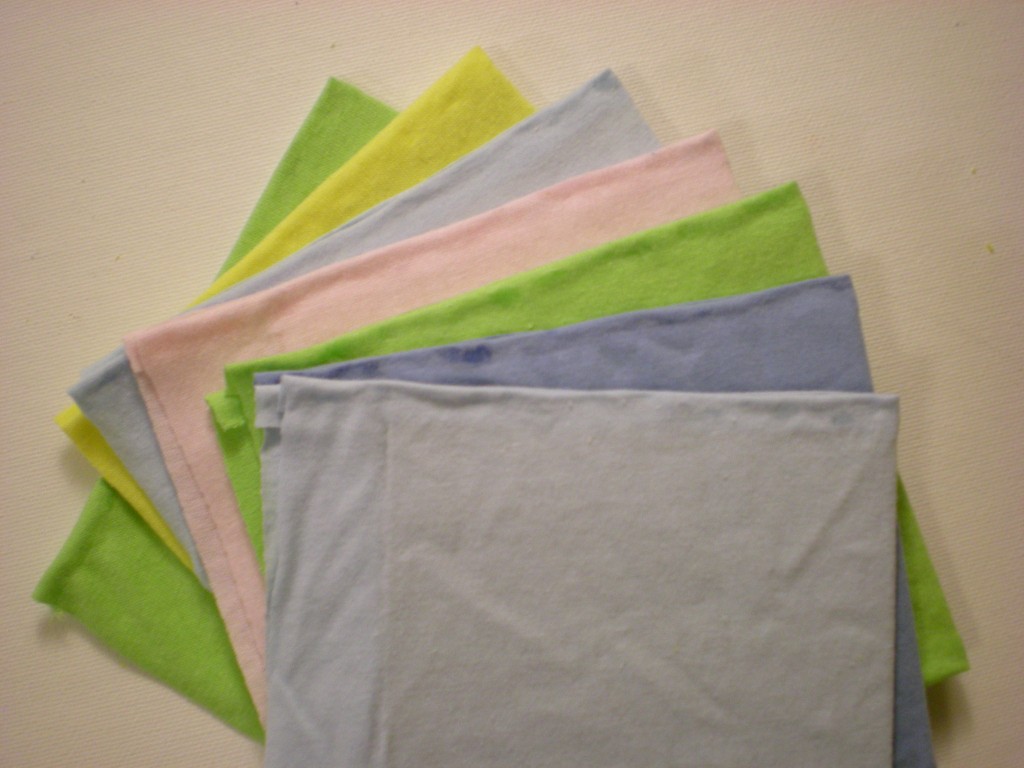
5. Repeat steps 2 through 4 until all of the cardboard squares are covered. These are the pages of the book.
6. Use the air-soluble ink pen to begin outlining the letters and images on the book pages. (Or, skip this step and freehand them with paint--I outlined the earth, but skipped to painting for them rest.)
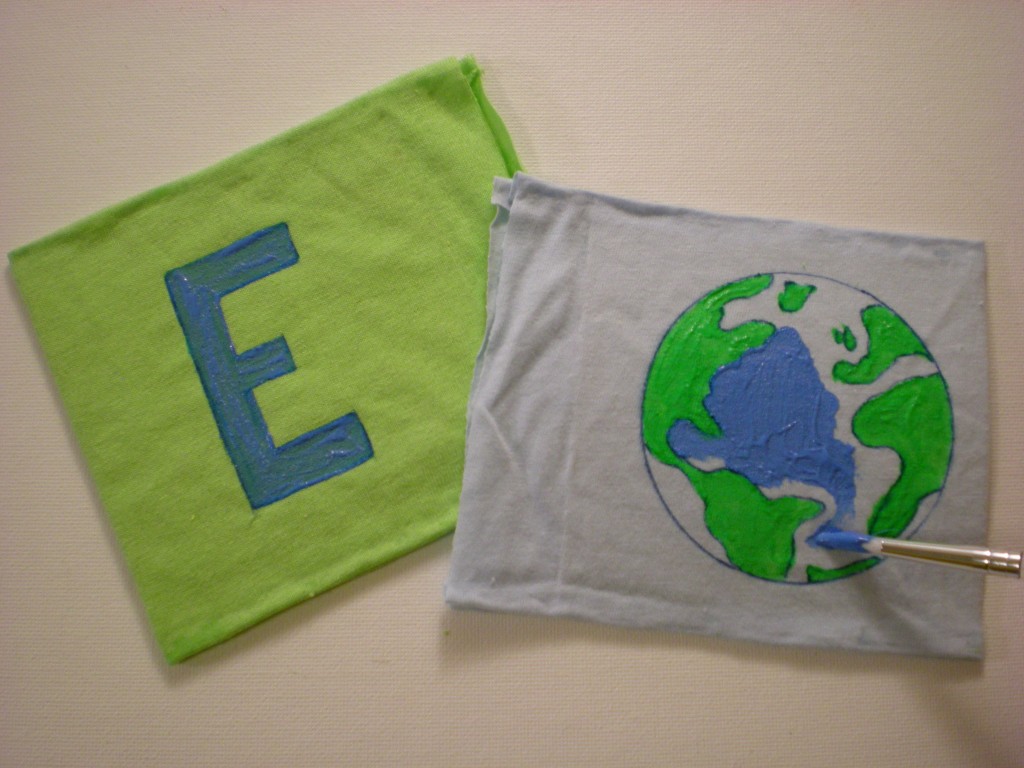
7. Color in the lines with fabric paint!
8. Paint all the right-folio pages first (including the front cover), let them dry, then paint all the left-folio pages, making sure you match up all the letters and images.
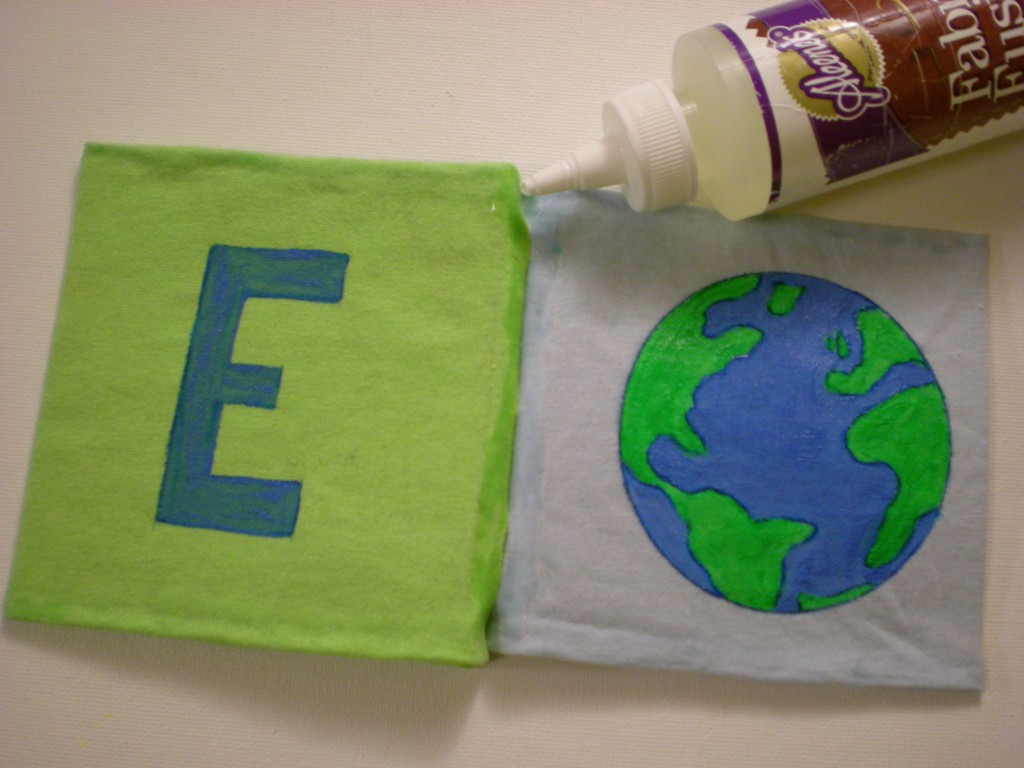
9. Trim the raw edges (the side of the pages that will go into the binding) down to 1/2". Then squeeze a line of glue along one of the edges you just trimmed and press it against the adjacent page. Keep gluing and adding pages (in the correct order!) until the book is complete.
10. Let dry completely. Optional: Clip the binding closed with clothespins while it dries.
11. Then it's story time! E is for earth. L is for light. L is also for love. I is for yummy ice cream. O is also for a delicious orange. T is for Tree (and Totally Terrific and....T-shirt book!).

Visit us on Facebook!
Craft on!Click here for today's daily giveaway!
Softie Headband (with T-shirt Scraps!)
Monday, November 22, 2010 at 7:58 PMYes, Thanksgiving is nearly here, but I'm already fast forwarding straight past the food coma to the holiday parties! And there is really nothing like a bit of proper party headgear to make a grand entrance. Bring in bright tones to battle the cold weather--or, ooh! add glitter to your project to really sparkle in the season!
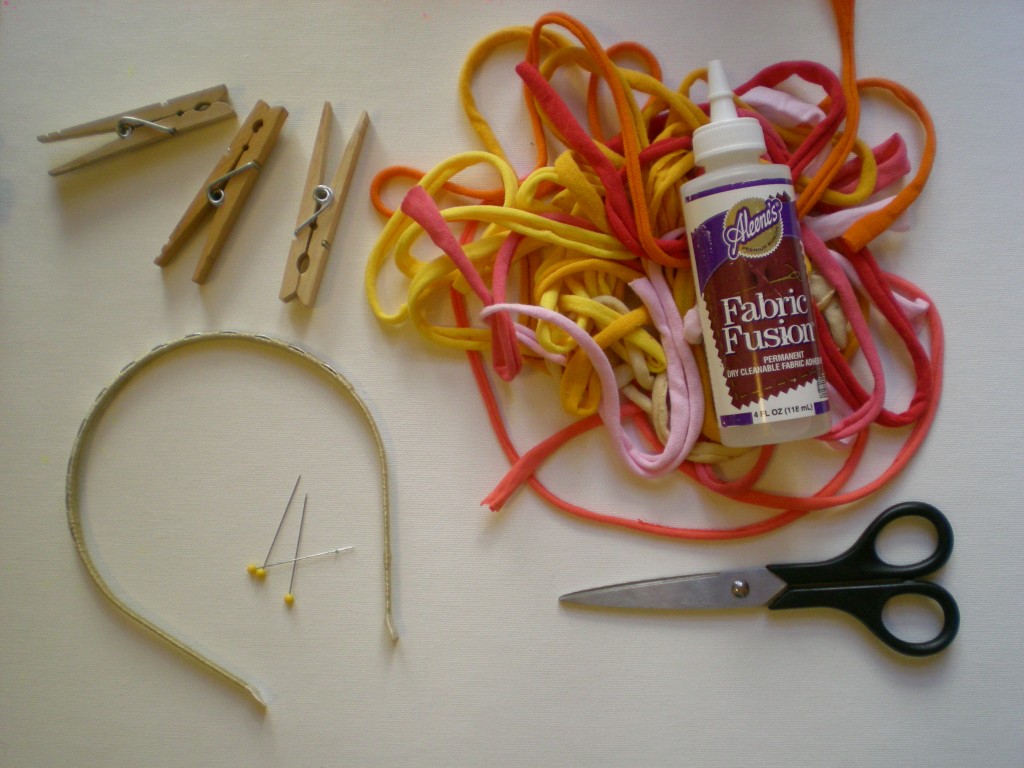
Materials:
-1"-wide T-shirt strips of varying lengths (in complementary shades)
-Aleene's Fabric Fusion Permanent Dry Cleanable Fabric Adhesive
-fabric scissors
-1 fabric-coated plain headband (preferably with a metal base)
-clothespins
-straight pins (optional)
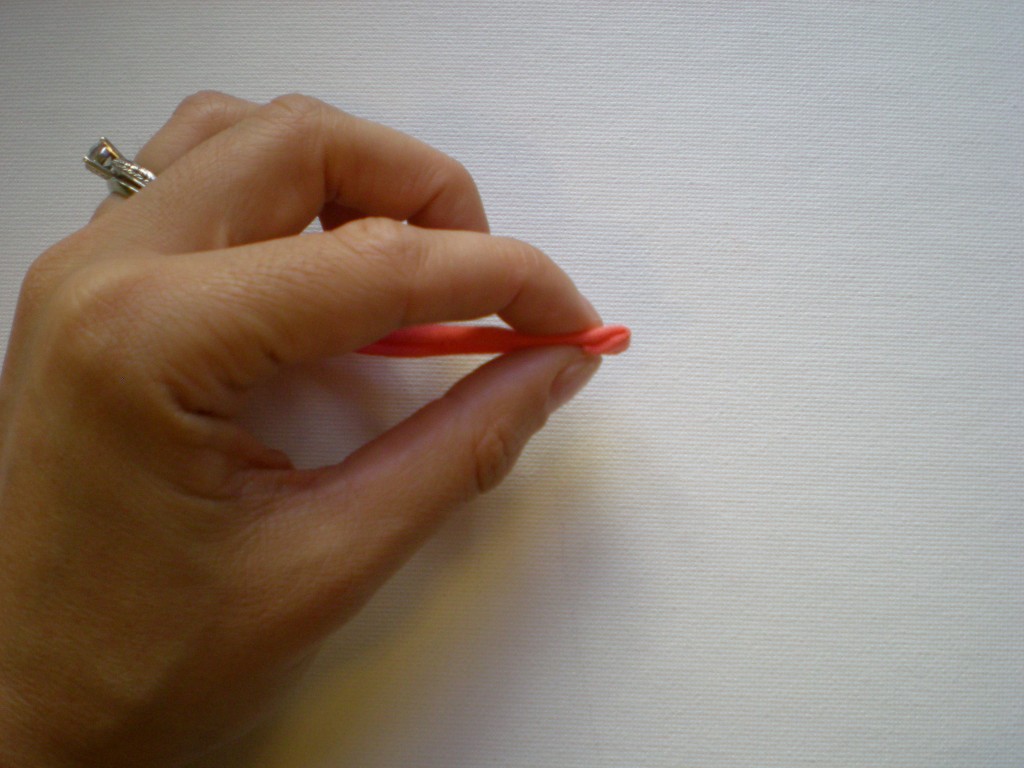
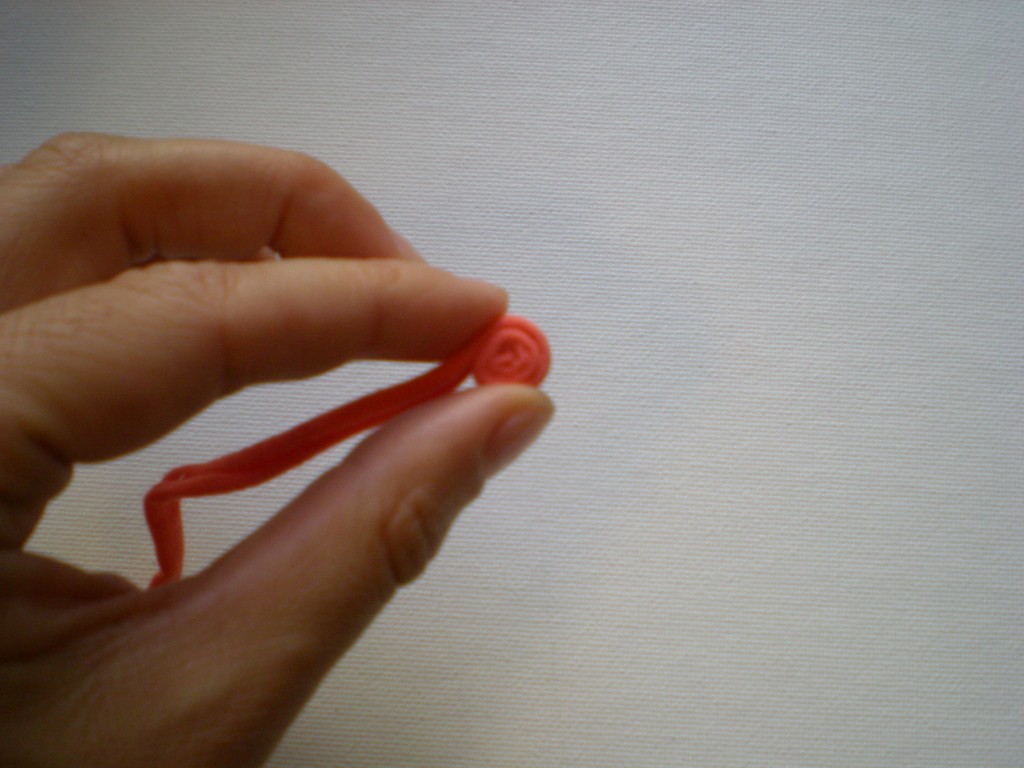
Select one T-shirt strip (a T-shirt hem works well -- just cut off the stitching and stretch it out), squeeze a dab of Fabric Fusion on the inside end and fold it over on itself.
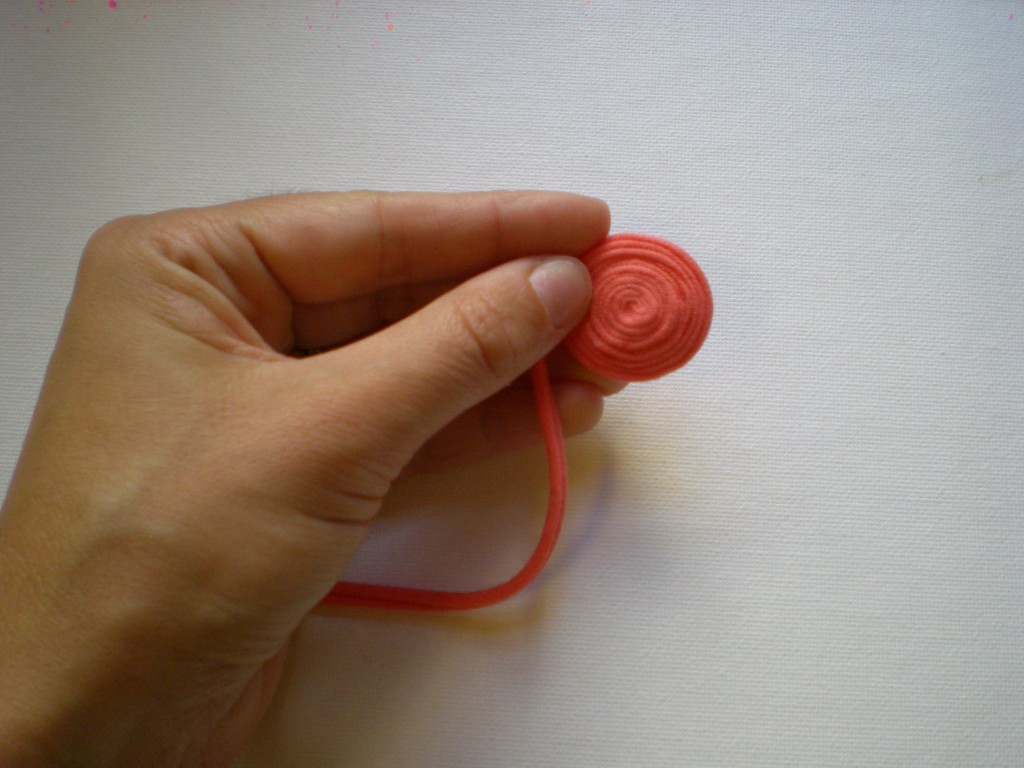
Gently squeeze more glue around the outside of the fold and coil more fabric into the glue.
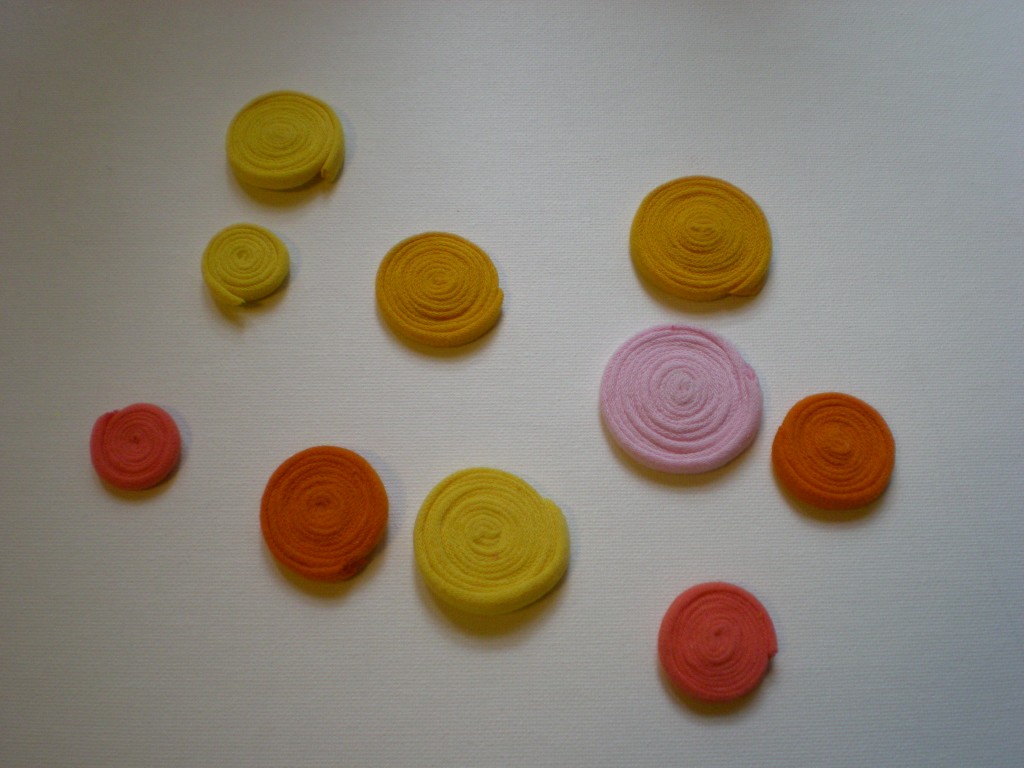
Continue gluing and coiling until you have a 1" to 1.5" fabric disc. Then snip the end at an angle and apply a bit of extra Fabric Fusion to make sure it flattens against the edge of the disc.
Repeat to make seven to nine more discs! Optional: Use straight pins to keep the ends of the coils in place while they dry.
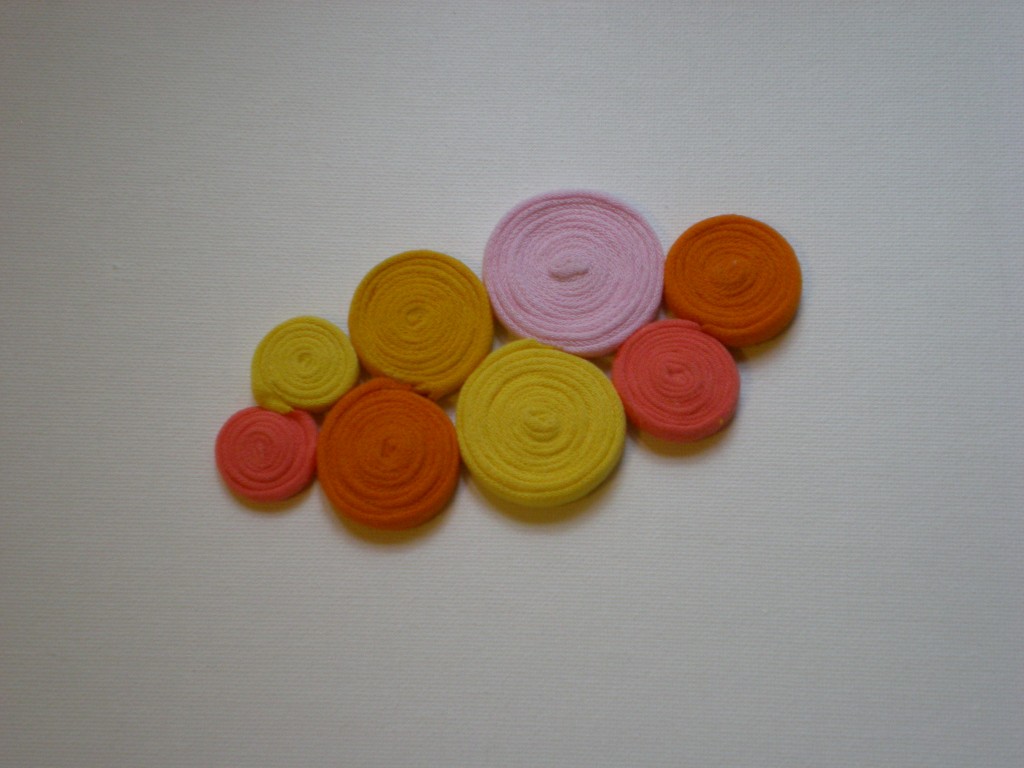
Arrange the discs in a pattern you like and glue them together where they touch. Let the panel dry.
Apply glue along the top edge of the headband and gently press the panel of coils against the headband.
Clip it in place with clothespins (so you don't have to hold it). Let it dry.
Wear it hair up or down!

Craft on! Click here for today's daily giveaway!
