Avalon Potter Models a Jaunty New Headband!
Teen Craft Project
Margot Potter for I Love to Create Mini top hats have been big with the DIY and the club crowds for a while now and they’re filtering up to the mainstream this season. I thought for this week’s project for
I Love to Create I’d whip one up for my daughter to wear to school. We just watched Moulin Rouge again and this has such a Satine vibe. It sounded so easy...and yet...well...it took some effort but I worked it out!
If you want to opt out of making the hat, just buy a doll or teddy bear sized top hat and embellish it. Would that I’d figured that out before diving into this head first...but there’s a lot to be said for Doing It Yourself! At least that’s what I’m telling myself so I feel better. I found a lot of great tutorials online for a variety of versions of this project and then I worked it out in typical Madge style. What’s crafting for if not making glorious mistakes and getting sticky, fuzzy fingers?! (Oh and if you’re more of a cowgirl than a circus performer,
Jen Perkins made an adorable mini straw hat headband last year you should definitely check out.)
MaterialsBlack plastic skinny headband (I got five for a dollar in a value pack at our local drug store!)
Craft felt (Wool is sturdier and more durable than acrylic, but I used acrylic here.)
Pink tulle netting (I got this at JoAnn Fabrics.)
Black marabou feathers (I got these at JoAnn Fabrics.)
Acrylic fiber stuffing
Black thread
Hot glue sticks
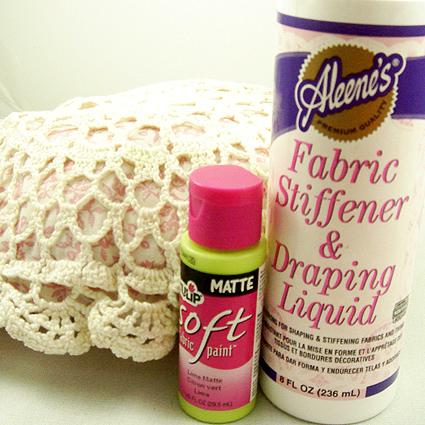
Aleene’s Fast Grab Tacky Glue
Aleene’s Stiffen Quick Spray Tulip Glam-It-Up Crystals in clear AB
ToolsHand Sewing Needle
Scissors
Hot glue gun
2” diameter template (I used a large plastic pill jar)
2.5” template (I used a ribbon spool)
Ruler
Dressmakers pencil or white pigment ink pen
Quick Kutz QuickStik
Quicker Poker Picker Upper Tool
Tulip Mini Iron 1. Measure and mark 5.5”x2.5” strip of felt and cut.
2. Use a 2” diameter template to trace and cut a circle of felt. This is the top of the hat

3. Repeat with a 2.5” template. This makes your brim.This is the tube of the hat. (If needed, Iron felt pieces flat with mini iron.)

4. Cut two 1/4" notches in the center of the 2.5” felt circle with scissors. (They need to be just big enough to accommodate your headband.)

5. Run a bead of hot glue along shorter edge of felt rectangle. Press on opposite short edge to create a tube.

6. Run a bead of hot glue along top edge of tube and carefully adhere 2” circle to edge. You can support this by reaching one hand inside to keep tube stiff while attaching the circle, just be careful not to burn your fingers on the glue.

7. Stuff tube with fluffy enough fluff to give it structure.

8. Run a bead of hot glue along bottom edge of tube and adhere to center of 2.5” circle.

9. Allow glue to set. If you have to go in and rework any funky spots this is a good time to do that!
10. Thread headband into slot you cut on large circle.
11. Use a needle and thread to secure the mini hat on head band, I’ve done it so it’s slightly off center for a “mad hatter” effect.
12. Your brim will pucker a little, that’s okay. Saturate it with Stiffen Quick and use your fingers to create an evenly spaced wave pattern in the puckers and to flip up the sides. Allow to dry.

13. Wrap a strip of pink netting around the entire brim of your hat and knot one strand around the other, tucking in the extra netting so it looks like a flower. Cut off any excess uneven netting. The netting will hide the back seam and any futzy spots along the top and bottom of the tube from the hot glue. (This is a typical The Impatient Crafter™ solution to not having to be perfect.)

14. Slide two marabou feathers into the side of the flowers and use Fast Grab to tack them and the netting at the knot into place.

15. Use Aleene's Fast Grab Glue to attach crystals to netting. Because the netting is made of plastic, I didn't think it wise to use heat, so I opted for glue. I used a Quicker Poker Picker upper to make it easier to adhere them.

16. Allow everything to dry before wearing...our hat was still wet here...we like to live on the edge like that.

Avalon Potter Looking Adorable in her new Moulin Rouge Tiny Top Hat Headband!