Showing posts with label liquid fusion. Show all posts

How To Stud Your Flats!

Wednesday, March 20, 2013
These are my "Tell me about it, STUD." Flats. (Clever, right?) I LOVE me some black flats, but what do you do when they get scruffed up? STUD THEM! This is a QUICK and EASY project using Liquid Fusion! Here we go!

 Supplies:


 Step One: I lightly sanded my shoes in the area I wanted to glue. Next, pour some glue into a paint tray, and with a bamboo stick, apply glue on to the back of stud.


 Step Two: Place stud on to your shoe. If you're unsure of a pattern, google "Studded Flats" and you'll find some ideas! For this project I did sort of a triangle, top row=6, middle=5, and bottom=4. Play around with it!


Step Three: Wait for about an hour for them to dry. After that, wear those babies out!
 Check out this quick video I posted on Vine(@mayainthemoment) of the process!
I also made a headband! does it match my pink streaks? So punk, right? :)
Love, Mayainthemoment.com
FOLLOW ME ON INSTAGRAM, VINE & TWITTER: @mayainthemoment
YOUTUBE: youtube.com/ahhmaya1234
:)

CRAFTY CHICA: DIY Crystal Eyeglasses!

Friday, January 18, 2013
A couple of years ago, I noticed my vision was starting to...well, SUCK. I couldn't zero in with precision like I used to. That's what a life of beading, sewing, painting and gluing will do to a chica. Instead of pouting, I decided to embrace the fact that I needed reader glasses and am now a collector of cool specs.

But when it comes slaving away in the art studio, I don't want to use my spendy finds. I go for the cheapies, but then those can be boring. Life is so hard!!!! (lol)

Call it procraftination on another project, but one day I sat down and embellished all my low-budget reader glasses...and made a video tutorial! Now I have sparkly energy at all times!

These are great to give as gifts, or for your favorite bookworm or girls night for crafting. Next, I want to make fabric sleeves for them too!

Supplies:Tulip® Glam-It-Up!™ Iron-On Crystals™ 
Tulip® Glam-It-Up!™ Fashion Art Tweezers™
Liquid Fusion® Clear Urethane Glue 
A chopstick or toothpick
Paper plate

Directions: Squeeze out some glue and apply to the top of the frames and then add the crystals, one-by-one. Check out my video to make the process super easy - plus a couple other insider tips!


LINK

Mirror Mirror on the Wall Who is the Craftiest of Them All?

Thursday, January 19, 2012


I have hand mirrors on the brain lately. Maybe it is all those Snow White and the Huntsman commercials. Maybe it was last week when I decided to hot roll my hair and realized I had no way to see the back of my head. Whatever the reason there was no way I was going to have a plain jane hand mirror on my vanity.


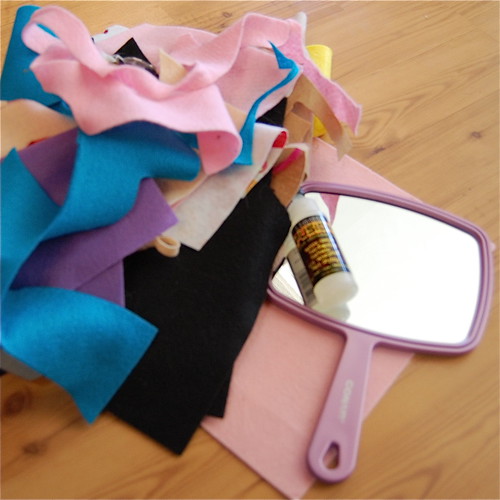
SUPPLIES
Felt
Scissors
Liquid Fusion Glue
Hand Mirror


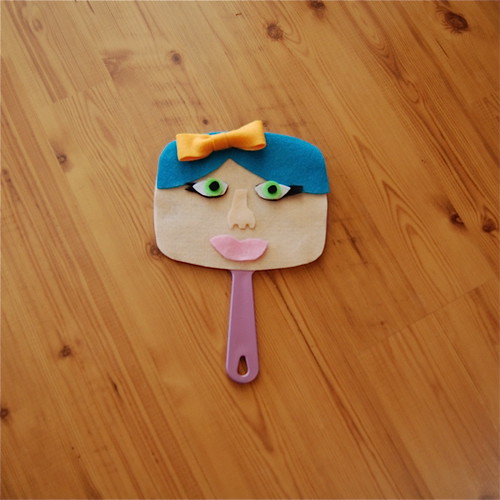
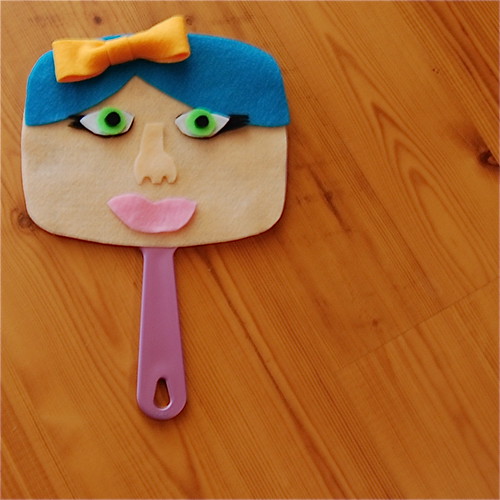
The first thing I did was decide on a design. Once I knew how I wanted my mirror to look I cut out pieces of felt.


I attached all the felt to the mirror using Liquid Fusion. Be careful not to use too much so that it does not darken your felt. I also added a hairbow from Jen at Hell Razor.

Now next time I need to see the back of my head I'm ready!

P.S. Don't forget that hand mirrors also make great picture frames.

P.P.S. Please excuse the slightly blurry pictures. I am taking photography classes and my teacher made me change all the nice settings my photag friend Erin had put my camera on.


Visit us on Facebook!
Craft on!

Beachy Fedora Makeover

Thursday, July 1, 2010


As I mentioned earlier this week my fam just returned from a trip to the Texas Coast. It's hard for me to believe it, but I came home empty handed. That's right even after perusing cheesy tourist shops I didn't buy a thing. However, there was one item that keeps haunting me - a painted fedora. The hat was by Roxy and super duper cute, but alas the price tag was not so cute. I snapped a few pictures because I knew at home I had an arsenal of Tulip fabric paint and a plain straw fedora just begging for a beachy makeover.


SUPPLIES
Tulip Soft Fabric Paint
Square Paint Brush
Straw Fedora
Liquid Fusion Glue
Scissors
Black Ribbon


PAINT
If I had been able to put my hands on some painters tape I might have adorned this hat slightly differently. However, the tape was on the lamb so I free handed my stripes. This is where the square shape of your paint brush bristles comes in very handy. I studied the picture of the dreamy hat from the souvenir shop and mimikied the same stripes pattern. Allow your stripes to dry in-between coats.


HAT BAND
Measure a piece of black ribbon. Attach to hat using Liquid Fusion Glue.


All that is left for me to do is wait for a sunny day or my next trip to the beach and sport my new and improved fedora.

iLoveToCreate Teen Crafts Flower Power Frame

Tuesday, February 16, 2010
Flower Power Shadowbox Frame by Margot Potter for iLoveToCreate
(click on images to view close-up)
iLoveToCreate Flower Power Frame
Margot Potter
Teen Crafts
‘Mom crafted, kid approved.’

I’ve lately become obsessed with crafting flowers, as you may be able to tell from my projects for iLoveToCreate. This shadowbox frame showcases a funky fiber flower made on a loom. I’ve created a collaged image to go inside, you can place anything you like in the frame including 3-D elements because it's a shadowbox. I love the irony of a Snow Day image in a warm and flowery setting. If you wander down the scrapbook aisles you’ll find lots of great coordinating paper collections that make fun collages, just size and print a photo and add glue and glitter accents and some Tulip Glam it Up crystals.  Avalon is excited to put this pic on her desk in her new office.


(Don't forget to head on over to iLoveToCreate and vote for your favorites in their Dress Up Your Pet Contest!)

Materials
Wooden Shadowbox Style Frame (I got mine at JoAnn Fabrics)
Crafty Chica Little Paint Pack (red and white mixed to create fuchsia)
Traci Bautista’s Collage Pauge Sparkle
Textured multi-colored yarn
Thread to attach bead or button
Large matching bead or button accent
Liquid Fusion glue

Tools
Boye Bloom Loom™ Flower Making Loom
Paint brush
Foam brush for decoupage medium
Sewing needle to attach bead or button
Scissors
Sand Paper

1. Sand and paint frame with a 2/3 to 1/3 mix of red and pink paint to create a fuchsia color.

2. Follow instructions on the loom to create a fiber flower.

3. Attach a coordinating bead or button to flower with thread.

4. When paint dries, add a coat of Sparkle Collage Pauge to seal it.

5. Use a bead of liquid fusion to attach yarn to the indentation of your frame. I used two rows of yarn.

6. Attach the flower to the top left or right corner using Liquid Fusion.

7. Create a fun coordinating paper collage to go inside of the frame. This will be a great way for teens to personalize this idea. I glued the elements down with a glue stick and adhered the collage to the back of the frame with a thin bead of Aleene’s Tacky Glue around the edge.

iLoveToCreate Teen Romantic Wristlet Ribbon Corsage

Tuesday, February 2, 2010

Romantic Wristlet Copyright 2010 Margot Potter for iLoveToCreate
(Click on images to view details)

iLoveToCreate Romantic Wristlet
Mixed Media Ribbon Corsage
Margot Potter
Teen Crafts
"Mom crafted, kid approved."

I have a deep and abiding love of all things vintage and romantic. When I saw this lovely wired damask ribbon I simply had to have it because I knew it would make the most charming ribbon flowers that would be delightful for Valentine's Day. A little sewing, a little Liquid Fusion, a little Aleene’s Fast Grab Tacky glue and you’ve got a lovely ribbon corsage or hair clip, pin, card embellishment... Make a whole bouquet of these on hard wire stems and give them to a sweetheart or glue a variety of these around the edges of a frame. The thinner the ribbon, the flatter your flowers will be. I doubled up two flowers to make a ribbon rose and added some vintage button accents and attached it to a ribbon wristlet for a simply stunning corsage. This would be perfect for a Valentine’s Day dance.

If your teen is a girlie girl, she’ll adore these flowers and they’re so fun and easy to make I guarantee you’ll be searching for ribbon to make more! These aren’t just for teens, they’d be perfect for bridesmaids too!  Heck I'd sport this wristlet myself.  I can't wait to surprise Avalon with this on her birthday this Thursday! 


Materials
Ribbon (I used 2.5” thick damask print ribbon with wired edges)
Vintage buttons
Thread
Magnetic purse snap
Liquid Fusion Glue
Aleene's Fast Grab Tacky Glue

Tools
Chain nose pliers
Sewing needle
Scissors

1. Cut an 11” length of red damask ribbon. Fold the edge on one end.

2. Use a simple basting stitch to sew the bottom edge of the ribbon.

3. Gently remove wire from top of ribbon.

4. When you get almost to the end of the ribbon, fold the end and sew the two ends together.

5. Gently pull the thread to create a flower.

6. Sew the edges together and finish. Cut off excess thread. Fold top edge over to create the first layer your rose.

7. Repeat making a 9” flower.

8. Sew the two flowers together, nesting the smaller flower in the center of the larger flower. Fold edge over as before.

9. Glue a smaller white button into the center of a larger red button. While still wet, glue these to the center of the smaller flower. Use thread to tack the buttons down. Cut off excess thread. Allow glue to dry.

10. Fold a 5.5” section of black and white damask ribbon over itself to create one half of a bow shape. You should have a 2.75” bow end. Repeat on the other side, leaving the ribbon end attached to the spool.

11. Wrap the ribbon around itself and gently tug to create a bow. The bow should be 5.5” wide. Cut off excess ribbon.

12. Use the thread to secure your ribbon together and sew it to the bottom of your ribbon rose.

13. Measure and cut a length of ribbon to fit your wrist, leaving a 1” overlap on each end. Remove wire from both sides of ribbon.  Fold end over 1/2" thick, mark center placement of magnetic snap.

14. Cut slits for snap to thread into, thread snap into ribbon and bracket and fold over ends with chain nose pliers.

15. Tack a button over the exposed snap end on one side with thread, secure with Liquid Fusion glue and allow to dry.

16. Tack flower to center of wristlet with thread and secure with Aleene’s Fast Grab Tacky Glue. Allow to dry. You can remove your ribbon flower and attach to a hair clip when the wristlet gets dirty.

Aleene's Glue Mannequin!

Thursday, January 28, 2010
Swelldesigner and Pattiewack show you how an awesome mannequin was made for the iLoveToCreate booth in CHA Winter 2010 Tradeshow! Check it out!

Black Velvet Dolly Painting

Thursday, January 14, 2010


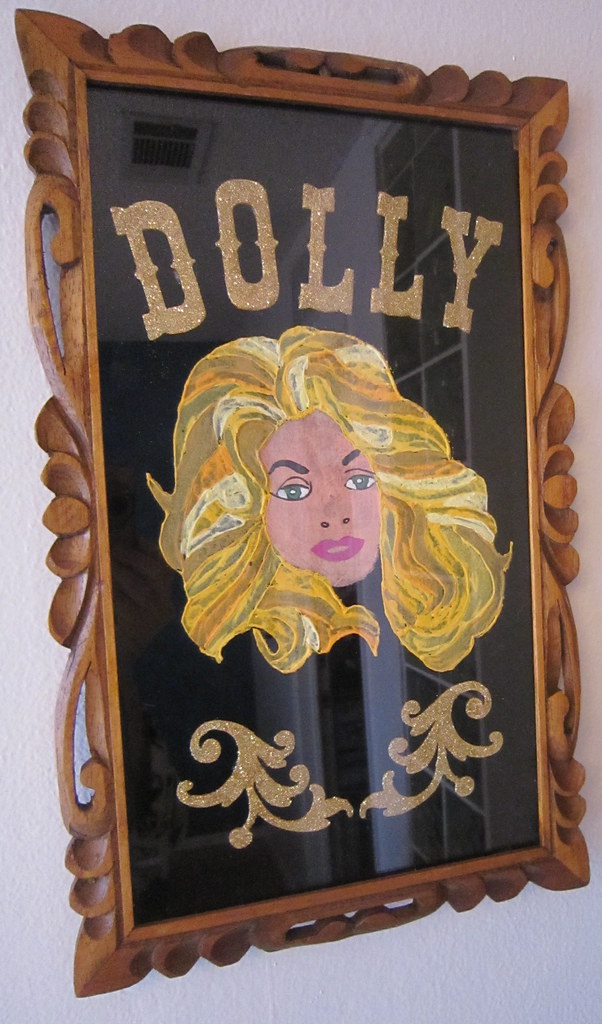
Next Tuesday, January 19th, might just be another day for some of you - but for some of us it is a national holiday. January 19th is Dolly's 64th birthday. Maybe I'll watch The Best Little Whorehouse in Texas and sing show tunes all day and annoy my husband. In the meantime I wanted to craft up something special to commemorate the big day. One of my favorite Dolly quotes is "It takes a lot of money to look this cheap". Nothing says cheap and tackaliscious like a black velvet painting so that is exactly what I am making today for I Love to Create.
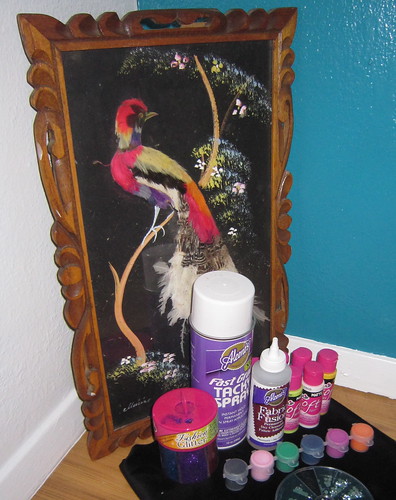

SUPPLIES
Black Velvet
Tulip Fabric Paint
Frame
Tracing Paper
Glitter Chipboard Letters
Aleene's Fabric Fusion Glue
Paintbrushes
Tracing Paper (light and dark)
Pen
Scissors
Aleene's Fast Grab Tacky Spray


GET YOUR DOLLY ON
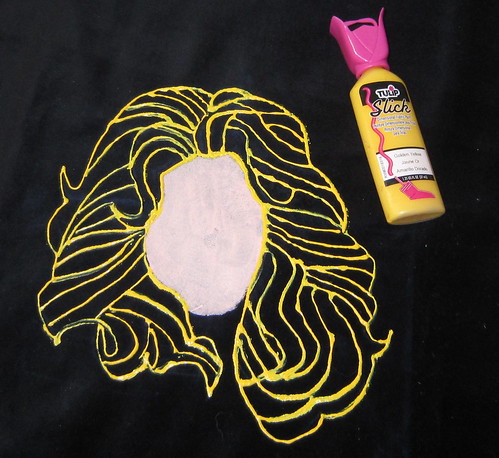
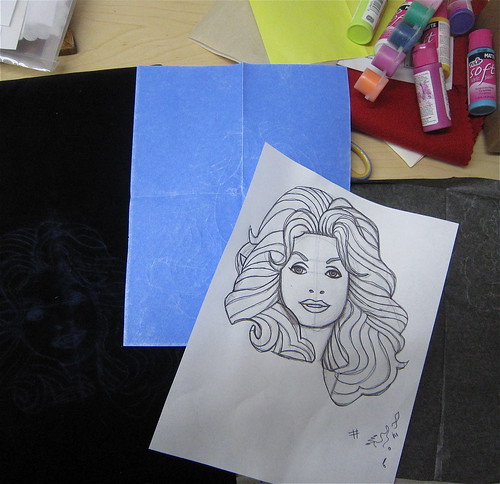
The first thing you need to do is either draw a picture of Dolly onto your black velvet using tailor's chalk or in my case trace a picture with tracing paper. Artist Stefan Govasli was kind enough to let me use his illustration of Dolly.


PAINTING BLACK VELVET
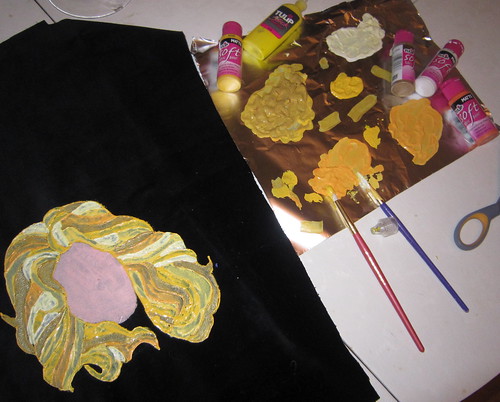
Using Tulip Fabric Paint fill in the lines of your drawing just like a coloring book. Mix colors like pink, orange and white to make flesh color and experiment with yellow to shade the hair. I opted to fill in her entire face with peach paint. Allow to dry completely.


FACE PAINTING
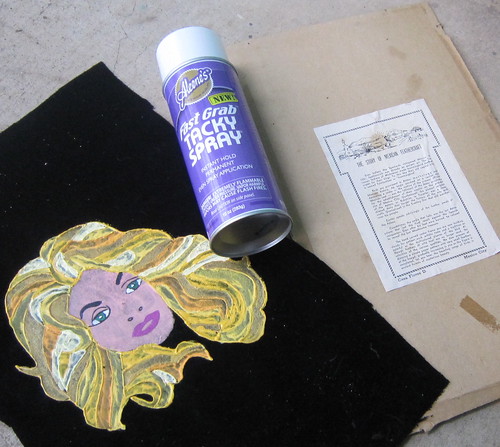
Once her face has dried completely retrace her face using a pen and dark tracing paper. Fill in using Tulip Fabric Paint and allow to dry completely.


ATTACH TO CANVAS
Next I cut my velvet down to the size of my frame. Using Aleene's Fast Grab Tacky Spray I coated the board and adhered my velvet painting. Make sure to get your picture as centered as possible.


SAY IT WITH GLITTER
Originally I thought I would cover some chipboard letters in Tulip Fashion Glitter, but then I realized I already had gold glittered letters. Using Fabric Fusion Glue attach your letters to the velvet.

Put your picture into a tacky frame fit for a tackaliscious black velvet painting. Happy Birthday Dolly, only the best for you!


Looking for more fun music related crafts? Check these out....
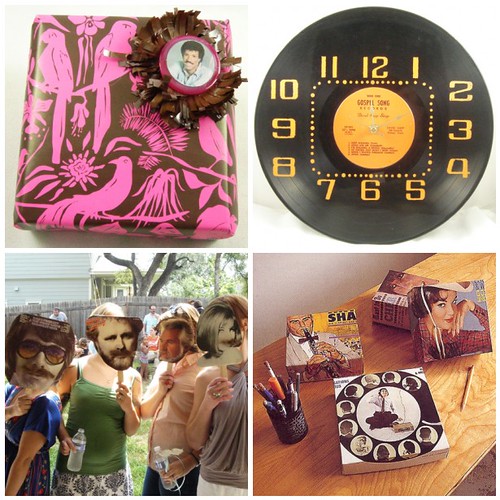
Musical Mustache Masks
Screen Printed Record Crafts
Rock-n-Roll Home Decor
Cassette Tape Pom Poms

Sparkly Bow Necklace

Thursday, December 10, 2009

DSC04326

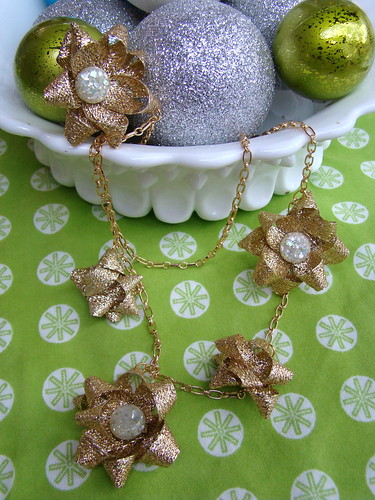
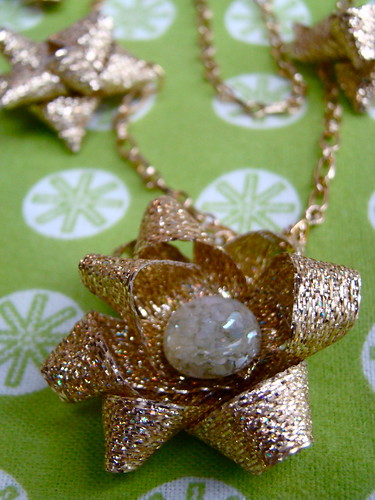
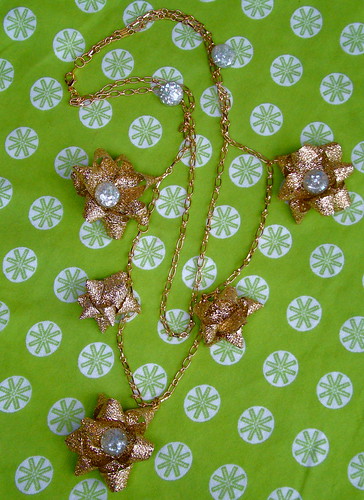
While visiting family last month, I flipped through a copy of Elle Magazine and came across the Kate Spade Bow Necklace. It made me smile in all of it's kitschy glory; also inspiring me to create a less-blingy, more affordable, ribbon version. I think the result is an adorable, vintage-style bit of sparkle that makes the perfect accessory to wear to those holiday parties. Here's how to make your own!

DSC04310

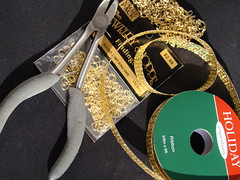
Materials
60" Chain
1, 9 ft. Roll of 3/8" Wide Ribbon
9, 6mm Jump Rings
1, 12mm Lobster Clasp
Jewelry Pliers & Cutters
Scissors
Needle & Thread
5, Lucite Shank Buttons

How-To Make Bows
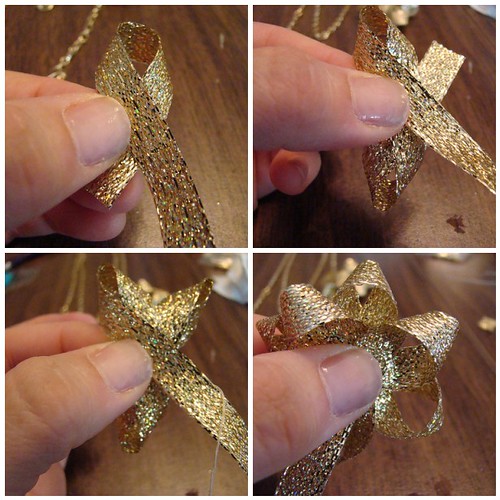
Make 3 large versions and 3 small (made by just pulling the loops tighter as you go).
  • To make these bows, make a loop as if you were creating a hope ribbon (you know, the ones for supporting our troops, breast cancer awareness, etc.). (Photo 1)
  • Without cutting the ribbon, make another loop that points in the opposite direction. Begin hand-tacking with needle & thread. (Photo 2)
  • Make 3rd & 4th loops, perpendicular to the last set. Hand-tack. (Photo 3)
  • Continue in this manner, creating 8 loops total and hand-tacking as you go, until bow has a "filled-in" look (Photo 4)
mosaic80c7afb503efa37b062a422db3fe827321f1424c
  • Brush-on a layer of Aleene's Fabric Stiffener to each bow. Let dry.
  • Use jewelry cutters to snip shanks off of 3 buttons. Use Liquid Fusion to adhere buttons to the centers of the large bows. Let dry.
Bold
DSC04330

How-To Assemble Necklace
  • Double chain, so it's tiered at desired lengths. Snip off excess.
  • Use jump rings to secure the ends of the two tiers of the chain together. Attach lobster clasp to one of the jump rings.
  • Link the two chains together towards the top of the necklace by attaching a jump ring to a button (with shank left on) and then hooking them both on to the chains. Repeat on opposite side.
  • Pierce a jump ring through each bow, and attach them evenly to both tiers of chain.
  • Wear, sparkle & enjoy!
DSC04329

Craft.Rock.Love...for the holidays!,