Showing posts with label DIY teen crafts. Show all posts

How To Stud Your Flats!

Wednesday, March 20, 2013
These are my "Tell me about it, STUD." Flats. (Clever, right?) I LOVE me some black flats, but what do you do when they get scruffed up? STUD THEM! This is a QUICK and EASY project using Liquid Fusion! Here we go!

 Supplies:


 Step One: I lightly sanded my shoes in the area I wanted to glue. Next, pour some glue into a paint tray, and with a bamboo stick, apply glue on to the back of stud.


 Step Two: Place stud on to your shoe. If you're unsure of a pattern, google "Studded Flats" and you'll find some ideas! For this project I did sort of a triangle, top row=6, middle=5, and bottom=4. Play around with it!


Step Three: Wait for about an hour for them to dry. After that, wear those babies out!
 Check out this quick video I posted on Vine(@mayainthemoment) of the process!
I also made a headband! does it match my pink streaks? So punk, right? :)
Love, Mayainthemoment.com
FOLLOW ME ON INSTAGRAM, VINE & TWITTER: @mayainthemoment
YOUTUBE: youtube.com/ahhmaya1234
:)

MAYA IN THE MOMENT TEEN CRAFT: Easy Puffy Paint iPhone Cases

Wednesday, January 16, 2013


 Hey guys! I LOVED making these cases. I've been seeing everybody with their crazy cell phone cases and decided to make my own versions. My mom recently bought a batch of clear cases on eBay super cheap and they just happened to fit my iPhone 4s.

The most common way of decorating these is the "decoden" method and using bathroom silicone and all kinds of little charms and baubles. I tried out using Puffy Paint because I wanted a brightly colored background and it worked! Once you see all the colors of Puffy Paint, you'll get a lot of ideas. The Puffy Paint acts as a glue to hold everything in place.
Here is my tutorial video:

You'll definitely get addicted. Enjoy!

LINKSUPPLIES: 
Tulip Crystals
Tulip Puffy Paint
A Chop Stick
Clear iPhone case
Other objects: Buttons, big gems, plastic charms, old jewelry pieces, guitar picks, anything small and eye catching!
Puffy Paint, topped with giant gems, then filled in with Tulip Glam It up Crystals!

Cover your work surface with plastic. Squirt the Puffy Paint on the phone case and move it around with the chopstick so you have a thick even layer. When placing items on the cover, start with the larger objects and then use the Tulip Crystals to "fill in." Make sure to let dry over night or ever longer if needed!


How to Make a Zig Zag Chevron Canvas

Wednesday, January 9, 2013

Learn how to make a super cute glittered Zig Zag Chevron Canvas in a few quick steps in this easy to follow tutorial from the talented Miss Avalon Potter for iLoveToCreate Teen Crafts!
You'll need a canvas, some scrap cardboard, painter's tape and a pencil to trace. Print a chevron pattern out for a guide, cut the cardboard, line it up and trace, then add tape. 
Mix up some Crafty Chica Little Chica Paints to make a soft yellow and turquoise blue. Paint on canvas in exposed areas with a Tulip paint pouncer. Let paint dry completely. 

Once paint is dry, remove tape. 

Apply a very thin bead of Aleene's Clear Gel Tacky Glue Paint Pen to top edge of stripes. Start with the yellow stripe adding gold Crafty Chica Goddess Gold chunky glitter to the top of the stripe. Allow this to dry completely before applying more glue and Crafty Chica Nova Blue chunky glitter to the top of the blue stripes. Allow to dry.  Make some coordinating canvases for a wall filled with pattern and color!  Here's a tutorial for the Op Art Decoupage canvas shown above!

'A' is for Awesome DIY Framed Initial

Wednesday, October 10, 2012
(It's another AWESOME DIY Teen Craft Project from the AWESOME Ms. Avalon Potter!)


A is for Awesome (Avalon and Autumn) 
DIY Framed Initial
Avalon Potter foriLoveToCreate
'Teen Crafted, Mom Approved'

Autumn has always been my favorite season. The way the leaves form a masterpiece of color, and the crisp air rejuvenates the mind amazes me. Even though I have never been a large fan of Halloween (I don’t do scary), I still love the thick textures and shabby chic appeal that pops up during this time. I have a beach theme throughout my room the blends naturally with this style, so I am always finding new things I would love to hang up. I decided for this project I would make something that would go with the theme of my room and the theme of the season. I hope you enjoy it!


Materials
Weathered wood frame
Sturdy cardboard
Burlap
Wooden letter
Crafty Chica white paint
Aleene’s Fabric Fusion
Tulip Glitter Spray Paint diamond
120 grit sand paper
Paint the letter with the Crafty Chica white paint and let dry.


Measure and cut cardboard to fit inside of frame.

Glue burlap to fit cardboard with spray adhesive.  Glue one layer, allow to dry.
Glue second layer and allow to dry.

Trip burlap leaving a 1" edge.


Install burlap board into back of frame.

Sand paint in various spots to distress.

Spray glitter paint on paint brush and brush on letter. Allow to dry.

Use Fabric Fusion glue to adhere letter to center of burlap.

iLoveToCreate Ribbon Wrapped Nevermore Halloween Pumpkin

Wednesday, September 12, 2012

"Once upon a midnight dreary, while I pondered weak and weary,
Over many a quaint and curious volume of forgotten lore,
While I nodded, nearly napping, suddenly there came a tapping,
As of some one gently rapping, rapping at my chamber door."


iLoveToCreate Teen Crafts
Ribbon Wrapped "Nevermore" Halloween Pumpkin
Margot Potter for iLoveToCreate

Avalon and I literally squealed when we found this luscious Luxe ribbon at Michaels for half price!  Squee!  Then we grabbed a foam pumpkin and a sparkly black crow (also on sale) to make week's Teen Crafts DIY for iLoveToCreate.  We are both delighted with how this turned out and intend to whip up some more for our Halloween decor!  You can create endless looks depending on the ribbon you choose, a thick line of Aleene's Quick Dry Tacky glue makes quick work of this project. 

Here's how to DIY a ribbon wrapped Poe inspired pumpkin of your own:

Materials
Foam pumpkin
Luxe ribbon (we used dotted dimensional black and white flower and silver burlap ribbons)
2 stems of wired tinsel
Aleene's Quick Dry Tacky Glue

Tools
Scissors
Paintbrush to use as dowel

iLoveToCreate Teen Crafts: Divine Damask Locker Magnets

Wednesday, August 8, 2012

iLovetoCreate Teen Crafts
Divine Damask Locker Magnets

Miss Avalon started High School this week and I am understandably ferklempt.  When did my beautiful baby turn into a gorgeous young woman?  She's gorgeous, creative, sweet and smart as a whip to boot!  She's taking honors classes this year, which means she's going to be a busy gal for sure.  Proud mama?  Yes indeedy do! 

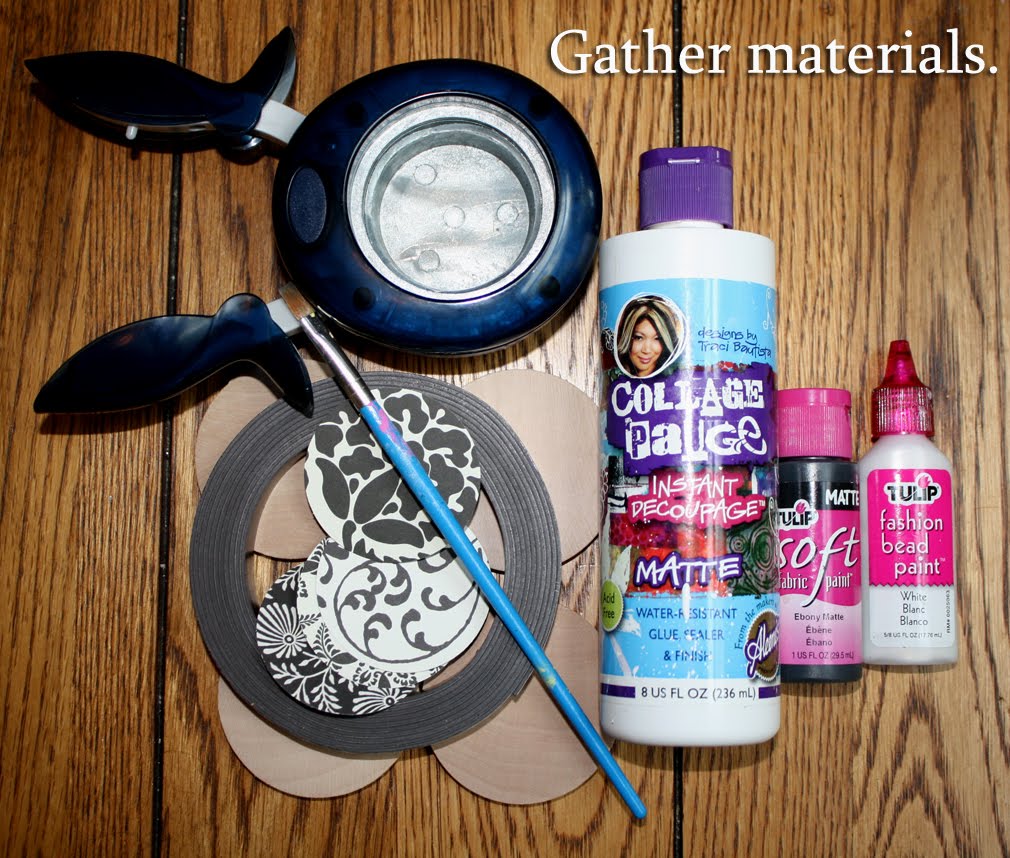
Have you seen the 'Locker Chic' accessories in the stores this season?  They have everything from mini chandeliers to book shelves in an array of styles and colors all designed to work in a school locker using magnets.  What fun!  Avalon got this lovely damask set at a big box office store and I thought she just might need some coordinating magnets.  These are so easy to make with scrapbook papers or even recycled magazine or greeting cards or printed pictures, just use some matte finish Collage Pauge and add some texture with Tulip Beads in a Bottle and attach Aleene's magnetic tape to the back and just like that, instant locker chic!  Tres jolie, n'est pas?

Materials
4 2 1/4" diameter 1/4" wide wooden circles
Various coordinating scrapbook papers (or any fun papers you wish to use)
Tulip Fashion Bead Paint or Beads in a Bottle White
Tulip Soft Paint Black
Traci Bautista's Collage Pauge Matte
Aleene's Magnetic Tacky Tape

Tools
2" Circle punch
Paint brush
Sponge brush

iLoveToCreate Teen Crafts: Carnival Canvas Covered Notebook

Wednesday, June 27, 2012
Carnival Canvas Covered Notebook
Avalon Potter (a.k.a. NGC-New Generation Crafter) for iLoveToCreate
"Teen crafted, mom approved."

Avalon has been obsessed with tribal prints all summer, from ikat to Native American to African inspired patterns and chevron, she's been showing me pictures of bedding, bags, clothes, shoes all emblazoned with an array of colors and patterns.  I trust a teen to know what's really cool and she's a really cool teen.  She wanted to make something fun to express her new found love of all things 'pattern-y', and we remembered Claudine Hellmuth's fabulous sticky back canvas.  By covering a basic notebook with layers of painted and embellished canvas, she made a truly fabulous one of a kind work of art.  This is so much fun to do with the vast array of paints from Tulip and Scribbles brands and with school just around the corner, a great way to help your teen personalize their supplies!

Materials
Notebook with hardback cover
Sticky back canvas
Decorative tape
Tulip 3-d fashion paint
Tulip fabric markers
Scribbles brush on fabric paints
Scribbles fabric paint brushes
Tulip sponge pouncers

Tools
Scissors

Cut canvas to fit cover of book, leave a 1" edge, cut edge at corners, fold over book cover and press to remove any bubbles on front of book.  Add a decorative tape accent to left side of canvas to conceal edge.


Create three strips of canvas. Peel and press on notebook at top, center and bottom edge.  Paint each stripe and the spaces in between a solid color and allow to dry.

Make two rectangular mini-canvas accents using dimensional paint in patterns, press together and adhere to front of notebook.

Use markers and paints to make a variety of patterns along strips.