Showing posts with label DIY Halloween. Show all posts

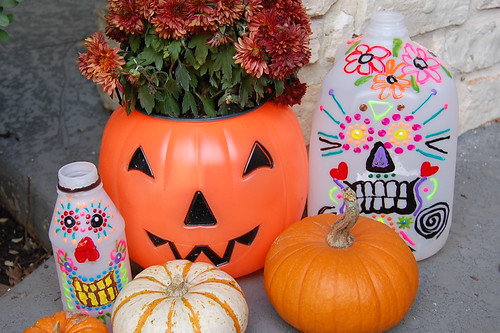
Recycled Day of the Dead Milk Jug Lanterns

Thursday, October 31, 2013
 

Read more »

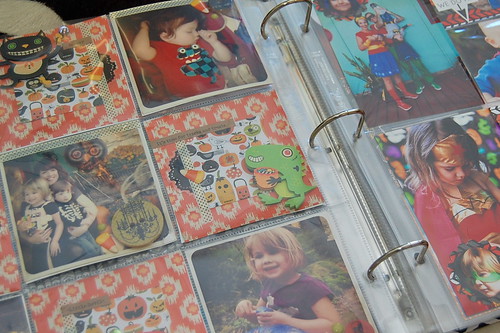
Halloween Themed Scrapbook

Friday, October 25, 2013

Read more »

DIY Cat Ear Headband

Wednesday, October 23, 2013
Last winter while visiting Urban Outfitters, Avalon and I were both smitten with a fabulous rhinestone accented cat ear headband.  Avalon liked it so much, she wanted to make one for herself.  We put our heads together to devise a way to make one using black felt, Tulip Glam-it-up crystals in black and a store bought headband.  A thick craft wire to give it some stiffness and some Aleene's Fashion adhesives helped to bring it all together.  
and
Read more »

DIY Witch Hat

Monday, October 21, 2013
 The Halloween decor isn't quite complete here at Casa de Potter, I've still got a few crafts up my sleeve.  This DIY Witch Hat was so fun and easy to create using an inexpensive paper mache form from a craft store, black Tulip Soft paint, black Tulip glitter and some ribbons, trims, feathers and bits I had in my studio.  
Read more »

Haunted Halloween Pillow How-To

Thursday, October 10, 2013

Read more »

DIY Screen Printed Good Witch Tote Bag

Wednesday, October 9, 2013
 Are you a good witch or a bad witch? You'll definitely be a Chic Witch when you screen print and embellish your own faBOOlous DIY Good Witch Tote Bag!  The Tulip Screen-It Machine makes it super easy to custom create and burn your own screens that you can use to print on all sorts of surfaces.  Add a little Tulip Beads in a Bottle glitter accent, some seasonally apropos decorative trims and you'll be absolutely enchanting.
Read more »

Wee Witchy Woman DIY

Thursday, October 3, 2013
 
A few years back my buddy Vickie Howell made a witch costume for my daughter Tallulah. I have several framed around the house and even once made a Wee Witch Shrine with one of the photos. 5 years later I am still working that photo shoot. I've always wanted to add glowing eyes to some of my Halloween photos so today I did.

Read more »

Fuzzy Monster Snap Bracelets

Wednesday, September 25, 2013

As soon as I spied these fun fur snap bracelets in the Halloween aisle at Target, I knew exactly what I wanted to do with them.  They're only $1.00, so I scooped up three!  Using various sizes and colors of googly eyes, some craft felt scraps I had in the studio and three types of Aleene's adhesives I made an armful of fuzzy monster snap bracelets that are sure to scare up some fun!  These are so easy and inexpensive to create, they'd make a great craft project for kids or teens.  (Though I'm a fully grown woman and I would rock these in a hot second. 
Read more »

DIY Halloween Paint Blob Monster T-Shirt Tutorial

Sunday, September 15, 2013


Read more »

DIY Feather Painted Pumpkin

Wednesday, September 11, 2013
I have become obsessed with foam pumpkins over the past few years.   I'm not alone, as pumpkin crafts have taken off on the internet!  They're so much fun and so simple to DIY.  Every different technique and treatment lends a totally different appeal.  This feather painted pumpkin is the perfect companion to the Goth Glam projects I created last year.  You'll have a blast using feathers to paint these bold graphic strokes, a technique you can use for fabrics, shoes, furniture and get a very chic mid-century modern inspired effect.  Try using different sizes of feathers and different colors of paints.  You can use this technique to make faux marble as well with a little more squiggling of the feathers.  True Craft Confession: I initially planned to accent the ridges with only the black sparkly ribbon, but I ran out mid-pumpkin and the gold chains came to the rescue.  I think they work here nicely, but you can opt to use all black instead.
Read more »

Hooty Owl Hallowe'en Cards

Wednesday, October 24, 2012


Hooty Owl Hallowe'en Cards
Margot Potter for iLoveToCreate


Avalon has been busy as a little bee getting straight A's in her honors classes!  Can you say proud mama?  I can!  Go Avalon!  So I stepped in to whip up some fun and festive Hooty Owl Halloween cards today.
These are so easy to make and you can layer them however you please with whatever papers and embellishments you have at hand.  The lenticular owl came off a panel on a Puff's tissue box, which I simply could not throw away!  The other owl is a permission free Art Deco era image from Dover to which I've added text and is here for you to download if you'd like to use it.  I can't resist the urge to add googly eyes whenever possible.  Teens can use these for party invitations or greeting cards or even frame them for room or locker decor.  Fun, fast...and fabulous!


Materials  Hooty Owl Upcycled Hallowe'en Card
Lenticular owl image from Puff's tissue box
Cardstock
Patterned coordinating papers
Jute or hemp twine
Clear acrylic tile
Large orange rick rack or other ribbon trim
Glam-it-Up crystals
Googly eyes
Tulip fabric marker in black
Aleene's Tacky Glue
Aleene's Tacky Dot Runner
Aleene's Jewel It Glue

Tools
Paper trimmer
Scissors
Bone folder

Remove image from tissue box.  Create a frame for image out of patterned scrapbook paper using paper trimmer or scissors.  Cut cardstock with a small border around edge of framed image, fold and crease with bone folder, marker or scissor handle.  Adhere image and frame to front of card using tape runner.  Cut rick rack to fit along the bottom edge of framed window.  Adhere with tape runner.  Cut twine to fit edges of frame, adhere with Tacky Glue.  Attach patterned paper behind acrylic tile using tape runner.  Cut a small piece of paper to fit center of tile and adhere to front of tile with tape runner.  Write Boo! on front of paper with marker.  Use Jewel-It glue to attach crystals to right edge of tile.  Attach googly eyes to owl's eyes using Jewel-It glue.  Use marker to add details to frame.


Materials Hoot Hoot Card
Hoot, hoot owl printed on white paper
Coordinating scrapbook papers
Orange cardstock
Plastic rhinestone accents
Googly eyes
Aleene's Tacky Dot Runner
Aleene's Tacky Glue
Tulip fabric marker in neon orange

Tools
Paper trimmer
Scissors
Bone folder
FREE DOWNLOAD!


Print owl image.  Cut, fold and crease cardstock.  Cut coordinating scrapbook papers for background and right edge of image.  Use marker to add orange accents to owl image.  Adhere paper layers to card with Tacky Dot Runner.  Use Tacky Glue to adhere faux rhinestones on bottom and top edge of owl image.  Attach googly eyes to center of owl's eyes with Tacky Glue.
This blogger was compensated and provided products for this post.  All opinions are 100% my own!

10 Quick & Easy T-shirt Halloween Costume Ideas!

Tuesday, October 23, 2012

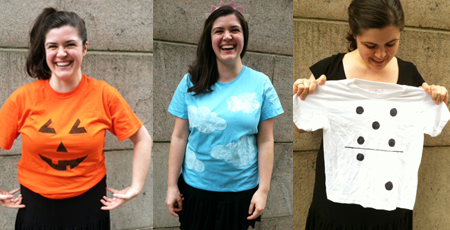
Following up last year's popular list of 10 Quick & Easy T-shirt Halloween Costumes, here is another collection of ten DIY costumes on the fly. From the cinematic to the everyday, from the historical to the commercial, from the sweet to the oh-so-punny (scroll down to #10).... But let's start with a classic.
 
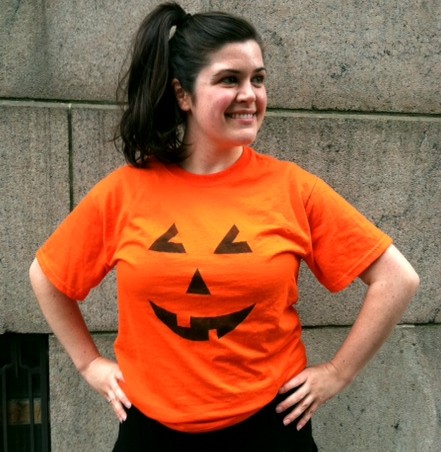
JACK-O-LANTERN T-SHIRT COSTUME

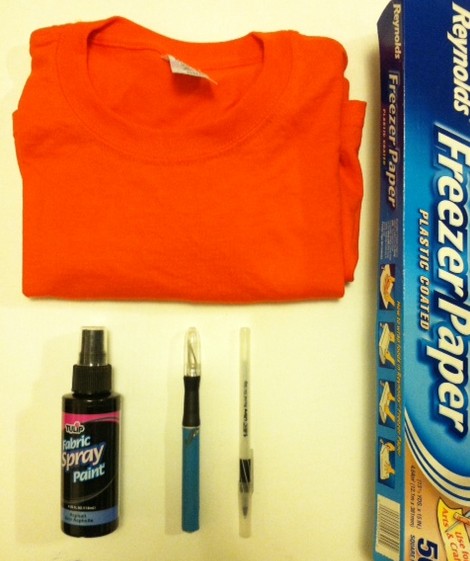
Materials:
-Orange T-shirt
-Tulip Fabric Spray Paint (in black)
-Pen
-Freezer Paper
-Craft knife and cutting mat
-Warm iron
-Newsprint paper


Make it:
1.
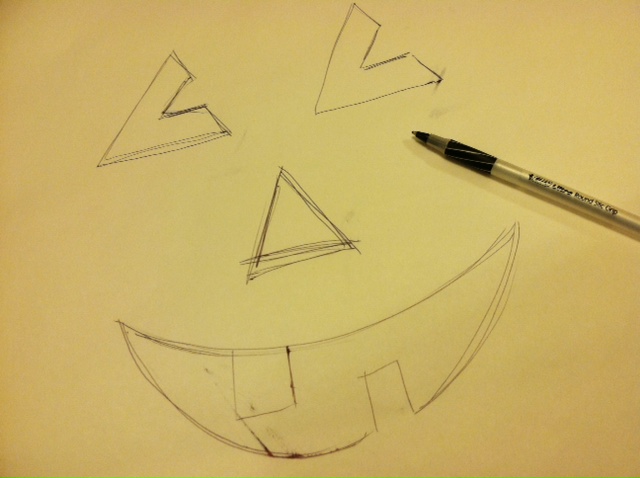
Use the pen to sketch out jack-o-lantern features on a sheet of freezer paper.
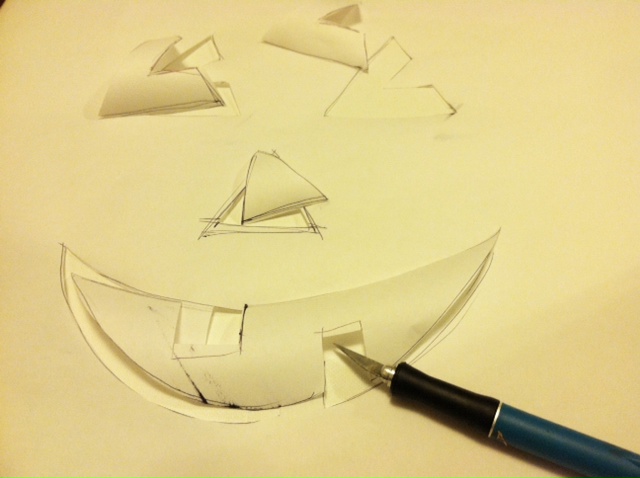
2. Use the craft knife and cutting mat to cut out the features.
3. Iron the freezer paper stencil onto the front of the T-shirt. Insert a sheet of newsprint between the layers of the shirt to prevent the paint from bleeding through.
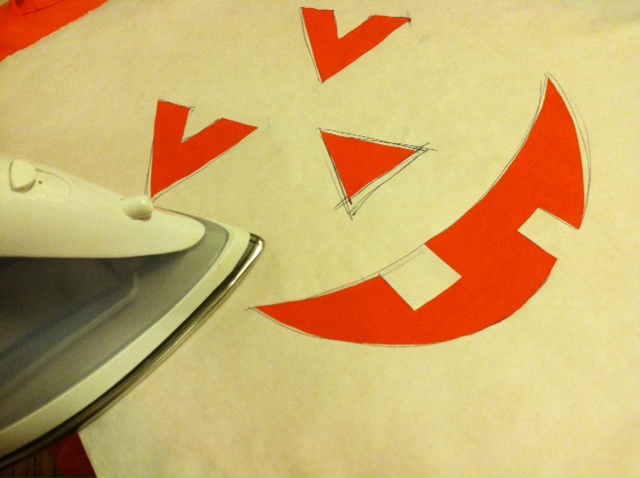
4. Mask the parts of the T-shirt that are still visible, and spray over the stencil with black paint.
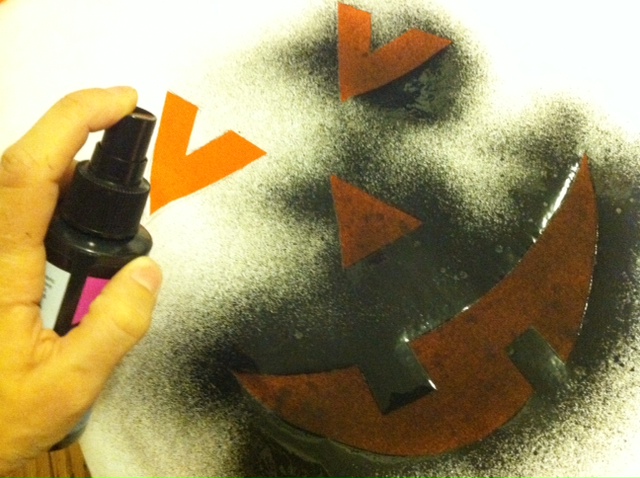
5. Let the paint dry briefly, then peel up the stencil.
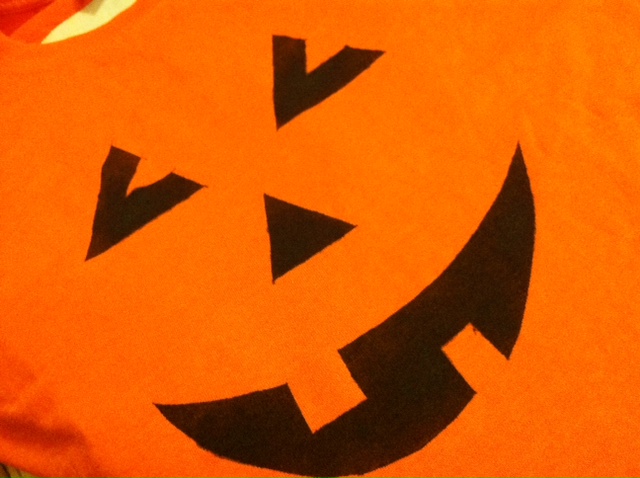
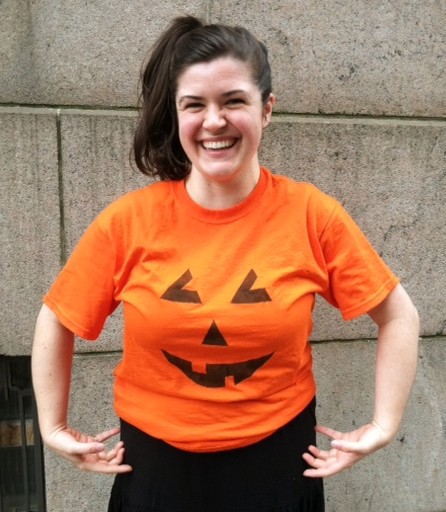
6. Let the paint dry completely, then try on the T-shirt and go find a pumpkin patch to haunt!
---
WITHOUT FURTHER ADO, HERE ARE 10 COSTUMES TO MAKE WITH T-SHIRTS (including the JACK-O-LANTERN!)

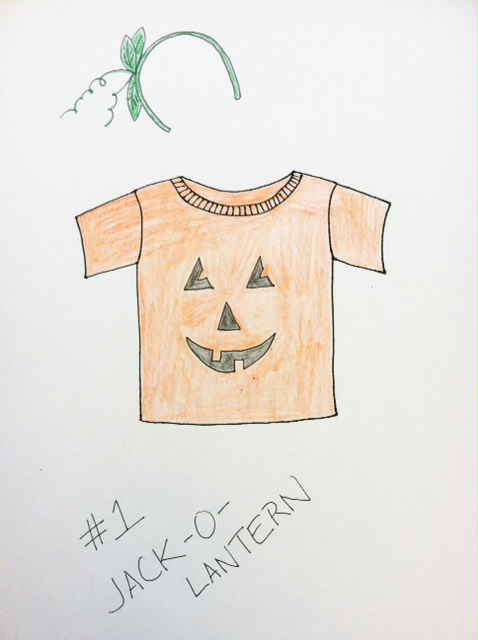
#1 Jack-o-lantern. As shown above, that pumpkin patch classic. Black paint on an orange T-shirt. Optional: Accessorize with a green vine and leaves headband.
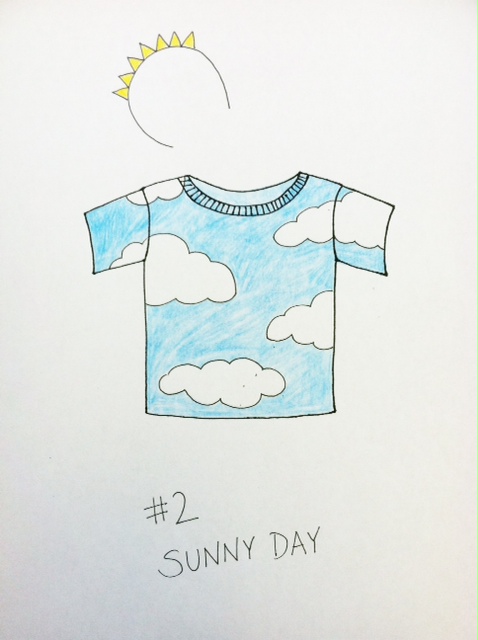
#2 Sunny day. Paint white clouds on a pastel blue T-shirt, or stick pillow stuffing on the T-shirt. Inspired by one of our readers, Emily A. (not to be confused with Emily P., our model for this post!), who used a variation of the Mohawk Mo' Rock hat (from Generation T: Beyond Fashion) as the headpiece. We used this more recent accessory. And hey, you can always use the costume to moonlight in Ben & Jerry land.
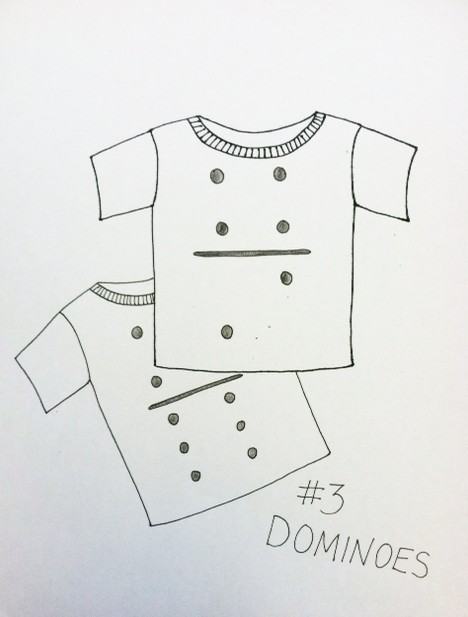
#3 Dominoes. A fun and very easy group costume (just leave the ears and tail at home so you don't get mistaken for a dalmatian) -- use black fabric paint or black permanent marker on a white T-shirt. And if you get tired at any point while wearing the costume, simply lie down adjacent or end-to-end with a matching number on  a friend's shirt!
#4 Strawberry. Paint yellow seeds on a red shirt, and use green T-shirt scraps to fashion a stem with leaves to sit a top your head. Go solo or meet up with friends to make blueberries, watermelon -- a whole fruit salad!

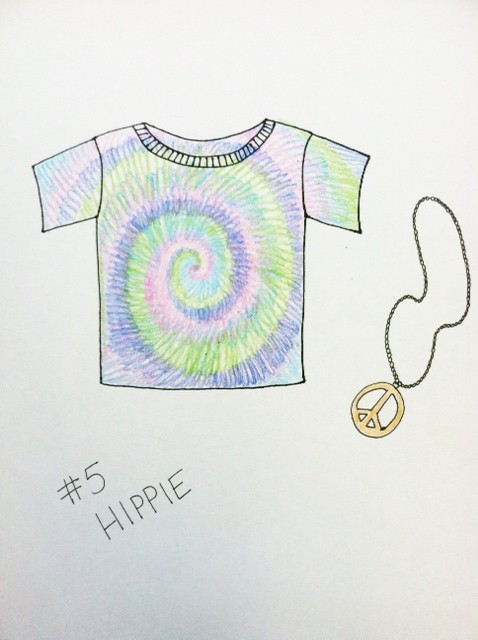
#5 Hippie. Tie-dye a T-shirt, then pair it with bell-bottom jeans, a headband, and any other . (Note: You have to schedule in additional drying time with this one.)
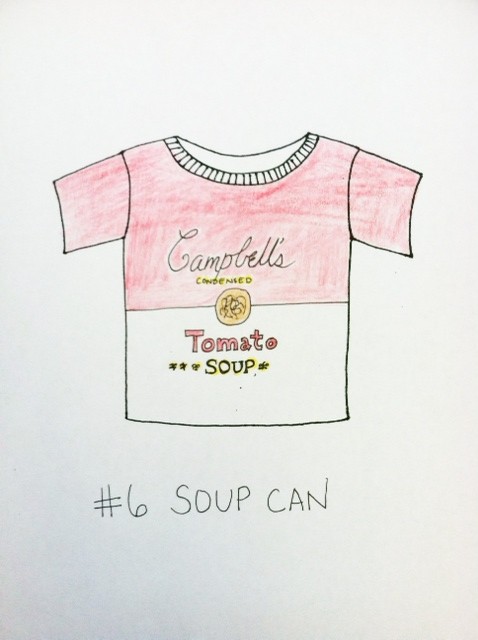
#6 Soup can. Start with a plain white T-shirt and use a black permanent marker, stencils, and red and yellow paint to embellish it. Then convince a pal to go as Andy Warhol!


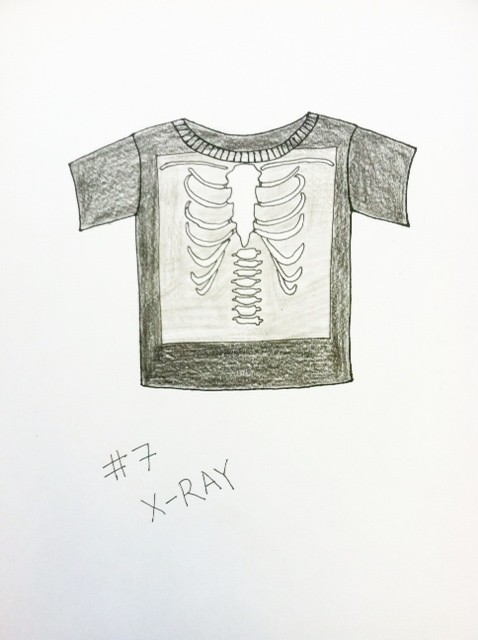
#7 X-ray. A great way to show some skeleton on Halloween, use white paint on a black T-shirt (and the painted parts will show up gray.


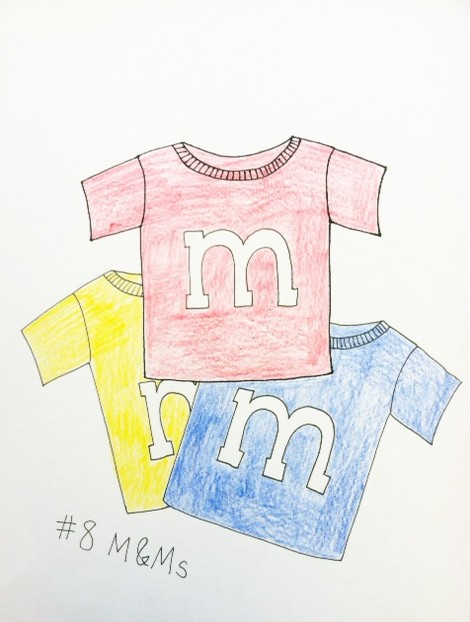
#8 M&M candies. Paint white lowercase 'm's onto red, yellow, blue, green, orange, and/or brown T-shirts. Then really go the extra mile and wear white gloves and white sneakers. Gather up a group of friends for a whole handful of candies. Note: This approach also works for Skittles!'


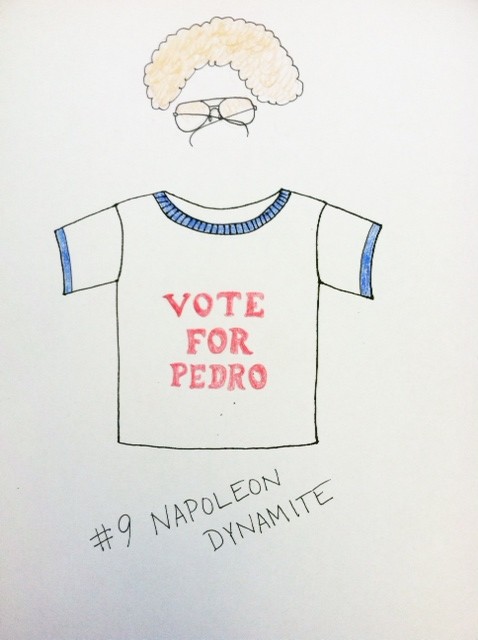
#9 Napoleon Dynamite. Based on the indie hit, paint blue edges on a white T-shirt to mimic a ringer tee; paint or iron on letters to spell "Vote for Pedro." Top off with some wiry glasses and a curly wig.
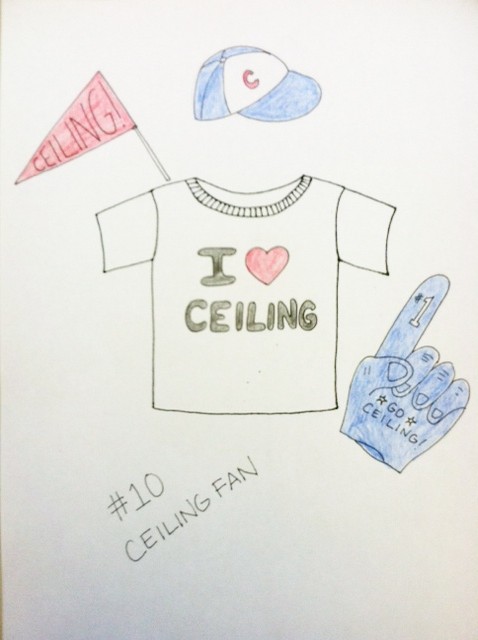
#10 Ceiling fan. Heh. Number 1 fan of the ceiling. Get it? Get it? Use fabric markers or paints on a white T-shirt -- and plenty of props!

---
Happy trick-or-treating everyone! Here's to last-minute costumes that are as easy as 1, 2, 3.

MAYA IN THE MOMENT: Sally (Nightmare Before Christmas) Facepainting Tutorial!

Wednesday, October 17, 2012

Hello! Since Halloween is just around the corner, and everyone is doing face painting tutorials....I thought I should do one! This is Sally from Nightmare Before Christmas! I love Tim Burton, and when I was little I asked my parents to paint me as the Corpse Bride. But Nightmare Before Christmas is the original TB classic, so much respect to my girl, Sally!


LINK


SUPPLIES:


First I mixed the white and the blue and tested it on my hand. I love that these paints are super creamy and you can blend colors really easily.

You want to pull up a picture to use as a guide! I used this one:

As far as the base coat - I added a dash of green to get a teal undertone. Next I covered my whole face using a make-up wedge (you can also use a soft paintbrush), and started with the painting the eyes and lips. For the eyes, create two large white ovals that go around your eyebrows and under your eyes as well. you can paint on top of the blue, or do the white separate from the blue.

Next use the deep red to create curvy lips, outline them in black, like Sally. For face painting, you always want to exaggerate the details to look more dramatic!

 Next, I had my dad help me with the eyes and eyelashes. Since I couldnt see....haha :) Paint on the stitches on each end of your mouth and up the side of the face. Don't forget the eyelashes and eyelid contouring, use a darker shade for that!

I could  have left it like this, but I wanted to do something cool with my closed eyelids, so we painted dots, again like Sally! Once you're done, paint your neck a little bit darker blue and add the stitches there too. 

You can make a maroon wig out of yarn or buy one at the costume shop. As far as the rag dress, look at the thrift store for a patchwork style. Or you could take a solid dress and use Fabric Fusion and glue fabric swatches all over it. 

Lastly add the last painted on stitches and you're done!

Here is my other Halloween facepainting tutorial!

Thanks for checking out my project! 
Come visit me on Facebook - http://facebook.com/mayainthemoment