Roving Reporter Mr. Tacky Glue meets Pattiewack at the 2011 CHA Show!
Monday, January 31, 2011You've never seen a reporter quite like this! Haha. Check out Mr. Tacky Glue chatting it up with Pattiewack!
Visit us on Facebook!
Craft on!Click here for today's daily giveaway!
Rebel Rider Skateboard Bank

Save your money in a bank that’s bad to the bone! The Duncan® Oh Four™ Skateboard Bank looks smokin’ with Concepts® Underglazes and your creativity.
Materials List
- Home Decor Bisque Designs

Skateboard Bank 8" x 4" x 2.625" - Duncan® Concepts® Underglazes for Bisque and Majolica

CN 022 Bright Saffron 
CN 052 Bright Tangerine 
CN 253 Dark Black 
CN 331 Light Olive - Signature Brushes

SB 803 No. 4 Liner 
SB 807 No. 6 Fan Glaze 
SB 811 No. 8 Round - pure•brilliance® Clear Glaze
-
Miscellaneous
- Pencil
- Foil or foam plate for palette
- Paper towels
- Graphite paper
- Container for water
- Potter’s sponge
- Toothbrush or stiff bristled brush
Instructions
- Wipe ware with damp sponge to remove bisque dust.
- Place graphite paper between bisque and pattern. Position top of skull design over the coin slot. Trace over pattern to transfer design onto bisque. Remove pattern and graphite paper.
- Using the No. 8 Round, paint Light Olive around eyes, nose and teeth. Fill in larger areas of skull using the Fan Glaze brush. Let dry then paint two more coats of the Light Olive on the skull, letting dry between coats. Let dry.
- Paint in flames with three coats of Bright Saffron, letting dry between coats. Referring to photo, brush a coat of Bright Tangerine over the flames, starting at the base of the skateboard and working the color up toward the tips of flames. Color should be heavier at the base and lighter as you move toward the tips.
- Paint the flames on the wheels as well. Let dry.
- Using the No. 4 Liner, paint a Black line around skull eyes, nose, teeth and around flames. Fill in spaces with Black. Let dry and repeat with two more coats, letting dry between each. Repeat on wheels.
- Use the Liner to paint a crack on skull’s head emerging from the coin slot. Refer to photo.
- Dip toothbrush or a stiff bristled brush into the Black and use finger to flick bristles to spatter paint over skull. Let dry.
- Use Fan Glaze to brush two coats of Pure Brilliance® over entire piece, letting dry between coats. Let dry.
- Stilt and fire to witness cone 06.
Visit us on Facebook!
Craft on! Click here for today's daily giveaway!
iLoveToCreate at CHA Winter 2011 Tradeshow
Saturday, January 29, 2011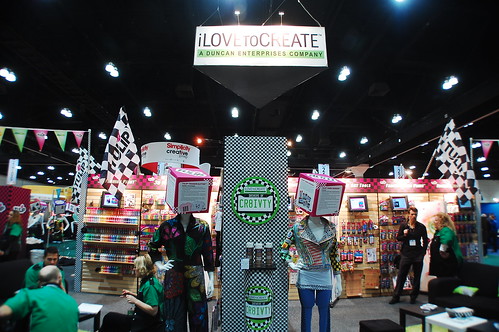
CHA has been a blast so far! We wanted to share a look into our booth, our new products, and some fab projects!
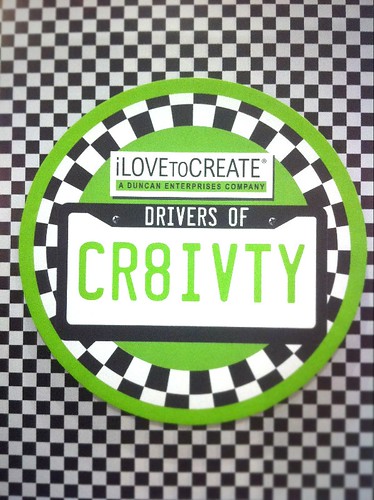
Our theme is "iLoveToCreate: Drivers of Creativity"! It is inspired by all things racing and driving!
We have been showcasing our new products: Tulip® Body Art, Tulip® Beads in a Bottle, Aleene's® Dry Adhesives, and our new Tulip® Fashion Glitter Shimmer Fabric Paints & Sheets!
Here's a few fun photos from the past 2 days of our tradeshow!
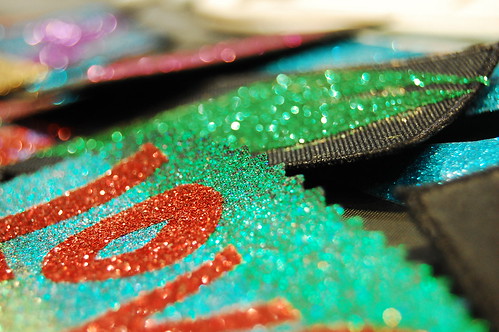
Here's a detail of the new Tulip® Fashion Glitter Shimmer Paints and Shimmer Sheets at work. So sparkly and radiant!
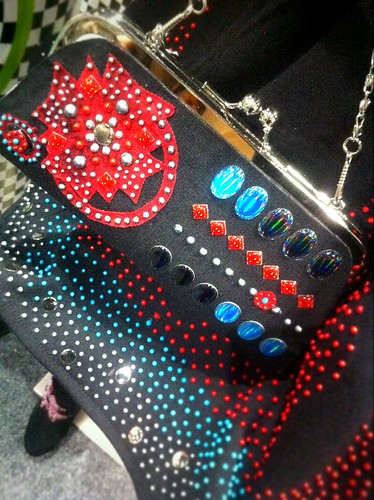
Tulip® Beads in a Bottle purse and dress detail by Pattiewack.
Pattiewack doing Beads in a Bottle.
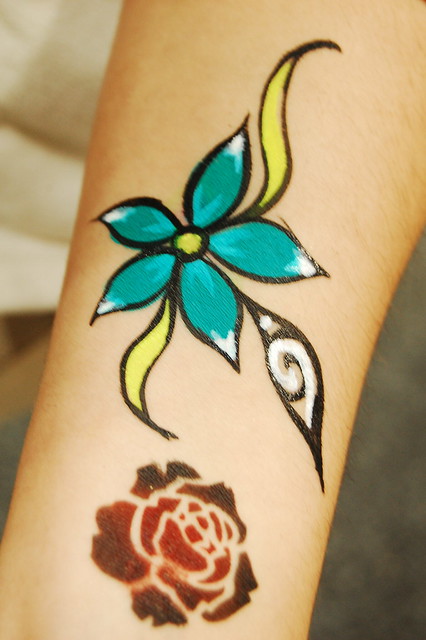
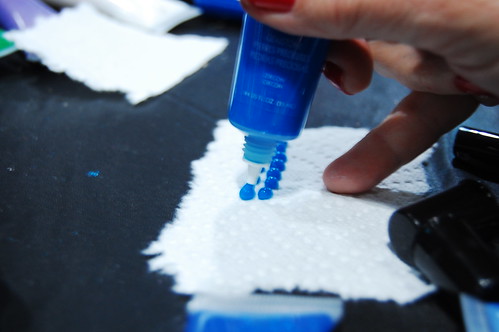
Tulip® Body Art tattoos!
Visit us on Facebook!
Craft on!Click here for today's daily giveaway!
Crafty Chica demoing our new Tulip® Fashion Glitter products at CHA Wint...
Live from CHA! Check out some of our new fab Tulip® Fashion Glitter products!! Fun, fun, fun! Don't you just love the sparkle?
Visit us on Facebook!
Craft on! Click here for today's daily giveaway!
Don't Rain on My Parade Umbrella
Friday, January 28, 2011
Materials List
- Tulip® Fabric Markers™

26256 Primary - Tulip® Multi-Surface Stencils™

Block Alphabet - Tulip® Surface Cover™
- Tulip® Glam-It-Up!™ Fashion Art Tweezers™
- Tulip® Soft Fabric Paint™

BI15784 Glacier White - Tulip® Cordless Heat Setting Tool™
- Tulip® Glam-It-Up!™ Iron-On Crystals™

25619 Pink -
Miscellaneous
- Scissors
- Umbrella
- Makeup sponge
- Foil or paper plate
- Masking tape
Instructions
- Cover work surface with Surface Cover. Open umbrella and place on prepared surface.
- Cut out letters from Block Alphabet Multi-Surface Stencil to personalize.
- Position stencil onto bottom edge of umbrella as shown and hold in place with masking tape.
- Squeeze a puddle of Glacier White Soft Fabric Paint onto foil or paper plate. Gently dab makeup sponge into paint and then onto stencils. Remove letter stencils and repeat step around umbrella. Refer to photo. Let dry.
- Use Black Fabric Marker from pack to outline each letter for a bold finished look. Let dry.
- Use Fashion Art Tweezers to position crystals around name on each section of umbrella.
- Adhere in place using Cordless Heat-Setting Tool and following instructions on package.
Visit us on Facebook!
Craft on! Click here for today's daily giveaway!
Peace, Love, Sand and Mushrooms
Thursday, January 27, 2011I have to give my mom a lot of credit on this project. She came up with the idea and executed most of the sanding. We both have a soft spot for sand art, vintage crafts and polka dotted mushrooms (check out how to make your own Polka Dotted Mushroom Stool and Terrarium Picture Frame). Going to college in the 60's mom has never been able to completely shake that love of mushroom art and today I am especially thankful for that.

SUPPLIES
Small board, canvas or piece of Masonite
Sand
Pen

Using some groovy vintage embroidery patterns my mom drew an image of a mushroom and some bugs. In retrospect a more simplistic design would have probably been easier, but we are always up for a crafty challenge.

One color of sand at a time we painted with glue and then sprinkled sand on top. My mom said this project reminded her of Vacation Bible School it reminded me of my Black Eyed Pea Owl. We outlined the mushroom and frame in black sand to make it pop.

It took a few days and a lot of sand, but eventually the picture was finished and looked just like something you would see in a college dorm in 1974. In other words it turned out perfect! My sandy little retro mushroom is the perfect piece to set out and welcome spring. Now what to do with all that left over sand? I have a whole book on sand painting for terrariums that has been calling my name.

Visit us on Facebook!
Craft on! Click here for today's daily giveaway!
Stylish Storage

Materials List
- Tulip® Sticky Fabric Stencils™

23265 Floral - Tulip® 3D Fashion Paint™

65407 Silver Metallics - Tulip® Soft Fabric Paint™

BI15801 Ebony -
Miscellaneous
- Offset plastic palette knife
- Contact paper
- Paper towels
- Foil
- Low-tack masking tape
- Me and My Box canvas box – 14” x 14” x 14”
- Pencil
- Wedge makeup sponges
- Blow dryer (optional)
Instructions
- Open box. To create stripe along top edge, place two lengths of tape about ½” apart along top edge. Run a fingernail along inside edges of tape to prevent seepage.
- Squeeze a puddle of Ebony Soft Fabric Paint onto foil. Tap flat end of wedge sponge into paint then pounce excess off onto foil. Pounce an even layer of paint between tape strips. Apply two thin layers rather than one heavy layer, letting dry between coats. Remove tape then use blow dryer to dry if desired.
- Repeat steps for bottom edges around entire box. Refer to photo.
- Remove desired floral design stencil from package. Remove clear plastic from blue backing, making sure to remove all white pieces from design. Place on side of box where shown. Press finger along inside edges to seal from seepage. The design can be made smaller by using tape to mask off lower or top half of design. Mask off top half then apply designs to sides of box. Mask off other half of design and add to box.
- Squeeze a puddle of Silver Metallic 3D Fashion Paint onto foil. Scoop up a small amount of paint with palette knife then “frost” paint across stencil, leaving a thin, even layer and making sure not to go past edges of stencil. Add more paint as needed until design is filled in. Carefully lift stencil from box and place paint side down on paper towel to remove excess paint.
- Reposition stencil and repeat step with all sides. Let thoroughly dry.
- Squeeze a puddle of Ebony Soft Fabric Paint on foil. Position stencil where desired. Pounce paint into stencil then carefully remove. Repeat as desired.
- Place a piece of shelf paper over oval pattern then trace onto paper. To create stencil, carefully cut out center, leaving sides intact.
- Remove paper backing from stencil then place where desired. Press along inside cut edges. Pounce in two thin coats of Ebony paint. Let dry.
- Use pencil to freehand write desired word in center of oval. Use Silver Metallic to trace over word and to create small dots around oval. Let dry.
Visit us on Facebook!
Craft on! Click here for today's daily giveaway!
Be Prepared Scout's Patch
Wednesday, January 26, 2011
Materials List
- Tulip® Sticky Fabric Stencils™

23565 ABC's - Aleene's® Original Tacky Glue®
- Tulip® Soft Fabric Paint™

BI15786 Sunshine Yellow -
Miscellaneous
- Cosmetic sponge
- Hole punch, small
- Paper towels
- Low tack masking tape
- Stiff felt, kelly green, yellow, 12”x18” each
- Ruler
- Pencil
- Paper, 8”x10”
- Heavy book
- Clear acetate sheet, 5” x7”
- Craft knife
- Scissors
- Foil
- Natural leaf, approx. 1¼” x 3”
- Cord, 1 yd, color of choice
Instructions
- Draw a 3½”x10” shape onto Kelly green felt. Cut out.
- Carefully fold in half to make a 3½”x5” piece. Make crease at fold. Open up. Lay flat onto work surface.
- Draw a 2”x3” rectangle onto paper. Cut out for template for pouch window. Center shape onto one end of felt piece 1” from top. Trace. Carefully cut out, using scissors or craft knife with adult supervision.
- Draw 2¾”x4” rectangle onto yellow felt. Cut out. Draw 2¼”x ½” rectangle onto acetate. Cut out.
- Make sure leaf is dry. Place between layers of paper towel. Press inside a heavy book to flatten.
- Center leaf onto yellow rectangle. Lightly glue edges into place, using Aleene’s® Original Tacky Glue.
- Carefully draw a fine line of glue around opening for window, ¼” from edges. Lay acetate over window. Press gently to adhere.
- Center leaf onto inside of window. Glue edges of yellow felt onto green felt. Secure edges, using masking tape.
- Arrange stencils to spell name, making sure name will be upright and on outside when pouch is folded. Apply masking tape to frame outside edges of stencils to keep paint from getting outside stencil.
- Shake bottle of paint well. Pour a puddle of Tulip® Soft Fabric Paint™ Sunshine Yellow onto foil. Dab cosmetic sponge into paint. Dab excess paint onto foil. Sponge paint into stencil openings. Let dry. Apply another coat of paint. Let dry. Remove stencil and tape.
- Fold pouch at crease, making sure leaf and name are on outside. Draw a dot ¼” from upper and lower edges along each side. Draw a dot at center, between dots. Repeat drawing dots centered between dots until there are nine dots along each edge. Draw four dots along folded edge. Punch a hole at each dot, punching through both layers.
- Apply tape to end of cord. Weave cord through holes, centering pouch on cord. Knot ends together.
Visit us on Facebook!
Craft on! Click here for today's daily giveaway!
T-shirt Book for Baby!
Tuesday, January 25, 2011I like projects that help me use up the scraps that threaten to overwhelm my craft space. I also like projects that can be gifted. So this one's a win-win: The T-shirt Baby Book is perfect for using the T-shirt sleeves that have been cut from another project (like a tank top) and it makes a great baby gift. Did I mention it's personalized? Once I picked the recipient (my friend's new baby, Elliot), I enjoyed figuring out what words to have each letter of his name represent (in other words, what could I illustrate easily?). I settled on: E = earth, L = light, L = love, I = ice cream, O = orange, and T = tree. No pictures of baby Elliot and his new book just yet, so the book is presented by these two cute corduroy pals.

Materials:
-T-shirts or T-shirt scraps (in multiple colors)
-Scissors
-Ruler
-Craft knife
-Cutting mat
-Lightweight cardboard (cereal, snack, or tissue boxes work great!)
-Aleene’s Fabric Fusion Permanent Dry Cleanable Fabric Adhesive
-Tulip 3D Fashion Paint Blazin' Brights (variety of colors)
-Clothespins (optional, for clipping in place while gluing/drying)

Make it:
1. Measure and cut one more 4" x 4" square of cardboard than there are letters in the baby's name. (Example: Elliot has 6 letters, so I cut 7 squares.) Then cut as many 5" x 10" rectangles from the T-shirts as there are cardboard squares.
2. Squeeze a small ribbon of glue along one long side of one of the fabric rectangles. Then fold over the edge about 3/8" and press. Repeat on the other long side.

3. Find the center of the rectangle and line up one edge of one of the cardboard squares. Squeeze a small ribbon of glue along the fabric at the top and bottom edge of the cardboard.

4. Fold the fabric in half, sandwiching the cardboard in between the layers. Press the glue into the edges to seal them. Squeeze another ribbon of glue against the cardboard and between the fabric layers on the open side. Press it closed.

5. Repeat steps 2 through 4 until all of the cardboard squares are covered. These are the pages of the book.

6. Use the air-soluble ink pen to begin outlining the letters and images on the book pages. (Or, skip this step and freehand them with paint--I outlined the earth, but skipped to painting for them rest.)

7. Color in the lines with fabric paint!

8. Paint all the right-folio pages first (including the front cover), let them dry, then paint all the left-folio pages, making sure you match up all the letters and images.

9. Trim the raw edges (the side of the pages that will go into the binding) down to 1/2". Then squeeze a line of glue along one of the edges you just trimmed and press it against the adjacent page. Keep gluing and adding pages (in the correct order!) until the book is complete.

10. Let dry completely. Optional: Clip the binding closed with clothespins while it dries.

11. Then it's story time! E is for earth. L is for light. L is also for love. I is for yummy ice cream. O is also for a delicious orange. T is for Tree (and Totally Terrific and....T-shirt book!).


Visit us on Facebook!
Craft on!Click here for today's daily giveaway!
Glitter Headband

Glitter has always been my absolute favorite. I love anything that sparkles, gleams, or shines! The way that glitter captures the light intensifies color and that was the inspiration for these "tone on tone" headbands. They are great accessories that are both sophisticated and sparkly!
I was able to make super intricate designs without any fuss. Now I'm addicted and I've made a headband in every color!
I was able to make super intricate designs without any fuss. Now I'm addicted and I've made a headband in every color!
Materials List
- Tulip® Fashion Glitter™

Jewels - Tulip® Sticky Fabric Stencils™
23265 Floral - Tulip® Fashion Glitter Bond™
-
Miscellaneous
- Thread
- Scissors
- Fabric, 9" x 20"
- Sewing machine
- Scrap paper
- Elastic
Instructions
1. Cut the fabric into a rectangle, 20" long and 9" wide.2. Fold the fabric in half lengthwise, set the sewing machine to a straight stitch, and sew the folded fabric closed along the long edge.3. Turn the fabric inside out to hide the seam, and then press it flat with an iron.4. Remove the backing from the Sticky Fabric Stencil. It has a slightly sticky back that will hold it perfectly in place. Center it onto the fabric and gently press it into place with your hand.5. Squeeze the Glitter Bond glue onto the sponge that is included in the package. Use it to coat the stencil with a thin layer of adhesive. Press the glue onto the fabric. Try not to smear it under the stencil.6. This is the best part! Cover the glue with the Fashion Glitter. I chose purple on purple, but you can use any color, or colors that you like! Sprinkle the glitter everywhere, then set it to the glue by tapping it down with your fingers.7. Allow the glitter to set for a few minutes before you shake loose the extra. Shake loose over a scrap of paper. Then gently and slowly lift the stencil up to reveal the perfect design. Let the glue fully dry for 2 hours, but don't wash the fabric for 72 hours!8. When glitter is dry enough to work with, the fabric can be sewn into a headband. Cut 4" of elastic. Fold down the edges of the fabric, about 1/4". Put the elastic into the ends of the head band, and stitch it together using the sewing machine.
Visit us on Facebook!
Craft on! Click here for today's daily giveaway!
Friendly Monster Pillow
Monday, January 24, 2011
Materials List
- Aleene's® Fabric Fusion® Permanent Dry Cleanable Fabric Adhesive
-
Miscellaneous
- Sewing machine
- Sewing needle
- Thread
- Pillow form, 16” x 16”
- Felt: fuchsia, yellow, turquoise, white, black
- Straight pins
- Scissors
- T-shirt, adult large, lime
- Paper towels
- Fuzzy yarn, lime
- Wax paper
-
Patterns
Instructions
- Cut sleeves from shirt. Cut up one side of shirt, creating a long strip of fabric.
- Lay strips of wax paper equal to length of fabric, onto work surface. Lay fabric right side down onto wax paper.
- Run a thin line of Fabric Fusion along hemmed edge of fabric. Press yarn into glue. Cut yarn even with end of fabric. Repeat procedure, placing lines of glue a scant ½” apart and working over armhole openings, until fabric is covered with yarn. Let dry 30 minutes. Carefully turn wax paper over. Remove wax paper. Let dry thoroughly.
- Pin patterns onto desired color of felt. Cut out number indicated. Some pieces will be double thickness for sturdiness.
- Lay a paper towel onto work surface. Squeeze thin lines of Fabric Fusion onto one side of a felt piece. Use finger to smooth glue to a thin, even layer, over entire piece, to edges. Press matching section into place. Smooth with fingers. Repeat procedure for all double thickness pieces. Let dry thoroughly. Trim edges if needed.
- Cut fabric in half crosswise, creating two squares. Pin fabric right sides together. Pin pattern into place. Cut out. Remove pins.
- Pin squares together so that lines of yarn run horizontally. Pin antenna into place at top of square, arms onto sides and feet at bottom, placing bottom of piece at cut edge of square and top of piece toward center of square.
- Machine stitch a ½” seam around all sides.
- Cut a 7” long slit between two strips of yarn on one side of pillow. Insert hand through slit. Carefully remove all pins holding pieces in place. Trim seams and corners. Carefully turn inside out, pushing out corners with finger.
- Carefully insert pillow form. Enlarge slit if needed.
- Thread needle with double strand of thread. Whipstitch opening closed.
- Arrange sections for eye. Glue into place. Glue eye and mouth onto pillow. Let dry.
Visit us on Facebook!
Craft on! Click here for today's daily giveaway!
Icing on the Cupcake Pillow
Friday, January 21, 2011
Designed by Kathy Cano-Murillo
Whether in visual or edible form, cupcakes bring sweet smiles all around. Here’s an easy way to add a sweet touch to a girl’s bedroom. This project makes for a great activity for mothers, daughters, sisters and friends.
Materials List
- Tulip® One-Step Fashion Dye™

Fuchsia - Tulip® Glam-It-Up!™ Iron-On Fashion Designs™

26635 Large Cupcake Pack -
Miscellaneous
- Plastic wrap
- T-shirt – 100% cotton – Large
- 12x12” pillow form
- Ruler
- Needle and thread
- Spray bottle
- Plastic tablecloth
Instructions
- Wash and dry T-shirt to remove sizing. Spread out shirt on plastic table cover and dampen with spray water bottle.
- Mix dye in bottle according to package directions and then pour into empty spray bottle. Spray bottom of the shirt until saturated.
- Fill bottle half way with water to dilute dye and spray middle of the shirt.
- Fill bottle to the top with water to further dilute and spray top part of shirt.
- Wrap shirt in plastic wrap, let set for 6-8 hours. Wash and dry.
- Set shirt flat on counter. Measure a 13x13” square in center of T-shirt and cut out through both layers of fabric.
- Turn the pieces inside out and sew up three sides.
- Turn right side out and iron flat. Adhere Tulip® Iron-On Fashion Designs according to package directions and where desired on pillow.
- Stuff with pillow form and sew an invisible seam to close the pillow.

Visit us on Facebook!
Craft on! Click here for today's daily giveaway!
Subscribe to:
Comments (Atom)


