Showing posts with label glitter. Show all posts

Glittered Glam Christmas Trees

Thursday, December 5, 2013
I think I love Christmas for one very distinct reason... It is totally acceptable to have everything in your home covered with glitter. In fact, it's highly encouraged! So I decided to bling out a pair of paper mache cones I had in my craft stash!

Read more »

3 Ways to Add Flair to Your Plastic Flatware

Friday, November 22, 2013
When it comes to my Thanksgiving Day, my family visits at least three houses. And each house has at least 20-50 people chowing down on turkey and pumpkin pie. Real silverware is out of the question! But here is a way to still look classy with all those peeps to serve - pick up a set of plastic silver flatware and dip them in Tulip Soft Paint. Here are three ways!
Read more »

Glitter Bones and Heart Tee.

Tuesday, October 8, 2013
 I LOVE this time of year.
 When I was young I could not wait to come up with a costume to Trick or Treat in from things I just had laying around the house. Now that I am all grown up I still feel like a little kid when October rolls around. It brings back such awesome memories. I wanted to make a shirt that I could wear even after the month of October. So the Glitter Bones Shirt was created.
Read more »

DIY Glitter Polkadot T-shirt

Tuesday, October 1, 2013
One of my very favorite Tulip products is the fashion glitter transfer sheets.  I think it's so cool that you can easily put glitter anywhere without making a big mess.  The transfer sheets made this glitter polkadot shirt really easy to make.
Read more »

Glittered Tie-Dye Totes

Friday, July 12, 2013

Last month I helped run a booth for the Tie-Dye Your summer campaign and we had leftover totes. These weren't normal boring totes, they were really nice ones - fully lined with a big roomy area for decorating. I knew I wanted to dye them, but to give them even more personality, I added some glittered elements! Here is a video I made showing the process! It was really fun!

Read more »

How to make Bohemian Flags

Sunday, May 26, 2013

Bohemian Flags 
Jaderbomb for iLoveToCreate


There is nothing like a set of whimsical flags flowing in your back yard catching the attention of everyone in your neighborhood or your friends and family. These flags super duper easy to make. It is also a project that relieves stress. You know, a little Art Therapy for ya! Let's get started.
You will need:
*Tulip 5 Color Tie-Dye Kit :  (Red, Orange, Lime, Teal, Violet)
*Plain White Napkins (I got these from Target)
*Glue Gun & Hot Glue 
*Tulip Fabric Markers
*Twine or Bias Tape
*Tulip Fabric Spray Paint (Glitter)
*Scribbles 3-D Paint
*Lot's of LOVE


I wanted to show you what comes with the Tie-Dye kit.
*Rubber Bands
*Powdered Dye
*Clear Gloves
*Instructions
*Squirt Bottles
(p.s. keep these you can reuse them)
I think this is my favorite part of the project. Using all of these materials make me giddy as a "giddy little girl". What is crafting if you can't use great products like these!
Fill a bowl up with water. On the side get an old tray with an old cookie drying rack in it. If you don't have this it's ok, just use whatever you have. I like the drying rack because it allows the dye to drip below it. 
Soak one white fabric napkin in the bowl of water. 
Make sure to cut a "little" hole on your dye packet. We are not using a lot of this and we want to store it without getting it all over. 
This is how much I actually put in my bottle. Not too much. We want a light color on our napkins. 
 
What! No Tie-Dye? Well I figured I would do something a little different today. After you squeeze water out of your napkin place it in your tray. Pick the color you want and start applying it all over the wet napkin. We are creating solid shades of color with our Tie-Dye. 
Repeat the steps until you are done with all of your napkins. I hung my napkins on a clothesline to dry. Make sure you don't hang in the middle of the day. If the sun hits the napkins more on one side it could dry that side faster and cause the color to change.
If you don't have a clothesline you can lay them flat on the ground to dry.
Well looky here! Someone just had to say HI! Mr. Tacky always pops up at my house. 
Your napkins should be done drying outside in 5 hours, maybe 4. Wash them all together, with nothing else.  Then pop them in the dryer. I ironed them when they came out. Trust me, they will be wrinkled. Look how spiffy these babies look. 

The next thing you want to do is:
 1. Lay your napkin flat and cut the edges off.
2. Fold your napkin into fourths and cut the sides. We are just creating small squares. If you want to do this differently you can. Also, remember you can make your squares smaller than what I did in the picture.
3.  After you cut your sides, pull the fabric around all four sides. This will make the edges look frayed.
4.  Tadahh! You will be left with a stack of frayed fabric.
 
P.S. The one thing I love about the Tulip Fabric Markers is...they have two sides! One side is a brush tip and the other side is a fine tip. This is so smart! You can really put those little details in your work now.

I started by drawing my flowers on the fabric squares with the black fabric marker. I figured that would be the easiest thing to do. When you are done it will kinda feel like a coloring book sheet. Have fun with your colors.
I tested the colors on the scrap sheets of fabric to make sure the colors went well together. Set aside for 15 minutes to dry.
 
After the fabric markers are dry I outlined the flowers with Scribbles 3-D Paint. This was the final touch that was needed. Big SIGH. I am in love with them. This takes about 3 hours to dry completely.
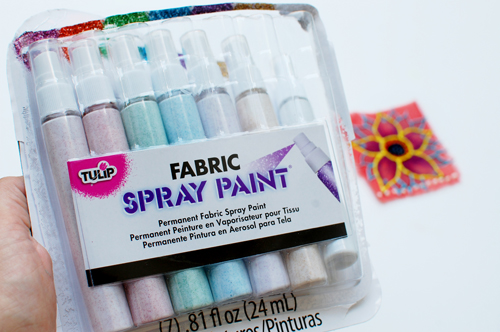
 
Last step is to coat the fabric with some Tulip fabric spray paint.
 
It adds a subtle coat of fine glitter on them. You know me, I love glitter.
 
This is the fun part, putting it all together. You can use bias tape or twine for this step. I like bias tape because it makes them look more elegant and finished. and it comes in ton's of colors.
*If you want twine just put a line of hot glue on the back on a square then place the twine on top.
*If you use the bias tape open it up and put a line of hot glue inside then place fabric on top. I put a little more glue on top of fabric then fold the top flap of bias tape on top of it.
 
I can't begin to tell you how much fun your kids would have making these.
 

The only rule for this project is to have FUN. You could do this project for special occasions and get a group of friends to each make a square. I think that is so special. Make your kids birthday flags, holiday flags or whatever you can think of. I love all of you "Tye-Dyers" big big! 
Huge hugs from my craft room to yours!
See you in the next post.
P.S. I promise when you start playing with Tie-Dye you won't be able to stop, hehe! 
*Find more of my DIY decor at JADERBOMB.COM*

Oh and check out my other posts for iLoveToCreate below!

MAKE IT: Glittered Typography Canvases!

Friday, March 8, 2013
Being a writer, I love incorporating words, message sand phrases into my art and crafts. So when iLovetoCreate came out with this Scribbles® Alpha Stamp Kit, I knew my art supplies would be welcoming a new friend! The idea for these canvases came from our summer CHA last year when we were stamping fabric as a demo. This is one of my sample designs:

The idea stuck with me and I've been wanting to make some new pieces for my studio so I thought I'd do it right and use paint and canvases! Here is how to do your own version!
 SUPPLIES:
12 x 12" canvas, primed.
Baby wipes.

Set out your stamps on a table so you can find the easily, I suggest in alpha order!

 Before you start stamping, decide on your message and lay it out so you know where to and where not to stamp the black lettering. Start at the top of your canvas. Use a paint brush to pat the paint on the stamp and press in place. Add random letters, try to line them up evenly in a row. Keep going. When it comes time to add the words, use a bright color!

Not all of your letters will have a perfect, opaque stamp. That's ok, just get through the stamping! When you're done, use a liner brush and paint to fill in any thin areas so it looks nice and uniform!

Here is a picture of a finished canvas, plus the second one in progress. See how it's all coming together? Nice!

Now it's time to add the glitter to make these POP! Use a paintbrush and the Tacky Glue. Paint hte glue on each letter and then pour the glitter. I painted all the letters and then applied the glitter. Tap away the excess. Let dry. That's it! If you want, you can use gold paint to trim the edges for a finished look!

TIP: Make sure to clean your stamps with baby wipes so they'll be good to go for next time!

After I finished these, I realized how much a metaphor these are. Sometimes it feels like we live a boring black and white world (even though I really dig that combo!), and we have to see through the stark contrast to see the bright stuff in life. I get deep with my crafting, don't I? 

IDEAS:
 - Mother's Day - use a funny saying that your mom is know for.
 - A line from your wedding vows.
 - A goal you have, this can be hung as a reminder.
 - Your kids names.

What other ideas can you think of for this idea? Please share below!

Easter Basket Picture Frame Tutorial

Thursday, February 21, 2013

I just can't stop the seasonal frame making insanity. With every holiday comes new pictures to display. Easter is no exception. I hit the craft stores, department stores even the thrift stores - but alas there were no cute Easter frames to be found. Luckily I had a plain wooden frame begging for a makeover lingering in my studio.

SUPPLIES
Aleene's Tacky Glue
Paint Brush
Glitter
Easter Grass
Small Eggs
Small Bunny
Blue Craft Paint

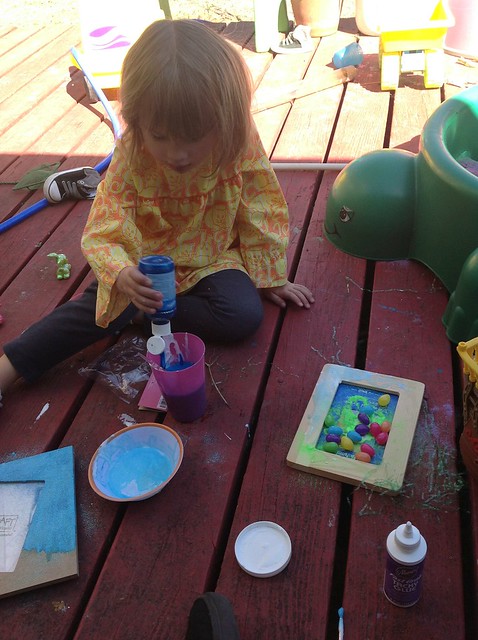
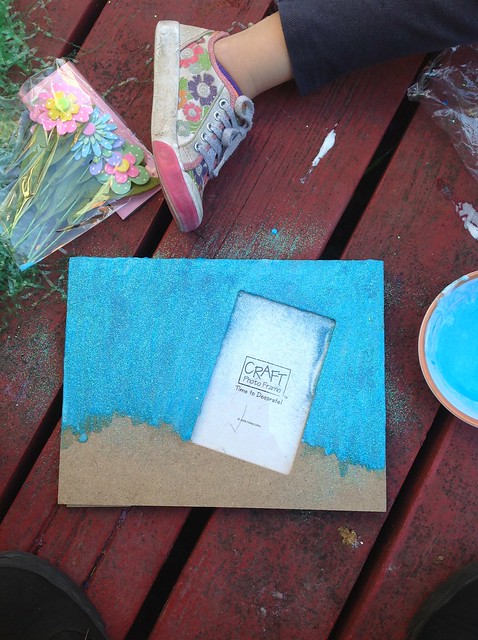
The first thing my crafty partner in crime and I did was make a glue/paint/water potion. I wanted my Tacky Glue thin enough that I could paint it on the frame.

While my glue was still wet I sprinkled blue glitter on top.

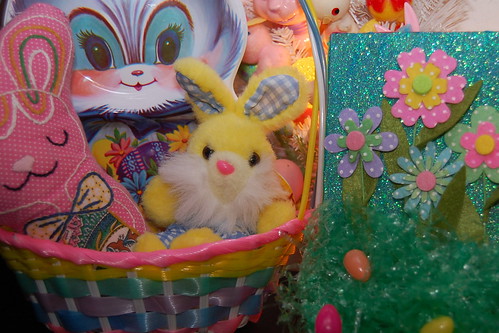
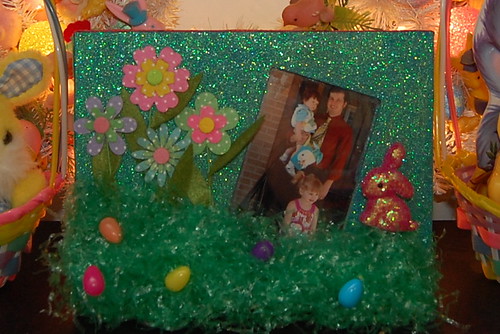
For the bottom half of the frame I glued on green Easter grass. Feel free to decorate your grass however you see fit. I opted for plastic eggs, glitter covered bunnies and felt flowers.

All that was left to do was choose the perfect picture of my family to put inside. This is us last year headed into church. I love the way the glitter shimmers by the light of my Easter wreath.

Rainbow Glitter Toms Shoes DIY

Friday, February 1, 2013
There are so many cool Toms shoes DIYs out there that we love!  It inspired us to to make our own cool pair that's absolutely over the rainbow!!  These are really fun to make using the Tulip® Fashion Glitter™ and the Aleene's® Fabric Fusion® Peel and Stick Tape™.  iLoveToCreate designer Lauri Eaton shows you how to get this vibrant look for you pair in the video below!
The Fashion Glitters are great not only for shoes, but also for totes, shirts, and other fabrics.  They are so sparkly, vibrant, and fun to use!