Showing posts with label DIY Easter crafts. Show all posts

Make Yarn Wrapped Easter Eggs

Wednesday, March 27, 2013
 We're trying to eat healthier here at Casa de Potter, so the Easter Bunny won't be bringing much in the way of sugary sweets.  Still, an Easter Basket needs a little something-something to perk it up!  Enter...a basket of pretty yarn wrapped paper mache eggs!  These are so easy to make in three easy steps using Aleene's Fabric Fusion sheets and these sparkly yarn bon-bons were super easy to wrap.  I learned this technique from Miss Crafty Chica during our Women's Show classes this summer, it's so much easier than using glue! The key to success is starting at the top, grasping firmly and wrapping tightly.  We tried stripes, but found that one color in one continuous thread worked best.  We are so happy with how these turned out, we may make some spheres to use for year round decor.

What You Need
Paper mache eggs
Thin sparkly yarn (I used Lion Brand Bon-Bons)

 
1.) Gather materials.  2.  Wrap one sheet around egg.  Cut off excess on top and bottom.  Gently press sheet to adhere film.  Carefully remove.  Use the strips you cut off to fill in any gaps.  3.  (Egg is sticky, so try to do this in one sitting!)  Grasp bottom of egg firmly.  Start a coil working from yarn skein.  Wrap moving egg and pulling yarn so it remains taut as you wrap.  Take your time to prevent gaps between yarn.  4.  Wrap a contrasting yarn around center of egg and tie into a bow.  
You could make these with a variety of yarns, twines and fibers, all for a completely different final effect.  This is so much fun, you'll be looking for objects to wrap! 
I hope the Easter Bunny is good to you and yours!  Hippity hoppity!
xoxo, Madge

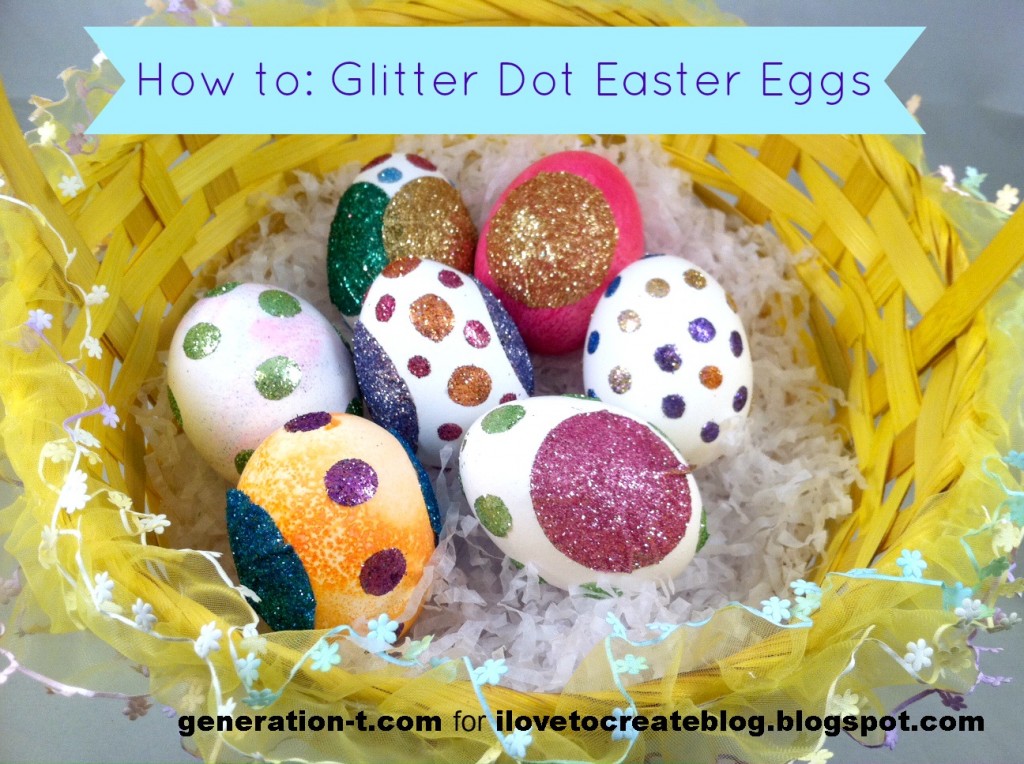
Easy Glitter Dot Easter Eggs

Tuesday, March 26, 2013

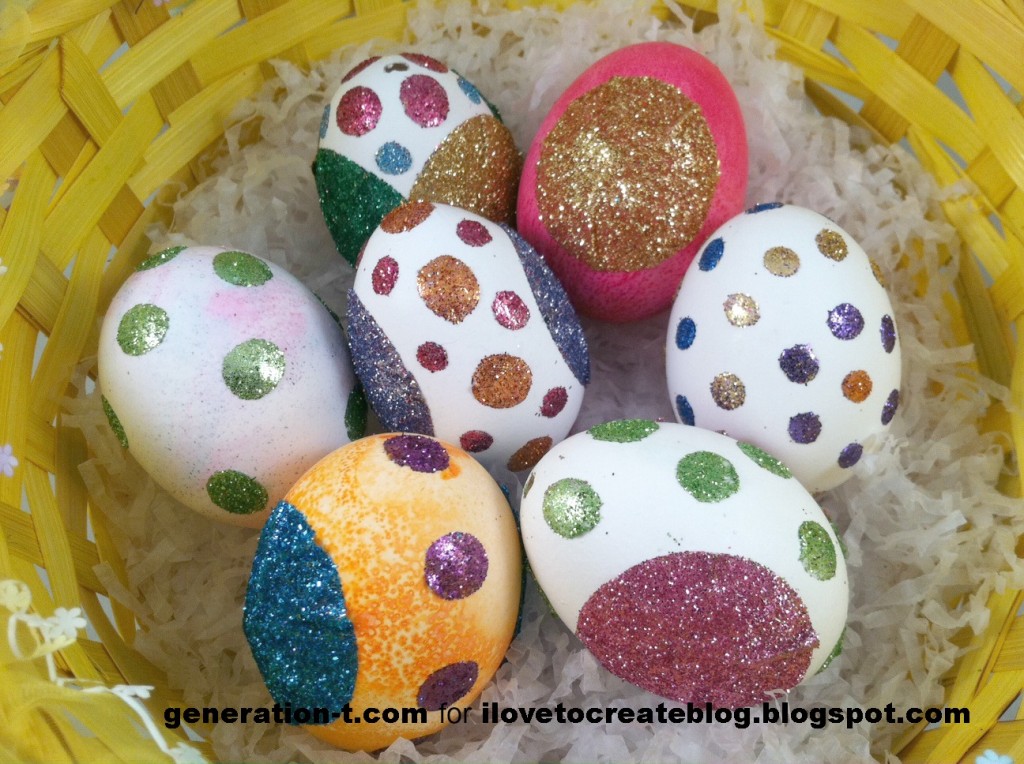
I'm pretty traditional when it comes to decorating eggs at Easter time (dollar store egg dying kit, anyone?), but to be honest, it was getting kind of dull year after year. My solution: Bring on the polka dots! Bring on the disco sparkle! The best part? No waiting around for dye to set or glue to dry. This is egg decorating with immediate (and rather shimmery) results.


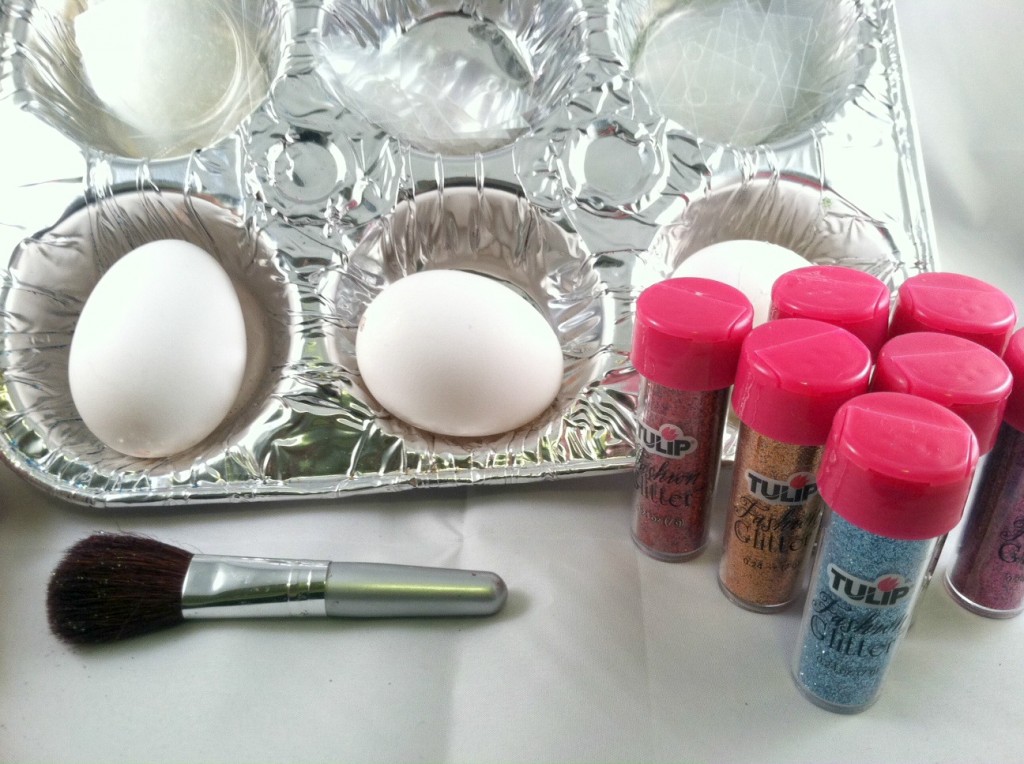
What you need:
-clean, dry blown eggs (hard-boiled will work fine, too; I personally just don't like to mix food and glitter!)
-Aleene's Tacky Dots
-Aleene's Tacky Dots Singles (small and medium)
-Aleene's Fashion Glitter
-aluminum muffin tin or tray
-makeup brush

Click through to watch the video tutorial I did for About.com, or follow the instructions below!
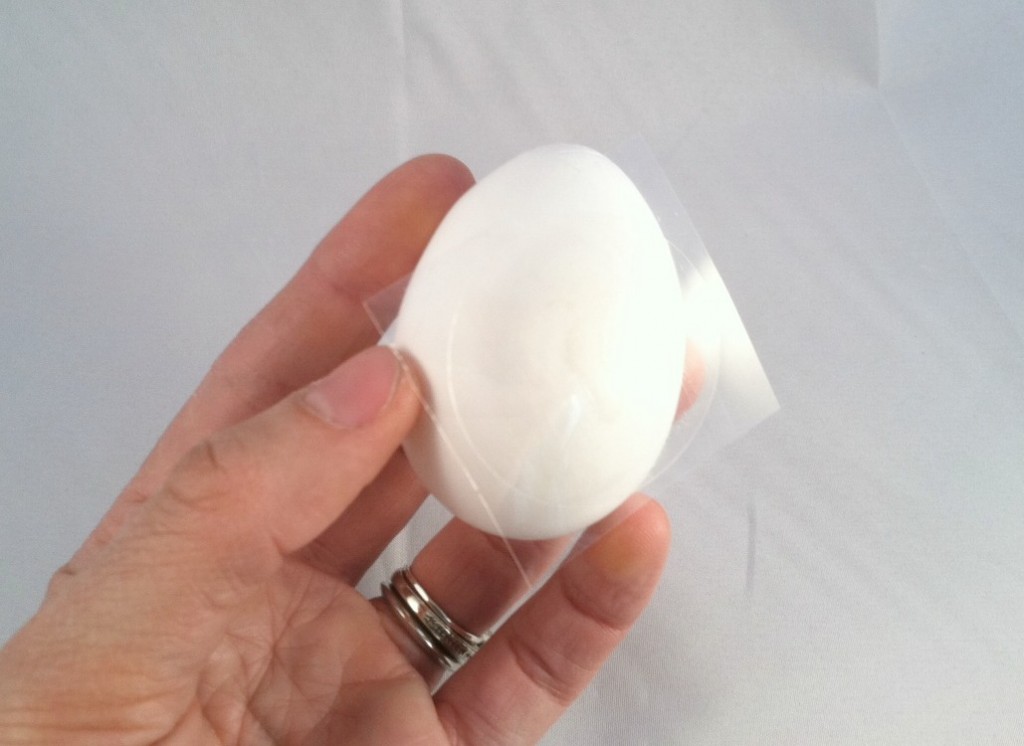
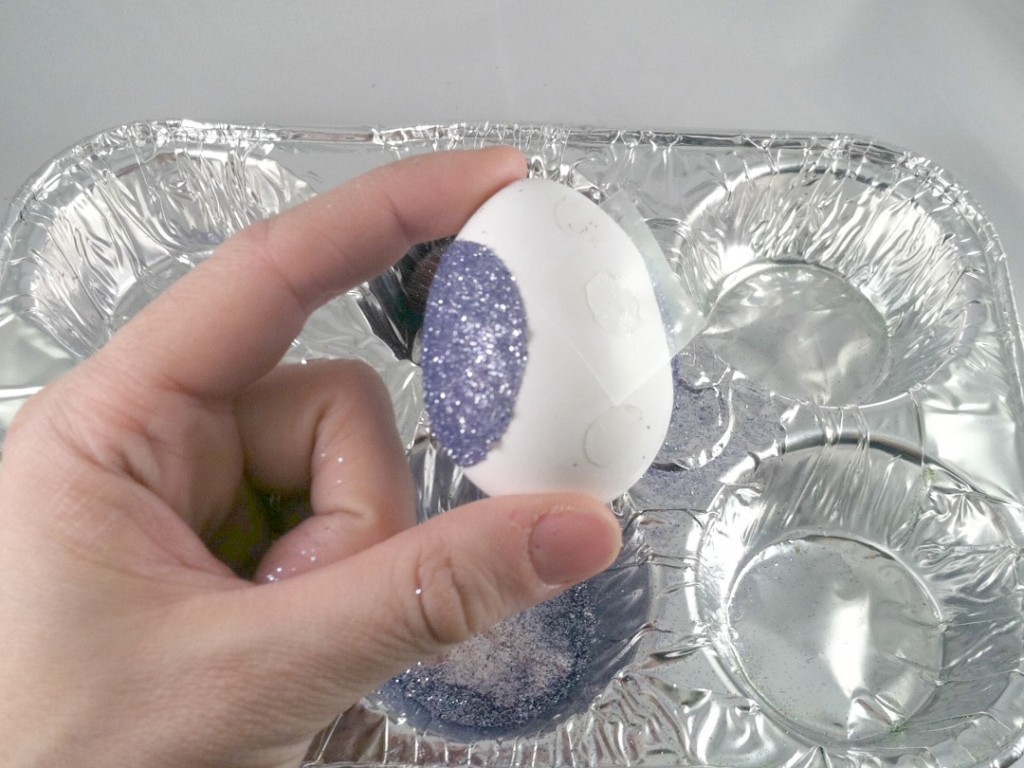
Center one of the Tacky Dots on the side of the egg, and gently press it down.
Peel off the backing and gently press down any wrinkles. Then repeat on the other side with another Tacky Dot.
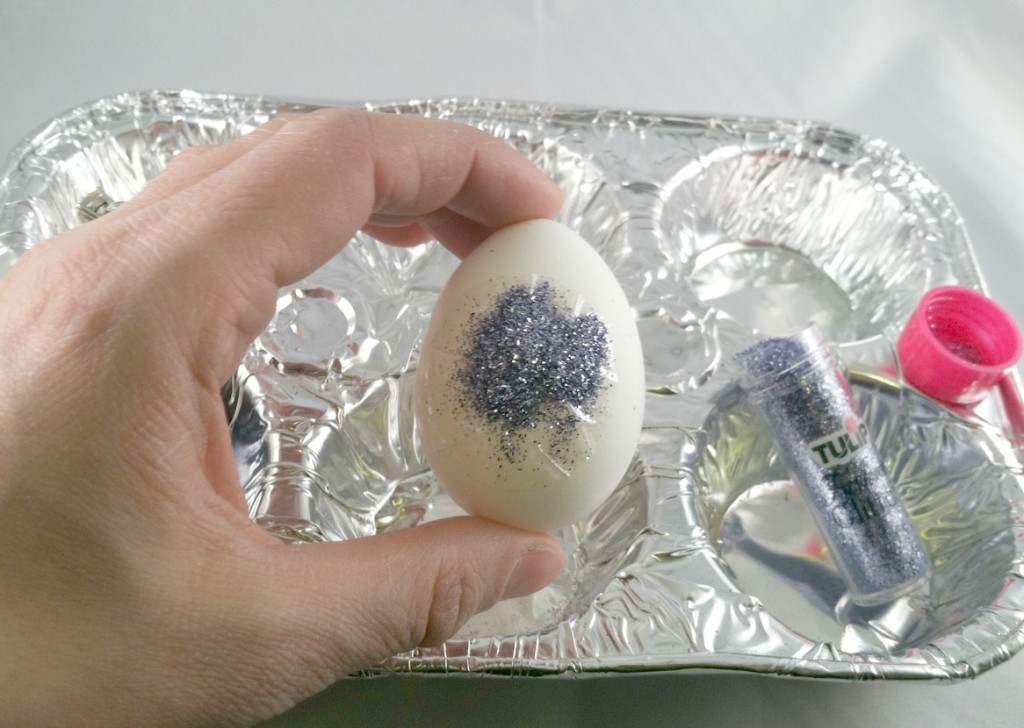
Hold the egg gently over the muffin tray and liberally sprinkle glitter over the tacky dot. Brush off the excess with the makeup brush and rotate the egg to repeat on the other side.
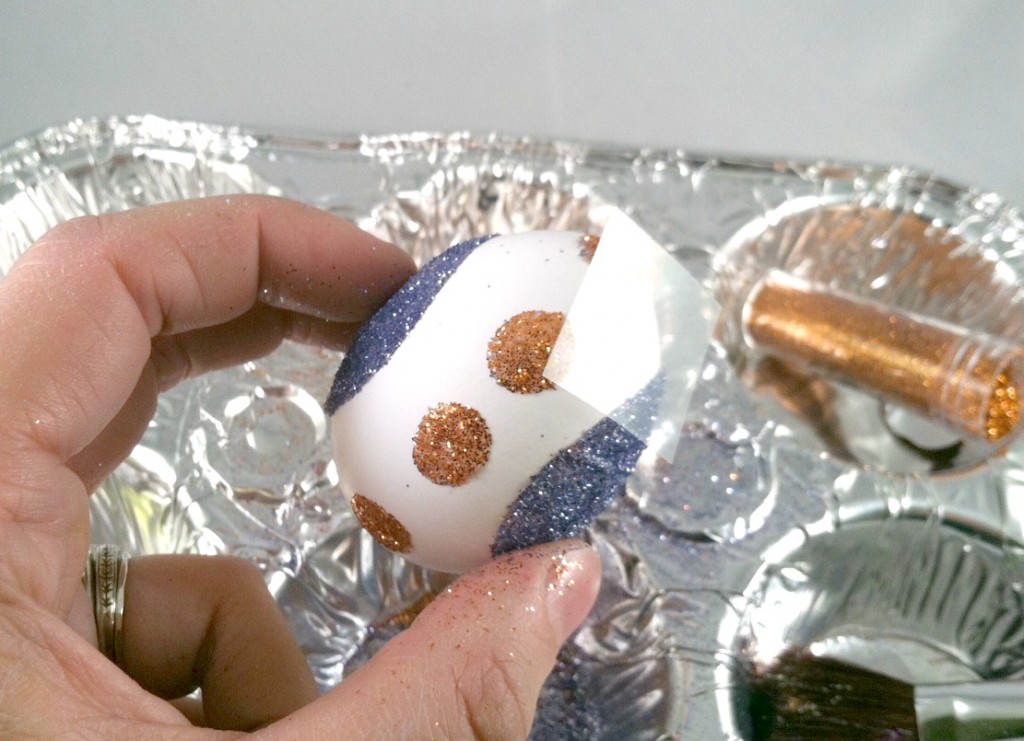
Try adding medium Tacky Dot Singles around the egg, between the large dots, and repeat the process: Shake on the glitter (new color!); brush off the excess.
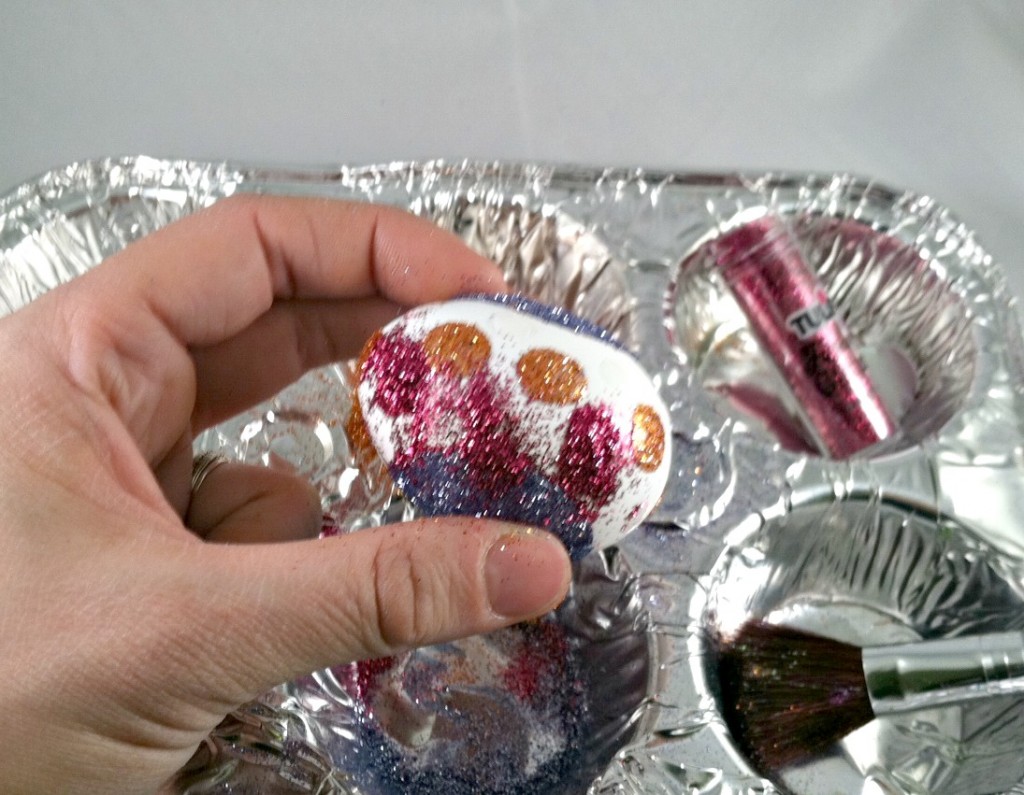
Next, I try sticking the small Tacky Dot Singles in the white area around the large dots and repeat the process a third time (again, with a new color).
Shake the glitter on, then dust off the excess.
 
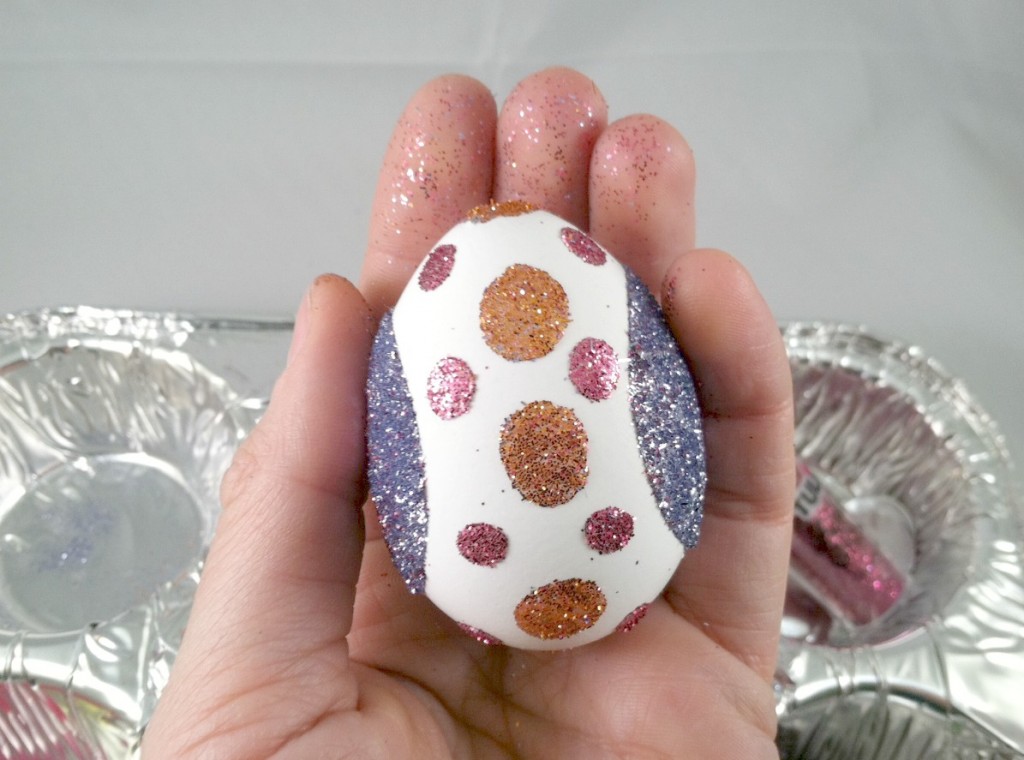
Finished!
Try different combinations of glitter color and dot sizes to repeat and fill your basket.
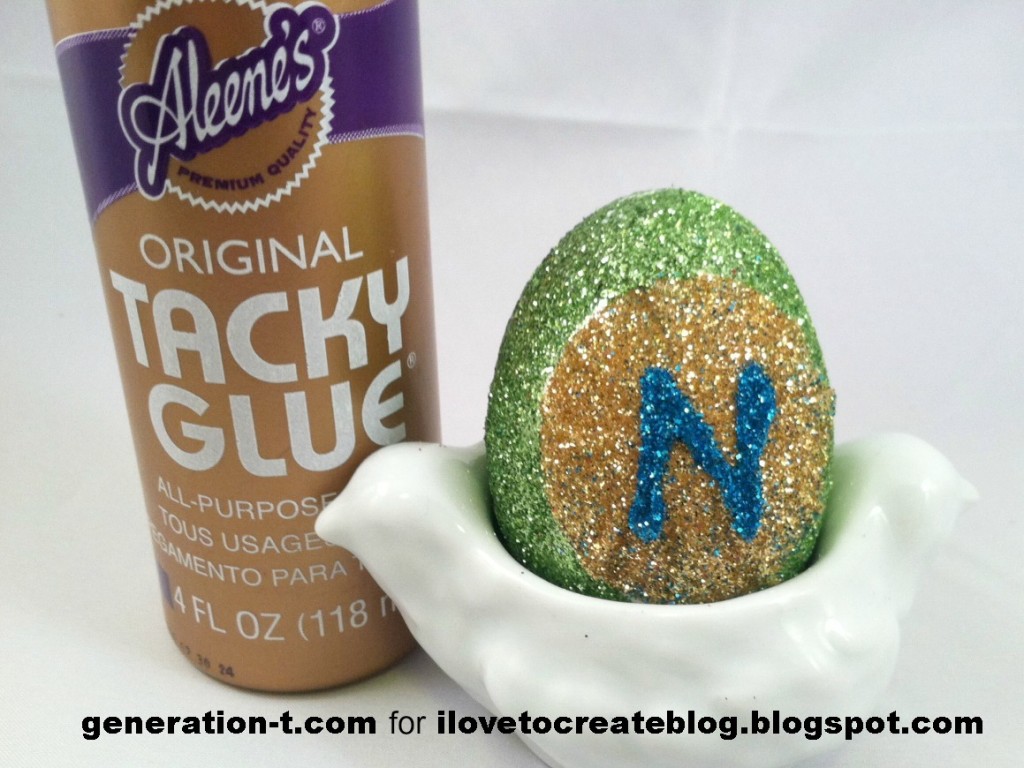
Variation: To personalize your egg, use Tacky Glue to write an initial over the glitter layer on the large Tacky Dot, then sprinkle it with contrasting color glitter. Let it dry completely before brushing off any excess sparkle.

Easter Basket Picture Frame Tutorial

Thursday, February 21, 2013

I just can't stop the seasonal frame making insanity. With every holiday comes new pictures to display. Easter is no exception. I hit the craft stores, department stores even the thrift stores - but alas there were no cute Easter frames to be found. Luckily I had a plain wooden frame begging for a makeover lingering in my studio.

SUPPLIES
Aleene's Tacky Glue
Paint Brush
Glitter
Easter Grass
Small Eggs
Small Bunny
Blue Craft Paint

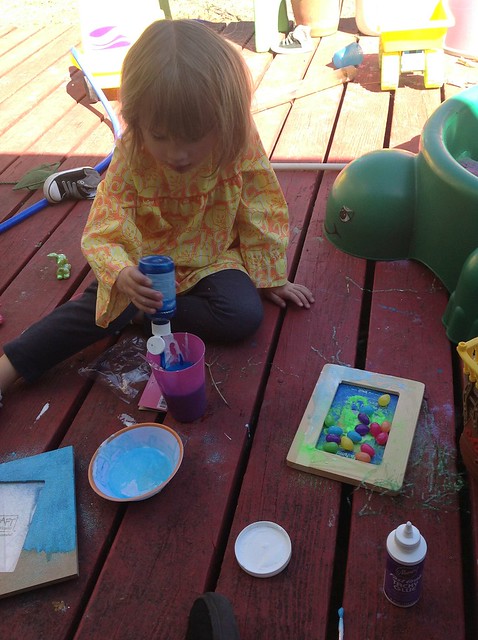
The first thing my crafty partner in crime and I did was make a glue/paint/water potion. I wanted my Tacky Glue thin enough that I could paint it on the frame.

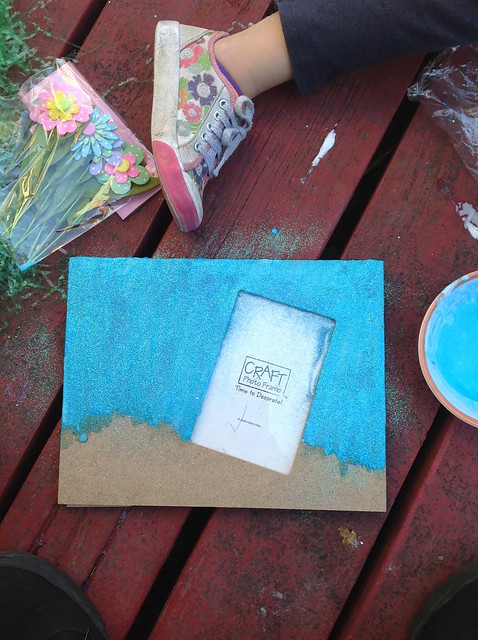
While my glue was still wet I sprinkled blue glitter on top.

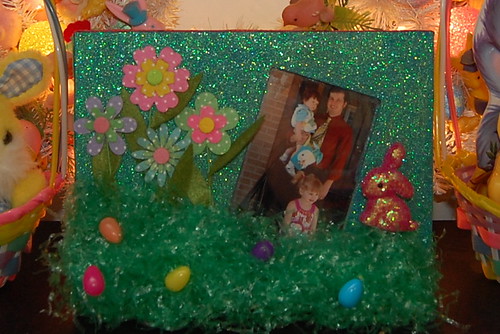
For the bottom half of the frame I glued on green Easter grass. Feel free to decorate your grass however you see fit. I opted for plastic eggs, glitter covered bunnies and felt flowers.

All that was left to do was choose the perfect picture of my family to put inside. This is us last year headed into church. I love the way the glitter shimmers by the light of my Easter wreath.

iLoveToCreate Retrofabulous Crafts: Sparkletastic Easter Earrings

Monday, April 2, 2012
Visit us on Facebook!
Craft on!


Sparkletastic Easter Earrings
iLoveToCreate Retrofabulous Crafts
Copyright Margot Potter
These ARE your grandmother’s crafts...ya gotta problem with that?”

From McCall's Needlework and Crafts 1968

I have been toying with making a pair of sparkly Styrofoam earbobs for a while now. There are endless variations on this idea in my stash of vintage craft magazines. They’re also made of cork and wood...I’ve even seen these made of crumpled aluminum foil. The idea is to suspend a round ball on a thin chain for a pair of swingy earrings. Remember that these are styrofoam, so they weigh almost nothing, but if you like a more delicate silhouette, feel free to use smaller balls. I like my jewelry big and bold. These would be perfect for a teacher, young mom or if you’re feeling cheeky, to sport to the family Easter dinner. I’d make a matching necklace and wear this out and about just for fun, but I’m not afraid to be noticed.

Take this idea wherever you like, add sequins, seed beads, rhinestones. A splash of glitter gives it a little sparkle and the sparkly rick rack trim immediately evokes Easter eggs. I’m of the mind that life is short, so have a little fun now and then. What could be more fun than pink sparkly Styrofoam earbobs?!


Materials
2 1.5” Styrofoam balls
Sparkly silver rick rack trim
2 2” head pins
2 matching beads to secure headpins
2 ear wires
2 1” segments of thin chain
Aleene’s Foamtastic Glue
Crafty Chica Little Paints in red and white
Crafty Chica glitter in pink
Craft wire for painting and drying balls
Styrofoam block for drying balls

Tools
Chain nose pliers
Round nose pliers
Flush cutters
Foam brush
Scissors


Insert a 5-6” segment of craft wire into each Styrofoam ball. Mix red and white paints to make hot pink. Use a foam brush to pounce pink paint on surface of ball. Sprinkle glitter on ball and shake off excess. You will probably have to go back in for a second coat to hit any spots that aren’t fully covered, if you repaint make sure to re-glitter. Allow to dry, inserting wire into Styrofoam block.  Keep ball on wire. Run a bead of Aleene’s Foamtastic glue along rick rack trim. Wrap trim around center of ball. Insert back into block and allow to dry.


When glue is dry, GENTLY thread a beaded headpin into the center bottom of your ball and thread to the center top. Make sure pin is straight and take your time.  Bend wire at a 90 degree angle using chain nose pliers. Cut to 1/4” with wire cutters. Grasp end of wire with round nose pliers and CAREFULLY turn into a loop. Open loop to add chains using chain nose pliers.


Cut chains and thread on open end of loop. Use chain nose pliers to secure closed.  Use chain nose pliers to attach earring wires to top of chain.


Optional: Add a beehive, tiara and a pair of cat eye glasses...hee.

Toddler Easter Basket

Thursday, March 29, 2012


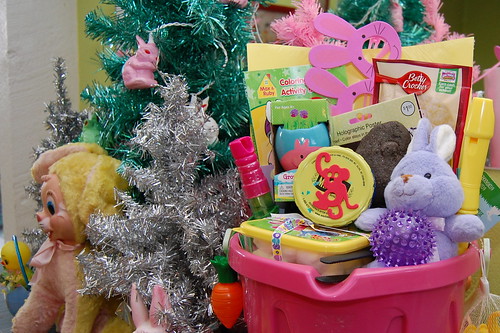
Easter is a mere 2 Sundays away, do you have your kid's Easter basket filled? Sure I've hit the dollar spot at Target to load up like all the other mother's, but I also made a slew of activities to include in the basket. My goal for this year's Easter basket was to not load up on cheap toys and junk that I would throw away in a week, but to look for items that would get used, played with and educate. I was inspired by a Creative Play Easter Basket I saw on Modern Parents Messy Kids and ran with the theme. Today for I Love to Create I am going to show you my own version of a toddler Easter basket. Next Thursday I will have the baby version.

First up I used a sand pail instead of a basket. I have a friend who every Easter gives her kids a sand pail filled with a new swimsuit, beach towel, float toy - you get the drift. I thought I would steal the bucket part. I must confess I also broke down and got a smaller basket from Target for Tallulah to use at the 3 egg hunts we have coming up in the next week. I should also mention no cheap Easter grass around these parts.
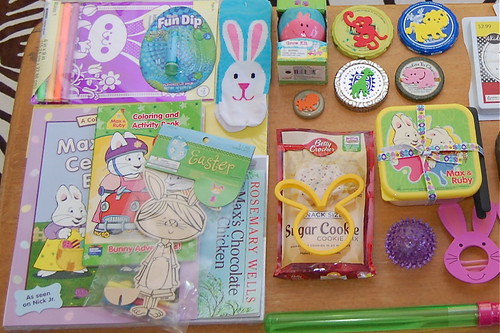

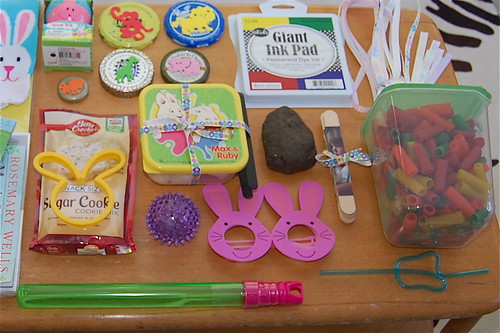
Not everything in my toddler Easter basket is homemade. Here is a quick list of the readymade items...
Coloring Book (Max and Ruby themed, they are bunnies after all)
Construction Paper (crafts, crafts and more crafts)
Glue (toddlers love glue)
Max and Ruby Book (her fave show)
Bubbles (big bubbles in wand form)
Grow Kit (mini garden in an egg shaped planter)
Lip Gloss (every toddler needs lipgloss)
Train Tracks (Thomas needs to feel the wind in his hair)
Curly Straw (kick milk up a notch)
Easter Socks (I can never find a pair so I keep buying more)
Recorder (more instruments for her pretend rock band)
Ball (it lights up!)
Stuffed Bunny (she loves a snuggly stuffed animal)
Cookie Cutters (for playdoh)
Cookie Mix (she loves to bake)
Various Craft Kits (at $.99 a pop, who can say no)
Bunny Glasses (futures so bright, I gotta wear bunny shades)

Ok, onto the stuff I did make!
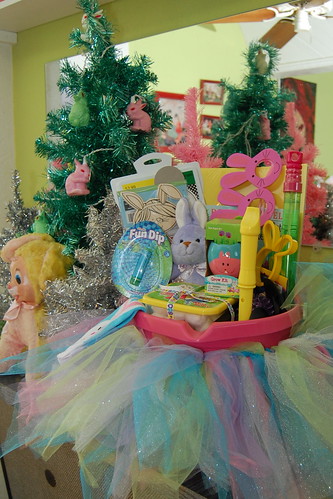

First up, the obvious is the Easter colors tutu. Tallulah is going through a ballet phase and often wants to listen to classical music and dance. I love to encourage a little dramatic play. I made a Halloween no sew tutu a few years ago with a full blogged tutorial.


To go along with the dance theme I also made some ribbon rings. I have seen these all over Pinterest and thought they would be fun for Tallulah.
SUPPLIES
Wooden Rings
Ribbon
Crafty Chica White Paint
Paint Brush
Liquid Fusion Glue


These were super easy. First I removed the small screws that came in my wooden rings. You could also use the metal rings from Mason Jars or shower rings. Next I painted my rings white. After the paint dried I attached some festive Easter ribbons. I used a little Liquid Fusion Glue to hold my ribbon in place. Let the maypole dancing begin.
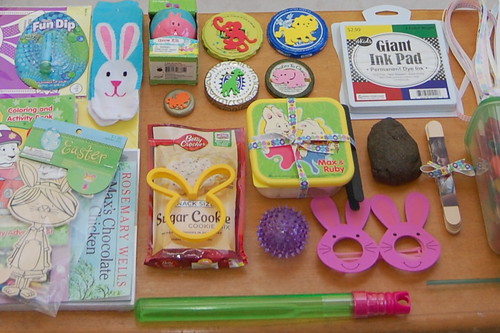

I finally found a way to recycle all those old lids I had been saving. Using foam stickers I made them into stamps. I also bought an extra large stamp pad to put in the basket.
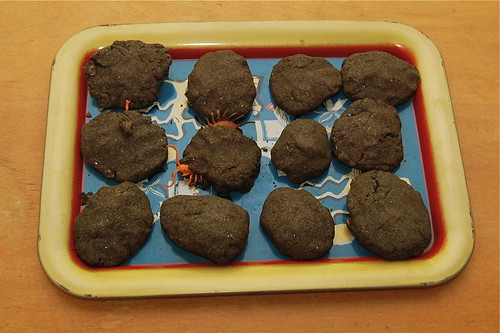

Tallulah loves dirt and dinosaurs so a batch of dinosaur eggs were in order. I used a recipe from Projects for Preschoolers.


I have long dreamed of making a popsicle stick puzzle since I first started seeing them floating around on Pinterest. I probably originally saw the idea in Halloween theme from Saltwater Kids. I used a photograph from Easter last year to make my puzzle.

SUPPLIES
Craft Sticks
Aleene's Tacky Double-Stick Sheets
Craft Knife
Masking Tape
Photograph
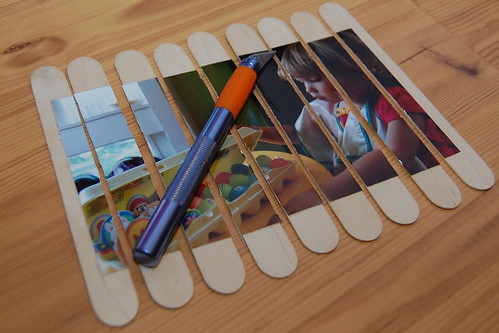

The first thing you need to do is line up enough craft sticks so that you can fit your photograph on top of them. Line your sticks up super straight and add a little tape to keep them together. Flip the sticks over. Add a sheet of Aleene's Tacky Sticker Sheets to the back of your photo. I had to use 1.5 sheets for mine. Center your photo over the sticks and press. Flip your sticks back over tape side up and using a craft knife cut the sticks apart. Remove the excess tape off the back, tie in a bow and stick in your Easter Basket.
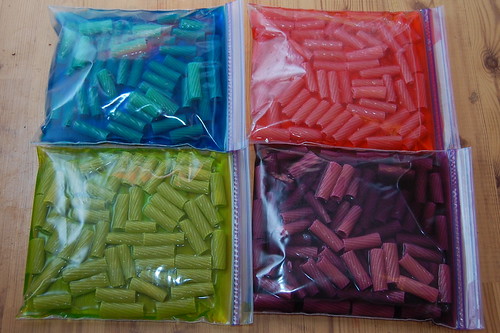

Yet another project I found on Pinterest is dyed pasta. Most folks seem to fill sensory bins with it, but Tallulah like her mother, loves to make jewelry. We have been on a kick of making straw necklaces around here and I thought we would upgrade from white straws to colorful rigatoni. All you have to do is place uncooked noodles, food coloring and rubbing alcohol in a baggie for a few hours. I put them in a tupperware container with some yarn for threading.


I went a little crazy at Target when they had Max and Ruby stuff in the dollar aisle. It is Tallulah's favorite show therefor making it also Baxter's favorite show since he has no choice. Anyway I was glad I loaded up on the little pieces of tupperware. This cute little container is filled with cotton balls and wrapped up with a set of small tongs. I'm going to tell her it is a game called 'bunny tails' where she picks up the bunny tails with the tongs and moves them to another container. Fun and practices motor skills and hand eye coordination.

So there you have it. My husband will say I went overkill as he always does (and most times he is right). However, I think this is a wonderfully entertaining candy-less basket to behold. What are some things you are putting in your toddlers Easter basket? I still have another week and a little bit of room left.

Remember to stop back by next week when I show you the baby Easter basket I am making for Baxter!

Looking for other suggestions of handmade toddler gifts that would go great in an Easter basket? How about playdoh, lacing cards, bubbles, soap, wash rag puppet, crayon cupcakes, rubbing plates - check out the kids section for more suggestions.

***This is a sponsored post by I Love to Create - I was compensated & given free supplies. Mama has gotta pay the bills somehow and really who in their right mind would say no to free craft supplies***

Visit us on Facebook!
Craft on!

iLoveToCreate Retrofabulous Crafts: Spring Peepers Easter Topiary

Monday, March 19, 2012
Visit us on Facebook!
Craft on!
Spring Peepers Easter Topiary Margot Potter for iLoveToCreate
Straw Flower Topiary Copyright 1963 Better Homes and Gardens Christmas Ideas Magazine


iLoveToCreate Retrofabulous Crafts
Spring Peepers Easter Topiary
Margot Potter
"These are your grandmother's crafts...ya gotta problem with that?"

I love topiaries.  It's true, I do.  Yet, inexplicably, this is my very first topiary craft!  There are a plethora of handcrafted topiaries in my stash of vintage craft magazines, mostly Christmas themed like the one above.  I've been meaning to make one and well, the time came.  Two years ago Avalon and I bought these little Easter chicks on super sale at Michaels after Easter.  We thought we had a lifetime supply, until this idea popped into my head.  I ran out of chicks mid-project and had to make an emergency tiny chick run to Michaels, thankfully they had more. What made me want to put tiny chicks on a styrofoam ball? I can not say.  But I love it so much it's staying in the living room until after Easter. 

This is so easy and fun to do.  Aleene's Tacky Glue Dots make super quick work of attaching the chicks.You can either use a pot that is already decorated or just mix up some fun colors with your Crafty Chica paints, add some fun trims, toss some Easter grass and either pre-made eggs or jelly beans on the top, add a bow and instant cute!  I love this as a centerpiece for Easter, you could make a couple more smaller ones for either side to make a trio.  I'm a big believer in the rule of threes.

Spring Peepers Topiary Materials

Materials
3" Styrofoam ball
8" Wooden dowel
Approx. 115-120 3/4" fuzzy chicks
4.5" Clay pot
Coordinating clay pot saucer
Easter grass
Glittered foam eggs or jelly beans
Styrofoam block for inside of pot
Decorative ribbon for pot rim
Ribbon to tie beneath topiary ball
Coordinating scrapbook papers
Coordinating button
Layered flower die-you could use a pre-made flower here if you prefer
Crafty Chica Paints (I used green and yellow mixed and red and white mixed)
Aleene's Acid Free Tacky Glue
Aleene's 3/8" Tacky Glue Dots

Tools
Die Cutting Machine
Scissors
Foam brush

Paint the pot pink and the pot rim and dowel green.  Allow to dry.  

Use glue to adhere ribbon trim around rim of pot.  I used super thick rick rack trim.

Die cut layered flower and adhere to conceal spot where ribbon ends meet using Aleene's Tacky Glue.  Use a Tacky Glue Dot to adhere button to center of flower.  Allow ribbon and flower to dry.


Take a chick and press it's feet on a Tacky Glue Dot.  Press the chick on the styrofoam ball.  Work from the center out, making a ring of chicks all facing the same direction.  Work to the center on one side (this will be the top of the topiary) and the center on the other leaving a space for the painted dowel.

Once pot has dried, cut styrofoam to fit inside.  Add some easter grass to hide foam.  You'll insert the dowel into the bottom of your topiary ball and insert that into the center of the foam in the pot.


Tie a bow around the bottom of the topiary ball.


Make some coordinating decorations to dress up the table...and if you love carrot cake...get the recipe for these Easter Bunny Nest Coconut Carrot Cake Cupcakes today on Your Grandmother's Crafts!