March is National Craft Month!

Sunday, February 28, 2010

March is National Craft Month! What does this mean for you? Well, maybe this is the month that you dust off that old project and start anew or maybe it's the month that you start planning crafts for your whole family to sit around the table to do! It's important that we take a moment to realize the power of crafting and how it has the ability to impact and enrich our lives! Think about how much better you feel after finishing a project, giving away a handmade gift or learning a new technique. It's incredibly empowering!!

Also, a lot of your local retailers will be hosting special events and in store demos to celebrate and web sites like the Craft and Hobby Association's Craftplace.org will be sharing great crafting ideas, videos, events, and resources to help you discover something new in the world of crafting!

Here at iLoveToCreate, we want to celebrate National Craft Month with you! Not only will we have our regular fab iLoveToCreate blogger projects and posts this month, but each day on our blog we will be featuring a new and fun craft for you to try! For fun, we thought it would be cool to break them up into weekly themes...

March 1st-6th: Awesome Accessories
March 7th-13th: Fancy Footware
March 14th-20th: Revamped & Recycled
March 21st-27th: Roses Revisited
March 28th-31st: Outrageous Owls

So visit our blog each day for new fresh and inspiring ideas. Also, one of our favorite ladies, Kathy Cano-Murillo a.k.a. Crafty Chica is featuring 30 Days of Glitter - A Crafty Chica Video Series, so stop by Crafty Chica's blog this month as well for lots of glitter and fun!

Too Cute Easter Crafts

Saturday, February 27, 2010
Looking for a fab and fun new project to whip up for an easter basket or perfect Easter centerpiece? This month on our home site iLoveToCreate.com, we have three springtime projects that will get you in the perfect mood for Easter crafting!


Fuzzy Easter Friends
A tisket, a tasket, create these adorable friends for your Easter basket! Glue felt and fuzzy yarn to foam balls with Aleene’s® Fast Grab Tacky Glue™ for a project that’ll make you want to put all of your eggs in someone else’s basket.


Easter Celebration Paper Cones & Blown Eggs
Celebrate Easter with colorful décor! Turn scrapbook paper into a festive egg holder with Aleene’s® Original Tacky Glue® and add shiny embellishments with Aleene’s® Paper Glaze™.


Fluffy Fun Easter Bouquet
Create an Easter bouquet of fluffy fun! All you need is Aleene’s® Crystal Clear Tacky Spray™ and yarn in your favorite springtime colors to transform Styrofoam eggs into a charming centerpiece for Easter brunch or dinner!

Loteria Framed Art

Friday, February 26, 2010


I can't sit still around a blank wood frame. I have to glue something to it. In this case, it was a deck of playing cards from my Crafty Chica™ Loteria Game™ !

Supplies:
1 wood frame with a wide border
Crafty Chica™ Loteria Game™
Aleene's® Original Tacky Glue®
Crafty Chica™ Little Chica Paint Packs™
Crafty Chica™ DIY Appliqués™ Value Pack™

Directions:
1. Paint the frame, and add contrasting accents to the outer edges.
2. Cut and glue the cards around the frame. Trim with black paint.
3. Iron on a sacred heart patch to a piece of fabric and insert in frame.
4. Enjoy!

How to Throw a Customized Birthday Part - Part 1

Thursday, February 25, 2010

Sure it is a lot easier to hit the party store and buy a pre-prepared theme birthday party kit, but it is a lot more fun to make a party theme yourself. I admit I perused the internet looking for party hats and goodie bags that fit the bill for my daughter's 1st birthday, but nothing seemed quite right. Then I contacted a few Etsy vendors that specialized in custom party gear that didn't bother to write me back. Left with nowhere else to turn I decided to take matters into my own hands. Sure it was a whole lot of work, but the end result was exactly what I wanted. Today on I Love to Create we have part 1 of a 2 part series on how to create your own custom party decorations!


Every good party needs a theme and for this particular birthday I decided to work with Tallulah's middle name, Fawn. I started to go with cherries and powdered wigs since she shares a birthday with George Washington, but that seemed a bit obscure for a 1 year old. Fawns are perky and fun and more importantly between my mother and I we had a ton of them to decorate with. First things first I had a logo designed by Autumn Leah Designs. Doesn't everyone have birthday logos designed? From there all that was left to do was plaster the birthday logo on everything.


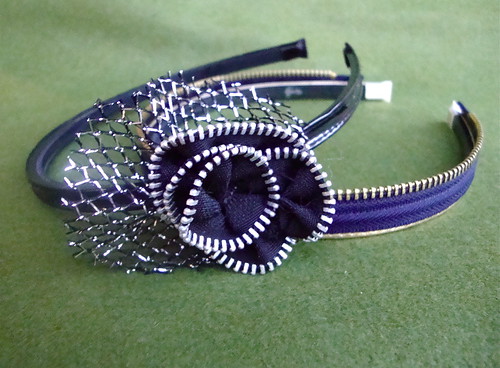
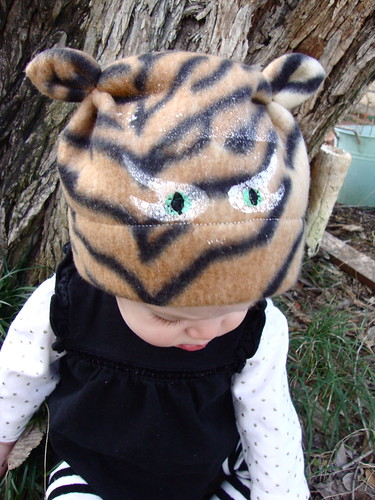
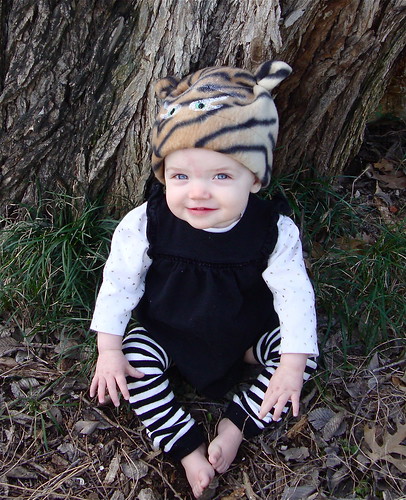
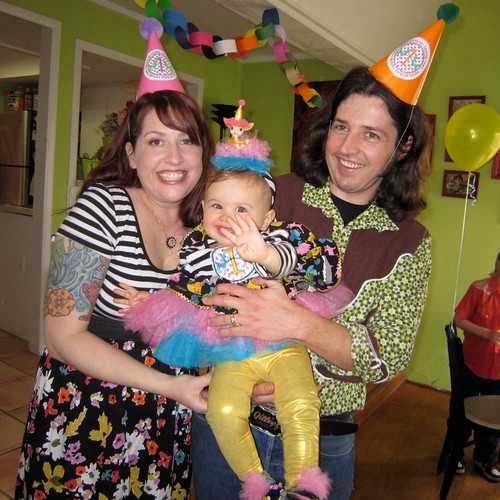
Is there anything cuter than kids in party hats I ask you? You might remember from my escapades making 
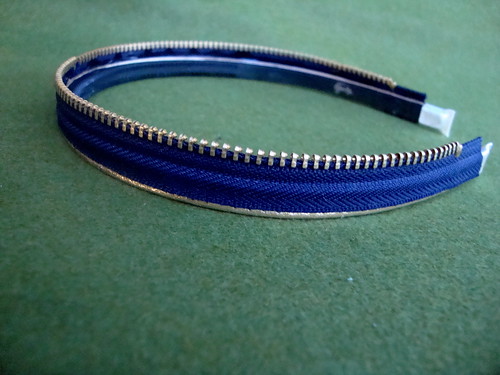
fabric covered crowns and 
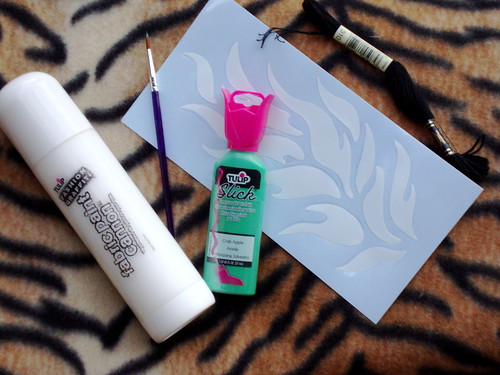
pipe cleaner tiaras that I am a firm believer in the idea that a decorated head makes everything more festive. Making your own customized party hats is easy as pie with a little Collage Pauge, colorful pom poms, Tacky Glue, decorative trim and blank party hats available at the party store.


Those of you with an eye for detail might have noticed that I spelled Tallulah wrong with the blocks. I needed to steal an L what can I say. I also went to Home Depot and scored several feet of astroturf to cover all the tables with. I was going for a green grass feel with all my fawn and deer.


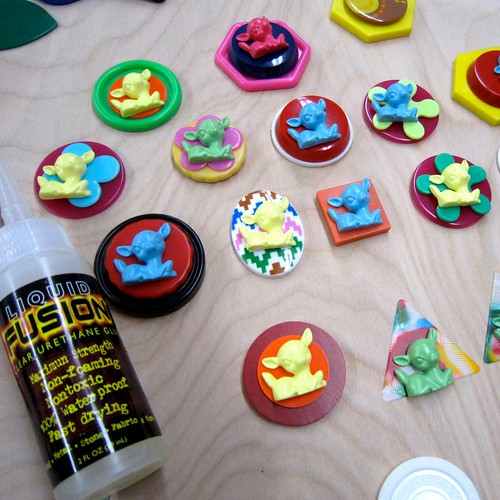
I ordered a whole slew of colorful resin fawns from Buzzard Brand. I made souvenir magnets for all the families that attended the party using various plastic cabochons, the fawns and Liquid Fusion Glue.


The little green baggies are filled with fawn shaped soap. Ordered the molds from Bake It Pretty and the soap supplies are Soapy Love.


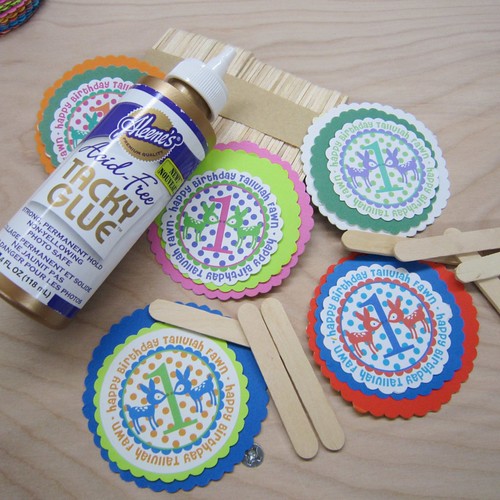
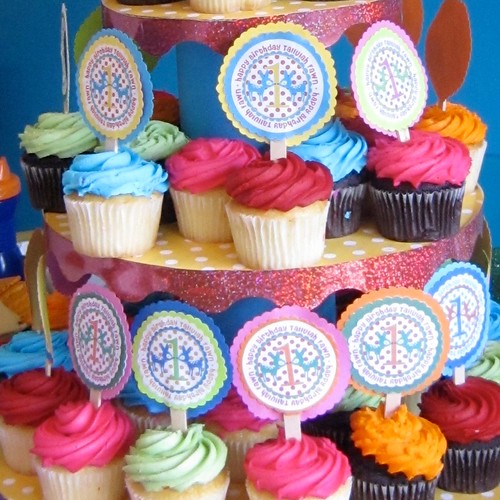
Cupcake toppers make the party, I'm a firm believer in that. You might recall the set I made for my baby shower. It seemed only fitting that a year later I would make them for Tallulah's 1st birthday party. Using small wooden sticks, card stock, scalloped edge scissors and Acid Free Aleene's Tacky Glue I had a batch of colorful toppers in no time. I tweaked my original logo in photoshop to get the different color combinations and printed them out onto card stock paper.


I'm a bit notorious for taking a theme and running with it. I might have gone a little fawn crazy, you be the judge.


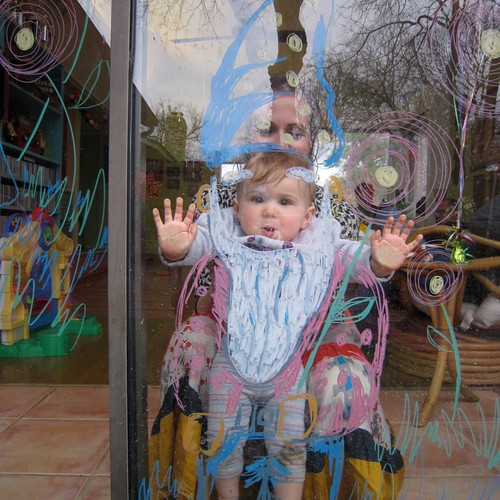
My amazingly talented sister Hope Perkins, who has a deer fetish of her own, did some creative window work for the party. The sliding glass door had a polka dotted fawn on one side and a gnome for the wee ones to pose in on the other.
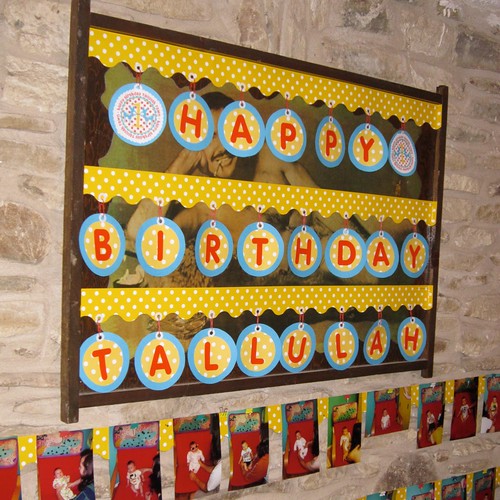


After making a black cat banner at Halloween I caught a bit of banner fever. Using sticker letters, scalloped trim, cardstock, paper clips, hole punch, Aleene's Tacky Glue Glue Stick and hole reinforcers I made a custom Happy Birthday Tallulah banner that censored the Burt Reynolds picture that lives in my living room.


Remember this is a two part series. Tune in next Thursday for more birthday fawn, I mean fun. So what do you think did I go overboard? What kind of custom party decorations have you whipped up? I need to start planning for next year.

Zipper Embellished Headbands

Wednesday, February 24, 2010
Zipper Embellished Head Bands

If you watch the fashion gossip shows or flip open a magazine, it's hard not to notice that zipper detailing is a H-O-T trend right now. How does a crafty gal incorporate said zippers into her wardrobe without re-enacting Michael Jackson's "Thriller" video (respect, yo)? Headbands, my friends, headbands. They're the perfect accessory for getting your zipper on, in a snap! Here's how you can make your own.

Materials
DSC00455

Assorted Headbands
Metal Zippers
Liquid Fusion
Scissors
Needle & Thread/Netting Scrap (Flower Version Only)

How-To

Straight-Up Version
DSC00458
  • Separate zipper and cut off ends.
  • Use Liquid Fusion to glue zipper strip on to headband. Let dry.
Flower Version
DSC00459
  • Separate zipper and cut off ends.
  • Using a needle and thread, sew a running stitch through zipper strip. Pull thread to make strip curl into flower shape. Hand tack to keep shape in place.
  • Cut a circle of netting. Scrunch, tack and fix to zipper flower with needle and thread.
  • Use Liquid Fusion to glue embellishment to headband.
Craft.Rock.Love,
Vickie
Twitter: @vickiehowell

iLoveToCreate Teen Crafts: Creative Wings Journal

Tuesday, February 23, 2010


iLoveToCreate Teen Crafts
Creative Wings Journal Cover
Copyright Margot Potter
"Mom crafted, kid approved."

I spent the better part of yesterday adding layers to a canvas to make a journal cover.  Right as I was finishing the first draft I made an unfortunate executive decision, then tried to 'fix' it and had to scrap the whole enchilada.  Second round I took what I learned and applied it and I'm really digging the final result.  This is a dollar store journal that I've covered with Claudine Helmuth's Sticky Back Canvas which has been layered with a wide variety of Tulip Fashion Graffiti line and Tulip fabric spray products.  This is one of those projects you can easily adapt to your own personal taste.

Every teen needs a place to keep their private thoughts and it's a good thing to take a break from the computer sometimes and pick up a pen.  They can doodle, dream, draw and do what they please inside, the cover is all about inspiring them to spread their creative wings.  Quite frankly, I think young women these days need all of the positive creative inspiration they can get.

Even professionals have craftastrophes sometimes, the key is to turn those experiences into positives.  No matter how badly you mess something up, there is something of value there.  Some of my best ideas came from my worst 'mistakes' so don't be afraid to take creative risks.  I call that creative fertilizer for my crafty garden.  Oh and...sometimes it's good to know when to stop adding 'one more thing' to your designs!


Materials
Basic Cardboard Cover Bound Notebook
Claudine Helmuth's Sticky Back Canvas
Multi-color Textured Yarn (coordinating with paint colors)
Tulip Big Phat Marker Black
Tulip Fabric Cannon
Tulip Cannon Fabric Paint White and Black
Tulip Paint Taggers Silver and Black
Tulip Fabric Spray Neon Pink, Orange, Yellow
Tulip Matte Dimensional Fabric Paint Coral
Tulip Slick Dimensional Fabric Paint Dandelion Yellow and Poppin' Purple
Tulip Fashion Graffiti Stencil Wing (Peace Love Stencil Set)
Aleene's Liquid Fusion Glue

Tools
Sea Sponges
Fabric Scissors
Marking Pen

1.  Begin by adding silver and black paint taggers to your canvas.  Use more silver than black.  Spray some black paint with the fabric cannon.  Use a sea sponge to dab the colors on the canvas until the canvas is covered with a layer of paint.  Allow to dry.

2.  Spray the canvas with pink, orange and yellow fabric spray in layers.  Allow to dry.

3.  Use the cannon fabric paint in white on a sea sponge to dab the wing stencil along both sides of your canvas.  Allow to dry.  I used segments of the wing and cleaned the stencil in between each use, then I could flip it over when working on the opposite side.  This is intended to create a batik or resist style image, so it's not going to be a perfectly clean stencil.

4.  Add more layers of fabric spray as desired.  Allow to dry.

5.  Use the Big Phat marker to accentuate the outlines of your stenciled images.

6.  Use the dimensional fabric paints to add accents to the outlines you've accentuated with marker.  Allow to dry.


7.  Mark the canvas with a pen to fit cover of journal.  Cut the canvas.

8. Adhere sticky canvas to cover.

9.  Attach a segment of fuzzy yarn to the top and bottom of your journal cover using a thick bead of Liquid Fusion glue.  Trim ends with scissors.  Allow to dry.

Quick and Easy Soft Paint Stencil

Monday, February 22, 2010

LUCKY CHARM


St. Patrick's Day is March 17th, and it'll be the perfect day to show off your crafty side with this snazzy little shamrock captured in a charm with Aleene's® Paper Glaze. It dries to a hard, nontacky glass-like finish to accentuate design details for dimensional designs and laminating effects on paper.


Believe it or not, the shamrock isn't real. I found it by "googling" shamrock and it was easy to find actual photos of the real thing. So, I simply printed it out, and I was ready to craft!

First, I cut two 1” wide circles from white cardstock. Then I printed the shamrock image from the web to fit inside 1” circle.

I glued an earring hook between the two circles of cardstock with Aleene’s® Original Tacky Glue®, exposing only the ring of the earring for joining to the chain when completed. (That's why I never throw any old jewelry away when it breaks... you can always use strays for crafting later.)

Next, I carefully cut out the shamrock and glued it to one side of the charm and let it dry.

I wanted both sides to look nice, so I turned the charm over to the backside and glued green Tulip® Glam-It-Up!™ Iron-On Crystals™ over the entire circle. Yes, I know the crystals are iron-ons, but they are positively wonderful to glue to paper!

After the crystals dried on the back of the charm I turned it over to the front and glued crystals around the outside edge, circling the shamrock.

Next comes the amazing part. I squeezed a thin layer of Aleene's® Paper Glaze over the shamrock, carefully covering to the edge of crystals. That's what makes it look like resin, and all shiny. It's important to let it dry overnight before you touch it, so you don't get your fingerprints on it and make it dull.

Last of all, I used needle-nose pliers to attach my lucky charm to a chain with a jump ring.

There ya go....A cute little lucky charm to wear or give away on St. Paddy's Day!

For more wacky & crafty ideas,

Come see me at: iLoveToCreate.com and at PattieWack.com


Wedding Cake Card Box

Friday, February 19, 2010

When it comes to bridal crafts, don't leave out the gift table. Here's the recipe to a picture-perfect faux wedding cake that is created simply by stacking a set of hatboxes.
Wedding Cake Card Box

Supplies:
- 3 papier-mache hatboxes in graduated sizes (8 inches, 11 inches and 14 inches in diameter)

- 9 sheets of scrapbook paper in three patterns, three sheets for each box


- Craft knife

- Foam or silk flowers


- Bride and groom topper

- 10-inch piece of netting or tulle
- Hot glue

Directions: Remove lids from the 8-inch and 11-inch boxes (these will not be used in final project). Choose a pattern of paper for each box. Working with one box at a time, add a coat of Aleene’s® Fast Grab™ Tacky Spray® to the bottom and outside and apply paper. Smooth out any bubbles with fingertips. You now have the three cake tiers.

Take the lid to the 14-inch box and make a slit 1 1/4 inches from the edge with the craft knife. Make it long enough across the length of the lid so cards can easily fit through. Use Aleene’s® Fast Grab™ Tacky Spray® and paper to cover the lid and the craft knife to cut through to the slit. On all the boxes, cover up where paper edges meet by adding trim, flowers or rows of Tulip® Glam-It-Up!™ Iron-On Crystals™ .

Turn the top two tiers over. Hot glue the 8-inch box to the center of the 11-inch box, then glue that box to the lid of the 14-inch box. Place the tiered lid on the 14-inch box. It will look like a round-tiered wedding cake.

Hot glue the bride-and-groom topper to the top of the cake and affix the tulle to their heads so that it drapes down over the back of the cake. Place your new wedding cake card box on the gift table so guests can insert cards.

VARIATIONS: Use fabric, wrapping paper or paint instead of paper to match your wedding colors.

Year of the Tiger Hat

Wednesday, February 17, 2010
Year of the Tiger Hat

Is kiddo the apple of your eye, or the eye of the tiger? Well, she can be both, with this furry fez! Here's how you can sew and paint your way to a cozy Chinese New Year for your purrfect, little kitty.

Year of the Tiger Hat Supplies

Materials
1/4 yd. Tiger Print, Polar Fleece
Scissors
Sewing Machine
Coordinating Thread
Fine Tip, Paint Brush
Embroidery Needle & Black Floss

How-To Make Hat
  • Cut 9" x 18 1/2" (or whatever your child's head measurement is, plus 1/2") piece of polar fleece.
  • With right sides together, fold fleece in half width-wise. Using 1/4" allowance, sew up back seam.
  • Position seam so it's on the back side. Using 1/4" allowance, sew top seam.
  • Fold bottom edge up, 2" to create brim. Using 1/4" allowance (from raw edge), sew around.
  • Turn hat right side out. Pinch one, top corner; wrap embroidery thread around tightly several times; tie off. This will create an ear. Repeat on opposite side.
How To Create Tiger "Eyes"
  • Place a piece of paper or cardboard inside hat, so paint won't seep through.
  • Using just one flame from the Flames stencil, Paint Cannon and white Cannon Paint, spray on base layer of the eye. Reverse stencil for 2nd eye. Let dry. Keep in mind that the Paint Cannon gives a spray paint effect, so there will be a bit of splatter. Don't worry; go wild.
  • Use a fine tip paint brush and green Slick Fabric Paint to paint the 2nd layer (iris) of the eye. Let dry.
  • Using black thread and needle, embroider black pupils. Growl.

DSC00392

Have a grrrrreat 2010!

Craft.Rock.Love,
Vickie

Graffiti Pillow On the Fly

Tuesday, February 16, 2010


This weekend, my friend Silvia (a.k.a. StudioMama) and I did a quick and easy video showing you how easy it is to use the new Tulip Fashion Graffiti products! We had a blast doing it! We just played with the product and had fun...I think part of the cool thing about this product is that it really allows you to just play and not think so much. I tend to overanalyze and think too much sometimes about what I am designing. This lets you loosen up and be free with your art and break out of that mold.

I was inspired by some various pillows I had found online (some retailing up to $70 a pop)!!

Here's a pic of the finished product! It's sloppy and messy...what makes graffiti so great!

Graffiti Pillow by Silvia

Here's a whole slew of projects that we also have using the Graffiti product. We've compiled them in this Flickr set. Click on each project and at the bottom is the tutorial link to the project instructions on iLoveToCreate.

Look for Tulip® Fashion Graffiti™ endcap at your local Michaels! It's also available via iLoveToCreate.com!

iLoveToCreate Teen Crafts Flower Power Frame

Flower Power Shadowbox Frame by Margot Potter for iLoveToCreate
(click on images to view close-up)
iLoveToCreate Flower Power Frame
Margot Potter
Teen Crafts
‘Mom crafted, kid approved.’

I’ve lately become obsessed with crafting flowers, as you may be able to tell from my projects for iLoveToCreate. This shadowbox frame showcases a funky fiber flower made on a loom. I’ve created a collaged image to go inside, you can place anything you like in the frame including 3-D elements because it's a shadowbox. I love the irony of a Snow Day image in a warm and flowery setting. If you wander down the scrapbook aisles you’ll find lots of great coordinating paper collections that make fun collages, just size and print a photo and add glue and glitter accents and some Tulip Glam it Up crystals.  Avalon is excited to put this pic on her desk in her new office.


(Don't forget to head on over to iLoveToCreate and vote for your favorites in their Dress Up Your Pet Contest!)

Materials
Wooden Shadowbox Style Frame (I got mine at JoAnn Fabrics)
Crafty Chica Little Paint Pack (red and white mixed to create fuchsia)
Traci Bautista’s Collage Pauge Sparkle
Textured multi-colored yarn
Thread to attach bead or button
Large matching bead or button accent
Liquid Fusion glue

Tools
Boye Bloom Loom™ Flower Making Loom
Paint brush
Foam brush for decoupage medium
Sewing needle to attach bead or button
Scissors
Sand Paper

1. Sand and paint frame with a 2/3 to 1/3 mix of red and pink paint to create a fuchsia color.

2. Follow instructions on the loom to create a fiber flower.

3. Attach a coordinating bead or button to flower with thread.

4. When paint dries, add a coat of Sparkle Collage Pauge to seal it.

5. Use a bead of liquid fusion to attach yarn to the indentation of your frame. I used two rows of yarn.

6. Attach the flower to the top left or right corner using Liquid Fusion.

7. Create a fun coordinating paper collage to go inside of the frame. This will be a great way for teens to personalize this idea. I glued the elements down with a glue stick and adhered the collage to the back of the frame with a thin bead of Aleene’s Tacky Glue around the edge.