Showing posts with label Party. Show all posts

How to Throw a Customized Birthday Part - Part 2

Thursday, March 4, 2010

Birthdays come but once a year, so why not go all out? Last week I showed you how to make cupcake toppers, party favor magnets, banners and more. This week is part 2 of our series on how to throw a customized birthday party.


If you missed last week, let me catch you up. My daughter's name is Tallulah Fawn and I decided to throw her a customized, fawn themed 1st birthday party. Some people might say I went a little overkill, I say it's just right.


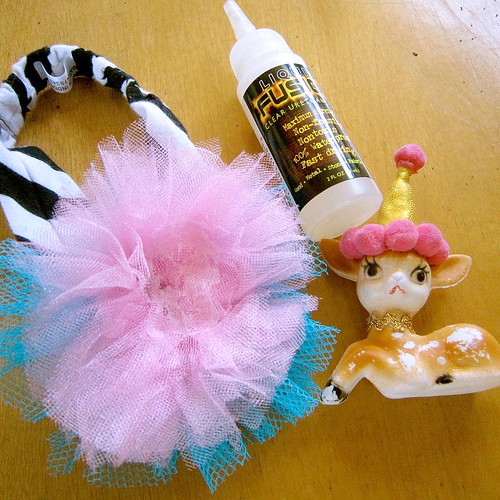
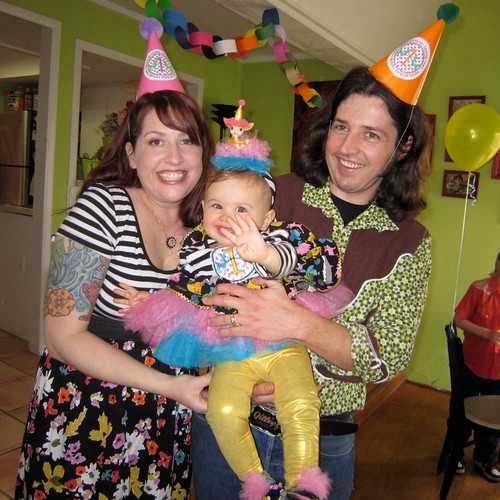
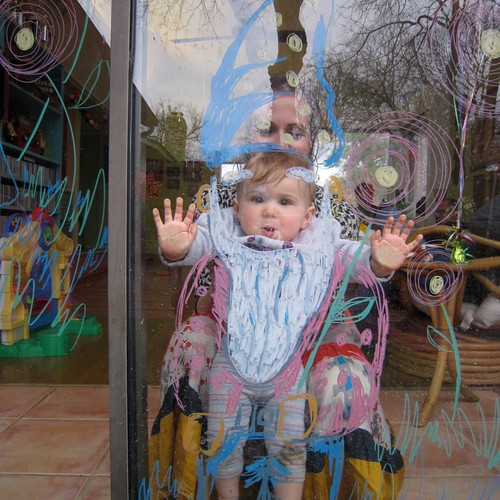
Literally from her head to her toes we kept up the fawn theme. Thank God for Grandma Perkins. She whipped Tallulah up the outfit of my dreams. Including a fawn in a party hat headband. The tulle was stitched to the headband and a wee little party hat for the crown was made. After that the tiny pom poms were glued to the gold lame party hat with Liquid Fusion Glue and then the fawn was glued to the headband.


Various deer vignettes were sprinkled throughout the house to keep things festive and in theme.


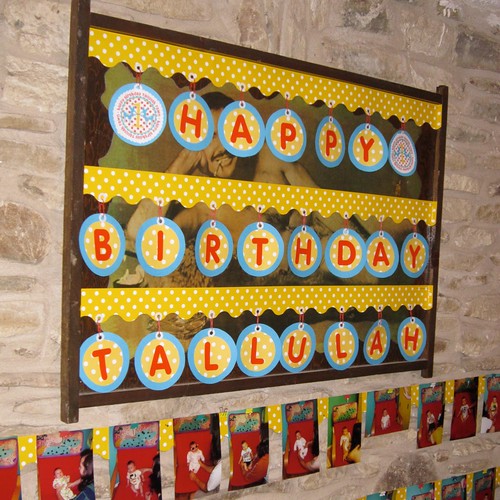
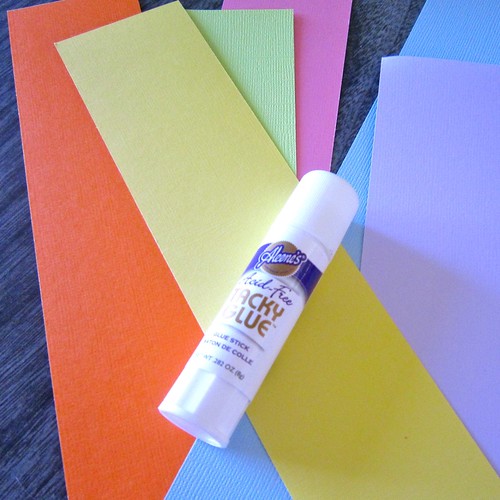
I decided one banner was better than two. Who knew you could buy paper already cut into the perfect size for making a chain banner in the scrapbook section of your local craft store? All that was left to do was to use my handy dandy Aleene's Glue Stick and some clothes pins to make the rainbow chain.


Ok so maybe it was more like 3 banners are better than 1.


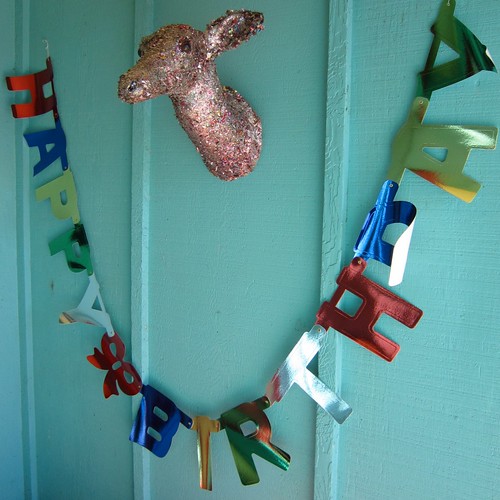
The whole party production was a family affair. Not only did my sister Hope draw the amazing deer and gnome window decorations I showed you last week, she also was kind enough to loan us a piece of glittery taxidermy to welcome our party guests with.


I have taken a picture of Tallulah in the same chair every Sunday since she was born. Well not the first Sunday because I did not have the idea yet, but 51 out of 52 weeks is not too shabby. Anywhoo I hung all the pictures where the party guests could take a gander at Tallulah through her first year.


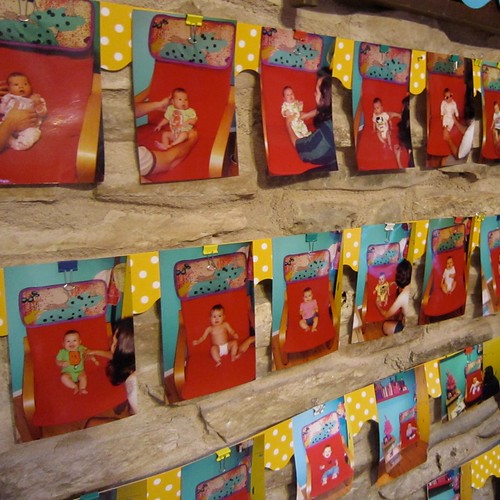
I'm now toying with the idea of doing a scrapbook with the pictures. I wish I had taken little notes of her weekly activities to add to this imaginary scrapbook.


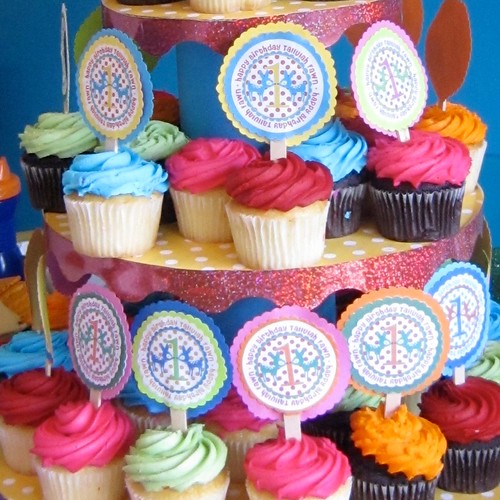
Grandma Perkins to the rescue again. I had bitten off more fawnage than I could chew, so my mother stepped in to whip up a cupcake stand. Using cake rounds, scrapbooking paper, decorative scalloped edge trim and some Aleene's Glues she came up with something amazing. She even incorporated in Tallulah's birthday logo.


The cupcake stand matched the custom cupcake toppers I made perfectly!


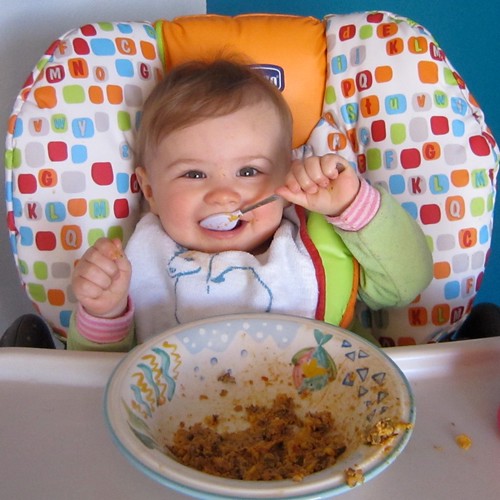
Speaking of my mother and the birthday logo. Did you happen to notice in the pictures of Tallulah that she has a patch of her logo on her dress? Oh ya mom and her fancy embroidery machine made some serious magic happen.


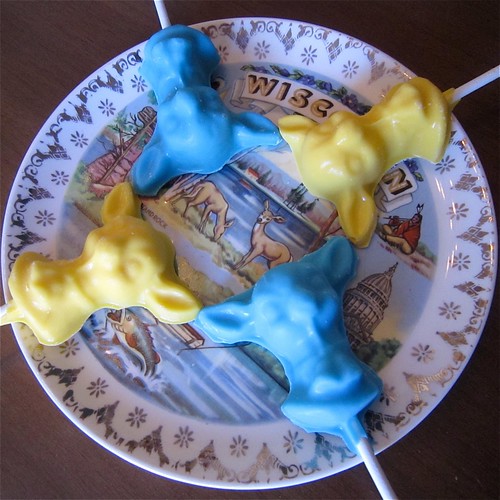
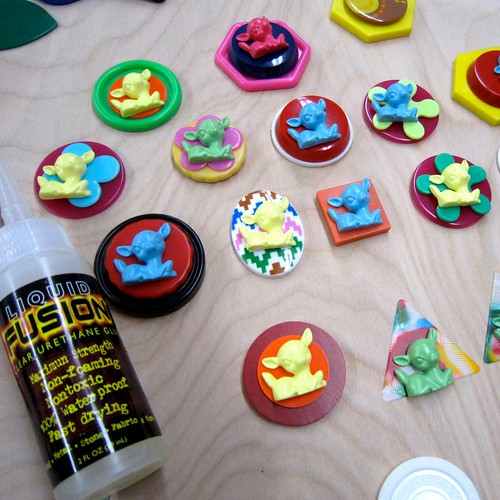
Mmmm deer lollipop anyone? Not only did I use this adorable deer mold to make soap to put in all the goodie bags I also used it make fawn pops.


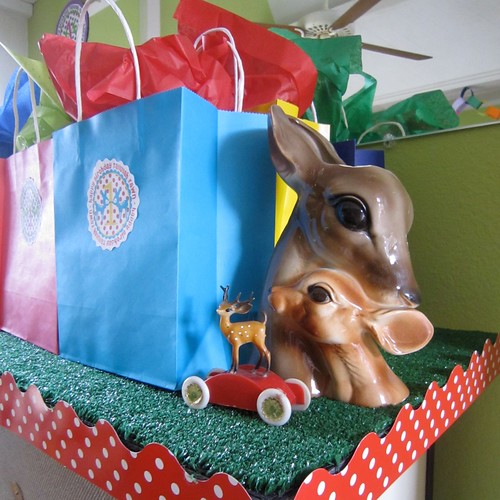
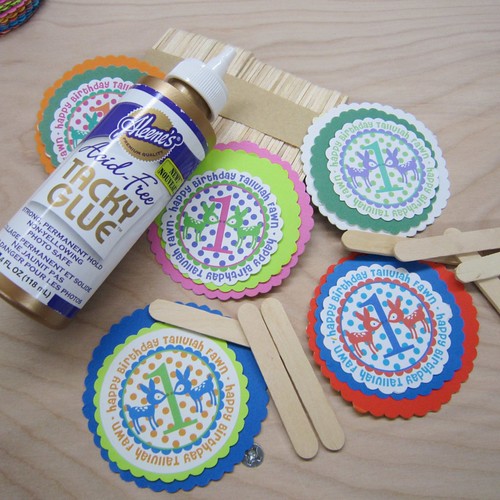
Plain goodie bags were spiced up with the birthday logo. All I had to do was print them, cut them and glue them to the bags with Aleene's Tacky Glue Stick. I filled them with Fun with Maisy: A Sticker Book (her best friend is a chicken named Tallulah), vintage Bambi (Little Golden Book)that my mother and I found at various Half Price Book Stores, fawn soap and bibs.


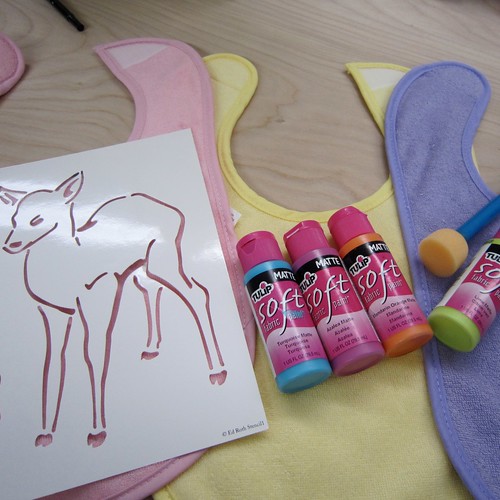
Did you really think they were plain bibs? I used a stencil from Stencil 101: Make Your Mark with 25 Reusable Stencils and Step-by-Step Instructions and Tulip Soft Fabric paint to put a fawn on each bib for all the wee attendees.


I had to keep one for the birthday girl, duh.


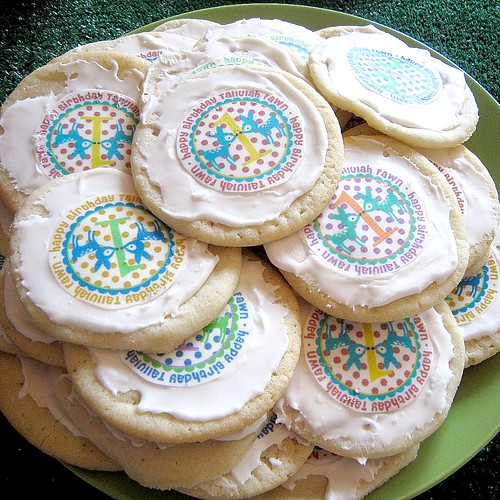
Between the cupcakes, fawn pops and cookie I should have put toothbrushes in the goodie bags. I sent the birthday logo to a local bakery who had a magical printer with edible ink that printed on sheets of fondant. All that was left for me to do (well actually my husband) was to bake and ice the cookies and stick the fondant logos on top.


So there you have it. I left no fawn stone unturned. Is it scary that I am already thinking of ideas for birthday number 2?

How to Throw a Customized Birthday Part - Part 1

Thursday, February 25, 2010

Sure it is a lot easier to hit the party store and buy a pre-prepared theme birthday party kit, but it is a lot more fun to make a party theme yourself. I admit I perused the internet looking for party hats and goodie bags that fit the bill for my daughter's 1st birthday, but nothing seemed quite right. Then I contacted a few Etsy vendors that specialized in custom party gear that didn't bother to write me back. Left with nowhere else to turn I decided to take matters into my own hands. Sure it was a whole lot of work, but the end result was exactly what I wanted. Today on I Love to Create we have part 1 of a 2 part series on how to create your own custom party decorations!


Every good party needs a theme and for this particular birthday I decided to work with Tallulah's middle name, Fawn. I started to go with cherries and powdered wigs since she shares a birthday with George Washington, but that seemed a bit obscure for a 1 year old. Fawns are perky and fun and more importantly between my mother and I we had a ton of them to decorate with. First things first I had a logo designed by Autumn Leah Designs. Doesn't everyone have birthday logos designed? From there all that was left to do was plaster the birthday logo on everything.


Is there anything cuter than kids in party hats I ask you? You might remember from my escapades making fabric covered crowns and pipe cleaner tiaras that I am a firm believer in the idea that a decorated head makes everything more festive. Making your own customized party hats is easy as pie with a little Collage Pauge, colorful pom poms, Tacky Glue, decorative trim and blank party hats available at the party store.


Those of you with an eye for detail might have noticed that I spelled Tallulah wrong with the blocks. I needed to steal an L what can I say. I also went to Home Depot and scored several feet of astroturf to cover all the tables with. I was going for a green grass feel with all my fawn and deer.


I ordered a whole slew of colorful resin fawns from Buzzard Brand. I made souvenir magnets for all the families that attended the party using various plastic cabochons, the fawns and Liquid Fusion Glue.


The little green baggies are filled with fawn shaped soap. Ordered the molds from Bake It Pretty and the soap supplies are Soapy Love.


Cupcake toppers make the party, I'm a firm believer in that. You might recall the set I made for my baby shower. It seemed only fitting that a year later I would make them for Tallulah's 1st birthday party. Using small wooden sticks, card stock, scalloped edge scissors and Acid Free Aleene's Tacky Glue I had a batch of colorful toppers in no time. I tweaked my original logo in photoshop to get the different color combinations and printed them out onto card stock paper.


I'm a bit notorious for taking a theme and running with it. I might have gone a little fawn crazy, you be the judge.


My amazingly talented sister Hope Perkins, who has a deer fetish of her own, did some creative window work for the party. The sliding glass door had a polka dotted fawn on one side and a gnome for the wee ones to pose in on the other.


After making a black cat banner at Halloween I caught a bit of banner fever. Using sticker letters, scalloped trim, cardstock, paper clips, hole punch, Aleene's Tacky Glue Glue Stick and hole reinforcers I made a custom Happy Birthday Tallulah banner that censored the Burt Reynolds picture that lives in my living room.


Remember this is a two part series. Tune in next Thursday for more birthday fawn, I mean fun. So what do you think did I go overboard? What kind of custom party decorations have you whipped up? I need to start planning for next year.

Tacky, But CUTE Thanksgiving!

Monday, November 23, 2009

Oh no- - -ooooooh, Thanksgiving is Thursday, and you need a centerpiece, candlelight, and cute little party favors. What to do????


Well, I've got it right here. This Thanksgiving centerpiece is way wacky, but it makes a great impression.

I made a big pot for my mum centerpiece, then the little pots hold candles and then I put candy corn in polka dot tulle and dropped it into little pilgrim hats.
Preeety cute, a little tacky because of the tacky glue, and easy, too.

Grab These Supplies:

Clay pot
Black spray paint
Black foam board
Pencil
Compass
Craft knife
Aleene's Fast Grab Tacky Glue
Craft metal, felt or cardstock for buckle
Black velvet ribbon (same width as the rim on the clay pot)

Follow These Steps:

1. Spray paint the clay pot black, let dry completely.
2. Turn the pot upside down on foam board. Trace around the rim, then set aside. Use a compass to draw a line 4 inches from the traced circle.
3. Cut around the outside circle with a craft knife, being careful to cut a nice, smooth edge.
4. Cut out the inside circle, 1/2-inch smaller than the traced line. If you plan to use the pot as a tray instead of a flowerpot, don’t cut out the center hole.
5. Glue the brim to the top of the pot with Aleene's Fast Grab Tacky Glue.
6. Cut out a buckle from craft metal, felt, or cardstock.
7. Thread black velvet ribbon through the buckle and glue to the rim of the pot.

You can plan your Thanksgiving centerpiece around a pilgrim theme with Pilgrim Party Hats. Place a pot of mums or fresh flowers in one large pot. Don’t cut a hole in the brim of another pot, and you can use it to display cupcakes or other goodies!


Happy Thanksgiving, Crafty Pilgrims!

Hugs & Blessings,
Pattiewack