Before the snowflakes invade, I'm still celebrating the last of the fall foliage. The leaves are so beautiful this time of year in Brooklyn. I was up in New England for peak color, but even the last few weeks in Brooklyn have yielded a lovely array of color and variety. Of course, no matter how you try to keep them, the color fades, and they become dry and brittle. Here are three projects with a common autumnal theme that, like the
snowflakes I made and painted last year, help make nature last a little longer.
INSPIRATION 1: DIY Leaf Stencil
This one starts with your basic stencil...
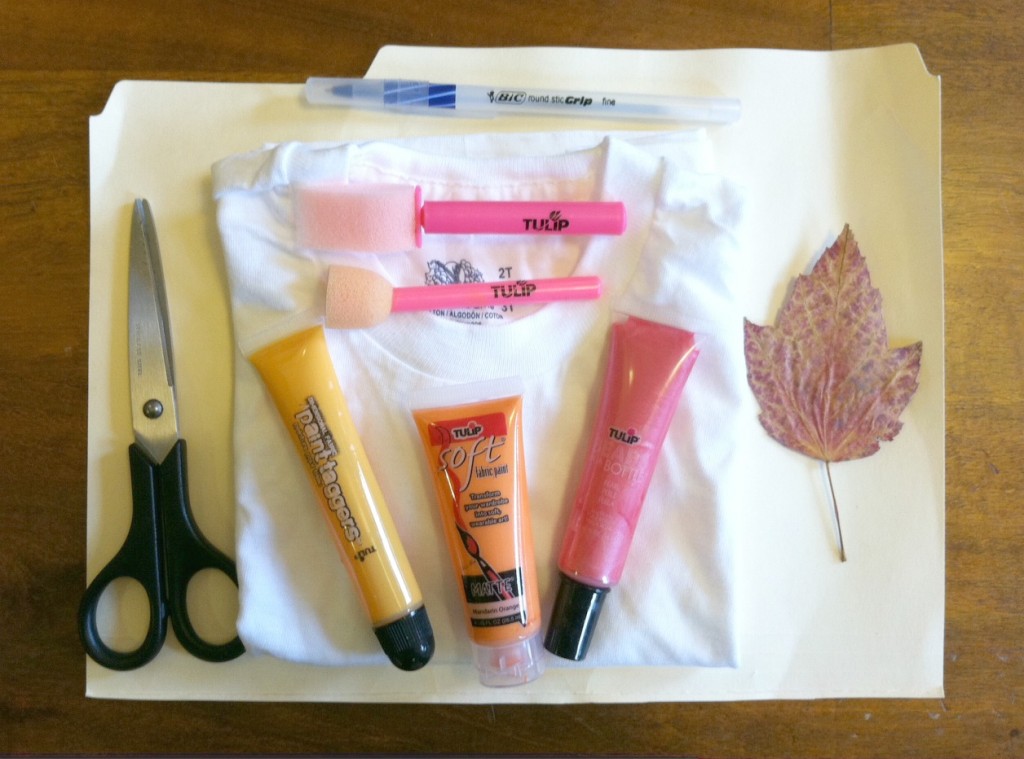 What you need:-variety of Tulip soft paints and/or Tulip 3D Fashion Paints (in shades of red, orange, and yellow)-Tulip sponge brushes and/or Tulip sponge pouncers-variety of pressed leaves for inspiration
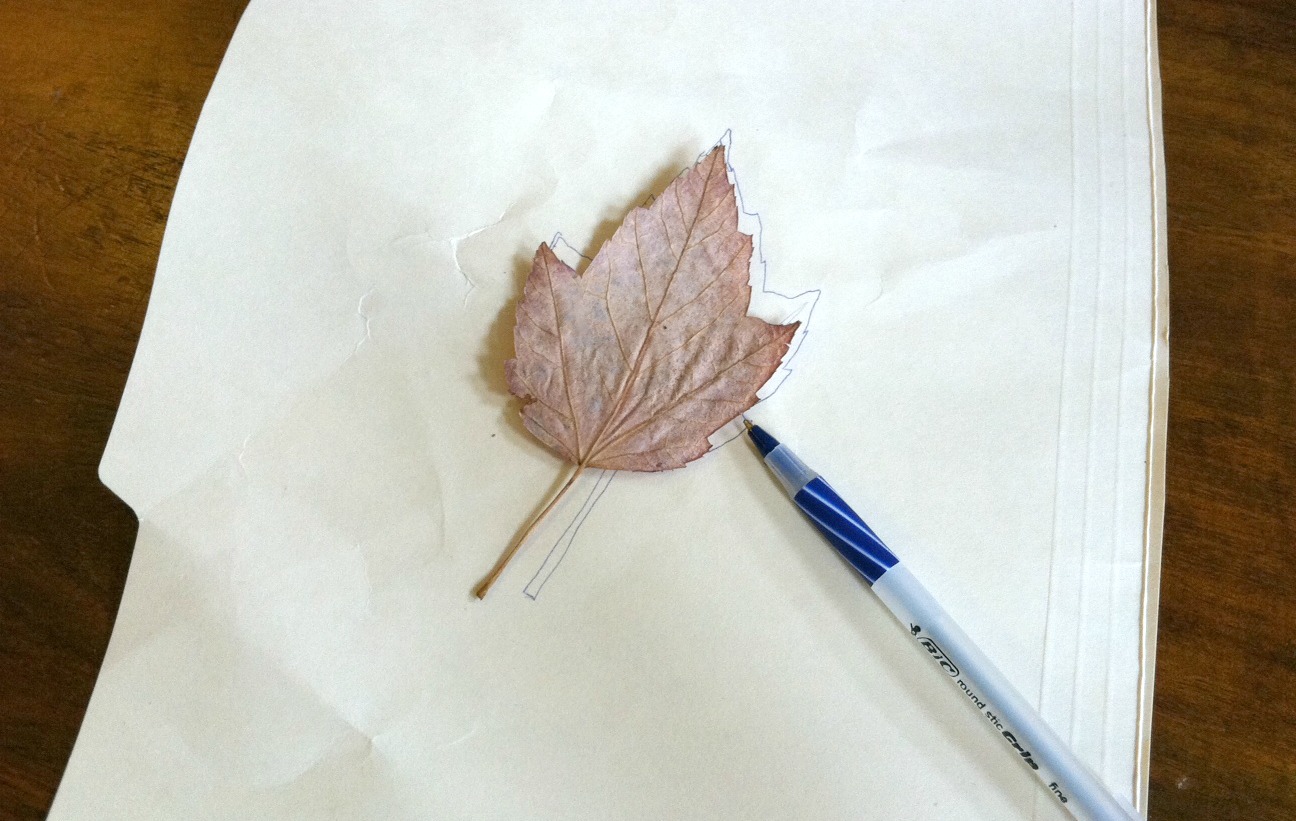
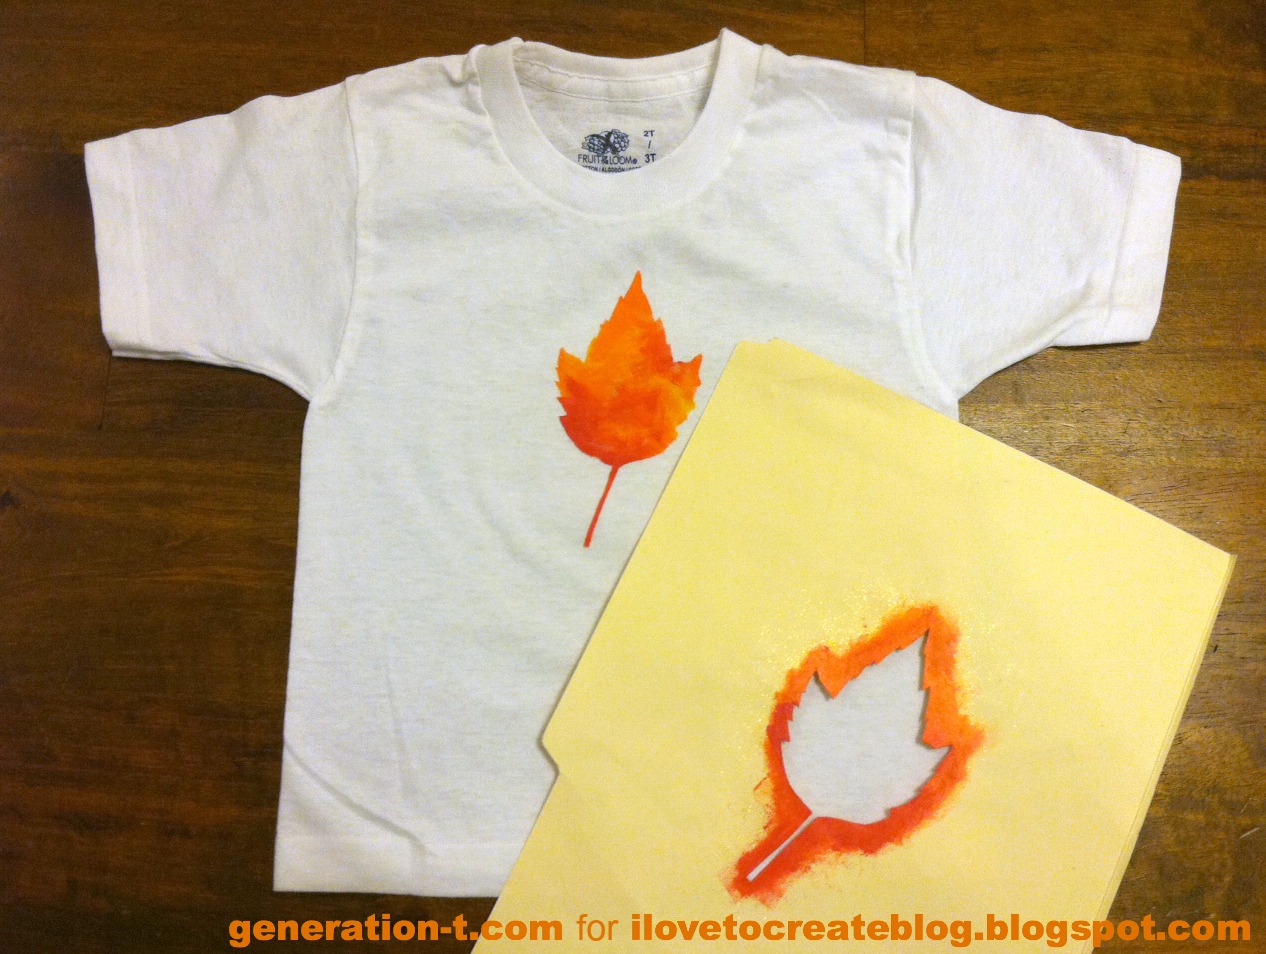
-sheet of card stock (or scrap manila folder)-pen or pencil-scissors or craft knife and cutting mat-plain T-shirt (lighter colors work best, but white is not required!)-paint palette (or a plastic container from the recycling bin)-scrap paper (optional) for inserting between the layers of a T-shirtTrace the leaf onto the center of the card stock.
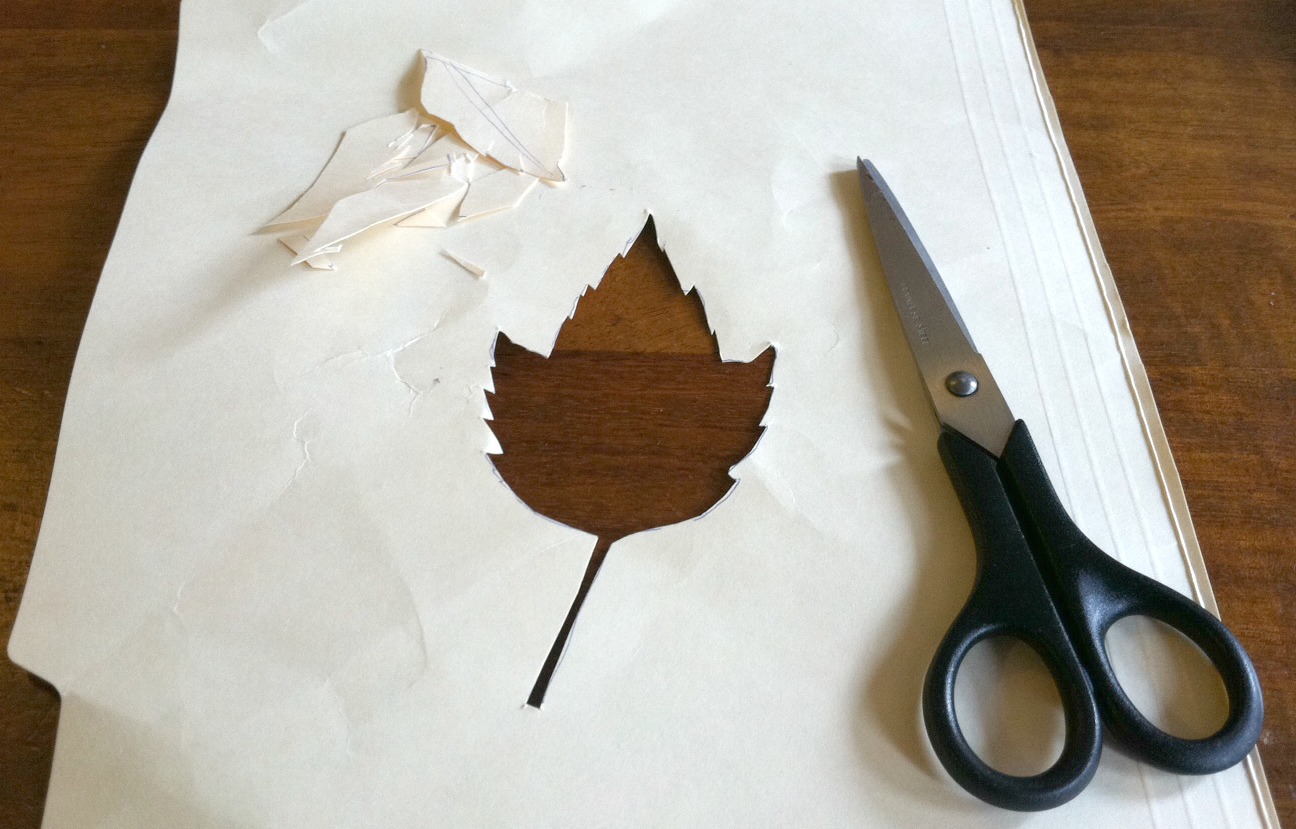
Cut out the center of your tracing.
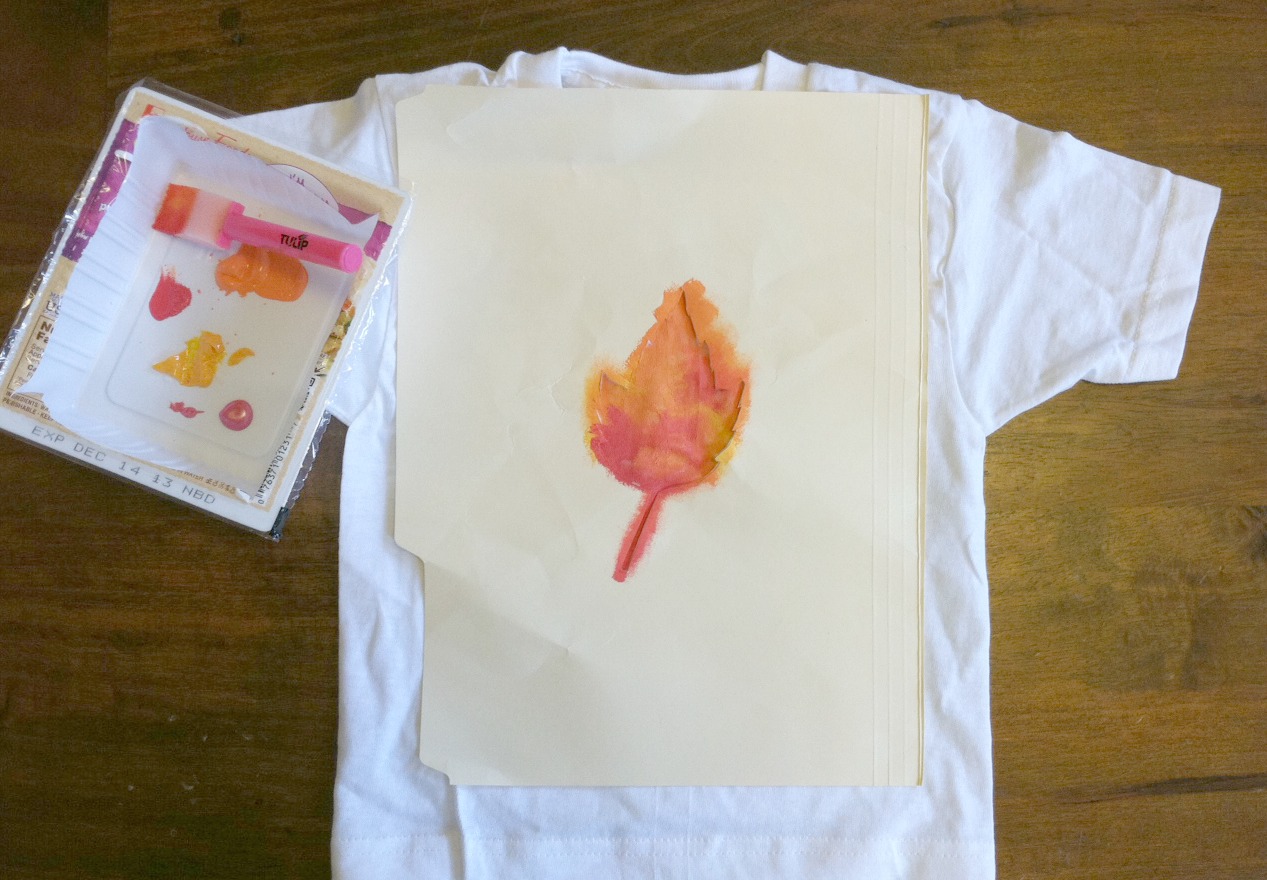
Place scrap paper between the layers of the T-shirt, to keep the paint from bleeding through. Hold the stencil, centered, on the front of the T-shirt and use the brush to lightly start adding paint. Dab the brush, rather than making broad strokes--any brushstrokes should be made from the stencil edge onto the fabric (so that paint doesn't get caught underneath the edge of the stencil and bleed).
Apply each color as desired, then lift the stencil, let dry, and remove the scrap paper.
You're ready to wear your single leaf...
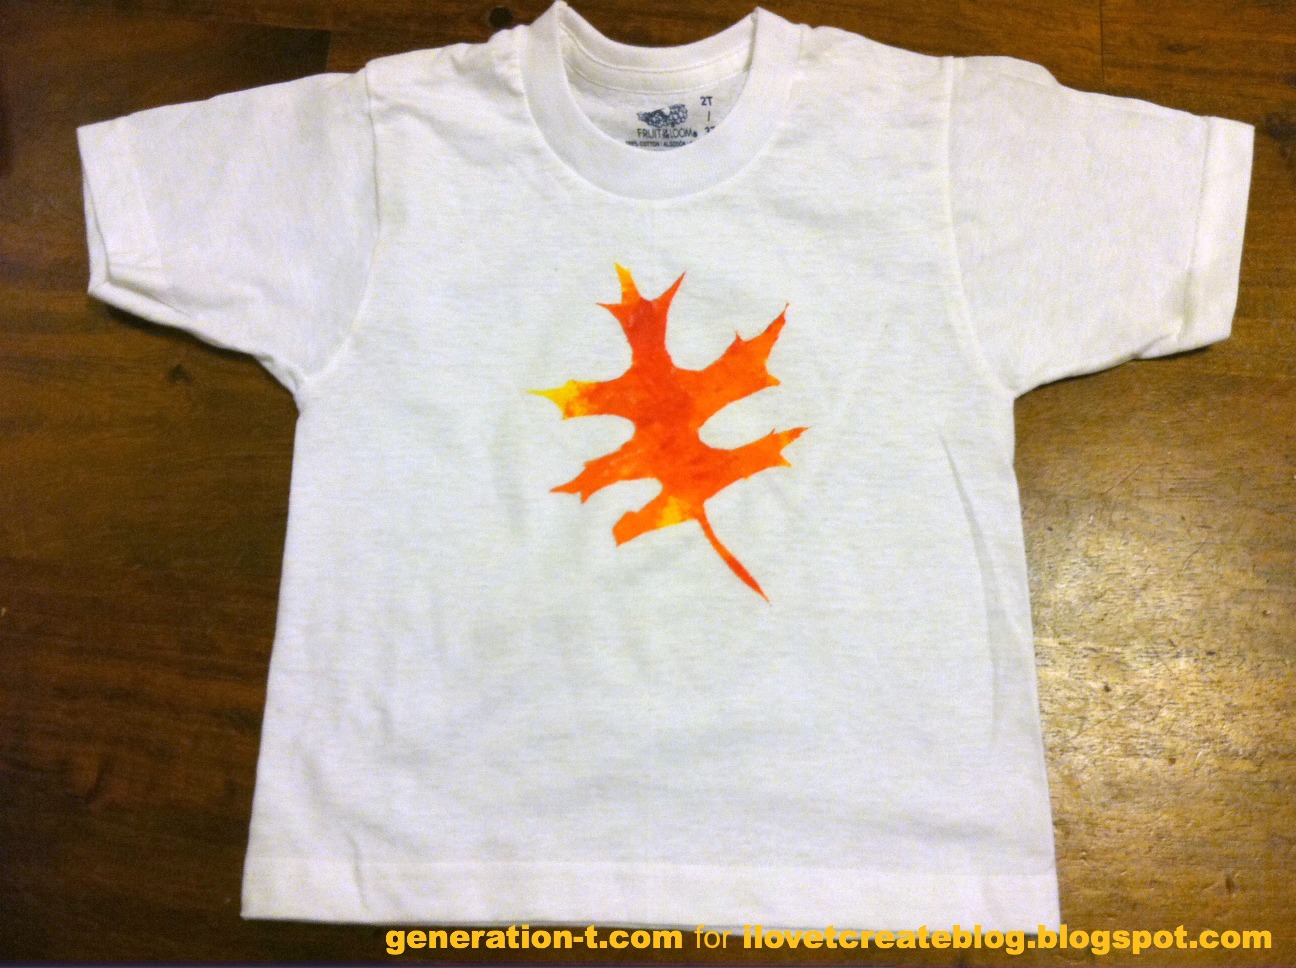
...or a different one, if you're more into oak...
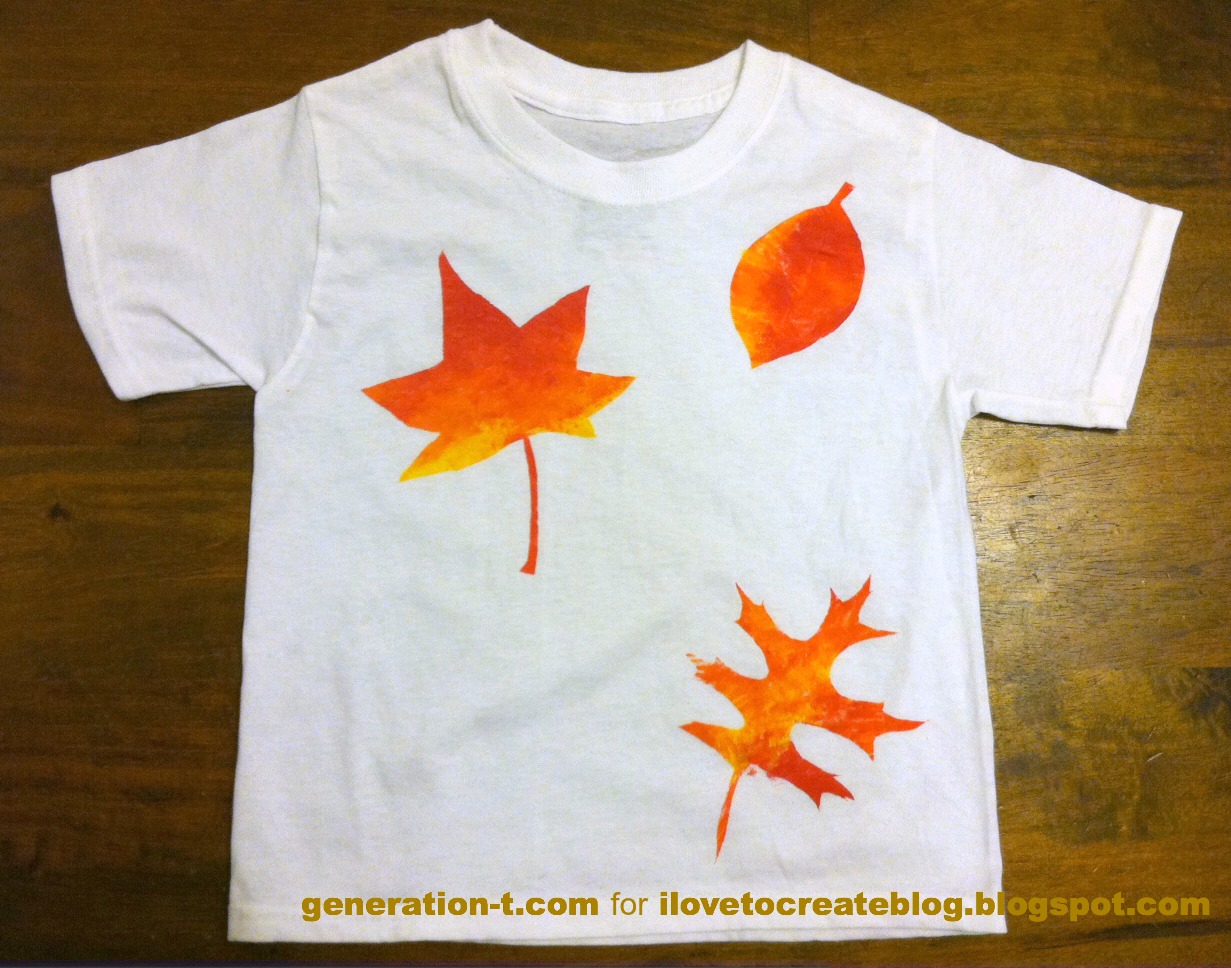
...or a variety, if you can't choose just one...
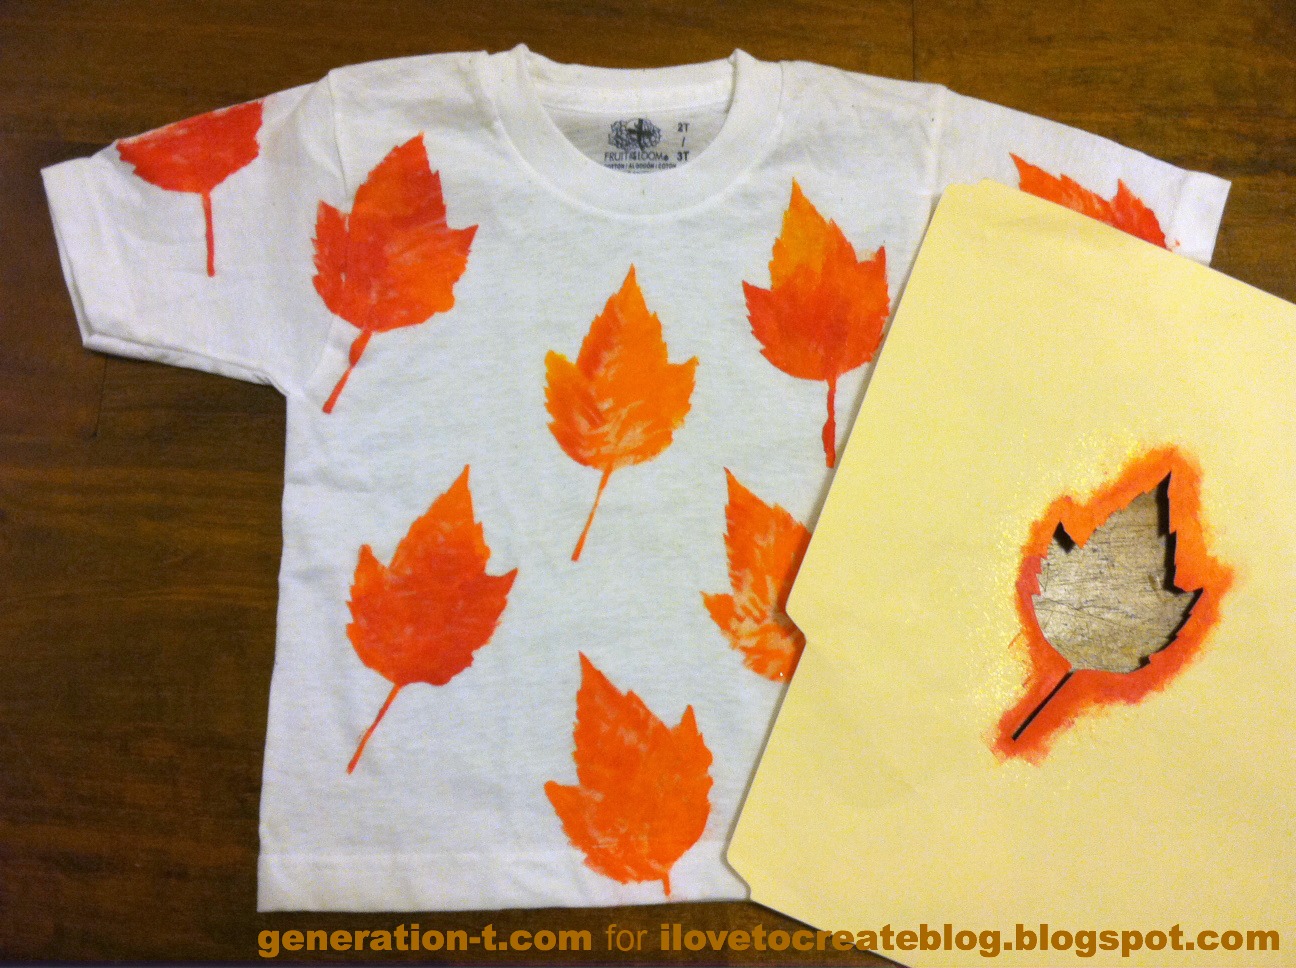
...or just jump in a whole leaf pile!
---
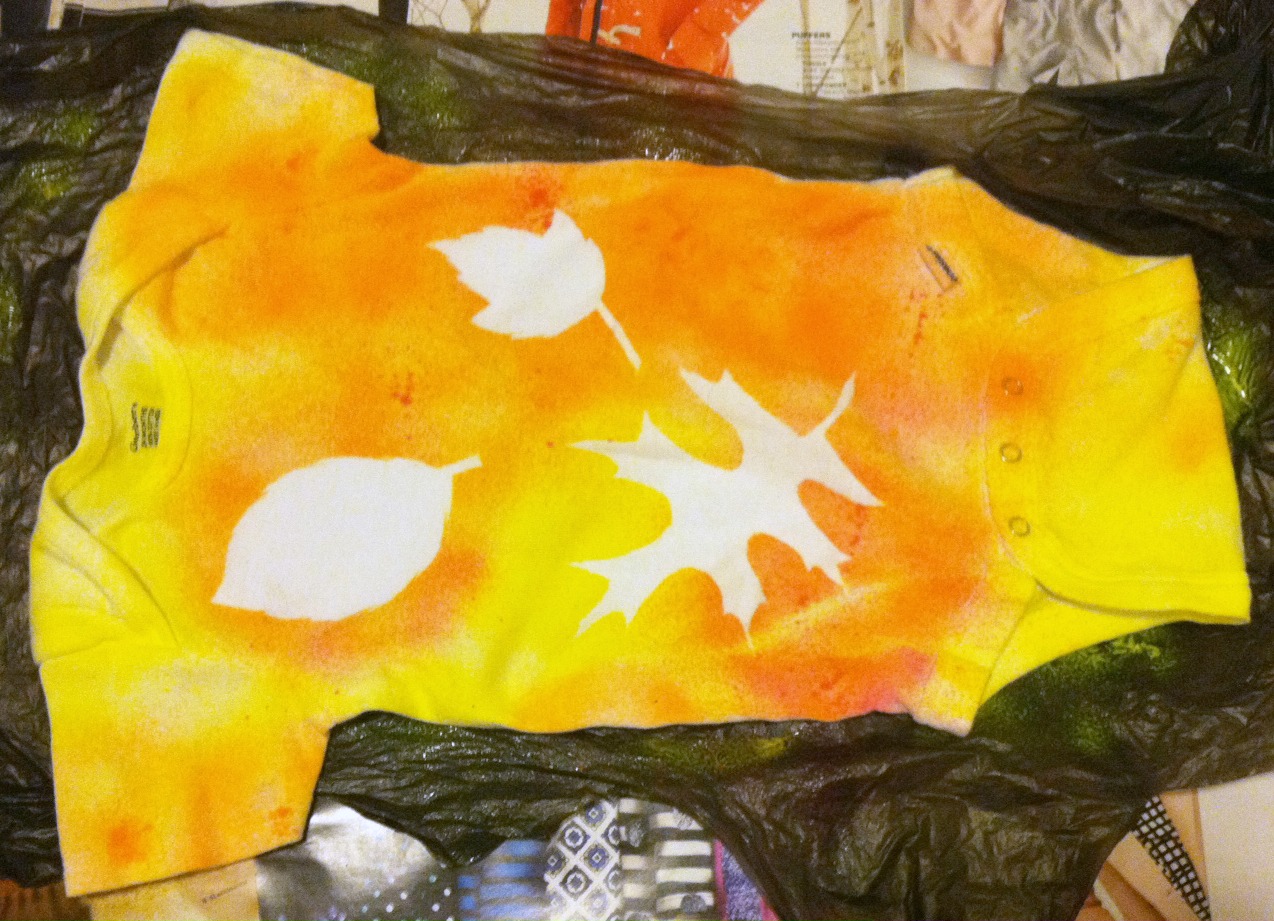
INSPIRATION 2: Reverse Leaf Stencil
This is the same concept as the stencil out of card stock, but you're instead using freezer paper as your mask, and painting the space around the leaf shape.
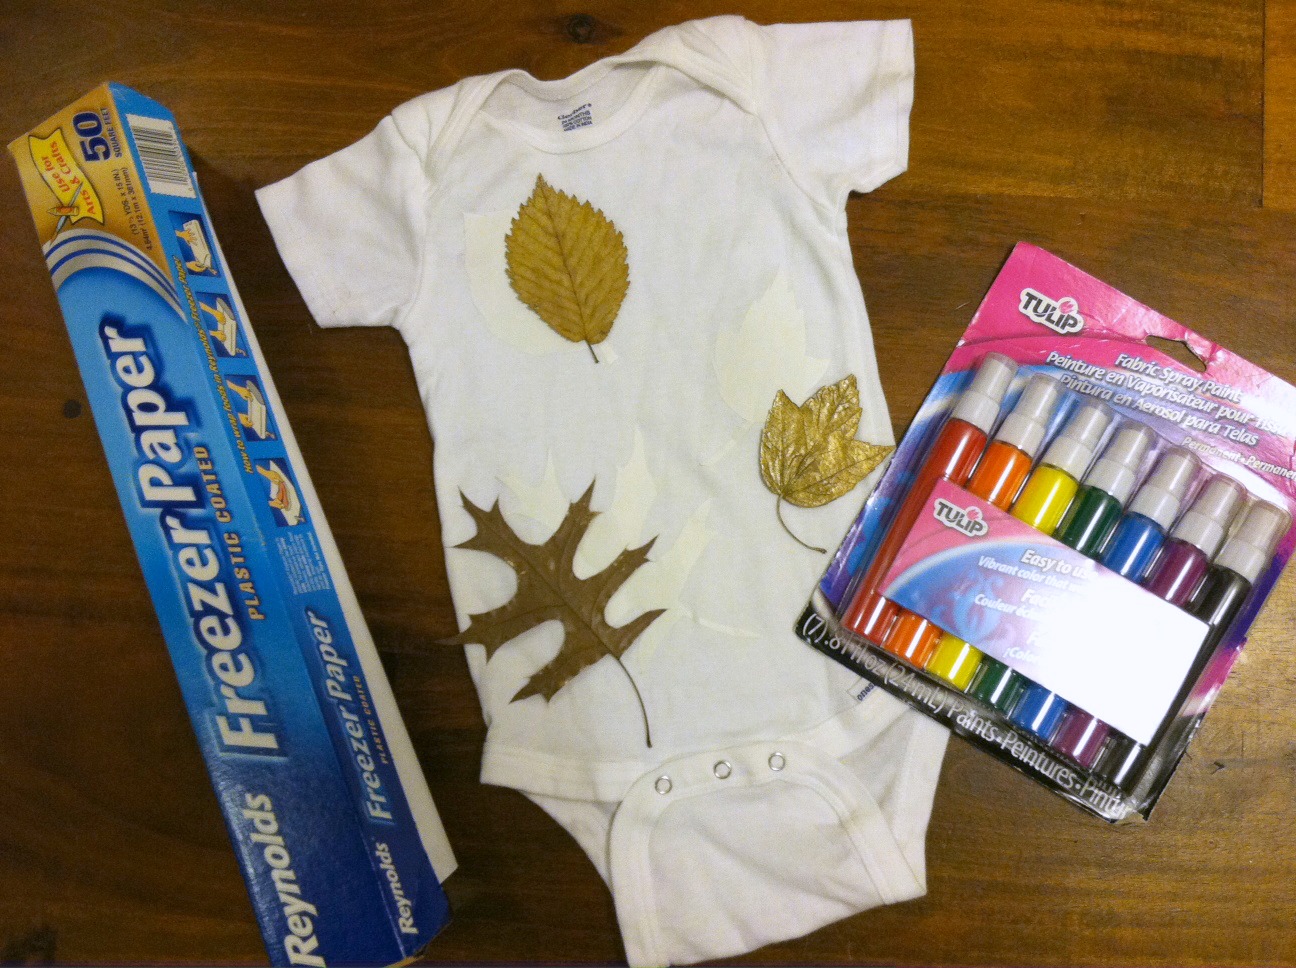
What you need:-variety of Tulip Fabric Sprays (in shades of red, orange, and yellow)-variety of pressed leaves for inspiration
-sheet of freezer paper
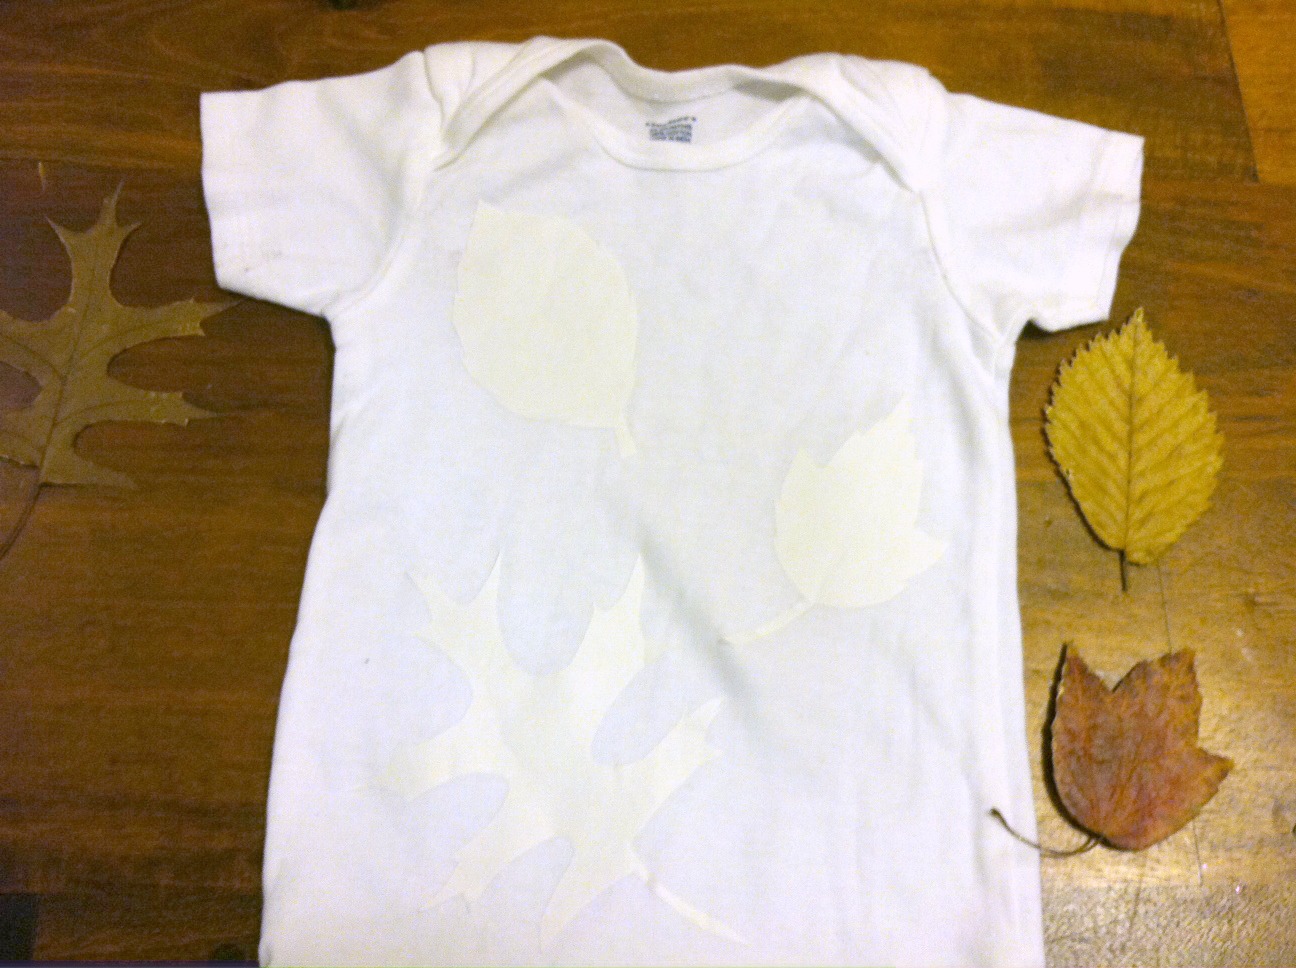
-pen or pencil-scissors or craft knife and cutting mat-iron and ironing board-plain T-shirt or onesie (lighter colors work best, but, again, white is not required!)-scrap paper (optional) for inserting between the layers of a T-shirt and to protect your work surface from paint Just trace a variety of pressed leaves onto freezer paper and cut them out. Iron the paper leaves, shiny side down, onto the front of the shirt (white on white is hard to see, but they're there!).
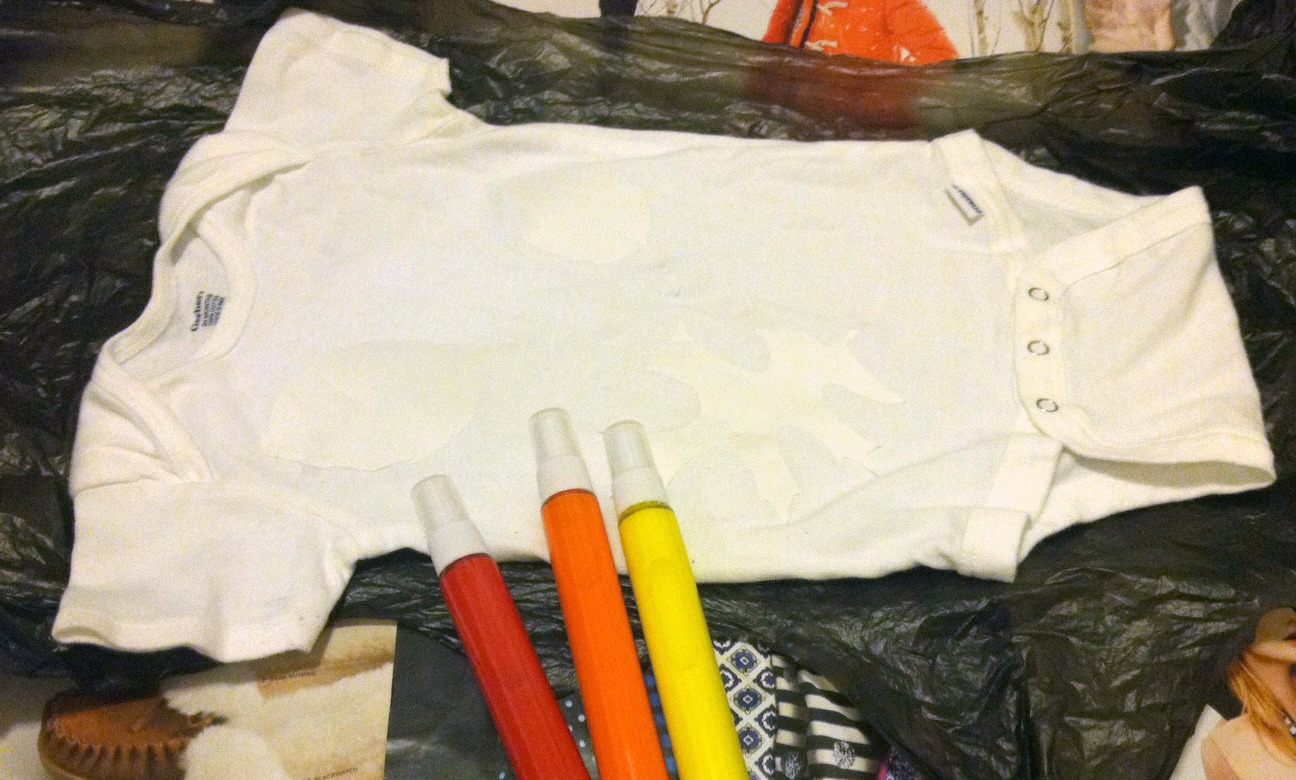
Lay the shirt on a bed of scrap papers (holiday catalogs are perfect!) before you spray the fabric paint over it.
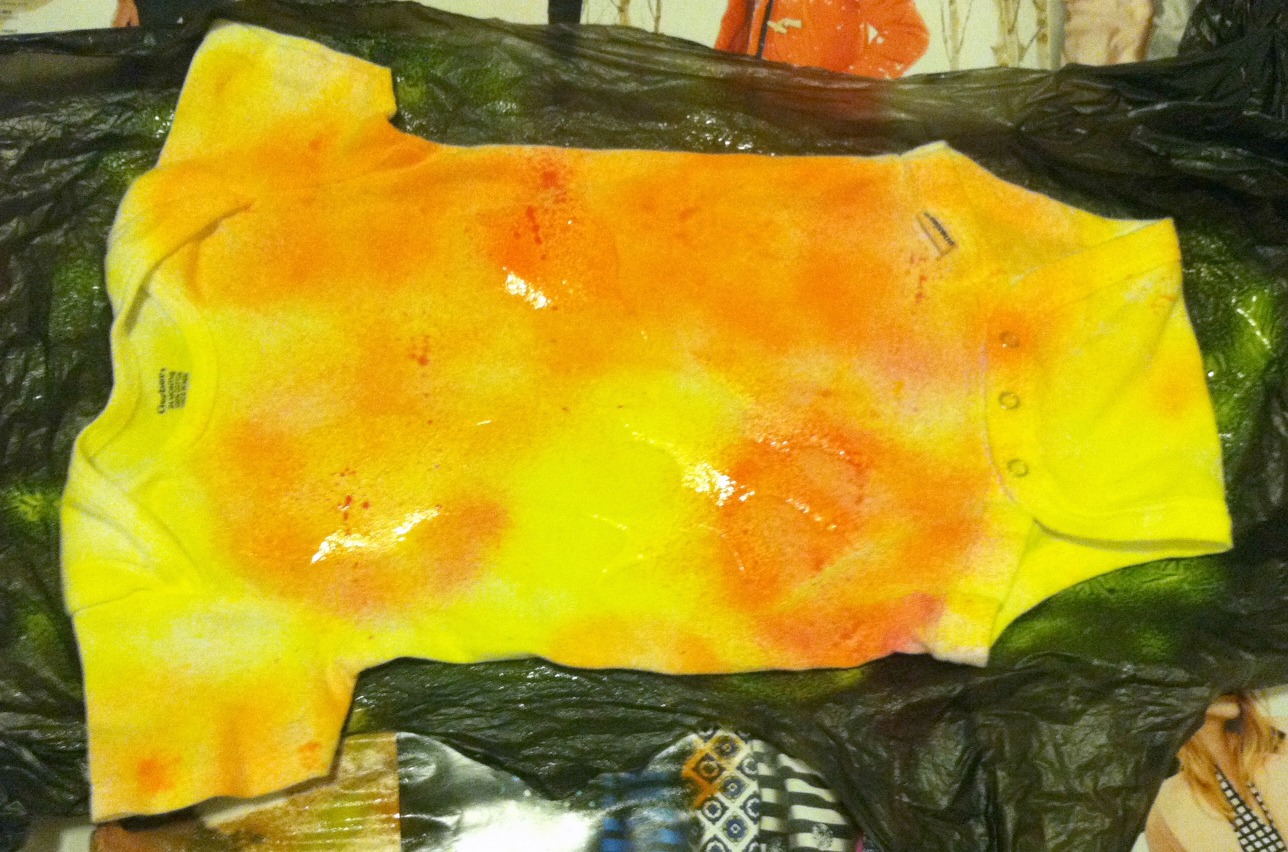
Lightly spray the fabric paints over the shirt, starting with the lightest color (yellow), then add orange and red.
Gently peel away the freezer paper leaves to reveal your nice crisp edges and let the paint dry completely.
---
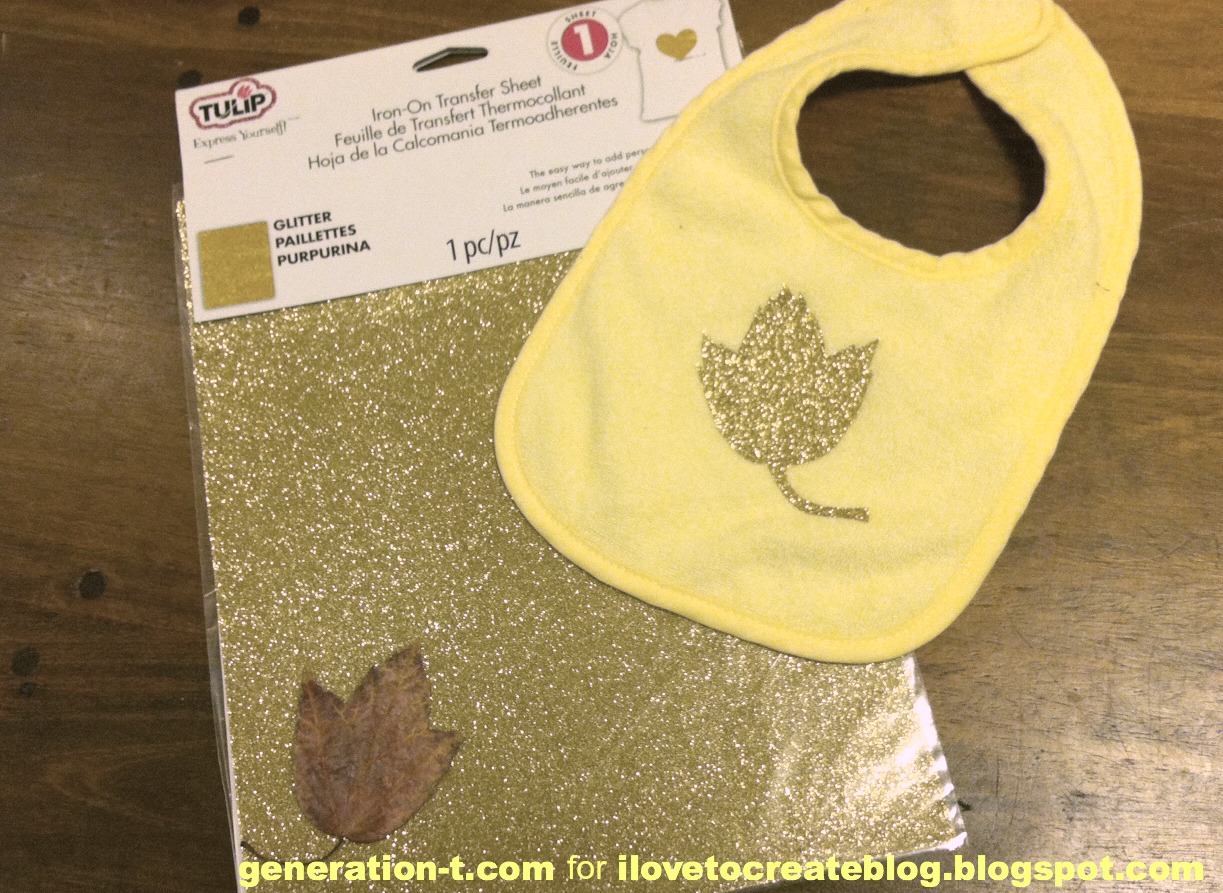
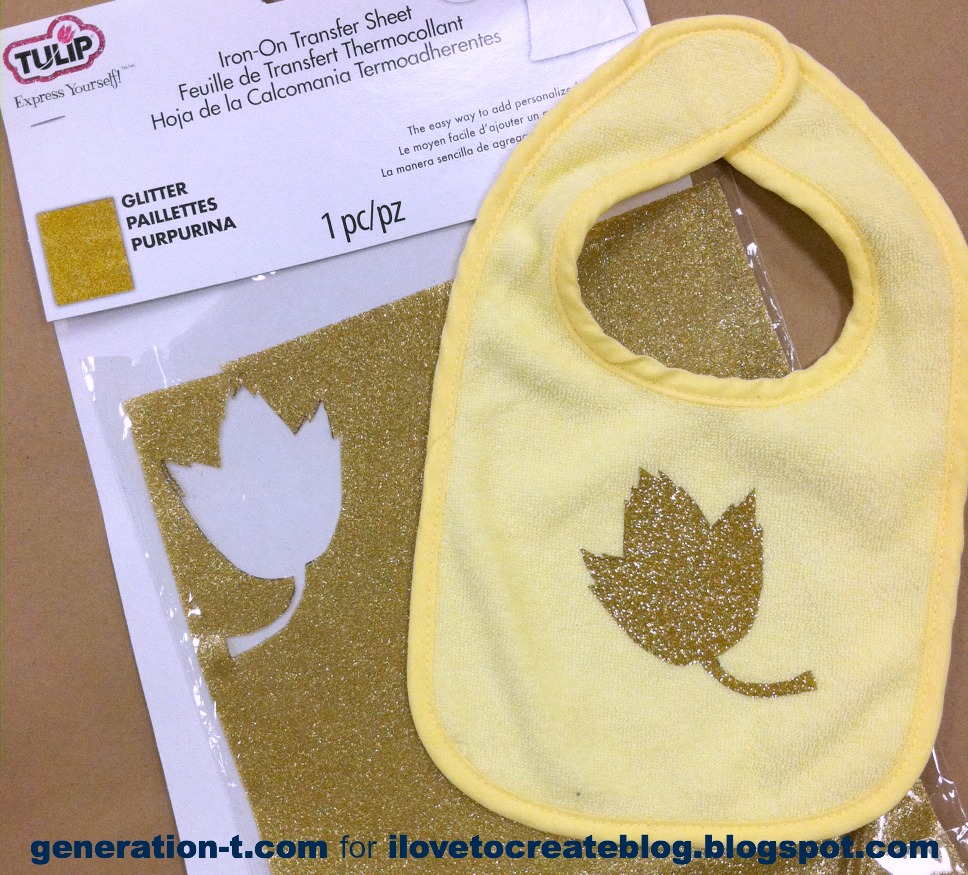
INSPIRATION 3: Glitter Leaf Appliqué
Like the reverse leaf stencil, you're using the actual leaf shape (rather than the negative space) to create
your decoration. The best part about this one? No waiting around during drying time--
since there is no drying time!
What you need:-Tulip Fashion Shimmer Iron-on Sheet (gold)
-variety of pressed leaves for inspiration-ballpoint pen-scissors or craft knife and cutting mat
-iron and ironing board-plain bib, T-shirt, or onesie Simply trace the leaf onto the smooth side of the glitter sheet and cut it out. Center and iron the glitter leaf onto the bib (or T-shirt or onesie), smooth side down. As soon as it adheres, the bib is ready to go for baby's first Thanksgiving!
Check out
Generation-T.com next week for one more way to use autumn leaves as inspiration for decorating fabric!