Showing posts with label Tulip Fashion Graffiti. Show all posts

Cool2Craft TV - Monday August 15, 2011

Friday, August 12, 2011


Cool2Craft TV for August 15, 2011: Back to School

Join host Tiffany Windsor for a new episode of Cool2Craft TV. This week's show theme is all about back to school. Tiffany is decorating a t-shirt graffiti style with Tulip Fashion Graffiti Fabric Paint Cannons and Tulip Fabric Spray Paint, EcoHeidi is decorating a wooden pencil box with the vintage Aleene's Look of Copper Enamel technique using Aleene's Original Tacky Glue and Candace Jedrowicz crafts a fabric book cover with Aleene's Fabric Fusion.

It’s easy to watch Cool2Craft TV right from your computer. Airing Monday August 15, 2011 9am Pacific/10am Mountain/ 11 am Central/ Noon Eastern. Go to http://cool2craft.com and find the Livestream player and chat box. See you Monday!

Visit us on Facebook!
Craft on!Click here for today's daily giveaway!

Day 2 Frenzy at the CHA Summer Supershow!

Saturday, July 31, 2010

We are busy bees again today at the CHA Summer Supershow 2010! But that doesn't mean we still aren't having a blast with CHA attendees! Check out Pattiewack as she smiles for the camera at the Joann Make&Take It! She's having a lot of fun showing attendees how to use Tulip® Fashion Graffiti™ products to make a custom t-shirt.


Our sales team is also getting hands on with attendees! Both Kelly and Mark (below) tied on their aprons and are helping out in the Joann Make&Take It Booth! By the way, doesn't it look like that kid is having a blast?


Here's Mark demonstrating how the Tulip® Fashion Graffiti™ Fabric Paint Cannon™ works. If you haven't used it, it is so much fun! It gives a spray paint mist just like a spray can, but it's totally non-aerosol and safe for the environment.


Here's a video demo from last CHA where Maya shows us how it works!


Meanwhile, back on the iLoveToCreate booth home front, we have been making more fab Collage Pauge® Instant Decopauge frames.


We are also making more cool water bottle bracelets using Tulip® One-Step Fashion Dye™, Aleene's® Fabric Fusion®, Blumenthal Lansing buttons.


Here are attendees making their bracelets. The finished product is soooo cute!

Oh and for you at home readers, we are having a contest to coincide with our show where we are giving you a chance to win your own Tulip® Fashion Graffiti Spray Paint Kit™! Make sure to leave a comment on our blog contest page to win!

ILoveToCreate Teen Crafts: Patriotic Flip Flops

Wednesday, June 30, 2010

ILoveToCreate
Patriotic Flip-Flops
Copyright Margot Potter
"Mom crafted, kid approved."

Who doesn't like to feel patriotic without feeling like a dork? Teens, that's who! I'm a fan of seasonal accessories as long as you don't start too look like someone on The People of WalMart blog. It's a fine line, people. These festive flip-flops are the perfect combination of '4th of July festive' and 'fashionista friendly.' They can be modified to suit the rest of the summer months with a little color change, so don't feel like they're only good for one day. Though for me, being patriotic isn't a one day event. Your teens will have a blast making these. Avalon pounced on them before the glue was even dry. I guess I'll have to make my own pair before the holiday!


Materials
Rubber Flip-Flops (I got my classic pair at Target)
3/10" wide navy blue ribbon with white stitching
1/4" wide dark red rick rack trim
2" wooden craft stars
2 silver-plated head pins or 20 gauge silver-plated craft wire
Aleene's Liquid Fusion Glue
Aleene's Jewelry and Metal Glue
Tulip Fashion Graffiti Big Phat fabric marker blue
Crafty Chica Little Chica Paint Pack paint white
8492-L Dawn Hauser Star rubber stamp from Inkadinkado
Elasticity clear stretch elastic cord

Tools
Brayer
Round nose pliers
Flush cutters
Non stick craft sheet
Electric drill with 1/16" bit


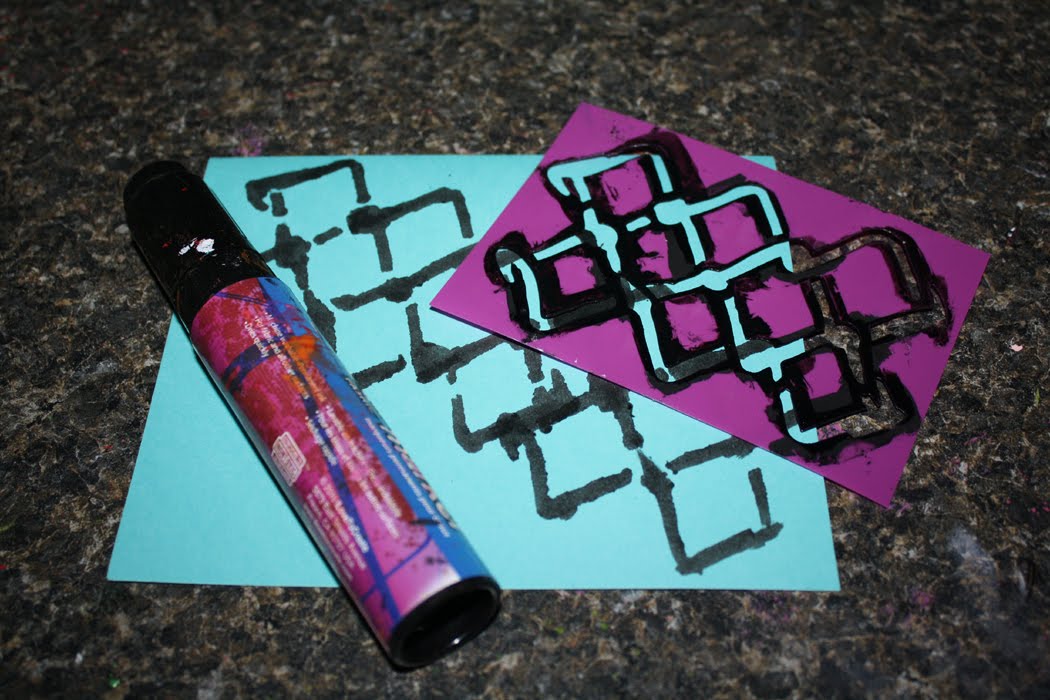
1. Use fabric marker to color star top and sides blue. Allow to dry.


2. Use brayer or foam applicator to spread paint on a non-stick sheet or directly on surface of stamp. Test print. Stamp on the stars. Allow to dry.


3. Glue blue ribbon trim to center of flip flop straps, starting at the bottom of the strap, tucking the ribbon into the space at the bottom and working your way to the center. It doesn't have to be pretty, the stars will cover it.


4. Glue rick-rack trim to center of blue ribbon again starting at the bottom of each strap, tucking the ribbon in and working to the front. Allow to dry.

5. Drill a hole in the center of each star.

6. Wrap rick rack trim around three times to create a 1 3/4" ribbon shape. There should be two loops on each ribbon.


7. Make a large loop at the top of a head pin, thread the center of your ribbon into the loop and secure it with the chain nose pliers. Thread this into the center of the star.


8. Use round nose pliers to create a loop flush to the back of each star, cut off excess wire before looping. The wire should be approximately 1/4" long before you grasp it with your round nose pliers at the end and wrap it around the jaw creating a round loop. Make sure the loop is secured closed.

9. Thread a 2.5" segment of Elasticity into the loop at the back of the star and around the front end of one side of the strap on your flip-flop. Tie it into a double knot (follow link for image.) Dab the knot with some jeweler's glue. Repeat for the other side of the same strap to secure the star. Repeat for second flip flop. Allow glue to dry before wearing flip-flops.

ILoveToCreate Teen Crafts: Super Star Sneakers

Wednesday, June 23, 2010


ILovetoCreate Teen Crafts
Super Star Sneakers
Guest Crafter Avalon Potter for Margot Potter
“Kid crafted, mom approved.”


The problem with most kid and teen craft projects is that they’re created by adults. We’d like to think that we can still look back at our wild youth and know what it’s like to be a teen, and on some levels, we can, but we’re viewing through an adult lens. I love to see what happens when the adults step back and let the kids create.

You know what?

They really kick some crafty butt!

They have fewer filters, less of a need to please and they just do what they like. I bought a grey pair of Converse All Stars a while back with the intention of tricking them out for this column, but I got busy with other ideas and in the meantime Avalon wore the sneakers. So they were no longer pristine and new...which is how she likes them.

She asked if she could create the teen craft project for today and I said, “YES!” So these fabulous sneakers are 100% Avalon. She used a variety of Tulip Graffiti products and some Tulip Glam it Up crystals to make a really rockin’ pair of shoes. Go Avalon! I think if adults can give kids more room for creativity, they’ll always surprise us.

Materials
Low top tennis shoes
Tulip Fashion Graffiti Big Phat Fabric Markers in Pink and Black
Tulip Fashion Graffiti stencil in chain link fence pattern
Tulip Fashion Graffiti stencil puffy graffiti letters
43 Glam it Up iron on crystals in crystal
Tulip 3-D fashion paint in silver
Toothpick with beeswax on end or tweezers
Non stick sheet or newspaper

1. Select your shoes and remove the laces.


2. Use the pink marker to stencil on one side of each shoe with the chain link fence pattern. Stencil in black on the opposite side.

3. Use the letter stencil and the silver dimensional paint to add your initials to one side of each shoe.


4. Freehand hearts, peace signs and butterflies using the dimensional paint.

5. Use the markers to color your shoe laces, one pink and one black.


6. Add crystal accents on both sides of shoe using the applicator and add 6 crystals to the back seam on each shoe. Be careful, it gets really hot!

7. Use glue to attach a crystal smiley face to the toes of the shoes. Dip the crystal into the glue carefully using a toothpick with beeswax or tweezers to hold the crystal and then attach to the shoe. Wipe off excess glue and allow to dry.

ILoveToCreate Teen Crafts: My Dad Rocks Father's Day Card

Tuesday, June 15, 2010

ILoveToCreate Teen Crafts
My Dad Rocks Father's Day Card
Margot Potter
"Mom crafted, kid approved."

School's out for summer around these parts and Father's Day is coming up fast. Where does the time go?! Phew! Here's a great "I'm bored" project for your teens to do that will rock Dad's socks off on his special day. The cost of store bought cards has skyrocketed, this gives Dad a personalized work of art for a fraction of the price of a generic card from the grocery store. Ya gotta love it!


Materials
8.5"x11" card stock in turquoise and acid green
Rock Star stack or similar themed papers
Printed phrase "My Dad Rocks" using Jellyka Castle's Queen Font in 48pt. from www.daFont
Vintage paper (we used an old typing manual)
7 Gypsies numbered gaffer's tape
Scrapbook Adhesives three dimensional stickers
Aleene's original Tacky Glue or Tacky Glue Stick
Tulip Fashion Graffiti Big Phat fabric marker in black
Tulip Fashion Graffiti Paint Cannon fabric paint in black

Tools
Fiskars 2" circle punch
Scissors
Bone folder
Paper cutter

1. Print phrase.

2. Fold blue card stock in half and use bone folder to sharpen crease. Cut folded paper to 6.5w" on a paper cutter.

3. Cut green card stock to a 2"wx5"l. Cut paper with phrase to 1.5"x4.5"l. Adhere phrase to card stock using a VERY thin layer of glue. Allow to dry.

4. Punch circles. I featured the skull and some nautical stars.

5. Hand cut recycled paper circles so they are slightly larger than the punched circles.

6. Use marker and stencil to put chain link pattern across card diagonally from top left to bottom right, you will have to slide the stencil overlapping it to get the full coverage.

7. Use a paintbrush to drip black paint cannon paint on front of card. Use a stylus or other pointed tool to scratch the ink around. Allow ink to drip. Layer this as much as you like, but be mindful that this ink will create texture in the card, so less is more.

8. Adhere circles using a thin layer of Tacky Glue or Tacky Glue stick. The recycled circles first followed by your punched circles set off center, they need to be about 1.75" apart in the center to allow room for the phrase.

9. Attach gaffer's tape to left edge of card.

10. Use dimensional stickers to add phrase to front of card in between the circles on an angle pointing from upper left to lower right corners.

ILoveToCreate Teen Crafts: Trashionista Mixed Media Purse

Tuesday, March 23, 2010

ILoveToCreate Teen Crafts
Trashionista Mixed Media Purse
Margot Potter

"Mom crafted, kid approved."
Copyright Margot Potter All Rights Reserved

I have an ever bursting at the seams pile of fashion mags that sit by my bed and on the kitchen table. I peruse them at night before I go to sleep and while I’m noshing to trend spot. The problem is that they start to take over my house if I’m not careful! What I don’t recycle, I love to use to make accessories. The words and images on this purse are all made of recycled paper. This is all about layers of paper, inks and paints and every purse will turn out differently. I love that! 

Teaching our teens about the many ways they can recraft, reuse and repurpose is crucial. Plus this project will be a lot of fun for them to personalize. You can do this with old cigar boxes and get hardware and a handle to retrofit. Avalon loved this one and I’m hoping we can whip up some more soon together.


Materials

Wooden purse blank
Aleene’s Traci Bautista Collage Pauge Matte
Crafty Chica Little Chica Paints Red
Fashion Graffiti Paint Cannon Fabric Paint White
Fashion Graffiti Big Phat Fabric Marker Black
Fashion Magazines
Vintage book pages or newspaper
Inkadinkado Animal Print Clear Stamps
Fiskars Clear Stamp Block
Sizzix Big Shot Flower Die

Tools

Sizzix Big Shot
Mini-screwdriver
Paintbrush
Foam Brush
Old toothbrush
Scissors

1. Remove hardware from purse. Sand, clean and coat purse with a layer of racy red paint inside and out. Allow to dry.


2. Use Big Shot and die to cut three vintage book page or newspaper flowers.


3. Select words and images.  Decoupage flowers and cut and torn magazine words and images to the purse front using Collage Pauge matte and a foam brush. Allow to dry. If bubbles form under the images, wet your finger with water and work them out from center. Don’t fret about bubbles, they’ll go away once the medium is dry.  (I had to remove and replace a word at the top of this purse...which you can do while everything is still wet.) 

4. Use the Big Phat marker to put a layer of ink on your stamps and randomly stamp the leopard and tiger prints around edge of purse. Allow ink to dry.

5. Use marker to make angled stripes on thinner edge of purse. Allow ink to dry.


6. Dip an old toothbrush into the white paint and flick it across purse front. Repeat using red paint. Allow to dry.

7. Reassemble purse.

ILoveToCreate Teen: Graffiti Fabric Flower Headband

Tuesday, March 9, 2010


ILoveToCreate Teen Crafts
Graffiti Fabric Flower Headband
Margot Potter
"Mom crafted, kid approved."

It's National Craft Month and in Studio Madge it's starting to feel like National Craft FAIL month!  I started this project out with a graffiti fabric sling in mind for Avalon, who broke her wrist recently.  There's this old saying I seem to have trouble remembering about measuring twice...

...so the fabric I made was too small for a sling...but I love the fabric so I decided to keep it for future projects.  Today I cut off four strips and made some fabric flowers using the ribbon flower technique I shared recently.  I love the tough and tender look I ended up with here and this will be even cooler as the flowers start to fray!  Fabric flowers are EVERYWHERE this season and they are really easy to make.  So again, I remind you not to be afraid to make 'mistakes.'  Sometimes that's where our best projects come from!

Try adding these flowers to a pair of flip flips or attach them to a strip of felt and adding ribbon ties for a funky bib style necklace or sew them on the neck of a t-shirt or on the front of a hoodie...have fun with these!  You can make a bunch of these fabric swatches and keep them around for crafty inspiration.  The Tulip Fashion Graffiti line makes it fast and fun!


Materials
Tulip Fashion Graffiti Paint Cannon 
Tulip Fashion Graffiti Cannon Fabric Paints in lime green and hot pink
Tulip Big Phat Fabric Markers in yellow, black and hot pink
Tulip Fabric Spray Paint in fuchsia, lime green, deep green, hot pink and orange
Tulip Fashion Graffiti Stencils Love, Peace, Peace Sign, Fancy
Large white cotton sheet (pre-washed)
Liquid Fusion Glue
Thread

Tools
Scissors
Sewing Needle

1.  Fold a large white cotton sheet in half and put on a flat surface.  If it's warm, a front porch or driveway would work well.

2.  Place stencils on sheet and spray with paint canon and fabric spray colors.  Spray colors around sheet in layers.

3.  Remove stencils and repeat as desired.

4.  Use markers to accent stenciled words and images.  Draw your own shapes with the markers.

5.  Keep adding layers of color until you reach your desired result.  Let paints dry.


6.  Cut the sheet into 8" strips, they should be smaller on one end and graduate so they'll be a triangular shape when cut.

7.  Use a needle and thread to sew fabric strips into flowers.  Here is a ribbon flower tutorial with pictures.


8.  Attach flowers to headband.  First tack them down with thread and then secure them with Liquid Fusion glue.  Allow glue to dry completely before wearing.

iLoveToCreate Teen Crafts: Creative Wings Journal

Tuesday, February 23, 2010


iLoveToCreate Teen Crafts
Creative Wings Journal Cover
Copyright Margot Potter
"Mom crafted, kid approved."

I spent the better part of yesterday adding layers to a canvas to make a journal cover.  Right as I was finishing the first draft I made an unfortunate executive decision, then tried to 'fix' it and had to scrap the whole enchilada.  Second round I took what I learned and applied it and I'm really digging the final result.  This is a dollar store journal that I've covered with Claudine Helmuth's Sticky Back Canvas which has been layered with a wide variety of Tulip Fashion Graffiti line and Tulip fabric spray products.  This is one of those projects you can easily adapt to your own personal taste.

Every teen needs a place to keep their private thoughts and it's a good thing to take a break from the computer sometimes and pick up a pen.  They can doodle, dream, draw and do what they please inside, the cover is all about inspiring them to spread their creative wings.  Quite frankly, I think young women these days need all of the positive creative inspiration they can get.

Even professionals have craftastrophes sometimes, the key is to turn those experiences into positives.  No matter how badly you mess something up, there is something of value there.  Some of my best ideas came from my worst 'mistakes' so don't be afraid to take creative risks.  I call that creative fertilizer for my crafty garden.  Oh and...sometimes it's good to know when to stop adding 'one more thing' to your designs!


Materials
Basic Cardboard Cover Bound Notebook
Claudine Helmuth's Sticky Back Canvas
Multi-color Textured Yarn (coordinating with paint colors)
Tulip Big Phat Marker Black
Tulip Fabric Cannon
Tulip Cannon Fabric Paint White and Black
Tulip Paint Taggers Silver and Black
Tulip Fabric Spray Neon Pink, Orange, Yellow
Tulip Matte Dimensional Fabric Paint Coral
Tulip Slick Dimensional Fabric Paint Dandelion Yellow and Poppin' Purple
Tulip Fashion Graffiti Stencil Wing (Peace Love Stencil Set)
Aleene's Liquid Fusion Glue

Tools
Sea Sponges
Fabric Scissors
Marking Pen

1.  Begin by adding silver and black paint taggers to your canvas.  Use more silver than black.  Spray some black paint with the fabric cannon.  Use a sea sponge to dab the colors on the canvas until the canvas is covered with a layer of paint.  Allow to dry.

2.  Spray the canvas with pink, orange and yellow fabric spray in layers.  Allow to dry.

3.  Use the cannon fabric paint in white on a sea sponge to dab the wing stencil along both sides of your canvas.  Allow to dry.  I used segments of the wing and cleaned the stencil in between each use, then I could flip it over when working on the opposite side.  This is intended to create a batik or resist style image, so it's not going to be a perfectly clean stencil.

4.  Add more layers of fabric spray as desired.  Allow to dry.

5.  Use the Big Phat marker to accentuate the outlines of your stenciled images.

6.  Use the dimensional fabric paints to add accents to the outlines you've accentuated with marker.  Allow to dry.


7.  Mark the canvas with a pen to fit cover of journal.  Cut the canvas.

8. Adhere sticky canvas to cover.

9.  Attach a segment of fuzzy yarn to the top and bottom of your journal cover using a thick bead of Liquid Fusion glue.  Trim ends with scissors.  Allow to dry.