Showing posts with label fabric flowers. Show all posts

Fabric Flowers Tutorial

Friday, May 10, 2013
Fabric flowers are one of those crafts that never go out of style. They are a great way to use up scraps that we can't bear to throw away. But what if you've tried every method out there and are pining for something new? That was my inspiration for these flowers. They are super easy and only take a few minutes to assemble, and you don't even need to sew! You can use them as brooches, hair clips, pins, rings or clothing accessories.

What you need:
Scrap fabric in contrasting patterns and colors
Circle maker template
Pinking shears
Thick felt
Ring base, comb base or pin back, your choice!
Chalk or pen
  Using the same fabric or a different one for each layer, draw and cut out circles in graduated sizes.
 Starting with the largest layer (the bottom of your flower), add a Tacky Dot to the center.
 Now add a piece of felt, then fabric, etc. Work with the fabric pieces that are largest to smallest.
 Keep going until you real the volume that you like.

 Add a gem or button on top!
I added this one to a crocheted flower and stitched a button on top. I then used
Aleene's® Max Tacky Adhesive™and glued it to a headband and added crystals trim and feathers. Sooo cute!

Crafty April Showers bring Rolled May Fabric Flowers

Thursday, May 5, 2011

I love the look of rolled fabric flowers. I love how easy they are to make even more. There are a million and one tutorials out there on how to make them, but I thought today for I Love to Create I would add to the pile with a few new spins on the classic.


The basics of rolled flowers goes like this... Get a long strip of torn fabric that is about 2"s wide. How big your flower is depends on how long your strip is. Be sure to tear the fabric and not cut it. The rough edges and stray threads are half the fun. Fold your strip in half wrong sides to wrong sides. When you first start rolling make your roll really tight and add a few drops of Fabric Fusion Glue. After the initial tight roll start twisting your fabric as your wrap it around the roll add Fabric Fusion Glue as you go. Still confused? My Sparkle has some really easy to follow step by step pictures.


First there is the basic fabric flower. Just roll and go. That is exactly what I did to make a bright and kitschy headband. There is nothing wrong with using a solid colored fabric, but I prefer a pattern myself. You might recognize these flowers from the fabric I used to make my suitcase lap top case. I just happen to have a slew of 80's bows I found at the thrift store and a white plastic headband on hand.


Put them all together and that is where the hair magic happens. I used Liquid Fusion Glue to attach the bow and flowers to the headband.


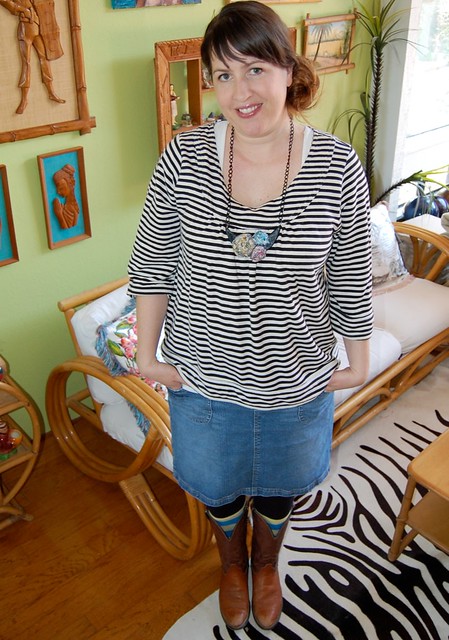
Another popular motif with the rolled flowers is the bib necklace. This is where I first spied rolled flowers and it was true love ever since.


I made my rolled flowers just as before, but this time I wrapped them in colored thread and coated the bottom with Fabric Fusion Glue a second time to keep the thread in place. I love the way the teal, yellow and hot pink pop against the black and white flowers.


After my flowers were ready I used Liquid Fusion Glue to attach them to a black bib.


All that was left to do was add a couple of jump rings and black chain.

Crazy quilts + rolled flowers = true love 4/ever. I decided to make my own fabric my using Fabric Fusion Glue to attach several small squares of fabric. Once the glue was dry and I had a long strip of patchwork fabric that I rolled into a flower.


Somewhere along the way I picked up this vintage piece of sequined floral felt. I cut out the leaves to use with my patchwork rolled flower and saved the flowers to use on another project.


Ta-da patchwork rolled flower hair clips with sequined felt flowers. Speaking of felt, special shout out to Jen from Hell Razor for sending me the adorable mustard hair bow.


I have to say this is my favorite one out of the bunch.


For my last trick I thought I would tweak the technique I used to make ribbon flowers. Tear a strip of fabric and slather with Tulip Soft Fabric Paint randomly. Tulip Spray Dye would work well too.


Once the paint is dry roll into a flower and secure with Fabric Fusion Glue. I decided to make this flower into a pearl encrusted brooch.


Are you excited to get your flower roll on? Can you hardly wait to rush out and start ripping, rolling and gluing fabric strips? I warn you they are addictive, which is ok since they are really easy.


Check out more I Love to Create projects by Jennifer Perkins right here.

Visit us on Facebook!
Craft on! Click here for today's daily giveaway!

MAYA IN THE MOMENT TEEN CRAFT: Jumbo T-Shirt Flower Pins

Thursday, March 3, 2011

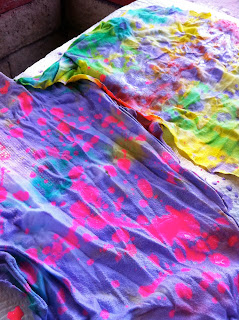
Have you ever had a tie dye t-shirt FAIL? You know, like when it doesn't come out exactly the way you thought?  I did. Well, what do you do with the shirt? After all my sweat and tears, I didn't want to throw it out. I decided to try and make those cool poofy fabric flowers!


  I took my shirt and cut it up into squares. I didn't measure, I just cut different sizes. Then I sprayed them with Tulip® Fabric Spray Paint™.

Next I added dots and splatter by taking apart the bottle and drizzling the paint. I used bright colors on dakr and vice versa so they would show up good.

I love the pink on the purple!

I let them dry for four hours and washed and dried them. I cut out different sizes of circles. Honestly, I didn't know how I was going to make my flowers at this point, I had to ask my mom for help.

We took each circle and added Aleene's® Original Tacky Glue® in the center of each one and pinched it so it looked ruffley. (Is there such a word as ruffley?) Let them dry.

I used the big piece as the base and glued the tips of each pinched circle towards the center so they looked super poofy!
 See the pin back in the picture? I used the Tacky Glue and added those too, so that I can use the flowers on whatever I want. I also covered them in Tulip® Glitter Spray Paint for sparkle.


Here they are on a blouse of mine. There are super JUMBO! I will end up wearing only one on my blouse and use the other two on other things, like my purse or a hat. Maybe I'll give one to my little cousins Sarah and Bella! Next time I'll definitely make mini versions. You can also add crystals if you want!


Visit us on Facebook!
Craft on! Click here for today's daily giveaway!

Alisa Burke's Fabric Florals!

Tuesday, September 14, 2010

Artist Alisa Burke says she keeps seeing fabric flowers EVERYWHERE in clothing, jewelry and crafts. She says these flowers are super easy to make and can be used in a multitude of projects - even better she wrote up directions!


(If you make the flowers, don't forget to post your pictures in our iLoveToCreate gallery!)


Craft on! Click here for today's daily giveaway!

Dimensional Canvas Flowers

Friday, August 27, 2010
Making canvas flowers are my latest obsession! They are very easy, inexpensive and you can use them on so many things! Here is my latest batch and what I did with them!


1. Using raw canvas, draw your flowers with a pencil and then outline with a black Tulip® Fine Tip Fabric Marker™.

2. Color with the other markers from the set, and then highlight them by outlining with Tulip® 3D Fashion Paint™ (black slick). Let dry.

3. Set out your t-shirt and insert wax paper or foil between the layers so the glue will not seep through. Before you glue down the flowers, arrange them in different patterns until you find the one you like.

4. Use Crafty Chica® Extreme Embellishment Glue™ or Aleene's® Fabric Fusion® Permanent Dry Cleanable Fabric Adhesive and paint on a generous layer on the back of each flower - one at a time! (Glue, apply to shirt; glue, apply to shirt, etc...) Let dry!

5. After the glue is dry, add accents around the edges of the flower with more Tulip® 3D Fashion Paint™. This will seal the edges and really make your flowers pop off the background fabric!

Craft on!
Click here for today's daily giveaway!

ILoveToCreate Teen Crafts: Flower Child Headband

Wednesday, August 25, 2010
ILoveToCreate Teen Crafts
Flower Child Headband
Copyright Margot Potter
"Mom crafted, teen approved."

I bought this exquisite Alexander Henry fabric to fashion curtains for my kitchen two years ago. My first attempt was a painful reminder of the old adage "Measure Twice, Cut Once." I adore vintage inspired fabrics and the colors in this are fantastic. I had some scraps left over and a sewn hem from the curtains. This idea popped into my head while I pondered some stretchy headbands I purchased a while back. I've shown how to create these fabric flowers before, in fact at the end of this post are several fabric flower projects I've created for ILoveToCreate.

This is so easy and fun and this headband can either be worn in a Flower Child style or as a traditional headband. Either way, this is the kind if accessory a stylish teen will adore.

Materials
Aleene's Fabric Fusion Glue
Large Floral Print Fabric
Coordinating craft felt
Stretchy headband
Thread

Tools
Sewing needle
Paintbrush

1. Select a flower to feature as the focal of the design. Cut it out, leaving fabric around it in a circle or oval shape.


2. Place fabric on felt and cut the felt just a little bit wider than the fabric.


3. Use a paintbrush and apply a thin layer of Aleene's Fabric Fusion glue on the back of the fabric. Press fabric on felt smoothing gently with your hands. Allow to dry.

4. I had a doubled up and sewn fabric section, but you can just double some fabric over, iron and create your fabric flower. I have a tutorial for this here and here.

5. Once felt has dried, cut felt edge off of flower to get a smooth edge.

6. Sew the fabric flower to the headband.

6. Sew the center of the felt backed flower and a black bead into the center of the fabric flower, the thread should go through to the headband so it's nice and securely attached.