The best art is oftentimes the one without any rules, that's why this technique using a lint roller as a rolling stamp is so cool! It's fun and experimental and you can great for creating abstract backgrounds for your mixed media and fabric paint projects! Kathy a.k.a. Crafty Chica introduced me to this technique through her Quick Tips video she did below. The most awesome thing about this creative stamp is that you can a wide variety of stamps for under $2...what a score! and
A couple of years ago, I noticed my vision was starting to...well, SUCK. I couldn't zero in with precision like I used to. That's what a life of beading, sewing, painting and gluing will do to a chica. Instead of pouting, I decided to embrace the fact that I needed reader glasses and am now a collector of cool specs.
But when it comes slaving away in the art studio, I don't want to use my spendy finds. I go for the cheapies, but then those can be boring. Life is so hard!!!! (lol)
Call it procraftination on another project, but one day I sat down and embellished all my low-budget reader glasses...and made a video tutorial! Now I have sparkly energy at all times!
These are great to give as gifts, or for your favorite bookworm or girls night for crafting. Next, I want to make fabric sleeves for them too!
Directions: Squeeze out some glue and apply to the top of the frames and then add the crystals, one-by-one. Check out my video to make the process super easy - plus a couple other insider tips!
Even if you don't need to dye your jeans, per se, I would still watch the video because you can use this technique on so many other applications! (Also, look for a funny cameo from MayaInTheMoment!) Visit his blog at BoiFromIpanema.com
I LOVE the look of oilcloth, but it's not always so easy to buy it and cover everythign with it. Plus,w hat if you want oh, say leopard print as a background for your platform shoes? Here's how you can take control and paint your very own oilcloth-inspired patterns and flowers!
Ever wonder what to do with those extra tie dye packs from your Tulip One-Step Tie Dye Kit? I've got the most awesome solution...Sprinkle-on Tie Dye! It's a fast, fun, and artful way to apply tie dye that I think you'll love too! Watch the video below to see how it's done!
Hope you enjoyed the video and are inspired to try something new with tie dye! There's so many possibilities to try that you'll want to take advantage of.
I've been on a quest to try every new way I can think of for our Tulip One-Step Tie Dye Kits. Being a mixed media artist, I decided to try it on wood. My biggest worry was that I wouldn't be able to seal the dye without it running and reconstituting. Luckily, that wasn't the case. The wood soaked it up nicely.
Every time I visit iLoveToCreate headquarters, I see designer Lauri Eaton in action with her paintbrush - she uses it to create all kinds of cool effects with the Tulip One-Step Dye. I finally had a chance to try it out on this summer blouse.
Kayte Terry is one busy gal in the crafty scene. She runs a popular blog, ThisIsLoveForever.com, is a former magazine editor and currently works as the merchandising manager for Anthropologie stores. Yes, she's the one who gets to decide what all those cool decorations are going to be!
But the real story? She's a hardcore crafter - like all of us, she loves to make things! Kayte has a new book out called,Paper Made!: 101 Exceptional Projects to Make Out of Everyday Paper($16.95, Workman Publishing). She recently came by my hometown of Phoenix, Arizona and I had the chance to lunch and craft with her! Here are two projects we made! Enjoy!
Crayons are a childhood staple, and many times they end up broken mess all over the house. The Crafty Chica shows us how to get more life out of your crayons with this fun and easy video tutorial using silicone cupcake/candy molds! And of course, she adds her signature touch of glitter using her very own Crafty Chica® Glitters. The kids will love drawing with their their crayon and glitter creations!
This is Fahtz with glittered nails, a handmade bracelet and an art tiara - all of which she made at the Phoenix Craft Rave earlier this month!
This adorable little girl named Fahtz came out to our Phoenix Craft Rave last month and stayed for hours crafting! iLovetoCreate was one of our sponsors - which meant everyone got a FREE Crafty Chica Empowerment Guardian in their swag bag.
Here is a video of Fahtz decorating her guardian - it is soooo cute, it will surely make you smile! And she certainly has the Crafty Chica spirit - from adding lots of glitter to cheetah print trim! Right on!
This Saturday I leave for Chicago with the iLTC team for the Summer Craft and Hobby Show! I'll be demoing our Tulip Body Art in our exhibit booth, but on Tuesday I'll be teaching a mixed media class to 75 craft industry professionals on Faux Embossing With Tissue. Remember I posted a tutorial here a while back? I had several people write me to ask for a video tutorial, so here it is!
For the project in the photo, all I had was red gift tissue, but you can use any color. I like the Moulin Rouge vibe that this one has! OK, here you go, enjoy!
We are thrilled to have been featured on Made in America, showing our products that are made right here in Fresno, California!
From the article:
"I Love to Create" formerly Duncan Ceramics in east central Fresno, manufactures dozens of products onsite.
You may recognize this little gold bottle of tacky glue. If you happen to have one of these in the drawer in your kitchen, you are supporting "Made in America" because this glue was made right here in Fresno California."
40% of "I Love to Create's" products are made in Fresno. The other 60% are made mostly in China.
Marketing Director Alyson Dias said, "As a manufacturer, that would be a dream to us, we would love to manufacture only here in Fresno, it's just not a reality based on the consumers purchasing behavior."
Chloe and Allee a.k.a. The Tulip® Girls, get their craft on again this week in another exciting DIY episode. This week, they are proving that sparkle really is a girl's best friend! Learn how to make an awesome glitter bowed headband, how to make your own custom glitters, and how to use glitter spray for cool sparkly effects! We think Edward Cullen would approve of all the sparkle up in this place.
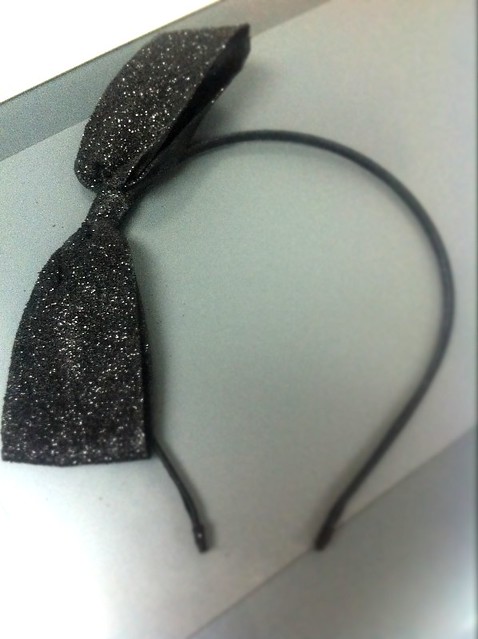
And here's a pic of Chloe's completed bow. She creates it in the video and it is still wet, so this is the finished product! Doesn't it look adorable in all its glitter glory!
We have a little crafty secret for ya! You know those dots of glue that you buy in packages at the store? Well, you can actually make your own! And all you need is a bottle of Aleene's Tack it Over and Overr (available at most craft and fabric stores and online at iLoveToCreate.com) and a Tulip® Craft Mat!
With this bottle of glue you can make hundreds, and yes we said HUNDREDS of dots of glue perfect for adhering embellishments, rhinestones, buttons, trims, paper, and more. It's the perfect and cost effective solution for you savvy paper crafters, scrapbookers and general crafters! And it is so super easy. Check out the video above.
P.S. That's our very own Pattiewack demonstrating how to make them and crafting with them in the video above!
This week the Tulip® Girls reuse scraps to create a stylish DIY cuff bracelet! They show how easy and fun it is to create a bracelet on the fly! This is a great project to do at a slumber party, craft night, or Girl's Night In! Everyone will create something totally differently with their scraps and that's what is so totally cool about this project!