Showing posts with label Aleene's glues. Show all posts

iLoveToCreate Retrofabulous Embellished Straw Tote

Monday, July 2, 2012


iLoveToCreate Retrofabulous Embellished Straw Tote
Margot Potter
'These ARE your grandmother's crafts...ya gotta problem with that? 
I didn't think so."

I'm afraid I have always had a serious soft spot for retro beachy looks.  Straw hats, straw totes, sundresses and seersucker rompers all make my little heart go pitter pat.  When I saw this plain straw tote in the dollar section at Target, I could not resist.  I knew immediately how I would DIY it into a retrofabulous summer bag!  Some felt, rick rack trim, pom-pom fringe and a judicious smattering of sparkly crystal accents take a plain bag from drab to fab and with the help of Aleene's Tacky Glues literally in seconds flat!  Now THAT's retrofabulous!

Materials
Plain straw tote
Craft felt in four colors
Coordinating pom pom fringe
Coordinating rick rack trim
Tulip Glam-it-up Crystals in Metallics
Aleene's Quick Dry Tacky Glue
Aleene's Tacky Glue Dots Singles 3/16"

Tools
Scissors
Ruler
Marker
Hand draw a simple 4"lx1.5"w fish shape, cut out to use as a template.


Place template on felt, trace and cut out four fish.
Cut rick rack and adhere to fish.


Glue fish and pom pom trim to tote with Aleene's Quick Dry Tacky Glue.  Finish one fish with metallic crystal accents using Aleene's Tacky Glue Dots.  Allow it all to dry, toss on your favorite vintage or vintage inspired sundress and sunglasses and ta da...go get 'em, you retrofabulous creature, you!

Quick & Easy Dots of Glue with Aleene's Tack it Over and Over

Wednesday, October 20, 2010


We have a little crafty secret for ya! You know those dots of glue that you buy in packages at the store? Well, you can actually make your own! And all you need is a bottle of Aleene's Tack it Over and Overr (available at most craft and fabric stores and online at iLoveToCreate.com) and a Tulip® Craft Mat!

With this bottle of glue you can make hundreds, and yes we said HUNDREDS of dots of glue perfect for adhering embellishments, rhinestones, buttons, trims, paper, and more. It's the perfect and cost effective solution for you savvy paper crafters, scrapbookers and general crafters! And it is so super easy. Check out the video above.

P.S. That's our very own Pattiewack demonstrating how to make them and crafting with them in the video above!

The Right Glue for the Job

Thursday, July 29, 2010

When embarking on any craft project involving sticking two things together choosing the right glue for the job is crucial. One glance at the adhesives aisle in your local craft store and you can see sometimes choosing which glue you should use can be a daunting task. Don't worry, today for I Love to Create I am going to hold your hand through the entire selection process plus throw in a few gluing tips.


Fabric Glue
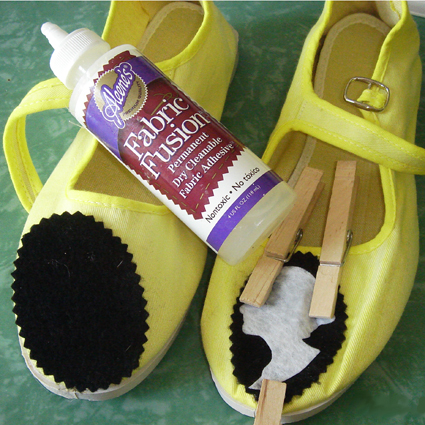
For those that don't sew a fabric glue like Aleene's Fabric Fusion can be your best friend. Without ever threading a needle you can often times fake a stitch or add an applique like on Customizing Your Kicks with just a dab of glue. One word of warning is to be careful not to get too heavy handed when gluing fabrics together as some things will darken from the glue.


Decoupage
Yup technically it's a glue with a fancy French name. If they sold Collage Pauge Instant Decoupage Medium in Gallon Jugs I'd buy it that way. Unlike most glues that don't show, decoupage can say it loud and proud on your craft project in glossy like I used on my terrarium picture frame, matte or my personal fave glittery!


Temporary Hold
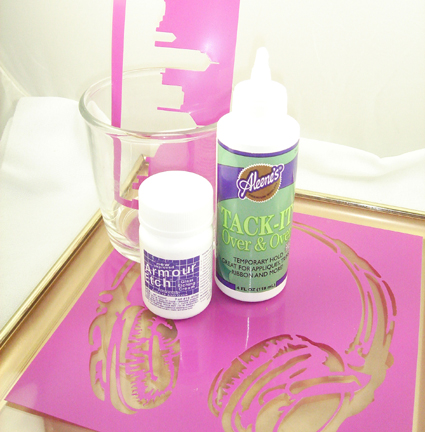
Sometimes as odd as it sounds, you don't want your glue to stick forever. Aleene's Tack It Over and Over is the perfect temporary hold glue for projects like appliques or in my case holding a stencil in place for glass etching.


Fabric Stiffener
Not only does glue adhere things, it also stiffens things. Sometimes you want the stiff without the sticky and that is where Aleene's Fabric Stiffener and Draping Liquid comes in handy. Very handy when making things like say string lamps or doily bowls. Did I mention you can add paint and dye to it to give it color.


All Purpose Glue
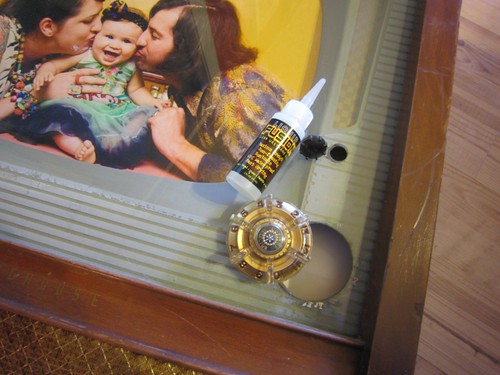
No crafty home is complete without a good all purpose go to glue around. Aleene's Original Tacky Glue is one of my favorites. Now that I have a kiddlet using non-toxic glues is important to me. Liquid Fusion Glue is put to use more often than any other glue in jewelry studio. Not just on jewelry I use Liquid Fusion on majority of my craft projects from turning TVs into picture frames to my neighbors trash into a toadstool. Remember when gluing things together like for jewelry lightly sand the surface when you can to give everything tooth.


Acid Free Glue
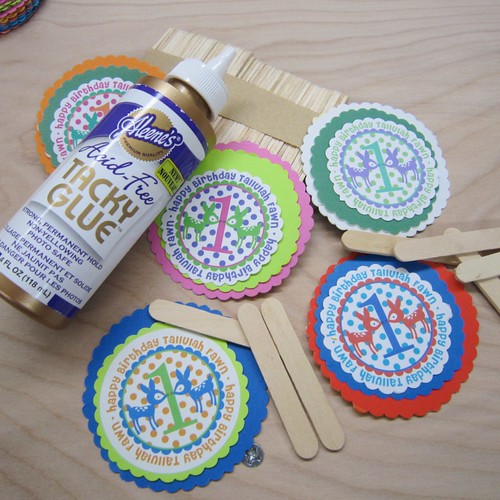
And you thought gluing paper was the easiest of all gluing tasks, wrong. When embarking on a paper crafting journey like perhaps scrapbooking or anything involving photographs you want to be sure and opt for an acid free glue like Aleene's Acid Free Tacky Glue.


Spray Glue
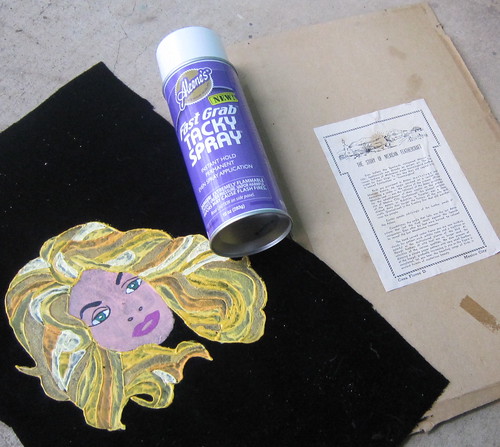
I must admit I have only recently discovered spray glue and all I can say is Aleene's Tacky Spray, where have you been all my life. Sometimes you have a lot of surface to glue like when attaching a piece of painted black velvet to a canvas and a spray glue can be a life saver.

This is just the tip of the adhesive iceberg. There are metal glues, industrial glues foam glues and more. Just remember there is always a specific type of glue for each project.

ILoveToCreate Teen Crafts: Pretty in Peeps Pendant

Tuesday, March 30, 2010


ILoveToCreate Teen Crafts: Pretty in Peeps Pendant
Mixed Media Jewelry Project
Margot Potter
“Mom crafted, kid approved.”
Copyright 2010 All Rights Reserved

I loves me some Marshmallow Peeps candies! How about you? Last year I bought a huge pile of them just to stack them up and stare at the fabulous colors. They’re so happy and fun filled. My daughter Avalon loves Peeps too. She loves them so much I can’t buy too many or she’ll turn into a Peep.

No, seriously.

I spent the better part of Easter season last year contemplating how to turn a Peeps candy into a bead. I thought about leaving one to sit for a few months and get nice and hard and then spraying it with a sealant...and heck that might work if you didn’t live in a 130 year old school house with a small mold problem. Methinks a moldy Peep bead would lack some appeal.

I finally settled on Sculpey Ultra Light polymer clay embellished with Crafty Chica paints and glitter and Tulip Glam It Up Studs. This could become a pin or a pendant or you could make a whole bunch of these on dowels and do a fun Peeps flower pot centerpiece like my edible bouquet from last year. I decided to make mine into a necklace and just added a bunch of springy Vintage and new Lucite and wood beads for a super cute necklace. If you really want to go to town, try making some Sculpey egg beads to coordinate...or add some polka dots and squiggles to large wooden beads...or do a collar of several Peeps that circle the neckline. I am not exaggerating in the least when I tell you that making these is so much fun, you’re going to look for reasons to make more!


Materials
Sculpey Ultra Light
Crafty Chica Little Chica Paints Red and White
3 Tulip Glam-It-Up Iron-On Studs Black
Crafty Chica Glitter Sunset Pink
Aleene’s Jewel-It Glue
Aleene’s Fast Grab Tacky Spray
Aleene’s Matte Finish Spray Sealant

Tools
Paint Brush
Polymer Clay Dedicated Toaster Oven
Sheet of Brown Kraft Paper

(To Make the Necklace:
Various Coordinated Beads in a Pattern That Makes a 16” or Longer Finished Length (I got the clear Lucite with green filament beads in NYC but here’s a source online and Beadin’ Path has a plethora of great vintage and new Lucite beads), 49 Strand .018 (or thicker) Beadalon Wire (always fill the holes of your beads with the wire), Beadalon EZ-Crimp Fancy Sterling Toggle Clasp, Mighty Crimp Tool and Wire Cutters)


1. Soften clay in your hands or by running it through a clay dedicated pasta machine until it is malleable. Use a real Peep as your guide to create a clay version. I bought some for research so I could get the size right...that’s my story and I’m sticking to it.


2. Use a sharp pointed object to create a hole in the middle of your rabbit’s head. This hole is threaded side to side so you can string the pendant on a necklace. Skip this step if you’re not making a bead.


3. Place rabbit on a sheet of Kraft paper on the baking tray and into a pre-heated 275 degree Toaster Oven. Watch the clay to be sure it doesn’t burn...it shouldn’t take very long to set. Mine took about 7 minutes...after I burned the first one. Oops.


4. Allow rabbit to cool. Mix red and white Crafty Chica paints to get a nice shade of pink. Paint rabbit. Allow to dry.


5. Place rabbit on a sheet of kraft or scrap paper. Spray with Aleene’s Tacky Spray. Pour a generous helping of pink glitter all over rabbit front and sides. Tap off excess and pour back into jar. Allow to dry.

6. Spray rabbit with Aleene’s Matte Finish Spray Sealant. Allow to dry.


7. Adhere the three Glam It Up studs to the face of your rabbit with the Jewel-It Glue. You’ll need to have a good dollop of glue so it fits into the recess on the stud. Use the handle of your paintbrush or a toothpick to remove any excess glue. Allow to dry.

Design Note: Do not eat this Peep.  It won't taste very good.  Trust me.