Showing posts with label tulip tie dye. Show all posts

Get fun tie dye techniques and inspiration over at Kollabora today!

Tuesday, July 9, 2013
 We've partnered up with the cool DIY site Kollabora for an exclusive post all about tie dye inspiration!  See how to get the hottest fashion looks you are seeing online and in department stores, but for much less!

Read more »

Altered Tie-Dye T-Shirt Challenge - The Results

Monday, July 8, 2013
Last week, we featured four amazing projects by our talented group of iLoveToCreate bloggers.  We decided to round up all these awesome projects so you can see how many different looks you can get from the same Tulip One-Step Tie-Dye Kit and plain white Gildan T-shirt.  As you can see, all our bloggers created truly inspired creations, each with their own individual style.
Read more »

DIY Tie Dye T-Shirt Bracelet

Wednesday, May 22, 2013
Tie Dye Your Summer is rolling on, and I've got a bracelet you can make in a flash with any tie dyed t-shirt!  This is a perfect Summer Camp craft for teens.  So easy to make and customize.  Tie dye a t-shirt, cut into strips, fold, glue and secure in fold over findings.  That's it!   It doesn't get much easier than that.  Tulip Tie Dyes are so easy to use, they're goof proof.  Plus how delicious are these vibrant colors?  Make an armful in a variety of colors and stack 'em up!
You will need:
White Cotton T-shirt (pre-washed)
(Kit includes dye, bottles, gloves, sheeting and rubber bands)
Metal Fold-over Findings with Clasp and Extension Chain
Ruler
Fabric Scissors
Flat nose pliers

Wash shirt first to remove sizing.  Tie dye works best with natural fibers like cotton.  Wet shirt.  Use rubber bands to tie off shirt in banded sections.  Add dye to sections.  It's okay if this isn't perfect, trust me.  I used neon yellow, pink and orange.  Let dyed shirt set in plastic bag for 6-8 hours and wash and dry following instructions on package.
Measure a section of fabric that is approximately 3" wide and long enough to wrap wrist.  Your clasp adds about 1/2", so factor that in when measuring.  Cut fabric into four even strips.
Add a little glue along inside of metal finding.  Fold each strip in half and line up between thumb and forefinger.  Gently place in finding as shown.  You want to be sure the fabric sections hit the top of the inside of the finding so they're secured when closed.
Use flat nose pliers to compress finding over fabric.  You have to squeeze this really hard, so don't be shy!  Repeat for opposite side (try to keep the folds in the same direction on both sides) and allow the glue to dry overnight.
 These look best in groups, so make an armful!  I'm showing a group of three in the photos!
How would you style these bracelets?  Do tell! 
Visit Tie Dye Your Summer for tons of awesome DIY Tie Dye projects.  Come see me at DIY Doyenne for more simply fabulous DIY fashion and style ideas.
Cheers,
Madge

Tie Dye Cut-out T-shirt DIY

Monday, May 13, 2013
Tie-Dye is one of the most popular and fun ways to re-create a plain t-shirt. When you Tie-Dye you become your own Artist by making  an original piece of art. 

Tulip has made creating that perfect Tie-dyed t-shirt so easy with their One-step Tie-dye kits. This kit has become my new favorite way to tie dye. 

What you need:
– T-shirt
– Scissor
– Tulip One-Step Tie-Dye kit
Pick out the colors you would like to use fill the bottle to the line with water. Decide on a design. I wanted green and teal varied stripes. Use the rubber bands provided by the kit, and make off your stripes.
Let sit for 6-8 hours you can place this in a plastic bag if you would like i just let mine sit as is.
Rinse until the water become comes clear. 
 To put my own twist on my shirt, I made cut outs around the top of collar. I cut out two triangle shapes out of paper, one large, one medium. I folded the front part of my shirt in half and folded the triangle in half and traced it on to my shirt.
Then I cut them out.
There are lots more Tie-Dye ideas on Tie Dye Your Summer.
and more T-shirt Ideas on my site Wobisobi.

Have a wonderful day!
Lots of love,
Anne

Tie Dye Your Summer + Enter to Win an iPad/Tulip Prize pack

Friday, April 26, 2013
We are so excited about our brand new Tie Dye Your Summer web site! The site is packed with tons of cool inspiration, step by step instructions, videos, and giveaways each month.  It's the one-stop place for all things TIE DYE and we hope you'll join us for the fun!
Here's just a few of the many things you will see when you visit the site...

We're running two awesome Tie Dye Giveaways!  For both giveaways, you can win an Apple® - iPad® mini Wi-Fi - 16GB with Tie-Dye Skin and supplies to throw your own Tulip® One-Step Tie-Dye party. You can enter in the form below -or- enter using Instagram.  All the contest rules and details can be found on our giveaway page!


a Rafflecopter giveaway


Click here for Tons of how-to's and inspiration.  Learn the basics of tie dye (prepping, rinsing, and washing) as well as all these fabulous techniques. The instructions are shown in clear, easy-to-follow photos along with lots of projects using that technique. And we've also compiled an informative list of frequently asked questions tie dye questions that will make your project the best it can be.

You might just want to try out the spiral technique!  So much of the fun of tie dye is the "MAGIC" reveal when you see the how your dyed item turned out!
Learn all about the history of our Tulip One-Step Tie-Dye Van. You'll also find info on our Tie Dye Tour down the California Coast this summer along with dates and photos of our appearances. Learn more on our Follow the Van page.

Planning a tie dye party?  We have a great video and detailed steps to plan a fun afternoon with you and your friends! Click here to find all the Tie Dye Party Planning details!

And finally, on our product page, you can see our brand new Tulip® One-Step Tie-Dye packaging!  It's so eye-catching and fun.


We hope you'll take a look at the site and that it will inspire you to TIE DYE ALL THE THINGS! 

iLoveToCreate Craft Haul Video with The Impatient Crafter

Wednesday, February 27, 2013

Craft Haul Video for iLoveToCreate  

(from The Impatient Crafter!)


One of my favorite freelance gigs is working as a blogger for the fine folks at iLoveToCreate. They make some of the coolest products in the craft industry and they're some of the nicest people you'll ever meet. Their team is unparalleled, creative, visionary and smart. So when I get a box filled with new goodies to use in my blog posts and designs, it's always a party at Casa de Potter. This time, we decided to film the most auspicious opening of the latest box of awesome. 

Yup, it's an iLoveToCreate Craft Haul Video!  Huzzah!

Be forewarned, I try to keep my tongue firmly planted in my generously rouged cheek at all times.  So if you're looking for a straight forward haul video, this isn't it.  If you're looking for a little chuckle, a lot of chutzpah and a bevy of bodacious products including Tulip Body Art, Tulip Tie Dye, Tulip Glam-it-Up and more...well you've come to the right video!

Enjoy!

xoxo
Madge a.k.a. Margot Potter

How to make Tie Dye Rainbow Socks

Tuesday, February 26, 2013
Do you love color as much as we do?  Then you'll want to make a pair of your very own Tulip One-Step Tie Dye socks (or leggings as some may call them).  We are so ecstatic how these tie dye socks turned out. They were created by superstar designer Lauri Eaton.  So fun and truly statement making for your wardrobe! Lauri shows you how to make them below...


What you need:

– Tulip One-Step Tie Dye (Neon kit for rainbow socks; Vibrant kit for green, blue, and purple pair)
– Long 100% cotton socks (we got ours from Dharma Trading Company)
– Surface Cover

– Paper Towels
– Drying rack (optional)

Before you begin:  Prepare your work area and wet your socks and squeeze out any excess water.
Lauri started off making the blue, green, and purple socks.  For these socks, you will fold them in half, then fold them again to make four layers.
Section the socks into three sections using the zip ties.  Pull the zip ties as tight as you possibly can for best tie dye results. 
 Fill your tie dye bottles with water and shake well. Now place the socks on a drying rack and squeeze the 3 tie dye colors on each section.  Make sure to not squeeze all around the zip ties.  The colors will seep toward the zip tie as it sets, so there's no need to stress about getting every teeny tiny white area!
This is what the dyed socks looked like before Lauri covered them to set.  She let them set for 10 hours!  That's why the colors turned out so intense.
For the rainbow tie dye socks, Lauri folded them in half, then dyed them in rainbow color order.  Notice there's a paper towel underneath the rack to catch the dripping dye.  Sometimes the paper towels turn out so pretty!


We love how the socks turned out and now want to make more!  Do you think you'd like to rock some tie dye socks?  They'd even be fun for just around the house!
Love tie dye? Check out these other fun, vibrant project ideas!!

Make a Striped Tie Dye Shirt using Tulip One-Step Dye

Wednesday, January 9, 2013
Have you always wanted to tie dye, just didn't know where to start? Here's an easy way to get your feet wet using Tulip One-Step Tie Dye available at Wal-mart, Michaels, Jo-Ann, Hobby Lobby, AC Moore, and other craft stores nationwide. This is the easiest tie dye out there to try and it's not intimidating to use at all, which makes it great for all ages to use.

What you need:
– Cotton shirt of your choice
– Tulip One-Step Tie Dye Kit
– Spray bottle

1) Break open your Tulip One-Step Dye packaging. Inside you will find everything you need to do your project (dye, plastic gloves, rubber bands, and an easy-to-follow instruction guide). 2) Wet a plain 100% cotton shirt. Gather your shirt horizontally from side to side. Tie rubber bands around your shirt in regular intervals, so that it is consistantly banded. We recommend wrapping your rubber band around 3 times for each band. 3) Fill up your entire bottle of Tulip One-Step Tie Dye with water and shake well. Now apply a generous amount over your entire shirt and around the bands. Flip over and do other side as well.  We did this process in a small plastic shoebox-shaped container to prevent a messy work area. Seal the dye with the lid and let it set inside for 6-8 hours (this makes for more vibrant results). 4) After 6-8 hours, fill up your plastic container with water to rinse out the excess dye. We filled up the plastic container and poured out the water several times until the water ran clear. You can wash and dry your shirt in your washer and dryer as normal, just wash separate from other clothes for the first couple washes so that the dye doesn't get on your other clothes!
Here's what it looks like when you are dyeing multiples of different colors using this technique.
And here's what our finished orange shirt looked like!  It turned out pretty fabulous, don't you think? What color would you like to make?

10 Quick & Easy T-shirt Halloween Costume Ideas!

Tuesday, October 23, 2012

Following up last year's popular list of 10 Quick & Easy T-shirt Halloween Costumes, here is another collection of ten DIY costumes on the fly. From the cinematic to the everyday, from the historical to the commercial, from the sweet to the oh-so-punny (scroll down to #10).... But let's start with a classic.
 
JACK-O-LANTERN T-SHIRT COSTUME

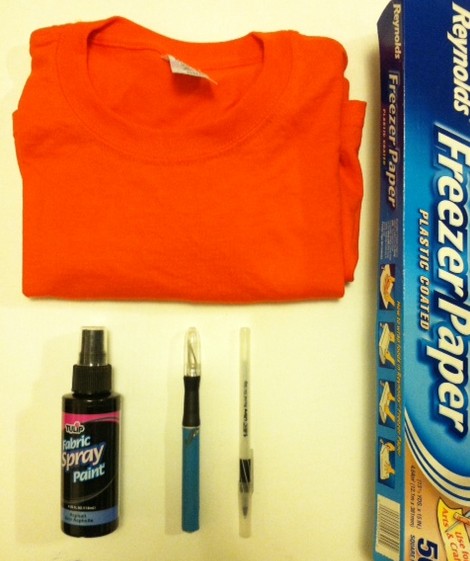
Materials:
-Orange T-shirt
-Tulip Fabric Spray Paint (in black)
-Pen
-Freezer Paper
-Craft knife and cutting mat
-Warm iron
-Newsprint paper


Make it:
1.
Use the pen to sketch out jack-o-lantern features on a sheet of freezer paper.
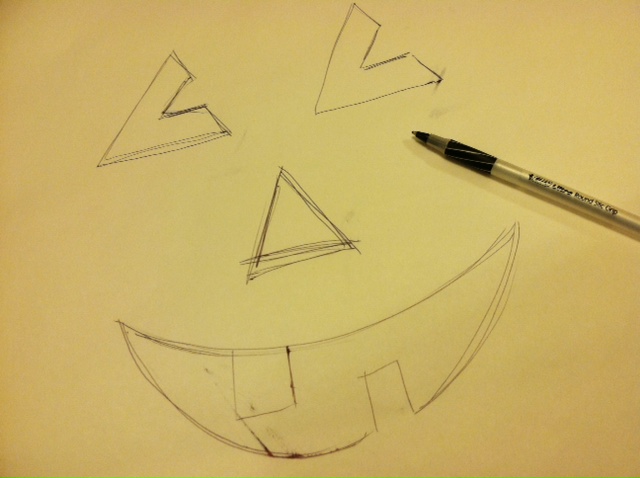
2. Use the craft knife and cutting mat to cut out the features.
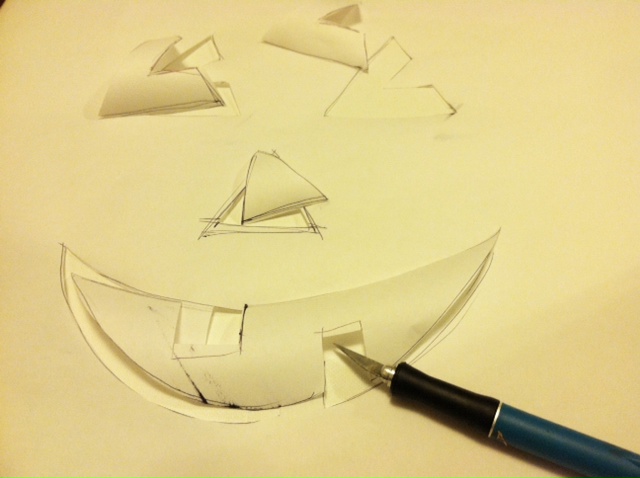
3. Iron the freezer paper stencil onto the front of the T-shirt. Insert a sheet of newsprint between the layers of the shirt to prevent the paint from bleeding through.
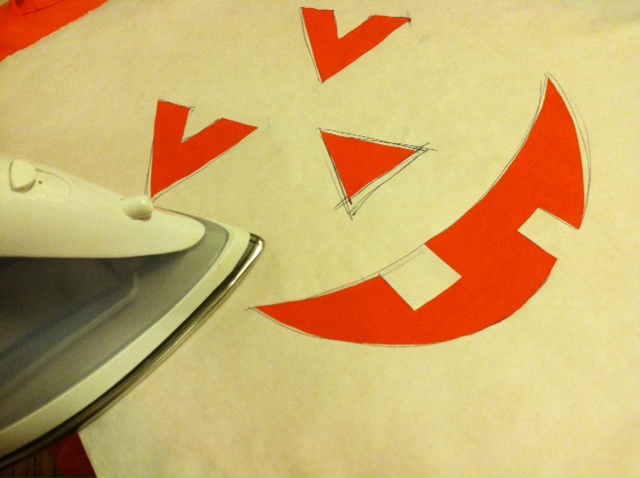
4. Mask the parts of the T-shirt that are still visible, and spray over the stencil with black paint.
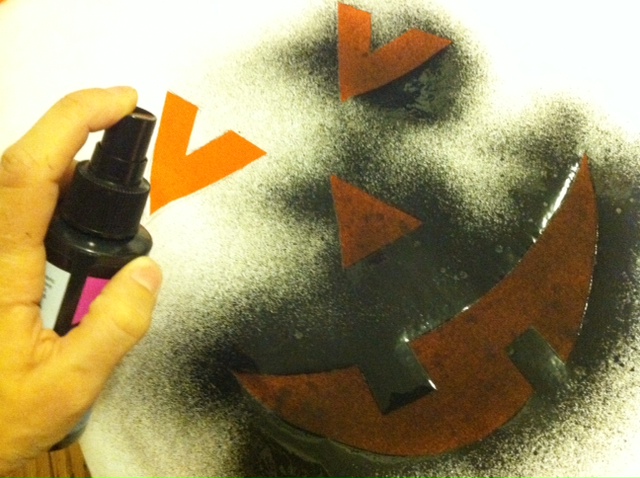
5. Let the paint dry briefly, then peel up the stencil.
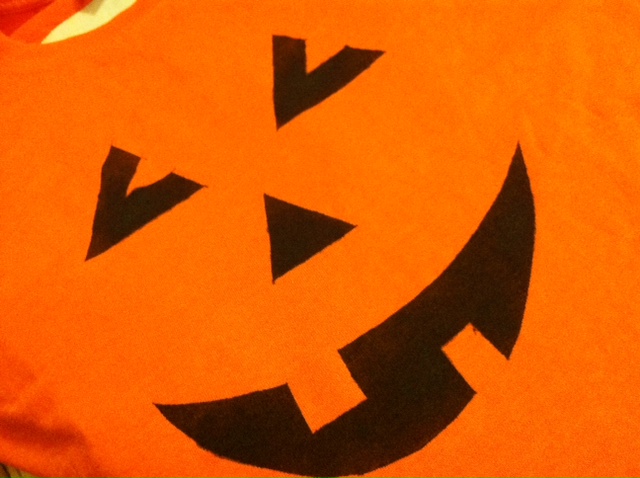
6. Let the paint dry completely, then try on the T-shirt and go find a pumpkin patch to haunt!

---
WITHOUT FURTHER ADO, HERE ARE 10 COSTUMES TO MAKE WITH T-SHIRTS (including the JACK-O-LANTERN!)

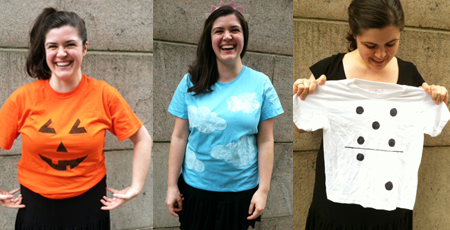
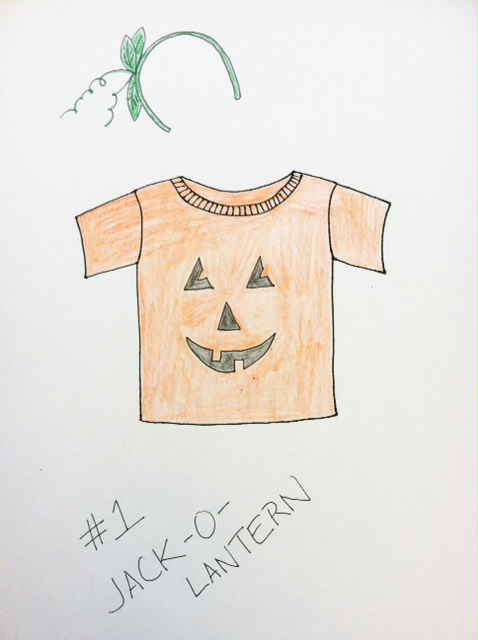
#1 Jack-o-lantern. As shown above, that pumpkin patch classic. Black paint on an orange T-shirt. Optional: Accessorize with a green vine and leaves headband.
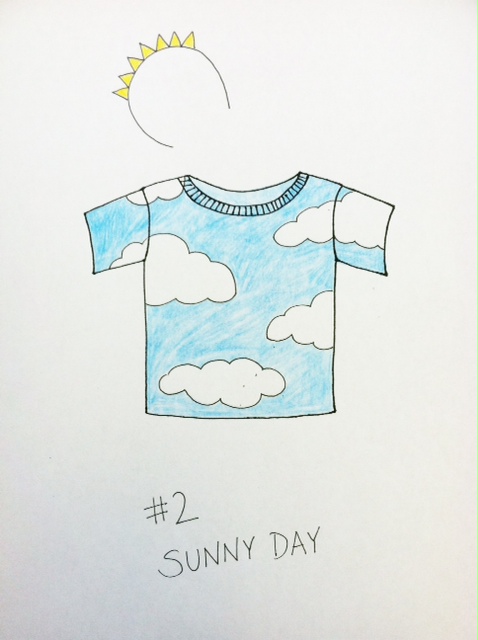
#2 Sunny day. Paint white clouds on a pastel blue T-shirt, or stick pillow stuffing on the T-shirt. Inspired by one of our readers, Emily A. (not to be confused with Emily P., our model for this post!), who used a variation of the Mohawk Mo' Rock hat (from Generation T: Beyond Fashion) as the headpiece. We used this more recent accessory. And hey, you can always use the costume to moonlight in Ben & Jerry land.
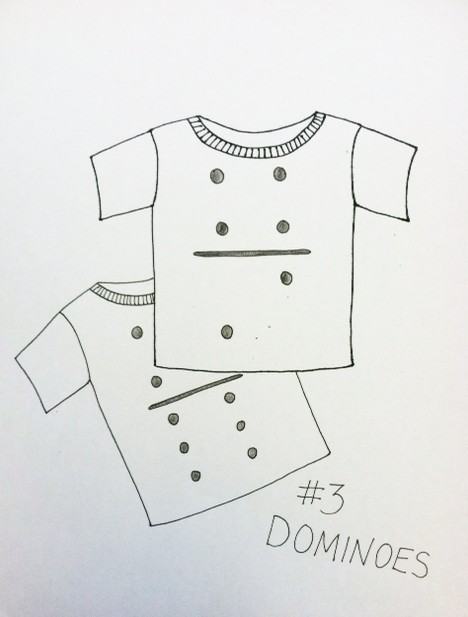
#3 Dominoes. A fun and very easy group costume (just leave the ears and tail at home so you don't get mistaken for a dalmatian) -- use black fabric paint or black permanent marker on a white T-shirt. And if you get tired at any point while wearing the costume, simply lie down adjacent or end-to-end with a matching number on  a friend's shirt!
#4 Strawberry. Paint yellow seeds on a red shirt, and use green T-shirt scraps to fashion a stem with leaves to sit a top your head. Go solo or meet up with friends to make blueberries, watermelon -- a whole fruit salad!

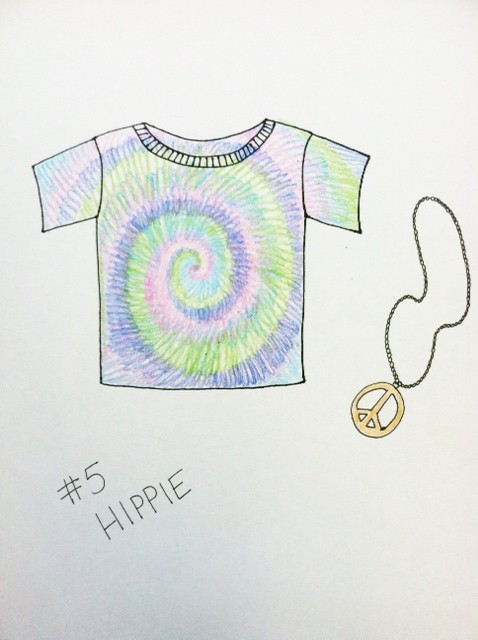
#5 Hippie. Tie-dye a T-shirt, then pair it with bell-bottom jeans, a headband, and any other . (Note: You have to schedule in additional drying time with this one.)
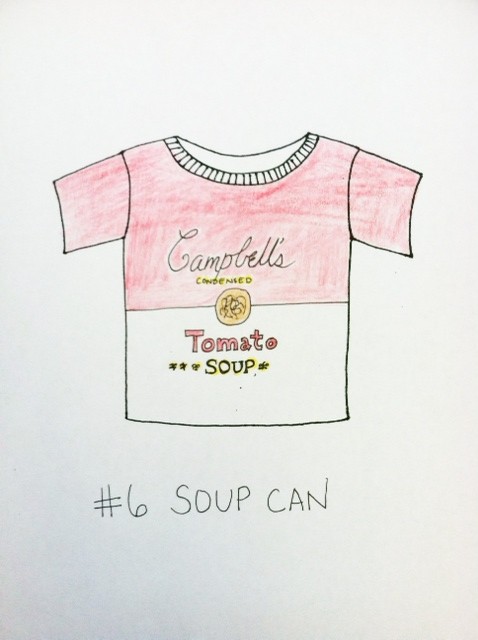
#6 Soup can. Start with a plain white T-shirt and use a black permanent marker, stencils, and red and yellow paint to embellish it. Then convince a pal to go as Andy Warhol!


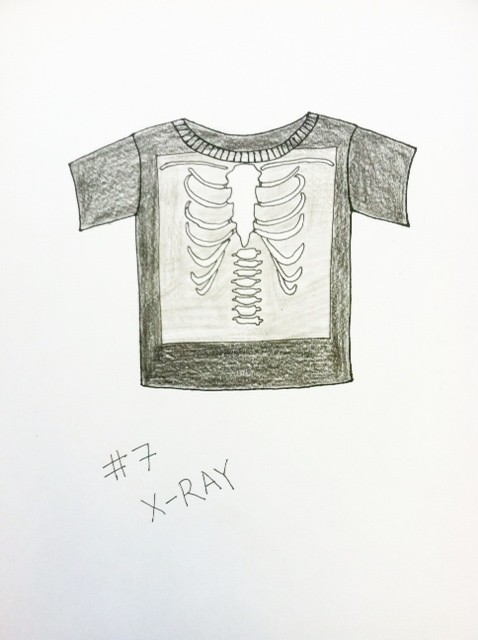
#7 X-ray. A great way to show some skeleton on Halloween, use white paint on a black T-shirt (and the painted parts will show up gray.


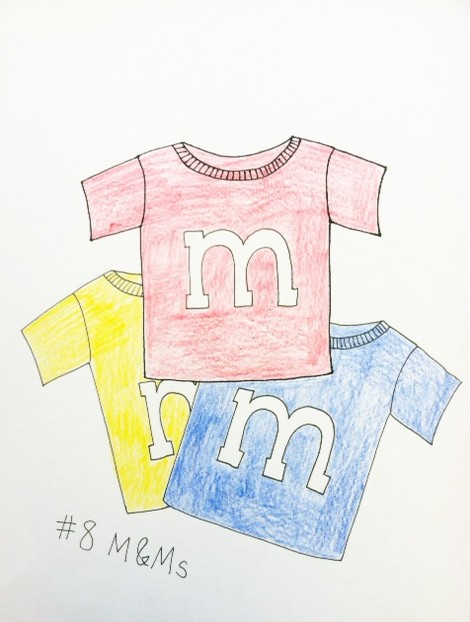
#8 M&M candies. Paint white lowercase 'm's onto red, yellow, blue, green, orange, and/or brown T-shirts. Then really go the extra mile and wear white gloves and white sneakers. Gather up a group of friends for a whole handful of candies. Note: This approach also works for Skittles!'


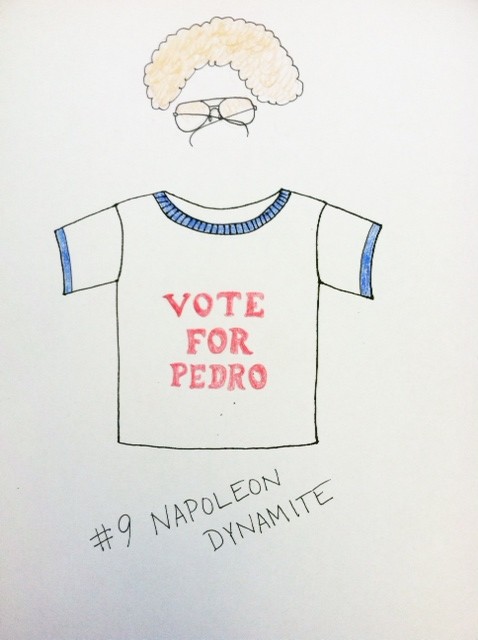
#9 Napoleon Dynamite. Based on the indie hit, paint blue edges on a white T-shirt to mimic a ringer tee; paint or iron on letters to spell "Vote for Pedro." Top off with some wiry glasses and a curly wig.
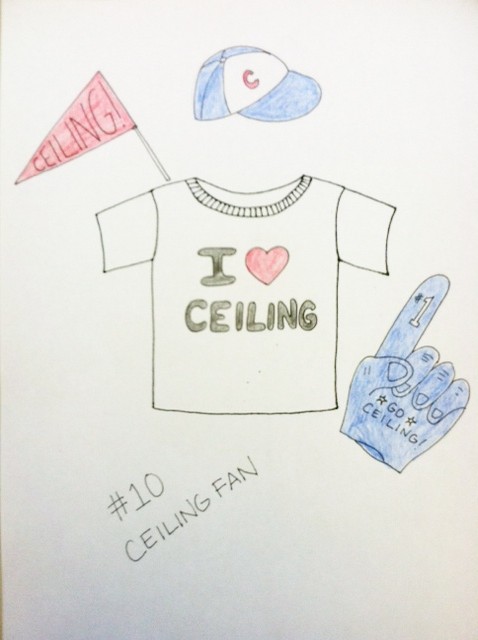
#10 Ceiling fan. Heh. Number 1 fan of the ceiling. Get it? Get it? Use fabric markers or paints on a white T-shirt -- and plenty of props!

---
Happy trick-or-treating everyone! Here's to last-minute costumes that are as easy as 1, 2, 3.