Showing posts with label wobisobi. Show all posts

You're a Star, Sweatshirt DIY

Tuesday, November 12, 2013
 I have seen Star shirts and sweatshirts everywhere and
 I just love them so I decided to make one for  myself of course
I had to add a little bit of sparkle to it.

Read more »

Glitter Bones and Heart Tee.

Tuesday, October 8, 2013
 I LOVE this time of year.
 When I was young I could not wait to come up with a costume to Trick or Treat in from things I just had laying around the house. Now that I am all grown up I still feel like a little kid when October rolls around. It brings back such awesome memories. I wanted to make a shirt that I could wear even after the month of October. So the Glitter Bones Shirt was created.
Read more »

Monogrammed Bags, DIY

Tuesday, September 10, 2013


 Along with working in "The Blog World" I have a regular 40 hour a week job, working with some amazing people. Associate Appreciation Week is this week and I wanted to make them something that was specifically tailored for each one of my them that shows  how much I value their hard work and dedication. I have always loved monogrammed bags so I thought that I would make each one of them a bag with their initials monogrammed it. Tulip made it so easy with their Spray and Tube Fabric paint.

Read more »

Strapless, No-Sew T-shirt #2, DIY

Monday, August 12, 2013

Happy Monday to you all.
 I am trying to squeeze every last moment I can out of Summer,
so I have been experimenting with a few strapless no sews over the last week.
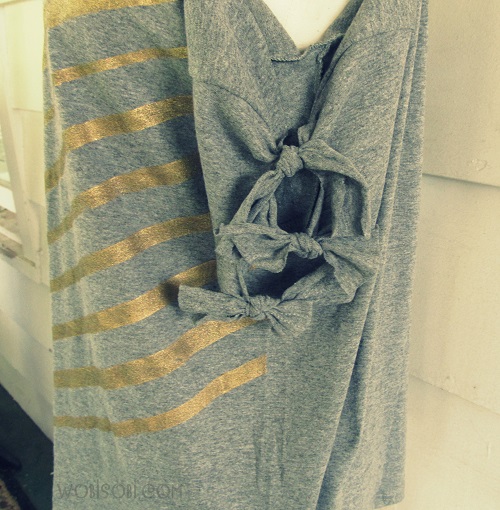
When you add a little Tulip Gold- Glitter Fabric Paint  
 you have your very own unique creation.
I hope you have as much fun making this top  as much as I did.
Read more »

Striped, Strapless No-Sew T-Shirt, DIY.

Monday, July 8, 2013


I have been trying to come up with new, no sew T- shirts in different styles, and while I was experimenting on a no sew skirt this weekend,  I came up with this cute no sew strapless shirt. 
I used Tulip Neon Fabric Sprays to help me create a beautiful stripped pattern. 
You could wear this with your favorite jeans, shorts or even use it  as a beach cover up. 
The best part is there is no sewing involved.
Read more »

Altered Tie-Dye T-shirt Challenge featuring Anne of Wobisobi

Monday, July 1, 2013
Editors note:  All this week, we will be hosting an Altered T-shirt challenge featuring some of our iLoveToCreate bloggers!  They were each sent a Tulip One-Step Tie Dye kit and Gildan t-shirt to distress, hack, cut up and alter to their heart's desire.  Have fun with us this week as we share four different looks from four awesome designers.  And check back with us in the future as we plan to have more challenges featuring our other iLoveToCreate bloggers!


 I love creating different types of no-sew t-shirts, and when you add tie-dye to them, it just makes them even more unique. Here I am using the Tulip One-Step Tie Dye kit in Moody Blues. This is the easiest way to tie dye, because all you do is open up the kit, add water and go!  There's everything you need for creating the perfect tie-dyed shirt in there!
 What you need:
– 100% Gildan Cotton Shirt (Large)
– Scissors
– Tulip One-Step Tie Dye Kit (I used Moody Blues)
 Fold your shirt in half.
Mark a diagonal line.
 Gather that line and rubber band around where you gathered.
 Add some rubber bands about 3 inches apart.
Now mix up your Tulip One-Step Tie Dye Bottles. Just add water to the top line of the bottle and shake well until all the powder is dissolved.
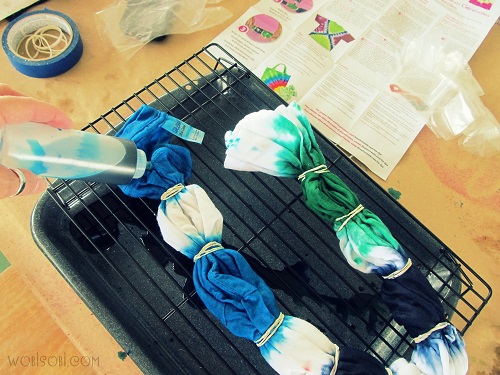
 
Squeeze you colors on your shirt, cover it with plastic, and let sit for 6-8 hours.
 Cut your rubber bands and rinse your shirt in the sink.
Then wash in the washing machine following the instructions on the kit.
 Now let's have some fun cutting this shirt up!
 It's so easy to cut up and restyle and basic t-shirt as you can see.
 Cut apart the top strap.
 Cut the other sleeve like the picture above!
 Cut and stretch the sleeve.
 Cut one inch strips down the side of your shirt.
 Cut them open.
 Now put on your shirt and tie the sides to fit your body.  It's the best part cause you can make it to fit your body type!
 Here's how the sleeves look.
 Another view...
 Now you have a cute summer shirt for the beach or to wear with your favorite pair of jeans.
For more no-sew t-shirts head over to my blog at wobisobi.com and click on T-shirt DIYs at
the top of the page.

Lots of love,
Anne

Altered Chevron No-Sew T-shirt

Monday, June 10, 2013

Here's a cool shirt perfect for a summer picnic or evening out!  And it's entirely no-sew and so easy to make. Here's how you do it!
What you need:
– T-shirt (this shirts ia a Men's Large Hanes)
– Scissors
– Tape
Lay your shirt out and mark a diagonal line from under the arm to the top of the opposite shoulder.
Cut on the line.

Cut the shirt on the shoulder down about 12 inches.

Cut open and tie a bow from the fabric left of the cut.
Now cut off the top of the sleeve.
Cut two lines on the sleeve.
Cut them open.

Tie Them.

Take your paint and put it on a paper plate.

Tape off your shirt in a chevron pattern.

Put a piece of cardboard between your shirt.
 
Paint your shirt with the pouncer

Let dry about 3 hours, then remove the tape.
Here's  how the bows look on the side.
When you wash this shirt, wash in cold and hang dry.
A fun, summer, no-sew t-shirt.

Have a wonderful Monday.

Lots of love,
Anne

See more of my tutorials at my Wobisobi blog!