Along with working in "The Blog World" I have a regular 40 hour a week job, working with some amazing people. Associate Appreciation Week is this week and I wanted to make them something that was specifically tailored for each one of my them that shows how much I value their hard work and dedication. I have always loved monogrammed bags so I thought that I would make each one of them a bag with their initials monogrammed it. Tulip made it so easy with their Spray and Tube Fabric paint.
Showing posts with label tulip fabric paints. Show all posts
Showing posts with label tulip fabric paints. Show all posts
Stenciled Snowflake T-shirts!
Tuesday, November 27, 2012 at 9:30 AM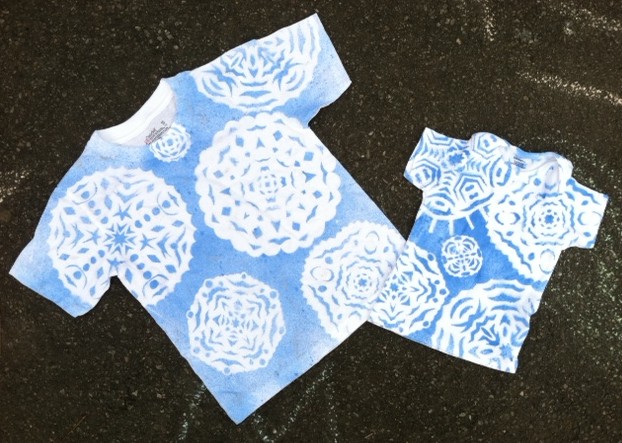
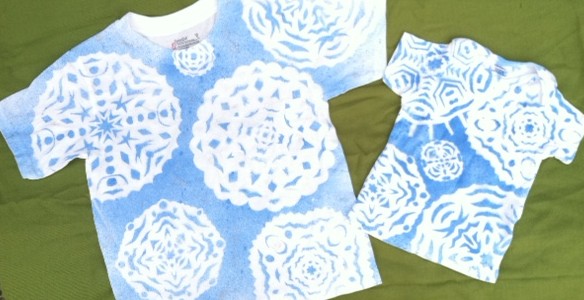
We had a wicked nor'easter blow through the East Coast last week, and though the snow pile-up lasted less than twenty-four hours, it sure put me in the mood for winter. So with the holidays upon us, I decided to make some wintery-themed T-shirts for the two young cousins (note: these tees can be made in adult sizes, too)--a little something to wear inside when it's too cold outside! And a nice alternative to the ubiquitous holiday sweater, don't you think?
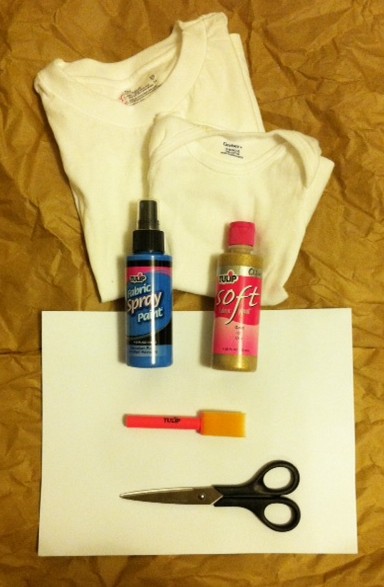 Materials:
-White T-shirt(s) in appropriate size(s)
-Tulip fabric spray paint (Light Blue)
-White printer paper
-Paper scissors
-Warm iron and press cloth
-Tulip Soft Fabric Paint (Gold Glitter, optional)
-Tulip Sponge Brush (optional)
Make it:
1. Fold one of the sheets of paper on a diagonal to "square" it. Use scissors to cut off the excess strip of paper.

2. Bring the lower left corner up to fold the triangle in half again.

3. And again!

4. Use your scissors to start cutting notches along the folded edges: zigzags, circles, crescents, curls, diamonds, and so on! Don't forget to cut the open edges in an arc, so that the snowflake will be somewhat round in appearance when you unfold.
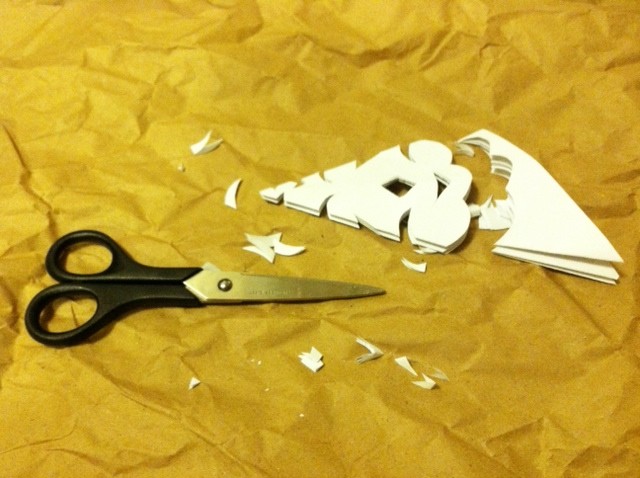
5. Unfold!

6. Repeat to make many snowflakes (no two will be alike)!

7. Lay the T-shirt flat on your work surface. Arrange the snowflakes onto the front, and press them with a warm iron to keep them relatively flat. (Note: The weight of the spray paint will actually help them stay flat, too.)
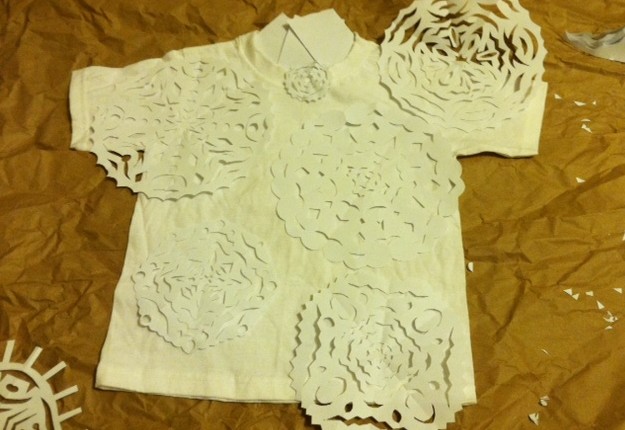
8. Lightly spray blue paint over the entire T-shirt (I masked the inside back neckband with paper scraps).

9. Carefully peel off the snowflakes and set them aside. Let the T-shirt dry.
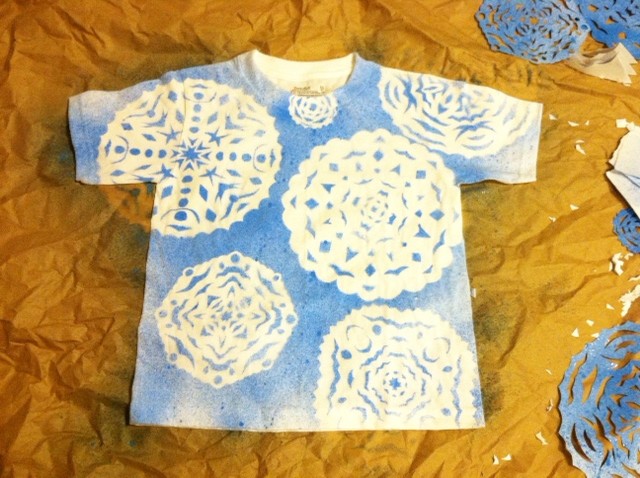
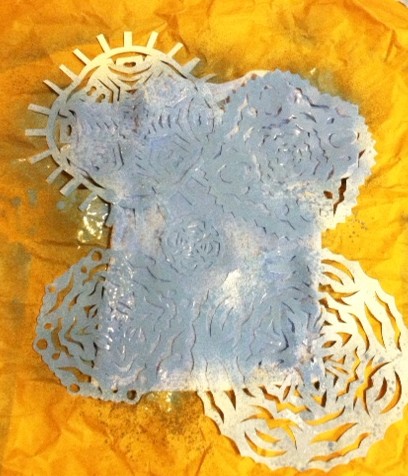
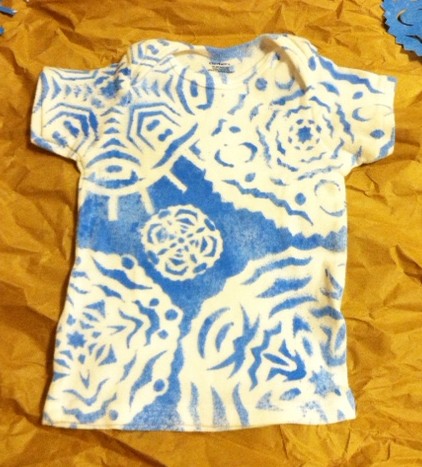
10. Reuse the snowflakes to make T-shirt number two!
Optional: Use the foam brush and glitter paint to add sparkly highlights to the snowflakes.

Let dry, then try on the shirt (or gift it to its recipient!), and curl up by the fire, knowing these snowflakes will never melt.

Cinco de Mayo Pinata Shirts
Thursday, May 3, 2012 at 6:34 PM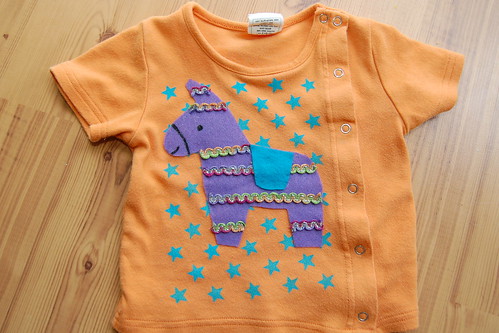

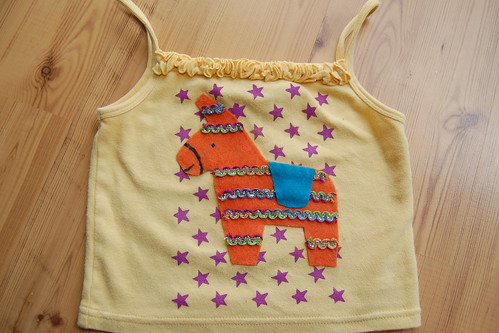
Nothing says Cinco de Mayo like a pinata. You know how I love to dress my kids in theme (weenie dogs anyone?) so I thought why not make them matching pinata shirts to wear this weekend. Not to mention they will be great for birthday parties.
 Earlier this week I featured an embroidery pattern by Mollie Johanson of Wild Olive on BlogHer. The pattern was for the March stitch-a-long at Feeling Stitchy. I kept thinking about this perky little donkey and how I needed to make something with him for this week's I Love to Create post.
 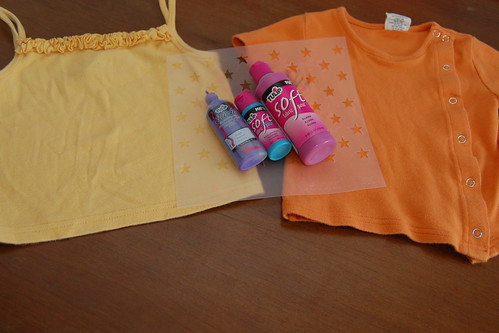 SUPPLIES
T-shirt and/or tank top
Tulip Fashion Paints
Stencil Bruch
Printer
Fabric Fusion Glue
Felt
Scissors
Wild Olive pinata embroidery pattern
Rick Rack
Scribbles Paint Marker
Stencil 1 star pattern stencils from the Stencil 201 Book
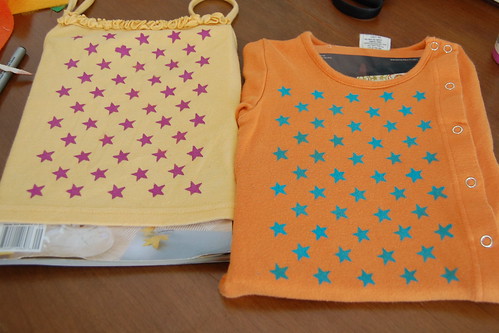 The first thing I did was adorn a T-shirt for Baxter and a tank top for Tallulah with a star pattern from Ed Roth's Stencil 201 book. I used some festive colors from Tulip.
 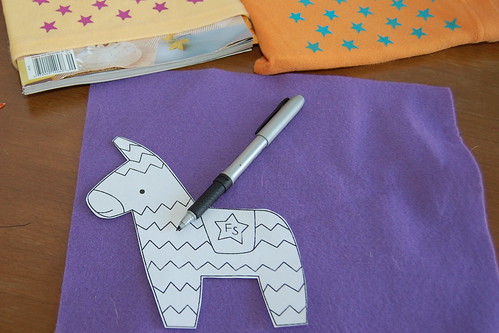 While the paint was drying I enlarged the pinata embroidery pattern from Wild Olive and printed it out. I cut out the donkey and traced it onto two separate pieces of felt.
 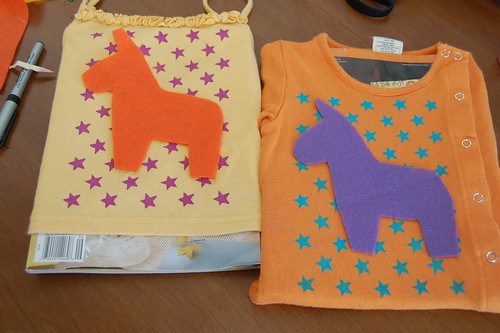 Once the stars were dry using Fabric Fusion Glue I attached my felt pinatas to the shirts.
 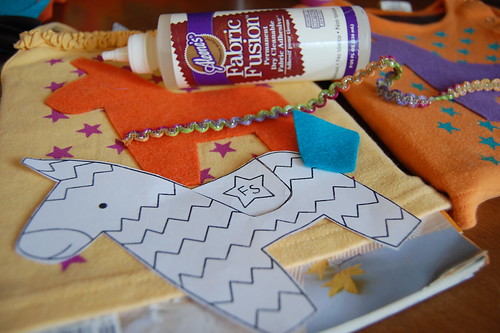 The next thing to do was add the stripes. Molly from Wild Olive embroidered hers, but I had some colorful rick-rack that worked great. Again, I used Fabric Fusion Glue to attach the trim.
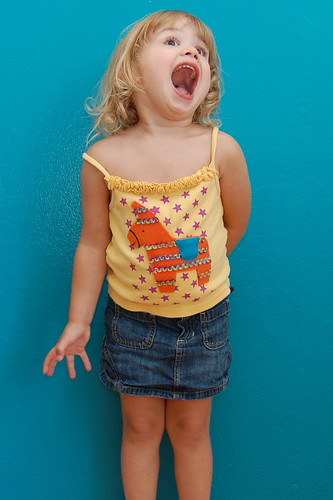
I cut out the saddle from the paper and traced onto some teal felt. Using Fabric Fusion Glue I attached to the pinatas.
 Last, but not least, I added the details of the face using a Scribbles paint marker.
 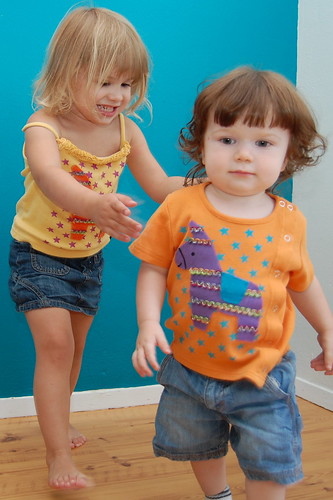 Once everything was dry I tried to get pictures of my children modeling their new shirts. This was about as easy as herding cats.
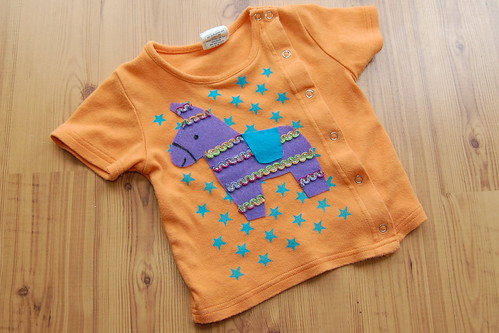

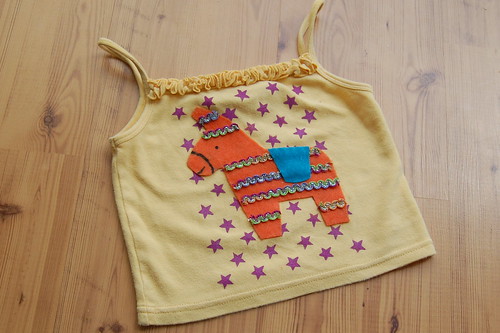 So now that I have these snazzy new matching shirts made I guess that means I should find something to do on Saturday so we can show them off. Visit us on Facebook!
Craft on!
iLoveToCreate Retrofabulous Crafts: Games People Play Ornament!
Monday, December 19, 2011 at 7:50 AM
Visit us on Facebook!
Craft on!
I havehoarded gathered lots of little vintage goodies over the years. As I move often, larger items are given away, but the little trinkets and treasures come along for the journey. It is fascinating how these tiny momentoes of days past have survived. Who tossed these dice? Who scooted this little scotty dog around a Monopoly board? These little doo dads, they've seen things. They carry a small piece of history in them. I have always felt like I was born in the wrong era. Vintage things fascinate me. From my first visits to rummage sales to my years of thrift store trolling, to my years of wearing vintage head to toe, I am enamored with and deeply smitten with the past-yet firmly rooted in the present. It's a dichotomy to be sure.
Speaking of presents, variations on this theme make lovely gifts. I have stacks of old BINGO cards, with crisp and clean graphics and they make the perfect background for all sorts of fun collages. In this case, I used old game parts, letter beads, tinsel and more to make a lovely ornament with a truly vintage appeal. Add as much or as little, glitter or no, make this yours...or more aptly...make it suit the recipient. Note that all number elements on this card have something in common...what could it be? Hmmm...
Various small vintage or new game pieces. I used a bingo chip, a Monopoly game piece and dice (Old games are easy to score at thrift stores, flea markets or on auction sites)
Plastic letter beads to spell: "Merry Christmas"
Small chipboard scrapbook pieces 2 5
Wired red tinsel to form hanger
Silver tinsel to decorate top of card
Tiny wooden clothespins to attach tinsel hanger
Wooden star
Tulip Beads in a Bottle crystal color (or Traci Bautista's Collage Pauge Sparkles)
Tulip Metallics 3-d paint silver
Aleene's Quick Dry Tacky Glue
Aleene's Tacky Line Rolls
Tweezers or chain nose pliers
No stick sheet to protect work surface
1. Cut red tinsel long enough to form a large bail on top of card. Mine is 6". Cut smaller tinsel to fit space at top of card where red tinsel attaches at the top.
2. Use Beads in a Bottle in crystal to color the dice, scotty dog, plastic letters, tiny clothes pins and paper elements.
3. Stipple the silver paint on star and paint around edges using foam brush. Allow all elements to dry.
4. Attach silver tinsel to center top of card using Tacky Line roll.
5. Use glue to adhere larger elements.
6. Use glue and tweezers or chain nose pliers to place plastic letters across bottom of card.
7. Attach red tinsel to front top of card on both sides with tiny clothes pins.
Craft on!
"Games People Play" Upcycled Bingo Card Ormament Copyright Margot Potter 2011
iLoveToCreate: Retrofabulous Crafts
Games People Play
Upcycled Bingo Card Ornament
Margot Potter
I have
Speaking of presents, variations on this theme make lovely gifts. I have stacks of old BINGO cards, with crisp and clean graphics and they make the perfect background for all sorts of fun collages. In this case, I used old game parts, letter beads, tinsel and more to make a lovely ornament with a truly vintage appeal. Add as much or as little, glitter or no, make this yours...or more aptly...make it suit the recipient. Note that all number elements on this card have something in common...what could it be? Hmmm...
Materials
Vintage or new BINGO card (you could opt to use cardstock and adhere a copy of an old card, buy a repro set or look for these on auction sites, they're fairly easy to find.)Various small vintage or new game pieces. I used a bingo chip, a Monopoly game piece and dice (Old games are easy to score at thrift stores, flea markets or on auction sites)
Plastic letter beads to spell: "Merry Christmas"
Small chipboard scrapbook pieces 2 5
Wired red tinsel to form hanger
Silver tinsel to decorate top of card
Tiny wooden clothespins to attach tinsel hanger
Wooden star
Tulip Beads in a Bottle crystal color (or Traci Bautista's Collage Pauge Sparkles)
Tulip Metallics 3-d paint silver
Aleene's Quick Dry Tacky Glue
Aleene's Tacky Line Rolls
Tools
ScissorsTweezers or chain nose pliers
No stick sheet to protect work surface
1. Cut red tinsel long enough to form a large bail on top of card. Mine is 6". Cut smaller tinsel to fit space at top of card where red tinsel attaches at the top.
2. Use Beads in a Bottle in crystal to color the dice, scotty dog, plastic letters, tiny clothes pins and paper elements.
3. Stipple the silver paint on star and paint around edges using foam brush. Allow all elements to dry.
4. Attach silver tinsel to center top of card using Tacky Line roll.
5. Use glue to adhere larger elements.
6. Use glue and tweezers or chain nose pliers to place plastic letters across bottom of card.
7. Attach red tinsel to front top of card on both sides with tiny clothes pins.
Copyright Margot Potter 2011
Subscribe to:
Posts (Atom)


