I found this nifty cotton cosmetic bag at Michaels recently and had to pick it up! It's a perfect blank canvas. This would make a great little pencil case for Back to School, too. A little painter's tape, Tulip fabric paints, some angled paint brushes and in under thirty minutes you can make a custom bag with just a few splashes of neon. Neon works best as an accent for maximum visual impact. The quilting on the bag made it easy to create a colorblock pattern, which is vaguely chevron inspired, but given a fresh, asymmetrical spin. I love this so much, I want to make a matching purse!
Showing posts with label Tulip fabric spray. Show all posts
Showing posts with label Tulip fabric spray. Show all posts
DIY Lace Fabric Spray Shorts
Wednesday, May 1, 2013 at 3:30 PMDid you know you can use Tulip Fabric Spray Paint to make cool designs over jeans, shorts, shirts and more? Check out the shorts that Brandi did for her DIY on the Fly video. This pair of shorts started out as white jeans, and Brandi turned them into lace pattern shorts with black Tulip Fabric Spray and leftover lace from the iLoveToCreate fabric stash. Cool huh? See the process from start to finish in the video below. After watching the video, we know your brain is going to be swirling with all kinds of ideas using this fun spray technique!
The spray works best on light colored fabrics, but there is a white (Snow) spray that works great on black! Also, there are various sprays in glitter and neon finishes, so you can get all kinds of cool looks!

The exciting part is the reveal!! What does this product inspire you to spray?

The exciting part is the reveal!! What does this product inspire you to spray?
Inside the iLoveToCreate studio via Instagram
Saturday, April 27, 2013 at 7:30 AM
There's always a lot of action going on in our studios on a daily basis! This past week, there was a whole lotta tie dye going on, as well as a couple photo shoots. One of the mom's of a model who came in brought this pretty conure. We had to put him on a tie dye shirt and he also left a present for us on said shirt. Haha. Oh, and by the way, he was born with his little feet that way, so nothing is wrong with him if you were wondering.

Lauri dip-dyed this shirt from Forever21. She used the Tulip One-Step Tie-Dye in coral. It left it a cool purple tone!

We are making shirts in the studio using various products that can be mass-produced for shirts to be displayed in stores. This neon shirt is using Tulip Fabric Sprays.

Pattiewack was painting Tulip One-Step Tie-Dye on specialty paper for an upcoming tradeshow. The colors are so full and rich!

During our sales and marketing meetings, we all bring a craft to work on! Alexa is working on a new Puffy Paint Canvas in honor of PUFFY PAINT! See what she's going to do with it in this blog post.

We're decorating our human resources area with bright and vibrant pieces that we've created for our web site. This rainbow-covered stool is so bright and cute...find the instructions to make it here.

And finally, we, once again are mass-producing shirts for retail stores! We think we've hit the BULLSEYE on this one.
CRAFTY CHICA: Jumbo Fabric Stencil!
Friday, January 4, 2013 at 12:00 AM
Last month I debuted 20 new art paintings at a local Phoenix gallery. I wanted to celebrate the crafty in me and still have something bold enough to turn heads. I ended up cutting a series of jumbo stencils and then spraying them on canvases and...glittering them!
I realized that I now have a collection of really cool jumbo sized stencils that I can use for graffiti art, clothing and more! Here is one of them - La Rosa. I used it to make my daughter a shirt!
Here is how to make your own version!
First of all, you'll need:
11x14" sheet of watercolor paper
Healing mat
Craft knife
Blue painter's tape
Tulip® Fabric Spray Paint™
First you'll need to draw or trace your design on the watercolor paper and then cut it out with the craft knife. Think bold to get a strong design!
Here are three I cut and have used!
You'll want to insert a shirt form between the layers of the shirt and then lightly spray the back of the stencil with the Repositionable Spray. Set it on the fabric and press in place with your hands. This will prevent the spray from getting under the design, you'll get nice, crisp lines!
Set down extra paper around the stencil to prevent overspray. Also, block off areas that you'll be spray in in a different color! Lightly spray one coat, let dry and repeat until you get a nice even coat of color.
Nxt it will look like this - nice, but a little flat. Time to add some sparkle!
I used a paintbrush to add thin layers of Tulip Shimmer Fabric Paint.
Now the shirt pops!!! If you want to take it further, you can use the Scribbles® Alpha Stamp Kit to add a phrase, like I did here:
Thanks! Hope you enjoyed this project!
Stenciled Snowflake T-shirts!
Tuesday, November 27, 2012 at 9:30 AM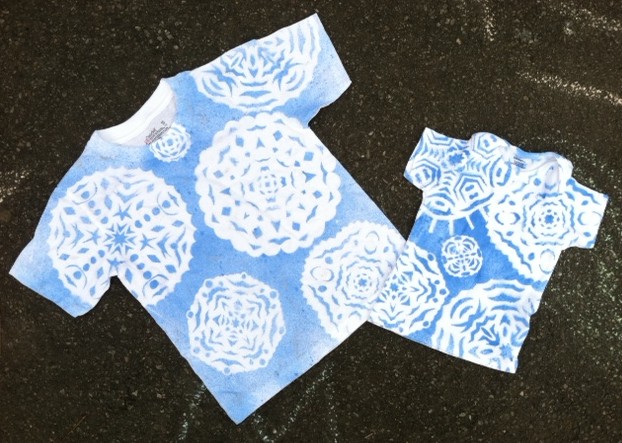
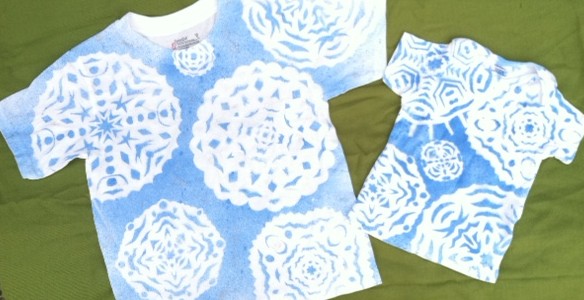
We had a wicked nor'easter blow through the East Coast last week, and though the snow pile-up lasted less than twenty-four hours, it sure put me in the mood for winter. So with the holidays upon us, I decided to make some wintery-themed T-shirts for the two young cousins (note: these tees can be made in adult sizes, too)--a little something to wear inside when it's too cold outside! And a nice alternative to the ubiquitous holiday sweater, don't you think?
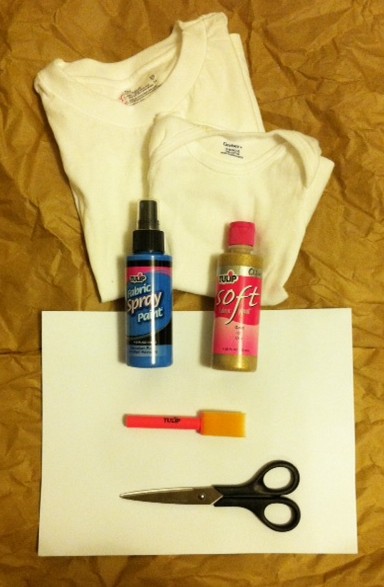 Materials:
-White T-shirt(s) in appropriate size(s)
-Tulip fabric spray paint (Light Blue)
-White printer paper
-Paper scissors
-Warm iron and press cloth
-Tulip Soft Fabric Paint (Gold Glitter, optional)
-Tulip Sponge Brush (optional)
Make it:
1. Fold one of the sheets of paper on a diagonal to "square" it. Use scissors to cut off the excess strip of paper.

2. Bring the lower left corner up to fold the triangle in half again.

3. And again!

4. Use your scissors to start cutting notches along the folded edges: zigzags, circles, crescents, curls, diamonds, and so on! Don't forget to cut the open edges in an arc, so that the snowflake will be somewhat round in appearance when you unfold.
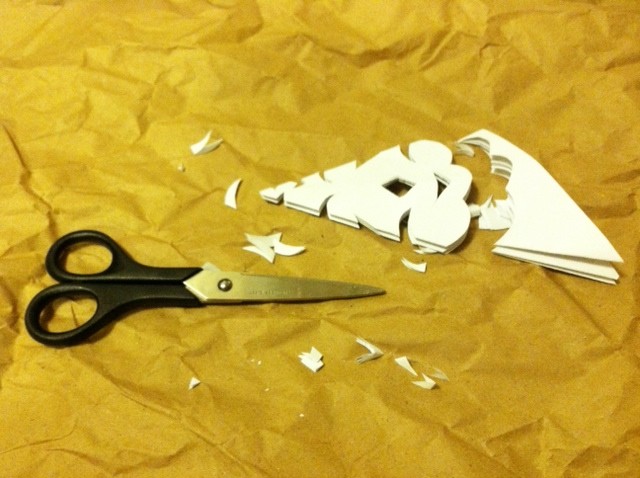
5. Unfold!

6. Repeat to make many snowflakes (no two will be alike)!

7. Lay the T-shirt flat on your work surface. Arrange the snowflakes onto the front, and press them with a warm iron to keep them relatively flat. (Note: The weight of the spray paint will actually help them stay flat, too.)
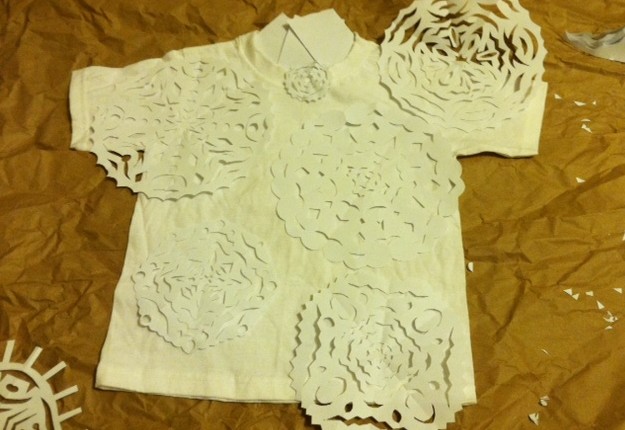
8. Lightly spray blue paint over the entire T-shirt (I masked the inside back neckband with paper scraps).

9. Carefully peel off the snowflakes and set them aside. Let the T-shirt dry.
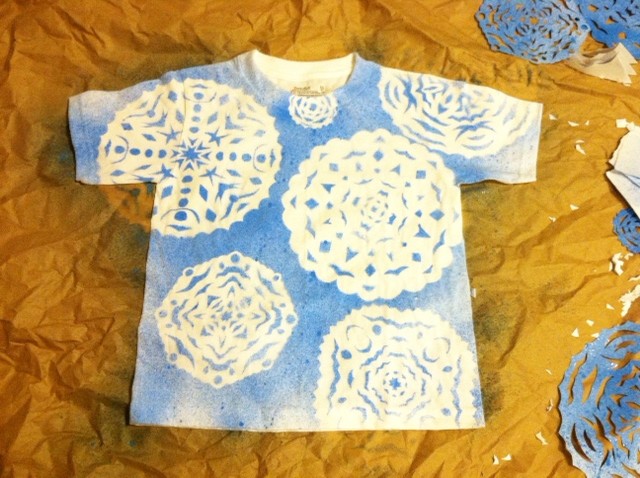
10. Reuse the snowflakes to make T-shirt number two!
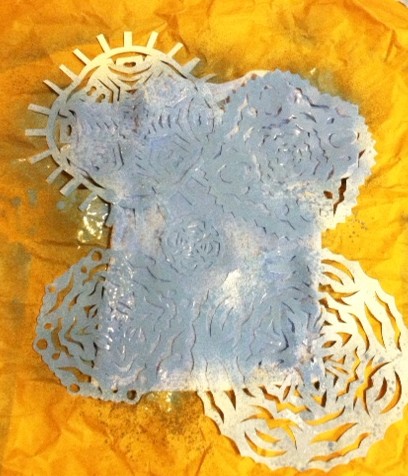
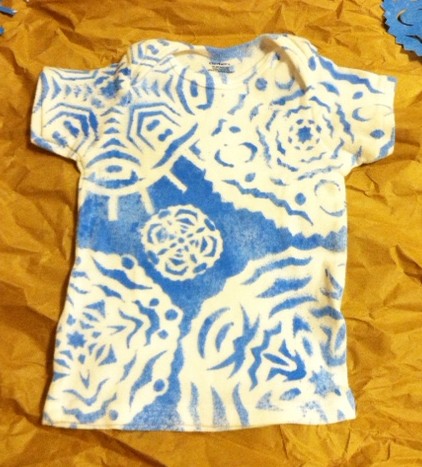
Optional: Use the foam brush and glitter paint to add sparkly highlights to the snowflakes.

Let dry, then try on the shirt (or gift it to its recipient!), and curl up by the fire, knowing these snowflakes will never melt.

Dyed Maxi Skirt
Tuesday, September 11, 2012 at 5:00 AMThe other day I sewed a long maxi skirt with a high waist. I wanted to give it some more visual interest, so I decided to dye the bottom of it. Here's how it turned out. (It actually is a skirt, but I have a matching shirt on with it to make it look like a dress.)
After sewing the skirt, the dye process was pretty easy. I used the Tulip one-step dye.
It comes with a bottle that already has powder in it. You just add the water to the line and you're set. The package even has a set of gloves in it.
I poured mine into a spray bottle. I also had some Tulip fabric spray at home that I used at the bottom of the skirt as well. The other spray bottle was filled with water.
So here's how it went down. I took my skirt, put on my safety goggles, and hung it in my lab. Okay, it was really just my garage...and I didn't have goggles. I put a drop cloth underneath.
I spray the middle section with water. That way when I sprayed the dye it wouldn't show the actual spray marks, but it would blend well onto the gray. This is key.
Then I sprayed the dye.
Lastly, I sprayed the fabric spray and let it all dry.
The colors all blend well when you spray them at the same time. If you don't want to see the wrinkles int the fabric you have to hold out the skirt as you spray. Or, if you like the wrinkles for texture (like the picture below) you can just spray away.
And you have a one-of-a-kind look. If you don't sew, you could easily buy a plain skirt and dye the bottom as well. I think it would look pretty with just one color at the very bottom, too.
Subscribe to:
Posts (Atom)


