Showing posts with label Christmas Crafts. Show all posts

Glittered Glam Christmas Trees

Thursday, December 5, 2013
I think I love Christmas for one very distinct reason... It is totally acceptable to have everything in your home covered with glitter. In fact, it's highly encouraged! So I decided to bling out a pair of paper mache cones I had in my craft stash!

Read more »

Festive Christmas T-Shirt DIY

Wednesday, November 20, 2013
Tulip Fashion Glitter sheets open up a world of DIY possibilities.  They can be punched and cut into all sorts of wonderful shapes, layered up and ironed on to t-shirts, pillows, throws, jackets, curtains and more.  I was inspired again by my favorite vintage Christmas ornaments, this time playing with the iconic mid-century modern shapes.  Just cut some out of paper (you can find templates online if hand drawing isn't your thing,) trace and cut the sheets, punch and cut accents, layer it all up and iron it on.  UseTulip fabric markers to add a few hand drawn details and you've got a boutique chic one of a kind DIY t-shirt that teens will love!

Read more »

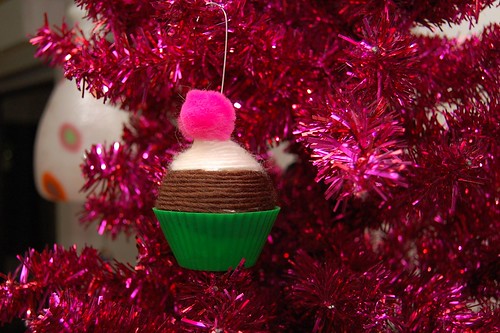
DIY Cupcake Ornaments

Friday, November 8, 2013


Wahoo! I don't know about you but I am super excited about Christmas being right around the corner. Yes, I do celebrate Thanksgiving but not in the normal way. Last night I took down all of my Christmas decorations from the attic and my goodness I was overwhelmed. But once I put my cupcake tree up everything got better.  

Let's go make some Cupcake Christmas Ornaments! 

Read more »

DIY Embellished Holiday Letters

Monday, December 17, 2012

DIY Embellished  Holiday Letters
Happy, Happy, Joy, Joy Holiday Letters
Margot Potter for iLoveToCreate
Cheap and Easy (Crafts)

I bought these wonderful FOOT TALL paper mache letters on super sale recently at Consumer Crafts.  It took me a while to decide how I wanted to embellish them and then it hit me.  I began with silver spray paint and a touch of gold to give them the effect of mercury glass.  Then I added some layers of color with stamps (I used a paint pouncer to evenly apply paint to my stamp) and then edged them with multiple sizes of faux rhinestones.  These are super easy to make and the cost is minimal for maximum impact, now that's my kind of cheap and easy craft!  iLoveToCreate has an array of fabulous products that took these letters from drab to fab in a flash.

Materials
Large paper mache letters to spell: "JOY"
Large faux rhinestones in various sizes
Silver spray paint
Gold spray paint
White Crafty Chica acrylic paint
Aleene's Spray Sealer (gloss or matte finish)
Aleene's Tacky Glue with brush
Tulip Glitter Spray
Swirly stamp or stencil

Tools
Tulip sponge pouncer

DIY Silvered and Glittered Frames

Wednesday, December 12, 2012

iLoveToCreate DIY Silvered and Glittered Frames
Cheap and Easy (Crafts)
Margot Potter The Impatient Crafter

Miss Avalon was sick this week, so I stepped in!  How fun are these DIY Silvered and Glittered Frames?!  Would you believe I scored these at our local Habitat for Humanity Re(store) for a whopping .40 cents? I've started a new feature on my blog called Cheap and Easy (Crafts) and these fit the bill.   All it took was a little paint, glue and glitter to spruce them right up, add some cut to fit vintage Christmas cards...and...shazam!  Cheap and easy!  You can do this with any ornate plastic or wood gold frames, they're easy to find at thrift stores, flea markets or even new at the discount stores.  Use unfinished wood for a shabby pickled finish.  You can find the paint, glue, glitter and pouncer all at iLoveToCreate!

Here's how you can make your own DIY Silvered and Glittered Frames faster than you can say, "Kris Kringle!"

(Click on the images to see in close up and read text.)

CRAFTY CHICA: Flocked 'n Glittered Trees

Friday, December 7, 2012

I recently came across these cute flocked trees at the craft store and scooped up a few. I knew I'd revamp them, my first thought was to cover them in gems and crystals, but for starters, I went with GLITTER!

SUPPLIES:
Aleene's Original Tacky Glue
Flocked Trees
Tulip or Crafty Chica Glitter in assorted colors
Flat brush
Paper to catch your glitter overflow

Use the brush to pat glitter around the area. I worked my color in stripes, but you can do blocks, or vertical stripes, anything! Next, pour the glitter over the wet glue, keep going until the whole thing is covered.

Let dry! Do an assortment because they look great grouped together. you can also add a little ribbon to make an ornament to use as a gift tag. They work great in shadowboxes or just by themselves!

How to Make Pretty Papers DIY Christmas Cards

Monday, December 3, 2012

Pretty Papers DIY Christmas Cards
Margot Potter for iLoveToCreate

It's all about Pretty Papers DIY Christmas Cards in today's fun filled tutorial!  Ho, ho, ho!  The holidays are upon us!  It's easy to just buy some generic Christmas cards at the bargain stores, but it's much more fun and rewarding to make your own.  And I bet you already have the ingredients in your craft studio closet!  I used patterned scrapbook papers, cardstock, shape cutters and various sundries from my crafty coffers to make these three adorable cards as fast as you can say, "Kris Kringle" and you can too.  Aleene's adhesives and Tulip glitter and beads in a bottle are fabulous for paper crafts!

Ingredients:
Red and green cardstock
Patterned scrapbook papers
Decorative trims and ribbons
Buttons with wells for crystals
Tulip Glam it up Crystals
Tulip 3D Fashion Paint 
Plastic rhinestones
Tulip Beads in a Bottle or Tulip Fashion Glitter
Aleene's Original Tacky Glue
Aleene's Tacky Dot Runner
Dimensional foam stickers
Handwriting fonts (DaFont is a great source for these)

Tools:
Fiskars shape templates in oval, circle and square
Scissors
Bone folder
Paper trimmer


To make the 'Jingle All the Way card', cut out three circles graduating in size to fit front of card. Cut the hat shape freehand. Fold cardstock and score with bone folder, trim excess paper. Attach circles and hat with glue runner. Attach rick rack scarf with Tacky Glue. Use black matte dimensional paint to draw stick arms. Print text (jingle all the way)on computer using a handwriting font. Use Beads in a Bottle or glue and loose glitter to add sparkling accents to snowman's body.  Cut out 'jingle' and stick on green card stock to frame. Stick this on front of card with a foam dimensional sticker. Cut out 'all the way' and stick on green cardstock to frame, adhere to inside center of card with glue runner.
To make the 'Joy to the World' Card cut out a large and a small oval using the Fiskars shape cutter.  Freehand cut a bow shape (fold paper segment in half and cut.)  Fold card and crease with bone folder, cut any excess paper with trimmer.  Attach paper shapes to card as in picture using glue runner.  Attach a ribbon segment across front of larger oval using glue runner.  Glue rick rack trim above smaller oval and button and faux rhinestone accents with Original Tacky Glue.  Allow to dry.  Print "Joy to the world."  Cut out 'j' 'o' and 'y.'  Layer on green cardstock and cut as in picture.  Attach to card using foam stickers.  Cut out 'to the world' and layer on green cardstock and attach to center of inside of card. 
To make "Merry Christmas Card" cut out three graduating in size rectangles using patterned scrapbook paper and the Fiskars shape template.  Cut out stripes and bows using red and white card stock and rick rack trim.  Attach papers and trims to front of card as in picture.  Print 'merry christmas and a happy new year'.  Cut out 'merry christmas' and stack on a lighter green cardstock border and a second border of coordinating scrapbook paper.  Attach to front of card using glue runner (rick rack bow will need to be glued to card.)  Cut out 'and a happy new year' and attach to lighter green card stock frame and center inside of card.  Using Beads in a Bottle or glue and loose glitter, add sparkles to paper bows and ribbons.  Glue buttons on center of bows and glue rhinestones and Glam it Up crystals into button wells with Tacky Glue.

Yarn Wrapped Cupcake Ornament How-To

Thursday, November 29, 2012

Christmas time is here! Finally I can start decorating the house and making crafty Christmas ornaments. Ok, the decorations have been up for a few weeks - but now I can openly talk about it. Today for I Love to Create I want to share a fun ornament I whipped up in about 5 minutes.

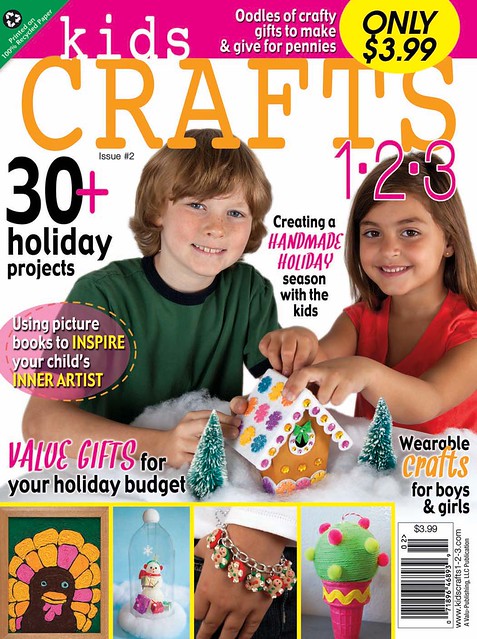
By now you have hopefully been to Walmart and gotten your hot little hands on a copy of Kids Crafts 1-2-3 the new magazine I am the editor for. I also happen to do a few of the crafts from time to time. You can see my handiwork on the cover with an ice cream cone Christmas ornament. The ornament is a yarn wrapped version of an ice cream cone ornament I did last year. I decided to roll with the sweet theme and go for a cupcake version!
SUPPLIES

Aleene's Tacky Glue

ornaments

Silicone cupcake liner

Scissors

Yarn

pom pom

The first thing you want to do is find ornaments that fit in your cupcake liners. Once you do that wrap your ornament in yarn. I went for a chocolate cupcake with vanilla icing look.

When your ornament is completely wrapped in yarn glue into your silicone cupcake liner. Feel free to add gem stone sprinkles or a pom pom cherry on top.

All that is left to do is hang from the tree. Now I need to figure out how to make a doughnut version of this ornament.

MAYAINTHEMOMENT TEEN CRAFT: Christmas Waltz Lyric Dress

Wednesday, November 21, 2012

 It's the holiday season! As a musician, that mean the holiday song requests will be coming in. I have a couple gigs comingup next month and thought I'd make some Christmasy attire.

My favorite song is Christmas Waltz (I even covered it HERE!) and I thought it would be cool to stamp the song lyrics on a dress.
 
So here we go, this is how I made it!

 SUPPLIES
Cotton dress - the smoother the fabric the easier it will be to stamp on.
 1. Set your dress out on a flat surface. If it is a brand new dress,make sure to wash and iron it. Spread out the dress if it is flared, and use the chalk to draw light guidelines so you'll know where to stamp your letters and keep them even.

2. Set out your letter stamps on a table. I found it was easiest to sort them by upper and lower case in alpha order.

3. Get stamping! Press the stamp onto the ink pad, make sure it is super juicy and then firmly press onto fabric. I like that the stamps have a little handle, that way they press evenly.

 4. Once all the lyrics are stamped, you'll want to embellish! I covered my dress in Tulip Gold Glitter Spray, it's a fine mist so it doesn't look overpowering, which I like.

 5. Because I want my dress to be noticed from the stage, I thought I'd add some green accents with pompom fringe. I used Aleene's Fabric Fusion double sided tape to add it. I didn't want to sew and I like that the tape is permanent bonding!

 6. Lastly, I added Tulip Glam It up Crystals on the collar and added a feather brooch.


I'm ready for the show!

Come join me on my Facebook page! http://facebook.com/mayainthemoment