Showing posts with label DIY ornaments. Show all posts

DIY Glittered Ornaments

Monday, December 2, 2013
 I love the look of glittered ornaments, but I wanted to do something a little different and create areas of glitter and areas of clear glass for a very modern take on a vintage look.  Painter's tape, Aleene's Super Thick Tacky Glue and Tulip Fabric Glitter made it easy to give inexpensive clear ornaments an upscale glam appeal.

Read more »

Sparkling Ornaments DIY

Monday, November 18, 2013
 
I'm super excited about this simple sparkling ornaments DIY!  I've been playing around with Tulip's new flexible stencils lately, and it occurred to me that they might be really fun on Christmas ornaments.  I collect the old Shiny Brite ornaments, and what I love best about them is the glittered accents.  You can use the Tulip Body glitter and adhesive for this, it works beautifully!  Add a little maribou inside and you have a sparkling, glamorous accent for your tree in a few simple steps. I had some tinsel ribbon in the studio, and it tied everything together perfectly. (Pun intended.)  Here's how you can make some Sparkling Ornaments of your own.  
Read more »

Neon Marble Paint Ornaments

Friday, November 15, 2013
We've been on a big neon ornament kick lately in our design studio!  We even are going to get a small white Christmas tree and hang them to add a pop to the room for the holidays!  This neon marble set definitely was a LOT of fun to make and all it took was some neon Tulip Soft Paint and clear ornaments to make them!  Here's how you can make your own fun and funky set!
Read more »

Neon Swirl Glitter Ornaments

Wednesday, November 13, 2013
Neon is everywhere you look these days, so I thought, "Why not ornaments too?"  Everyone who I've showed these ornaments too fall in love with them!  They are just so bright and funky.  Here's how you can make your own set to share with your friends and family!
Read more »

DIY Cupcake Ornaments

Friday, November 8, 2013


Wahoo! I don't know about you but I am super excited about Christmas being right around the corner. Yes, I do celebrate Thanksgiving but not in the normal way. Last night I took down all of my Christmas decorations from the attic and my goodness I was overwhelmed. But once I put my cupcake tree up everything got better.  

Let's go make some Cupcake Christmas Ornaments! 

Read more »

DIY Neon Puffy Paint Ornaments

Monday, November 4, 2013
Here's a super simple DIY holiday ornament that you can whip up in a flash that even the kids can have fun creating.  Neon puffy paint makes these bright and cheerful, but you can use holiday colors or glitter paint.  I am a big fan of low stress, high impact crafts, how about you?

Read more »

CRAFTY CINEMA: Quotable Christmas Ornaments

Thursday, December 23, 2010
Designed by Kathy Cano-Murillo

If watching Christmas movies is a holiday tradition in your home, then you’ll love making these fun Color Bazaar™ ornaments with beloved movie lines. Whether your favorites are from timeless classics or laugh-out-loud comedies, you’ll smile every time you hang them on your tree.


Materials List

  • Color Bazaar™ Pigments

    Amethyst
    Azalea
    Gold
    Gunmetal
    Lime
    Sapphire
  • Color Bazaar™ Glass Objects

    Glass Egg Large
    Glass Heart Large
    Glass Star Medium
  • Tulip® 3D Fashion Paint™

    65018 Purple
    65032 Leaf Green
    65130 True Red
  • Color Bazaar™ Tools

    Plastic 6-Well Tray
    Plastic Mini Spoons
  • Color Bazaar™ Sparkle Fuse™

  • Aleene's® Original Tacky Glue®

  • Miscellaneous

    •   Movie quote printed out on paper
    •   Newspaper
    •   Scissors
    •   Scissors
    •   Photo corresponding to movie quote
    •   Disposable cup 

    Instructions

    1. Cover work surface with newspaper.
    2. Pour desired pigments into 6-well tray.
    3. Remove topper from glass heart or egg and pour Sparkle Fuse™ inside. Swirl around until inside is completely coated. Turn upside down and set on a disposable cup to drain excess adhesive. Pour excess adhesive back into Sparkle Fuse™ bottle.
    4. Use mini spoon to scoop desired color pigments inside glass objects.
    5. Cover glass object’s opening with thumb and shake and turn until pigments cover entire inside surface.
    6. Let dry and replace topper.
    7. With glue affix photo and quote to the front of glass heart or egg. Smooth out any ripples with fingers.
    8. Add dots of 3D Fashion Paint around the edges for a finished look. Let dry.
    9. Celebrate the magic!
Visit us on Facebook!
Craft on! Click here for today's daily giveaway!

ILoveToCreate Teen Crafts: Joyful Christmas Ornament

Wednesday, December 22, 2010


ILovetoCreate: Joyful Christmas Ornament

Avalon Potter
"Teen created, Mom approved."

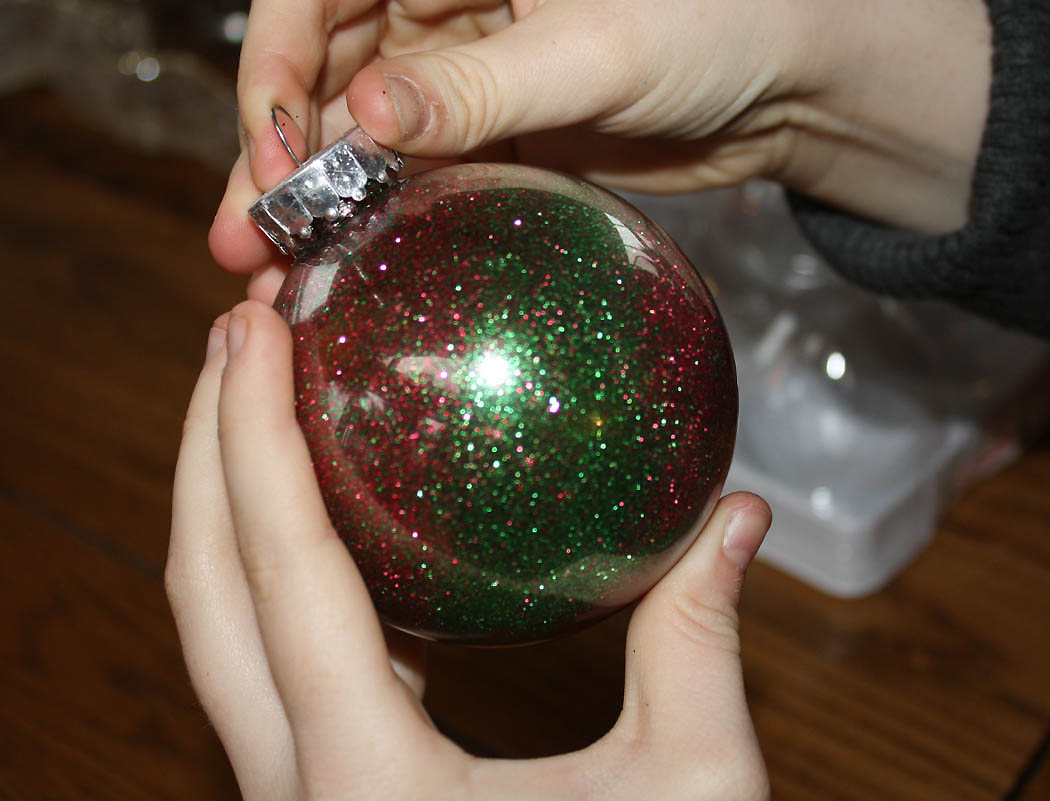
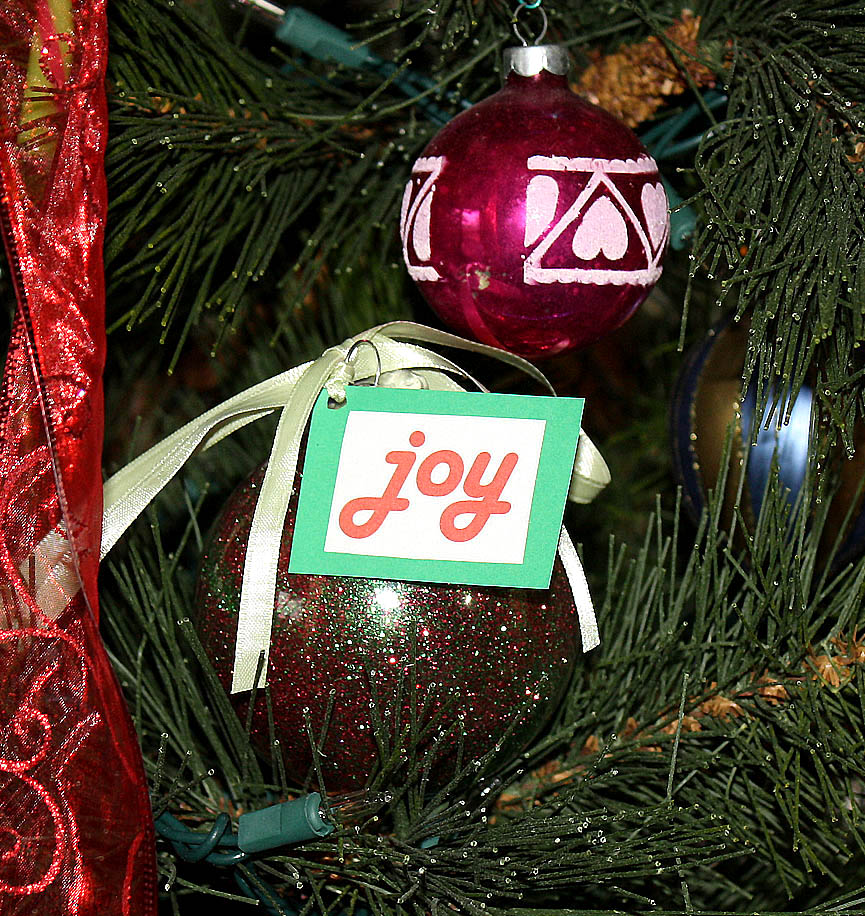
I thought I would squeeze in one more holiday project because it is one of my favorite seasons. A few years ago my mom took a clear glass Christmas ornament and put crystals inside making a snow globe for your tree. It was one of my favorite projects she ever made, so I thought why not adapt her old project into something new! My project is a clear ornament that you spray wit Aleene's Tacky Spray Glue and coat the inside with Crafty Chica glitter! I enjoyed making these as gifts for my little cousins because it is fun, easy, and you can personalize each ball with different colors and tag to make it special for the person you give it to.

Materials
Clear ornament with opening top (preferably plastic in case of accident)
Aleene’s Fast Grab Tacky Spray
Tulip Fashion Glitter (green and red or colors of choice)
Colored paper to match glitter
White printer paper
Paper to make funnel
Aleene’s Original Tacky Glue Stick
Ribbon to match color of ball

Tools
Printer
Hole punch
Scissors

Instructions

1. Gather your materials.


2. Open up your ornament and lightly coat the inside with the Aleene’s Fast Grab Tacky Spray.

3. Make a funnel with a piece of paper and insert the bottom into the opening of the ball.

4. Pour a sufficient amount of the color(s) of glitter you choose into the ball. Feel free to mix colors or choose different colors then I used.


5. Close the ornaments top and shake until the ball is completely coated with sparkles. Shake the excess sparkles out of the ball.

6. Using a font you like print out in large letters the word or name you want as the tag. Use a similar color as the one you used in the ball. If you used two or more colors chose one for the font and another for the colored paper behind it.

7. Cut out the word and cut out your colored sheet of paper a slightly bigger into a rectangular card for the word to sit on.

8. Use your Aleene’s tacky glue stick to glue the word to the colored paper.

9. Punch a hole in the corner of the tag.

10. String some colored ribbon that matches the ball through the hole and tie a knot.

11. Tie onto the top of the ornament in a bow to complete the ornament.


Easy Cinnamon Christmas Ornaments

Tuesday, December 21, 2010

Cinnamon Christmas Ornaments

Combine cinnamon, applesauce and Aleene's Original Tacky Glue to create this one of a kind holiday ornaments.

Materials List

  • Tulip® 3D Fashion Paint™

    65000 White
    65032 Leaf Green
    65141 Bright Red
  • Aleene's® Original Tacky Glue®

  • Tulip® Glam-It-Up!™ Iron-On Crystals™

    26592 AB Crystal
  • Miscellaneous

    •   Nutmeg
    •   Wire Rack
    •   Scissors
    •   Bowl
    •   Plastic Food Wrap
    •   Wax Paper
    •   Cinnamon
    •   Cookie Cutters
    •   Ribbon, to Hang Ornaments
    •   Measuring Spoons
    •   Measuring Cup
    •   Cloves
    •   Paper Towels
    •   Rolling Pin
    •   Drinking Straw
    •   Applesauce 

    Instructions

    Recipe:1 cup cinnamon
    1 tablespoon cloves
    1 tablespoon nutmeg
    ¾ cup applesauce, drained
    2 tbsp glue
    1.  Combine cinnamon, cloves and nutmeg. Add applesauce and glue. Mix well with hands until mixture is smooth and well combined.
    2. Place wax paper down onto work surface.
    3. Roll one quarter of dough between two pieces of wax paper until about ¼” thick.
    4. Cut into desired shapes with cookie cutters, etc.
    5. Cut holes for hanging using straw or similar object.
    6. Dry on wire rack for several days, turning daily to keep from curling. Option - dry in a 250 degree F oven until hard.
    7. For stones, squeeze out a dot of Tulip® 3D Fashion Paint slightly smaller than size of stone. Place stone into paint and gently press so paint comes up and around stone.
    8. Refer to photo when decorating ornaments. Start flow of paint on a paper towel, applying an even pressure on bottle for a smooth line. Create polka dots or lines using different colors. Let dry completely.
    9. Cut ribbon to desired length. Run through hole and knot at end of ribbon.

Visit us on Facebook!
Craft on! Click here for today's daily giveaway!

Holiday Hugs and Kisses Collaged Ornaments

Tuesday, December 7, 2010


Don't throw away those leftover gift wrap scraps!!! Save them to make cute custom ornaments that make great tree accents or cheap gifts for family and friends using Collage Pauge® Instant Decopauge. Our crafty expert Pattiewack shows you how!! Oh, if you love Collage Pauge® as much as we do, you can get it in the iLoveToCreate store with FREE SHIPPING through December 13th, 2010! Just click the buy now button! What a great gift for you or your favorite crafter!

Click here for today's daily giveaway!