Showing posts with label tulip glitter. Show all posts

Polkadot Glittered Lamp Shade

Tuesday, March 5, 2013
As I'm slowly working on a few little projects for my girl nursery I must admit that I'm excited to be able to use a little glitter here and there.  I wanted to make this little white lamp I used with both of my boys seem a little more girly.....


.....so I put glitter polka dots on it.  It was a pretty easy project.


Here's how it went down.  I took got out my Aleene's tacky dots and my glitter.  


The glue dots have a clear plastic film on both sides.  I peeled off one side of the film like this....


....and then I pressed it into my glitter.


I shook off the excess glitter and was left with this.  I peeled off the dot and placed it on the lamp shade.  Peeling them off can be a little tricky since you don't want them to stick to themselves.  I tried to be patient as I pulled them off.


I figured that would be a lot easier than putting them on the lampshade first and then sprinkling the glitter on the whole shade.  Plus, if I touched the dots first they might loose some stick and not hold the glitter as well.

I made sure to clean off the shade well first.  It was a bit dusty and the dust would also have ruined the project, making the dots fall off.


Now the lamp is still fairly neutral in color, but a little more girly for the nursery.

Thanks for visiting.


Converse Shoe Makeover

Tuesday, February 12, 2013
I have two boys, but I'm now expecting a little girl.  I've been looking through my boys' old clothing and shoes to see what I can convert to girl clothing for the baby.  These little red converse sneakers have been through a few boys in the family.  I decided to try and "girlify" them for the baby so she can wear them one day too.  It was a quick, easy project.


I started by removing the old laces and scrubbing the toes to get them a little cleaner.


Then I got out my Tulip Glitter Bond and some Tulip glitter.


I used a little sponge to apply the glitter bond.


Then I shook on the glitter.  I pressed it on with my fingers and shook off the excess.  I used my fingernail to make sure the edge was really clean along the black line.  The glitter covered the dirty toe really well.


I added some ribbon I already had for laces and called them done.  If you're wondering how well the glitter will stay on, I can attest that it stays on really well.  I made THESE SHOES a long time ago and they held up really well.  (If you scuff your toes a lot them you could always reapply some extra glitter if necessary.)  


And there you have it - from dirty, worn out boy shoes to clean, cute girly ones.  Thanks for stopping by.

Encrusted Jewel Stone Necklace

Monday, April 9, 2012

Supplies Needed:
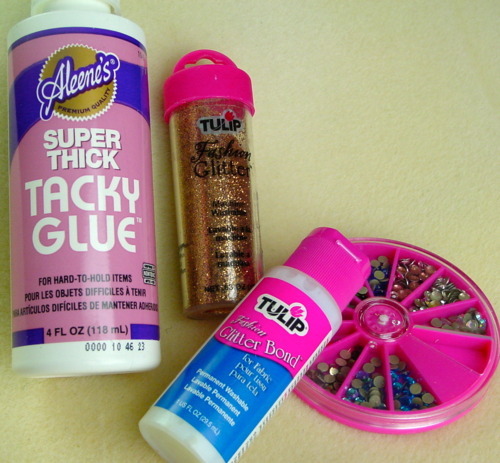
Aleene’s Super Thick Tacky Glue
Tulip Fashion Glitter Orange
Tulip Fashion Glitter Bond
Tulip Glam-it-up Iron On Crystals
Spellbinders Die Cutting Machine
Jewel Stone dies by Julianna Hudgins
– Royal Langnickel Engraving Art Copper Foil
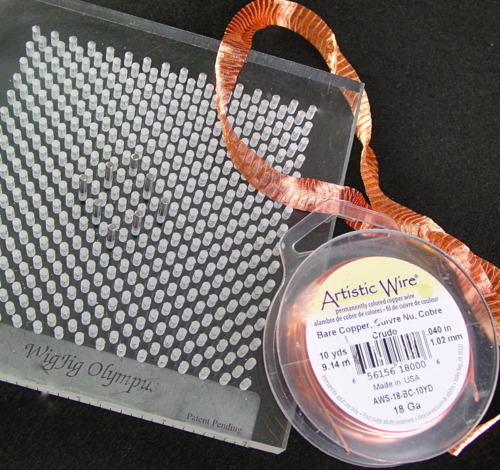
– WigJig Olympus
– Artistic Wire Bare Copper Wire 18G and Copper Wire Mesh

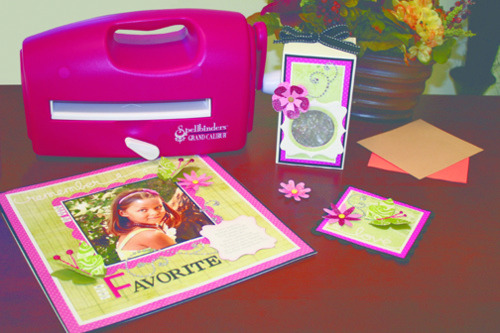
Using your Spellbinders Grand Caliber Die Cutting Machine

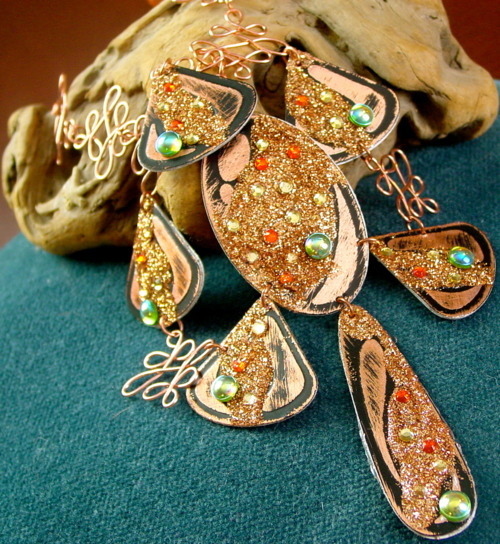
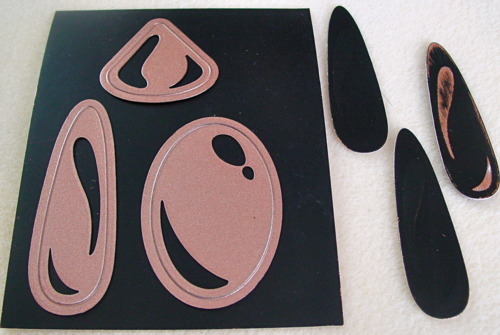
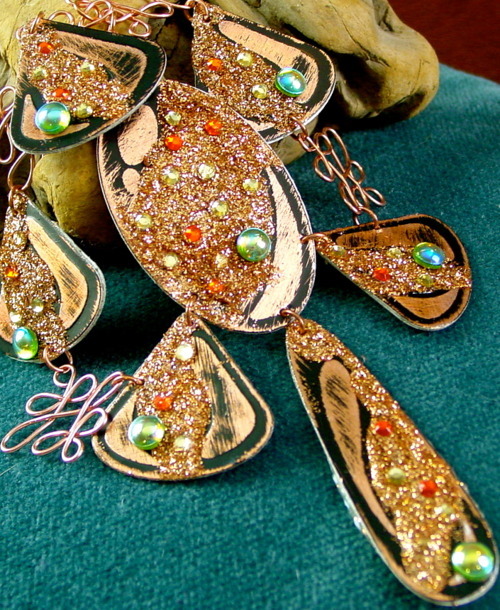
Cut and Emboss Jewel Stone dies out of Royal Langnickel Engraving Art Copper Foil. Sand each piece using fine sandpaper to expose copper color on foil. Adhere two of the same stones together using Aleene’s Super Thick Tacky Glue so front and back sides are finished. See finished image for total quantity and shape of stones used for this project.

Using the Glitter sponge applicator spread Tulip Glitter Fashion Bond between embossed areas of stones and sprinkle Tulip Fashion Glitter. Embed gemstones into glitter while still wet. Add extra Glitter Bond to bottoms of gemstones if needed.

Using your Wigjig Olympus Jig, create random patterns to attach pieces together. Add Artistic Wire Mesh at ends of finished pieces and tie together to create a choker type necklace.

Visit us on Facebook!
Craft on!

Glitter and Glue Snowflakes

Thursday, January 20, 2011
Aleene’s® Original Tacky Glue™ and Tulip® Fashion Glitter™ add sparkle to presents, to your tree, to your windows – anywhere you want a little touch of the holidays. A perfect holiday project for the classroom, too!

Materials List

  • Tulip® Fashion Glitter™

    23532 Multi Ultra Fine
  • Aleene's® Original Tacky Glue®

  • Miscellaneous

    •   Straight pin
    •   Freezer paper
    •   Scratch paper
    •   8” iridescent thread (optional)
    •   Masking tape (optional)
  • Patterns

    Instructions

  • Remove cap from bottle. Use straight pin to poke a hole in tip of bottle.
  • Place pattern on work surface. Cover with freezer paper, shiny side up. If paper curls, tape to work surface.
  • Trace pattern with Glue making sure to connect all parts of design. Immediately, sprinkle Glitter over Glue. Let dry completely (can take as long as two days). Tap off excess Glitter on scratch paper. Place Glitter back in container. Gently peel snowflake from freezer paper.
  • For hanger, knot thread ends together and glue knot to back of snowflake.


Visit us on Facebook!
Craft on! Click here for today's daily giveaway!

ILoveToCreate Teen Crafts: Joyful Christmas Ornament

Wednesday, December 22, 2010


ILovetoCreate: Joyful Christmas Ornament

Avalon Potter
"Teen created, Mom approved."

I thought I would squeeze in one more holiday project because it is one of my favorite seasons. A few years ago my mom took a clear glass Christmas ornament and put crystals inside making a snow globe for your tree. It was one of my favorite projects she ever made, so I thought why not adapt her old project into something new! My project is a clear ornament that you spray wit Aleene's Tacky Spray Glue and coat the inside with Crafty Chica glitter! I enjoyed making these as gifts for my little cousins because it is fun, easy, and you can personalize each ball with different colors and tag to make it special for the person you give it to.

Materials
Clear ornament with opening top (preferably plastic in case of accident)
Aleene’s Fast Grab Tacky Spray
Tulip Fashion Glitter (green and red or colors of choice)
Colored paper to match glitter
White printer paper
Paper to make funnel
Aleene’s Original Tacky Glue Stick
Ribbon to match color of ball

Tools
Printer
Hole punch
Scissors

Instructions

1. Gather your materials.


2. Open up your ornament and lightly coat the inside with the Aleene’s Fast Grab Tacky Spray.

3. Make a funnel with a piece of paper and insert the bottom into the opening of the ball.

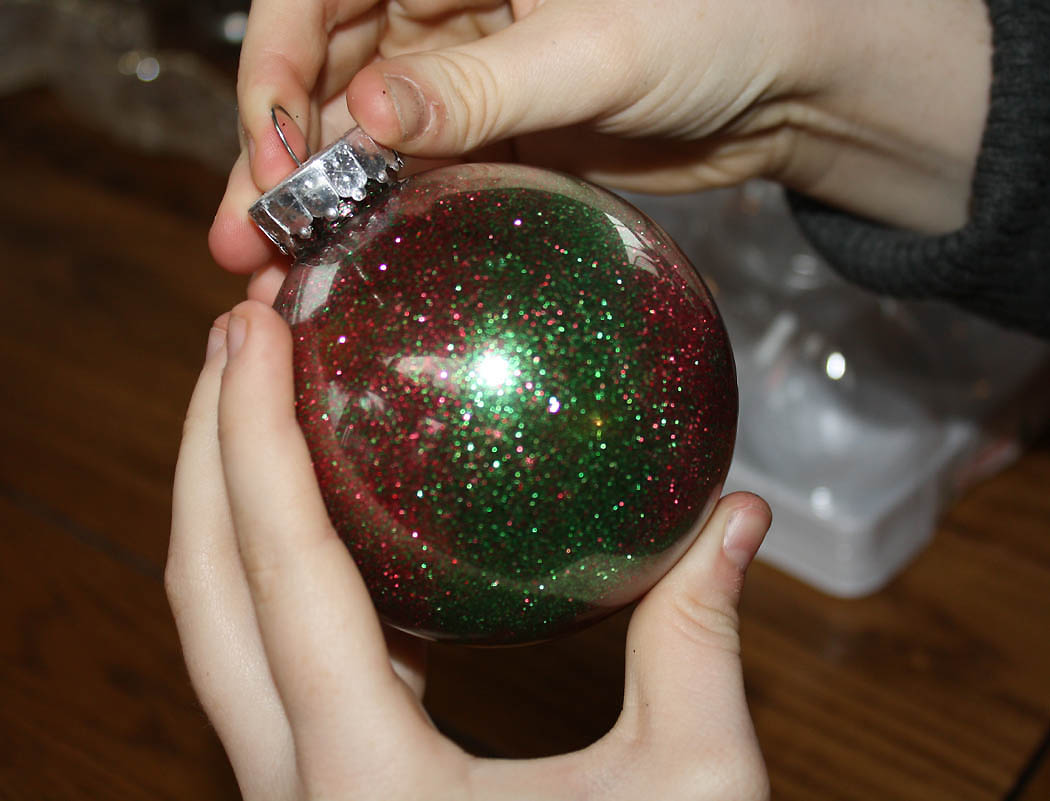
4. Pour a sufficient amount of the color(s) of glitter you choose into the ball. Feel free to mix colors or choose different colors then I used.


5. Close the ornaments top and shake until the ball is completely coated with sparkles. Shake the excess sparkles out of the ball.

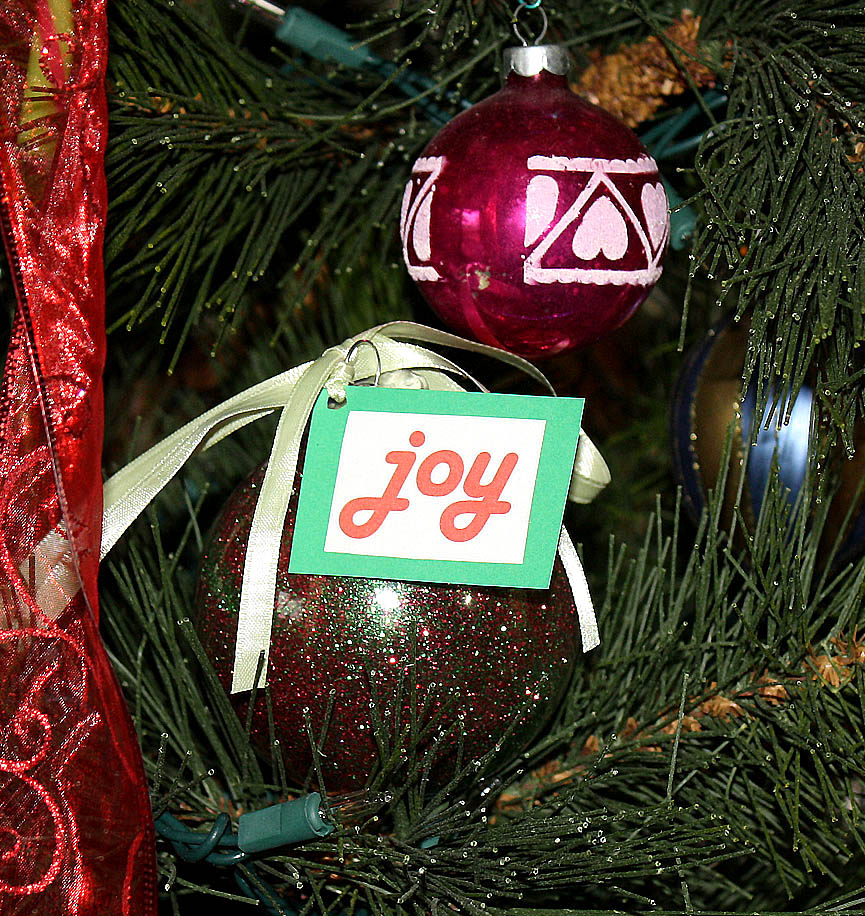
6. Using a font you like print out in large letters the word or name you want as the tag. Use a similar color as the one you used in the ball. If you used two or more colors chose one for the font and another for the colored paper behind it.

7. Cut out the word and cut out your colored sheet of paper a slightly bigger into a rectangular card for the word to sit on.

8. Use your Aleene’s tacky glue stick to glue the word to the colored paper.

9. Punch a hole in the corner of the tag.

10. String some colored ribbon that matches the ball through the hole and tie a knot.

11. Tie onto the top of the ornament in a bow to complete the ornament.


Making Monogrammed Sweaters

Thursday, September 16, 2010


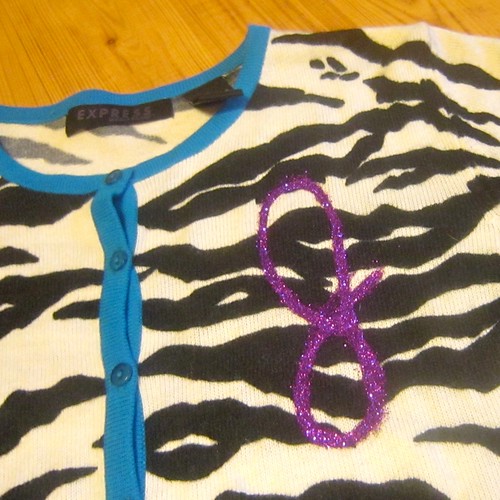
Sure monogrammed sweaters first gained popularity with Laverne and Alvin, but they seem to be making a resurgence. I can't help but notice Project Runway contestant Valerie often sporting some sort of handmade looking name tag or monogram. The new movie 'Easy A' puts a different spin on Hester's Scarlet letter A. I thought what better time with fall on the horizon to gussy up a few of my own cardigans.

I made two different cardigans for today's I Love to Create post and am inspired to make several more. Let's start with the ribbon monogram.


SUPPLIES
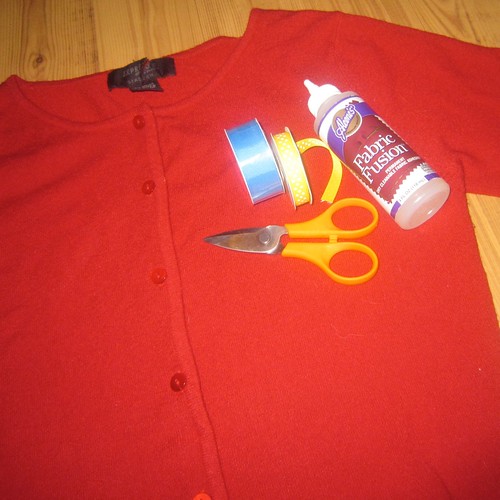
Aleene's Fabric Fusion Glue
Ribbon
Scissors
Cardigan


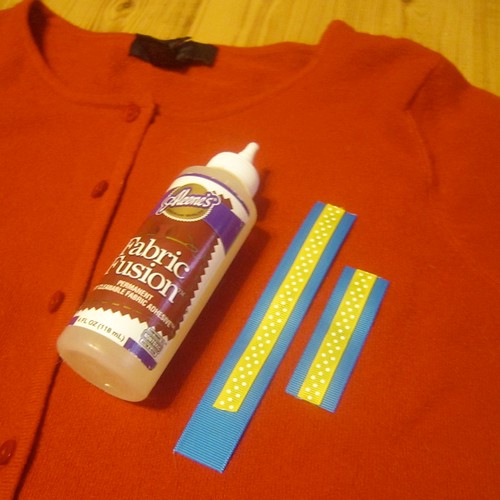
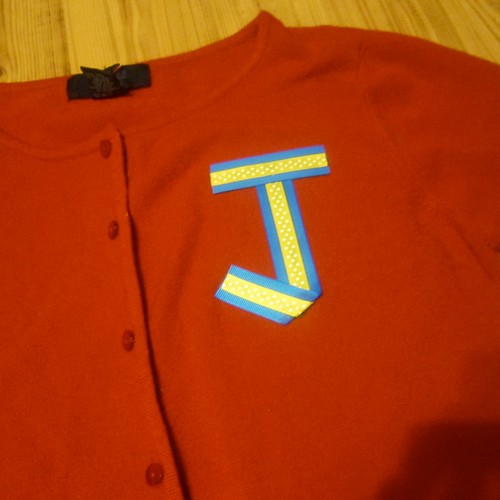
This cardigan was super duper easy to make. I cut out 2 pieces of blue ribbon to form the letter J. I then adhered a piece of smaller thinner yellow ribbon in the center of this ribbon using Fabric Fusion Glue. I allowed my letter J applique to dry. Once the J was dry I used more Fabric Fusion Glue to attach it to my cardigan. Be sure to put a piece of paper of cardboard between the layers of your cardigan. You want to use enough glue to make sure your letter stays put!


Next up the glittertastic monogram cardigan that is almost easier than the ribbon cardigan as if that was possible.


SUPPLIES
Tulip fashion Glitter
Cardigan
Tulip Fabric Marker
Tulip Soft Fabric Paint
Paint Brush
Aleene's Fabric Fusion Glue


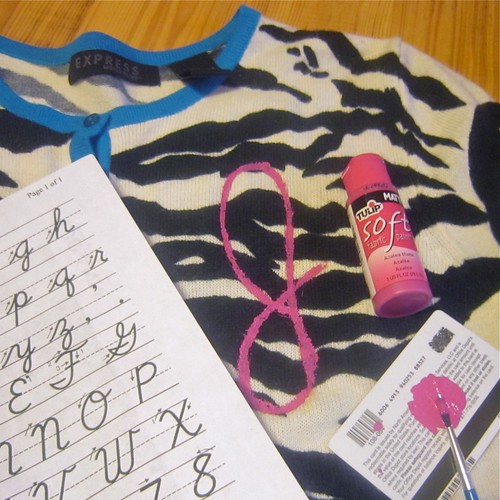
I must confess I looked up a guide to cursive letters for this cardigan. I used a Tulip Fabric Marker in place of tailor's chalk to draw my cursive letter J. I painted the letter J hot pink with Tulip Soft Paint. On top of the fabric paint I applied a thick strand of Fabric Fusion Glue and dusted a heavy coating of hot pink Tulip Fashion Glitter. When the glue dried I dusted the excess glitter off my cardigan. Again remember to place something between the layers of your cardigan so that the glue does not get through to the backside.


I have been practicing my cursive letter T to make a few cardigans for Tallulah. If Chris will let me there might be one in his future too, sans glitter of course.

Crafty chaos over Tulip Fashion Glitter shirts!

Tuesday, August 3, 2010


Last week at the Craft SuperShow, we had a demo in the Michaels booth. Here is a post with some pictures.

The project was a cool shirt idea where we folded the shirt in half, outlined half a pair of lips using chalk and then opened the shirt, applied Tulip 3D Fashion Paint within the chalk lines, and then pressed the shirt together. We then peeled it back to reveal a fun smoochy impression. Of course we had to cover the whole thing in red glitter!

After that, we applied one of our Tulip stencils, more glitter and gems.

Our booth had a two-hour line of hungry crafters anxious to make the project! It reminded me of a Disneyland ride - watching people wait with that excited look in their eyes.

In the middle of the chaos, I whipped out my camera and shot a snippet of video.

I'm trying to locate the project directions and photo so you can make it too!

I Love to Create Jack-o-lantern Tote Bag

Friday, October 2, 2009


I Love to Create Teen Crafts
Jack-o-lantern Purse
Copyright Margot Potter


I know I’ve got a winner when my daughter begs me to let her wear the project to school. She didn’t even want to wait for the tote to dry! I made a series of sketches with half images of iconic Halloween items: a skull, a bat and a jack-o-lantern. I decided on the jack-o-lantern, but I may revisit the other images. These half images have been showing up all over the place lately, so I thought it might give a ‘cute’ project just a little edge.

My daughter is finished with trick-or-treating but she’s got a party to attend and she loves wearing Halloween themed t-shirts. I thought this would be a fun way to look stylish and seasonally apropos. I may sport this bag myself, you never know!

Materials
Black blank canvas purse
White marking pencil
Crafty Chica Little Chica Paint Pack
Tulip Fashion Glitter Rock and Roll (clear crystal)
Tulip Glitter Dimensional Fabric Paint (crystal sparkles)


Tools
Fine tip paint brush
Square tip paint brush


1. Hand draw half of a jack-o-lantern on the right side of your purse using a white marking pencil or gel pen. You can opt to use a template if you prefer, you may need to size the image on your computer to fit the dimensions of your purse.

2. Mix equal parts red and yellow Crafty Chica paints to make a deep orange. Paint a layer of orange and allow to dry. Use a fine tip brush for details and the flat tip brush for larger areas.

3. Paint the stem green. Allow to dry.

4. Paint a second layer of orange. Allow to dry.

5. Use black paint to cover any white lines left from your pencil.
6. Paint a layer of dimensional glitter on purse and sprinkle clear crystal glitter on it.

7. Shake off excess glitter and allow to dry.