
Showing posts with label tulip fashion glitter. Show all posts

Glittered Glam Christmas Trees

Thursday, December 5, 2013
I think I love Christmas for one very distinct reason... It is totally acceptable to have everything in your home covered with glitter. In fact, it's highly encouraged! So I decided to bling out a pair of paper mache cones I had in my craft stash!

Read more »

DIY Zebra Glitter Shoes

Wednesday, September 18, 2013
Glitter shoes have been all the rage for the past couple of years!  I adore shoes and I knew I wanted to give my own spin on this popular shoe trend!  I took it too the next level with a fun set of zebra strips, because who can resist an animal print?  I know I can't.  Here's how you make this fun and sassy pair of kicks.
Read more »

Glittered & Dyed Shorts

Saturday, June 22, 2013
Sometimes I get in moods where I just want to cover everything in glitter. If not covered, then at least trimmed, right? When I dyed these shorts, I felt like they needed some pop - more "wow" - hello, glitter! I know you're thinking - will the glitter wash off? I used Tulip Glitter Bond as my glue. I'm sure it will fade after a few washings, but all you have to do is touch it up and you are good to go, these shorts will always look as good as new!

 SUPPLIES:
Paint brush
Cotton shorts
Pant hanger with clips
Hose with spray nozzle

 1. Wash your shorts, leave them damp. Add water to the dye bottle and shake. Set the shorts on a plastic tablecloth and spray at the bottom.

 2. Well, I changed my plan. I decided instead of spraying the shorts, I wanted them to look dipped. Therefore I switched out the top of the bottle to a tip instead of the sprayer. I hung up the shorts using a pant hanger and dripped the the dye in an even row along the shorts. This gives it the dipped look. Drip, dip, it's all the same, right?

3. Let them set for six hours, then use the sprayer to remove the excess dye. This will prevent the dye from getting on the white part of the shorts. Spray until the water runs clear. Put on the plastic gloves that come with the dye and squeeze out the water and any remaining excess dye. NOW you can wash them in the washer on cold. 

 4. After they are dry, iron them and create a crease at the bottom of each leg. This will give you a nice, crisp guideline to add the glitter!

 5. Paint on a juicy layer of Tulip Glitter Bond and then pour on the glitter! Tap off excess. Do this for the front and back of each cuff. You can also do the belt loops too!
Let dry for an hour.

And here you go - ready-to-wear! To wash, turn inside out and wash in cold water. Hang dry. If your glitter fades after a couple washings, simply repeat the glittering process!

DIY Dipped Glitter Vase

Tuesday, May 14, 2013
While I enjoy intricate crafting, it's also really fun to find a simple project you can create in a few minutes.  This dipped glitter vase can be made in about five minutes.  It would make a great wedding centerpiece or just a pretty decoration at home.
To Create This Project You Will Need:

- a glass vase
To begin, I taped off the vase with paper about 1/3 of the way up.  I headed outside and sprayed the bottom of the vase with Aleene's Fast Grab Tacky Spray.  
I poured the glitter onto the bottom of the vase.
After enough pouring, the glitter starts to accumulate on the paper and you can roll the vase in it as well.  That makes it easier to really get the glitter pushed on tightly.
 Once the glitter is on you can protect it with Aleene's Spray On Glitter Sealer.  
Then simply remove the paper.
 Now you have a one-of-a-kind vase with some extra glam.

Reward Wheel or How I Converted an Embroidery Hoop Into a Chore Chart

Thursday, January 3, 2013

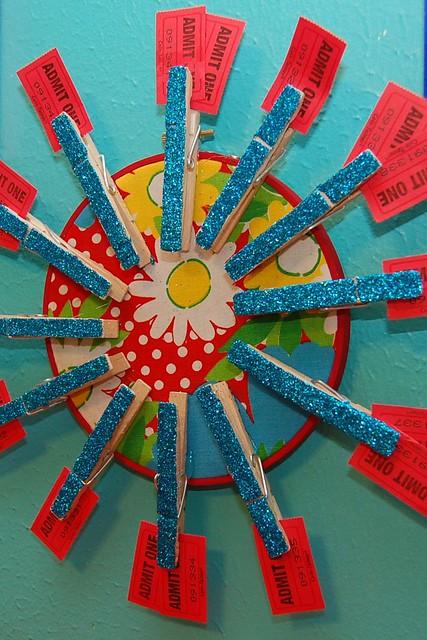
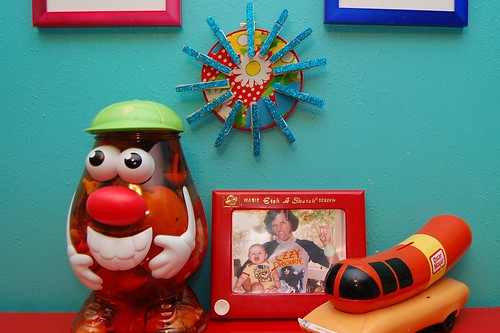
I swear one day I will make a craft that is not related to children, really I will. If you look at my kid crafts most times they can easily be transitioned into an adult craft. For instance take the reward wheel I made today for I Love to Create. Mine is intended to reward my daughter for good behavior (saying please, picking up toys, not strangling her brother - even when he is being annoying). However, I got the idea from Martha Stewart and she intended hers to hold Christmas cards. I'm seeing one with heart covered fabric in place of floral and holding Valentine cards for next month.

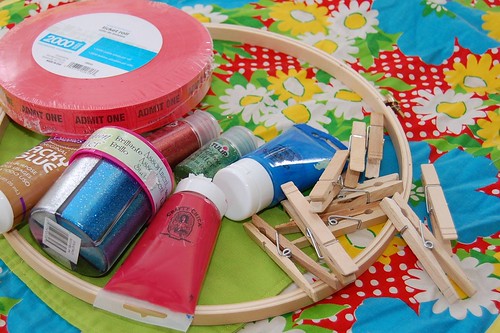
SUPPLIES

Embroidery Hoop

Crafty Chica Paint red

Scissors

Tulip Fashion Glitter

Scrap Fabric

Aleene's Tacky Glue

Paint brush

Clothes pins

Carnival tickets

Glue gun

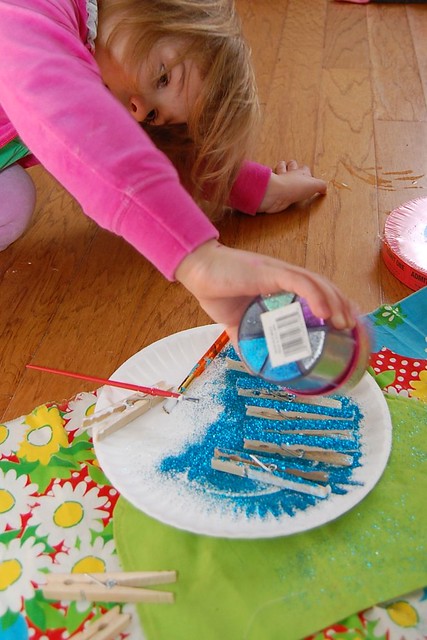
Using a paint brush apply Tacky Glue to one side of your clothes pins.

While the glue is still wet shake glitter on top. After you have a few covered with glitter shake the excess off onto a second batch of clothespins. I used 12 clothespins, but feel free to add as many as you like.

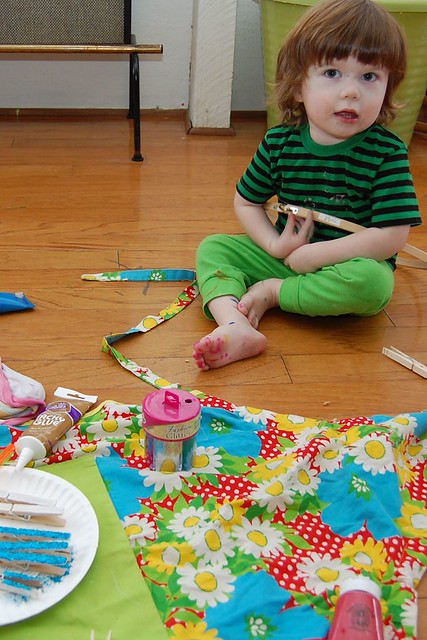
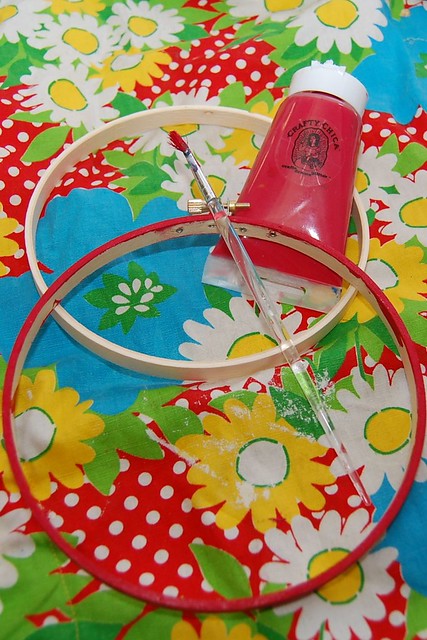
Once I convinced Baxter that the embroidery hoop was in fact not a hula hoop I painted it red. Actually, that is a lie. I used a smaller hoop in the end for the actual project but Baxter was such a cute helper I had to include this picture, never you mind the marker all over his feet.

Martha did not have fabric in her card holding hoop which in my opinion was a gross oversight. I had the perfect vintage apron to use. Once the fabric was in the hoop I glued the raw edges around the back.

Using a hot glue gun I attached my clothespins to the hoop when everything was nice and dry.

I used little carnival tickets for my reward wheel because they were cute, cheap and Tallulah is obsessed with amusement parks.

There are about a million variations on chore charts floating around on the internet. I didn't want to make mine so specific to things like making a bed or taking dishes to the sink. Instead I have decided to apply one of the few things I took away with my degree in psychology - the power of intermittent reinforcement. Meaning that when I notice Tallulah being nice to her brother, helps me feed the pets, puts her 7,000 Legos away before dumping out another bin with 6,000 bristle blocks I reward her. My tentative plan is that when each clothespin has 2 tickets we will go out for ice cream, get a gum ball sized prize, have spaghetti for breakfast. Some treat she gets to pick. Tallulah is almost 4 it is plenty early for her to start having a few jobby jobs around the house. Fingers crossed my reward wheel works.

P.S. I kinda have a thing for using embroidery hoops for things other than embroidery. In fact I wrote a whole blog post about it once. There was also that time I did a project flyer for JoAnn's.

DIY Retrofabulous Halloween Masks

Monday, October 15, 2012


DIY Retrofabulous Halloween Masks
Margot Potter for iLoveToCreate
“These are your grandmother’s crafts, ya gotta problem with that?”

I found these vintage inspired paper mache masks at Target and my only regret is that I didn’t buy every last mask.  Alas, they’re sold out locally and I’m kicking myself for not getting more.  If your local Target is sold out don't fret, you can find similar masks made of fabric and paper at craft chains and costume supply stores.  It’s so easy to dress them up with inexpensive glitter, gems, feathers and decoupage using Aleene’s Tacky Glue, Fabric Fusion tape and decoupage medium.  These also look fabulous painted or covered with sequins or ribbon, so make them your own.  I love them for Halloween, but they’re so fun you could use them for Home Décor year round!  You can give these masks even more vintage appeal if you remove the stretchy straps and attach a painted dowel and satin or lace ribbons.  

Watch the video on Knoxville's WBIR Channel 10 Live at Five at Four here!

Materials
3 paper mache masks (I got mine at Target)
Hot pink feathers
Various sizes faux rhinestones
Vintage sheet music (we have lovely packs of old book pages at our website)
Wired silver tinsel
Chunky silver glitter
Traci Bautista Collage Pauge Matte

Tools
Round nose pliers
Awl or drill with 1/16” bit


Sparkle Kitty Mask
Cover mask with a thick layer of Tacky Glue using a sponge pouncer.  Working over a paper plate or cardboard folder, douse mask with chunky glitter.  Tap off excess.  Dump unused glitter back into jar.  Allow to dry.  When mask is dry, use an awl or a drill to create three holes on both sides of nose.  Cut each wire tinsel stem in half, turn a small loop in the end and thread into hole, dabbing back of hole with Tacky Glue to secure whiskers.  Allow to dry.  Purrrfection!


Circus Showgirl Mask
Cover mask with a thick layer of Tacky Glue using a sponge pouncer.  Working over a paper plate or cardboard folder, douse mask with fine fabric glitter.  Tap off excess.  Dump unused glitter back into jar.  Allow to dry. When mask is dry add faux rhinestones.   Squeeze out a small amount of glue on a paper plate.  Dip each crystal in glue and add varied sizes around eyes and top of mask.  Glue three features to back top of mask.  Allow to dry.  Now you’re ready for the center ring!


Divine Music Mask
Working in small sections, tear pieces of sheet music and adhere them on to surface of mask using decoupage medium  Brush medium on mask, add paper, add more medium. Old paper tears easily and works very well for this technique.  (Old book pages or sheet music will work, if you’re thinking of using new paper try printed tissue or stamping text on plain tissue.)  Allow decoupage medium to dry completely.  Squeeze a bead of glue around edges of mask and eye holes.  Work in sections.  Sprinkle chunky silver glitter over glue and tap off excess working over a paper plate or cardboard folder.  When all glue is covered, dump unused glitter back into jar.  Allow to dry.  Attach a Fabric Fusion tape strip across the top at the back of your mask, peel off top of strip to expose adhesive.  Working from your crepe paper spool, adhere paper making small folds as you move across tape.  See photo for details.  When you reach the end of the mask, cut off excess paper on both sides.  I feel a song coming on!

Wednesday, April 25, 2012
Visit us on Facebook!
Craft on!

iLoveToCreate Teen Crafts: iLoveMom Glass Vial Necklace 
Margot Potter for Avalon Potter 
“Mom crafted, teen approved.” 

I’ve used these glass vials in a variety of jewelry making projects over the years. They’re like miniature works of art. You can put all sorts of things inside of these, beads, glitter, printed messages...whatever makes you smile. This is the perfect way to tell Mom how much you love her with a one-of-a-kind, handcrafted wearable work of art! It’s so easy to make these with Tulip Fashion Glitter and Aleene’s glue; you’ll find yourself looking for reasons to make more! I made some matching earrings using some smaller glass vials using the same techniques for a fun, fast and fabulous jewelry set just for mom.

Materials 
Miniature glass jar with cork top
Thin ribbon for accent
One large puffy and four small flat felt hearts in pink and white
Tulip Fashion Glitter in multi medium crystal
Screw eye
Ball chain necklace
2 ear wires
2 jump rings
Aleene’s Quick Dry Tacky Glue
Aleene’s Stop Fraying
Aleene's Collage Pauge Matte

Tools 
2 small paintbrushes
Chain nose pliers
Scissors
Computer and printer

Pour a small amount of glitter into vial. Add felt hearts, use end of paintbrush to position them in vial.  Add a small amount of glue around edge of cork stopper, insert into vial top. Use paintbrush to remove any excess glue.

Add a small amount of glue to screw eye, use chain nose pliers to screw into center top of cork stopper. Allow all glue to dry.


Take a small ribbon and tie in a bow around rim of jar. Use Aleene’s Stop Fraying on ends of ribbon. Allow to dry.


Use a typewriter font to print xoxo, x and o in 10pt. Cut out using scissors and decoupage to front of jars with Collage Pauge and a small paintbrush.  Thread screw eye with ball chain necklace.  Use smaller jars with glitter and ribbon to make matching earrings. Attach a jump ring and ear wire to top of stopper, repeat for second earring.

(Blogger was compensated for this post.)

Creating a Customized Little Lumberjacks and Jills Birthday Party

Thursday, March 22, 2012


How does one create a Little Lumberjacks and Jills birthday party? I'm here to tell you that you can't run down to the local Party Pig and pick up supplies. Oh no. You have to put on your crafty hat and make your own. Tuesday I showed you pictures from kid's lumberjack themed birthday party, Wednesday it was all about the lumberjack breakfast and today for I Love to Create I'm gonna show you how you can make your own Little Lumberjacks and Jills party.
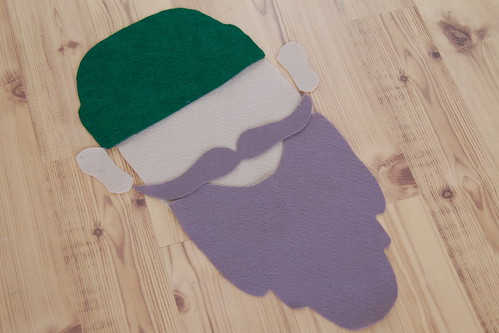

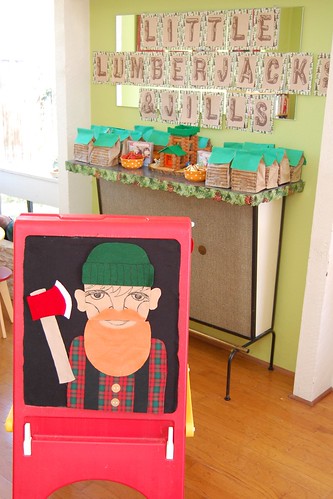
When I throw kids parties I like to have lot's activities for everyone to do. I've been known to whip up batches of homemade Playdoh, have coloring stations, chalkboards, sensory bins, bubble machines and more. For the kid's lumberjack themed birthday party I toyed with an idea of a 'pin the beard on the lumberjack' game. In the end I decided to make a flannel and felt story board instead.


SUPPLIES
Liquid Fusion Glue
Easel
Felt
Scissors
Flannel
Tulip Slicks Paint

Tallulah has a Little Tikes easel that she rarely uses. I picked it up at the thrift store for cheap so I had no problem converting it into a storyboard. Using Liquid Fusion Glue I attached black flannel to the front and the back. Luckily, my mother was in town to help me make a lumberjack face and accessories out of felt. There were different beards, hats, a log cabin, axe, trees, even a blonde flip for a little lumberjill. We used Tulip Slicks Paint to add detail to the felt. Tallulah can still use her easel (not the chalkboard side). I plan on making some other story boards and paper doll type activities out of felt so she can continue to use her board. When Baxter is older he can join in too.

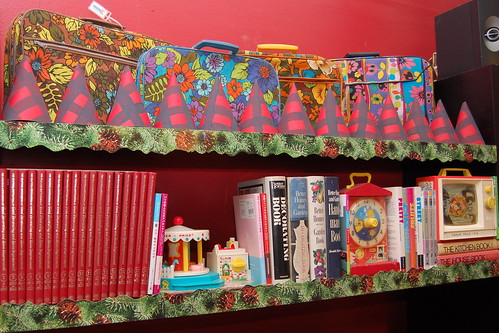

As mentioned it is not as if you can walk into Party Pig and find yourself some buffalo plaid party hats. I did however think I would be able to walk in to a scrapbook store and find plaid paper. Wrong again.
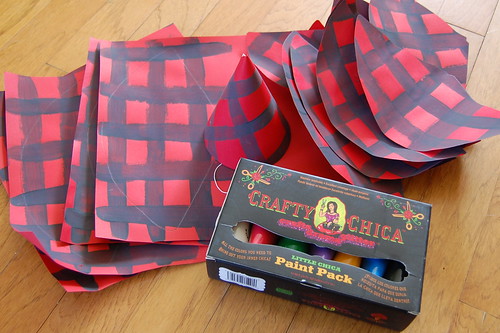

SUPPLIES
Party Hats
Red Paper
Wide Sponge Brush
Crafty Chica Paint Black
Stapler
Scissors

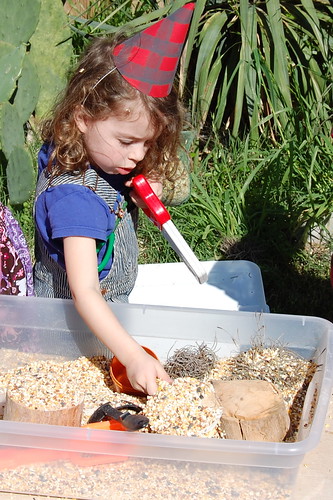
Turns out buffalo plaid paper is pretty easy to make. Using a wide sponge brush and some black Crafty Chica paint I striped pieces of red scrapbook paper. I bought readymade party hats to cover. I took one apart and traced it onto the sheets of paper. Cut the red paper out, wrap around the hat and staple together and to the readymade party hat all at once. It took a lot of will power not to add earflaps and fur trim for the full lumberjack effect.
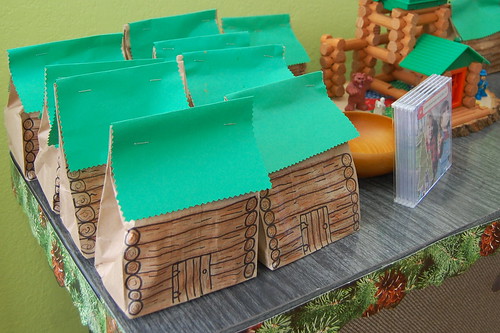

We had goodie bags for the kids and mixed CDs for the adults. No readymade goodie bags around these parts. I was inspired by this paper bag fireplace I had seen on Pinterest.
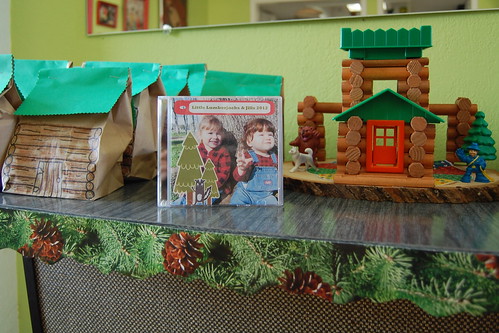

SUPPLIES
Paper Bags
Green Construction Paper
Scalloped Edge Scissors
Black Markers
Brown Crayons
Stapler

My mother, husband and I all decorated the paper bags. I decided my husband was the best log artist of the bunch. We hand drew logs and a door on the bags and then using brownish crayons made them look more wood like. Once the bags were filled with loot it was time to seal them up. Using a sheet of green paper I measured it so that it would fold over the bag and look like a roof. I trimmed the edges with scalloped scissors. Once the folded paper was in place I used a stapler to attach it to my bag.

For the CD I did a little digital scrapbooking with Cosmo Cricket goodies. The CD had hits like "Baxter" by Superchunk and "Talulah Gosh" by Talulah Gosh.
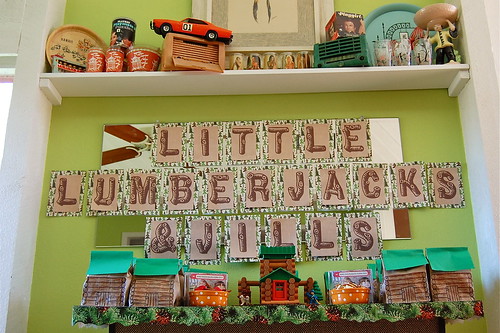

Speaking of digital scrapbooking I used some elements to make one of the two banners at the party.

SUPPLIES
Computer
Kitschy Digitals Calico Dream Kit
Aleene's Tacky Glue Dots
Scissors
Forest Scrapbooking Paper
Father-in-Law

The first thing I did was hunt down a font that looked like twigs. Once I found that I printed up the letters with a backdrop from the Kitschy Digitals Calico Dream Kit. Next my father-in-law and I furiously cut out squares that I had traced onto the paper. I wanted the letters to be slightly smaller than the tree paper I got in the scrapbooking section at Hobby Lobby. Using Aleene's Tacky Glue Dots I first attached the letters to the forest paper. Next, also using the glue dots, I stuck my letters to a mirror.


This party had not one, but two banners. I love making banners what can I say. The second banner hung in the dining room behind the food table.

SUPPLIES
Fabric
Packing Tape
Tacks
Ribbon
Photographs
Aleene's Tacky Glue Stick
Green Tulip Fashion Glitter
Sticker Letters
Paper Pinecones
Aleene's Tacky Glue
Clothes Pins
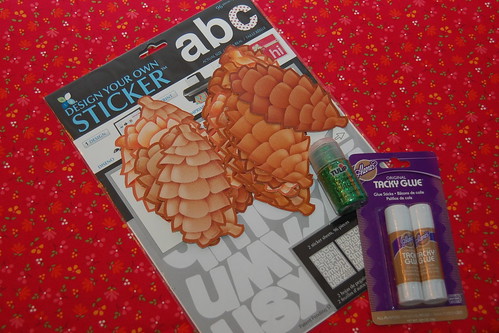

I bought a large faux pine tree from a local teacher supply store to decorate with that just so happen to come with some random pinecones. I was inspired by a banner I saw on Pinterest by Eleven Cupcakes that used clothespins.
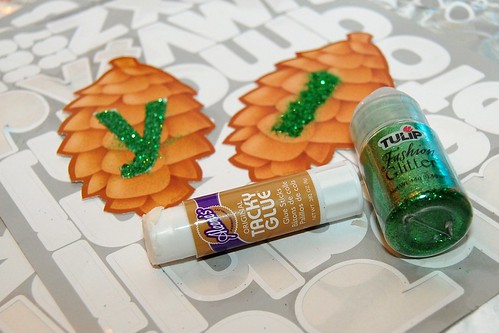

First I decorated my pinecones. I found these sticker letters at JoAnns that you can run through your printer. While the sticker was still on the sheet I covered it with my glue stick. Next I put the letter on the pinecone. Once it was centered I quickly covered it in glitter while the glue was still wet. Every three letters or so I shook off the excess glitter. When all the letters were glittered and dry I used Aleene's Tacky Glue to attach the pinecones to clothespins.
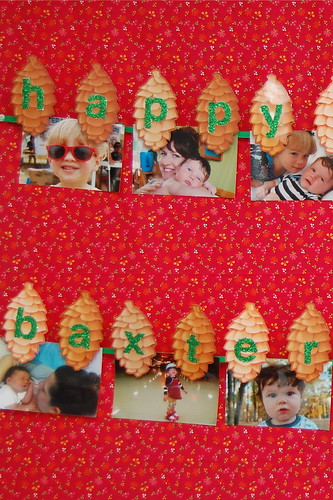

I have a large framed piece of glass from a vintage pin ball machine that hangs in my dining room. I wrapped the glass in a yard of fabric like a gift and used packing tape on the back. Once I had a blank canvas I used push pins to attach two strands of green ribbon. I selected a few of my favorite pictures of the kids over the years and hung them on my banner spelling out "Happy Birthday Baxter and Tallulah".


No lumberjack themed party is complete without a log cabin to play in. Luckily my husband Chris was nice enough to indulge me and make one.


SUPPLIES
Crafty Chica Paint
Level
Knife
Scissors
2 Large Cardboard Boxes
Duck Tape

The first thing you will need are some large boxes. We went to a packing store and bought two wardrobe boxes. They have used boxes for sale too. Chris taped two boxes together to make the cabin large enough for a gaggle of kids.
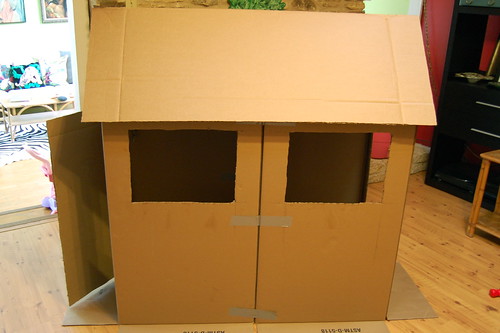

Chris used a knife, scissors, level and more to create the little fort. There was a door on one side, two windows and a roof. He also cut out the sides of the boxes that joined so you could walk all the way through the cabin from end to end.
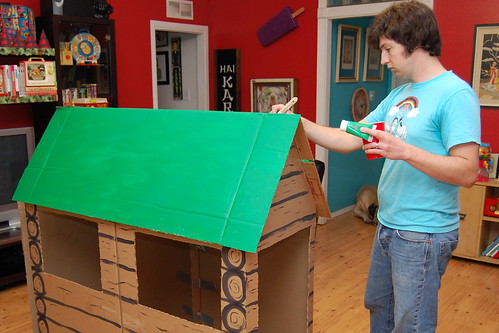

Chris used Crafty Chica paint to give the cabin some faux wood, green roof and a red doormat that said "welcome".
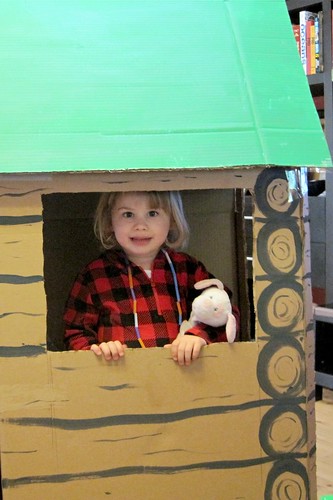

All that was left to do was tape the cabin to the floor for stability and let the kids have at it. And have it they did!

I hope you can tweak some of these ideas and use them for your next party. It just goes to show that with a little bit of paint and glue you can create a party with any theme you can think of!

Visit us on Facebook!
Craft on!