Showing posts with label tulip paints. Show all posts

Diy Wooden Henna Bangle

Thursday, May 16, 2013
Hey guys! 
So summer is just around the corner! The perfect weather for that easy, breezy beach look....
-and whats a beach look without a little arm swag right?-

Well ...I've found the perfect, thought-filled gifts for the women in my life and a super easy method to make a really creative and individualized bangle.

The folks over at DIY Bangles have these awesome wooden bangles that come in a bunch of sizes and different styles to help you make the perfect choice for your personality.
What You Need:
Tulip Soft Fabric Paint in Gold
Painter's Tape
Paintbrushes
Base-coat your bangle with Tulip Soft fabric paint and let dry. I used gold on the outside and black on the inside to give a bit of contrast.  
I used some painters tape around the edges to keep the black from covering the gold paint. 
Next, using the Tulip fabric spray, give your bangle a few light spritzes in varying colors.  
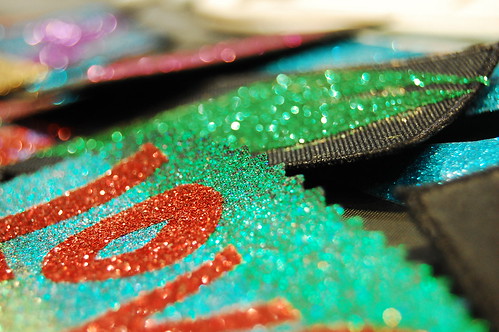
Next, I used some Collage Pauge with sparkles in it to give the base of the bangle a bit of shine.  I even added a generous helping of the white  Tulip Fashion Glitter to really give it some 
karate-kick-realness (I suppose that, in my dictionary, that just means to make it cooler! lol).
Since I painted the inside of my bracelet black, I added some black Crafty Chica glitter to the Collage Pauge to give the inside some more dimension and sparkle *jazz hands* 

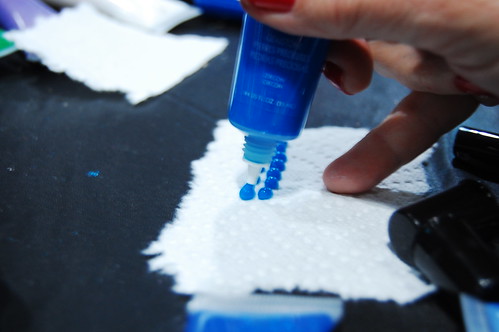
I used the Tulip Slick Dimensional Fabric Paint  to make a design over the surface of the bangle.   I got some inspiration from a few henna designs that I found on the internet.  
The dimensional paint took some getting use to, but once I got the hang of it, it was totally easy to manipulate the size and thickness of the lines.  
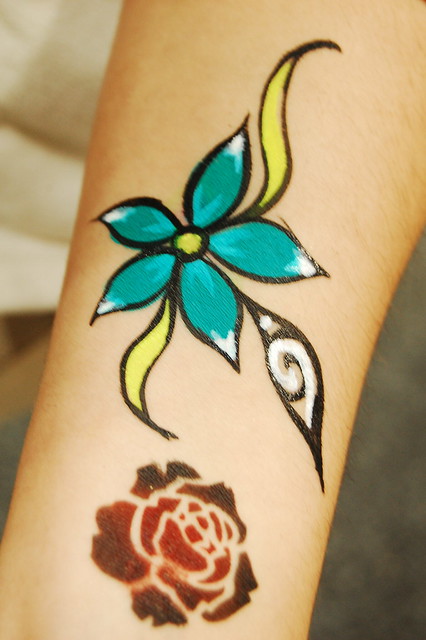
Once the Dimensional paint dried, I used some paint markers I had laying around to color
 in the design.

 The last step is to coat the entire bangle with the high-gloss Collage Pauge (without sparkles) to seal the bangle and give it a really nice finish.

Here's the finished bangle:
The brighter and more colorful, the better!  Experiment with different colors and techniques.

Get that glitter all up in there!!!

But most of all DO YOU! Do your own thing because nothing is cooler than a creation from your own imagination 

until next time,
ttyl.
Jeshua
Check out more of my posts at boifromipanema.com
Wednesday, July 11, 2012
Craft Wars Inspired (Junk Drawer) Ocean Dreams Birdhouse
Avalon Potter for iLoveToCreate
"Teen crafted, Mom approved."

My mom is going to be on an upcoming episode of TLCs new show Craft Wars and she's making projects every week with other contestants from the show inspired by the theme of the week before.  Last week's Pop Craft challenge was to make a junk drawer themed birdhouse.  We had two of these old birdhouses sitting in our yard, so we decided to both decorate one.  I used her paint scraping technique in colors that fit my style and added some things from our 'junk drawer', some sea shells from our last trip to the beach, old buttons and a seahorse metal charm.  Layers of mixed acrylic paint colors from Crafty Chica, Scribbles and Tulip are all sealed under Aleene's Spray Sealer so this can go outside.  I can't wait for a bird to move in!

Materials
Old wooden birdhouse
Seashells
Old buttons in colors to match
Seahorse or ocean themed metal accent
Number tape (7 gypsies)
Blue, black, copper, white and brown paints (Crafty Chica, Tulip and Scribbles brands)
Aleene's Turbo Tacky Glue
Aleene's Spray Acrylic Sealer (matte)

Tools
Scissors
Butter knife or palette knife


If you are using an old birdhouse, clean off any debris and lightly sand.  If a new birdhouse, sand lightly.

Mix up paints to make several shades of blue, grey and tan.  Use a butter knife to scrape paint on house door, roof and sides in layers, starting with the darker colors and continuing until you're happy with how it looks.  try not to smash the colors together, layer them on top of each other instead.

Use Tacky Glue to glue shells around your door frame.

 Glue buttons around opening using more Tacky Glue. 

Glue Seahorse to Door with more Tacky Glue. Yay, Tacky Glue!

Run tape along edge of roof on front and sides.  Cut to fit.

Spray with sealer, apply several coats allow them to dry in between each layer.

iLoveToCreate at CHA Winter 2011 Tradeshow

Saturday, January 29, 2011
The iLoveToCreate Drivers of Creativity booth

CHA has been a blast so far! We wanted to share a look into our booth, our new products, and some fab projects!

Our theme is "iLoveToCreate: Drivers of Creativity"! It is inspired by all things racing and driving!

We have been showcasing our new products: Tulip® Body Art, Tulip® Beads in a Bottle, Aleene's® Dry Adhesives, and our new Tulip® Fashion Glitter Shimmer Fabric Paints & Sheets!

Here's a few fun photos from the past 2 days of our tradeshow!

Photo by TiltShift Generator

New Tulilp® Fashion Glitter products
Here's a detail of the new Tulip® Fashion Glitter Shimmer Paints and Shimmer Sheets at work. So sparkly and radiant!

Photo by TiltShift Generator
Tulip® Beads in a Bottle purse and dress detail by Pattiewack.

Beads in a Bottle Demo
Pattiewack doing Beads in a Bottle.

Body Art Tattoos
Tulip® Body Art tattoos!

Visit us on Facebook!
Craft on!Click here for today's daily giveaway!

A weekend in the life of an I LOVE TO CREATE designer

Monday, May 11, 2009
When most people find out that we have people on staff that do all the designs that appear on our web sites, packaging, and displays, they immediately say, "Wow, that must be so cool to get to be creative all day!" It may be a creative job, but like any other job there are tight deadlines and demands! Case in point...check out the "homework" that our designer Allee Marderosian (at right above) took home one weekend in order to have projects ready for a Monday photo shoot!

The driveway is the perfect impromptu spot for drying tie dye! The colors look so vibrant!

Friends who paint together stay together (admittedly, that was really cheesy, but how awesome is it that her friend helped out?. And don't those jeans look fab?

Tulip®, Aleene's® products, and project sketches take over the table! An inexpensive plastic tablecloth made for easy cleanup!

Allee ended up completing the projects in time for the photo shoot and they looked awesome! Great job Allee! The ultimate compliment was when the models at the photo shoot got super excited about the clothes they got to pose in! They wanted to take them home with them!