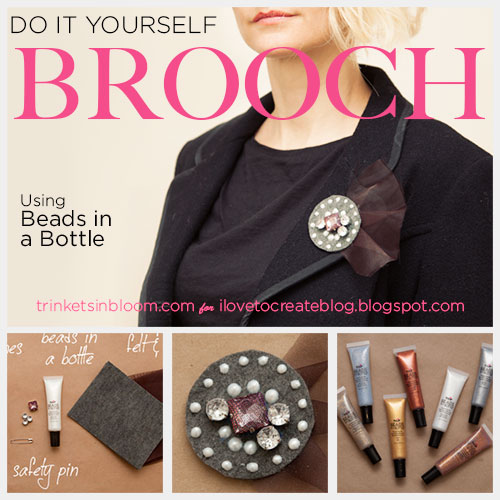
DIY Brooch using Beads in a Bottle
Monday, October 28, 2013 at 7:59 AMiLoveToCreate: Glitterville's Handmade Halloween Inspired Chick or Tweet Display
Monday, August 20, 2012 at 11:48 AMiLoveToCreate Retrofabulous Crafts
Glitterville's Handmade Halloween Inspired Cheek or Tweet Display
Margot Potter
"These are your grandmother's crafts, ya gotta problem with that?!"
Er mah gerd, this project was EPIC! Yes, I started yesterday and did not finish until this afternoon! I did sleep, eat and drive my daughter to school, which was an expletive filled epic adventure this morning. Forgotten school event pass, back up mountain, slowest old person EVER in front of us on the way back down the mountain, miss turn, u-turn, drive-up ATM closed, out of gas...what?! Ergh. Tiny baby spiders covering gas pump, leap back into car and go to next pump, walk of shame into gas station cafe in dog hair covered pajamas to second ATM, miss bus, dog leaps in lap while driving, extract dog from lap, drive daughter to school with teen age boy riding our rear and stuck directly behind slow moving school bus the entire ride...HEY KIDS! YUP! WE MISSED IT!
Fiskars Shape Templates Frames
Fiskars Shape Template Cutter
![]() |
iLoveToCreate Teen Crafts: Divine Damask Locker Magnets
Wednesday, August 8, 2012 at 7:01 AMiLovetoCreate Teen Crafts
Divine Damask Locker Magnets
Miss Avalon started High School this week and I am understandably ferklempt. When did my beautiful baby turn into a gorgeous young woman? She's gorgeous, creative, sweet and smart as a whip to boot! She's taking honors classes this year, which means she's going to be a busy gal for sure. Proud mama? Yes indeedy do!
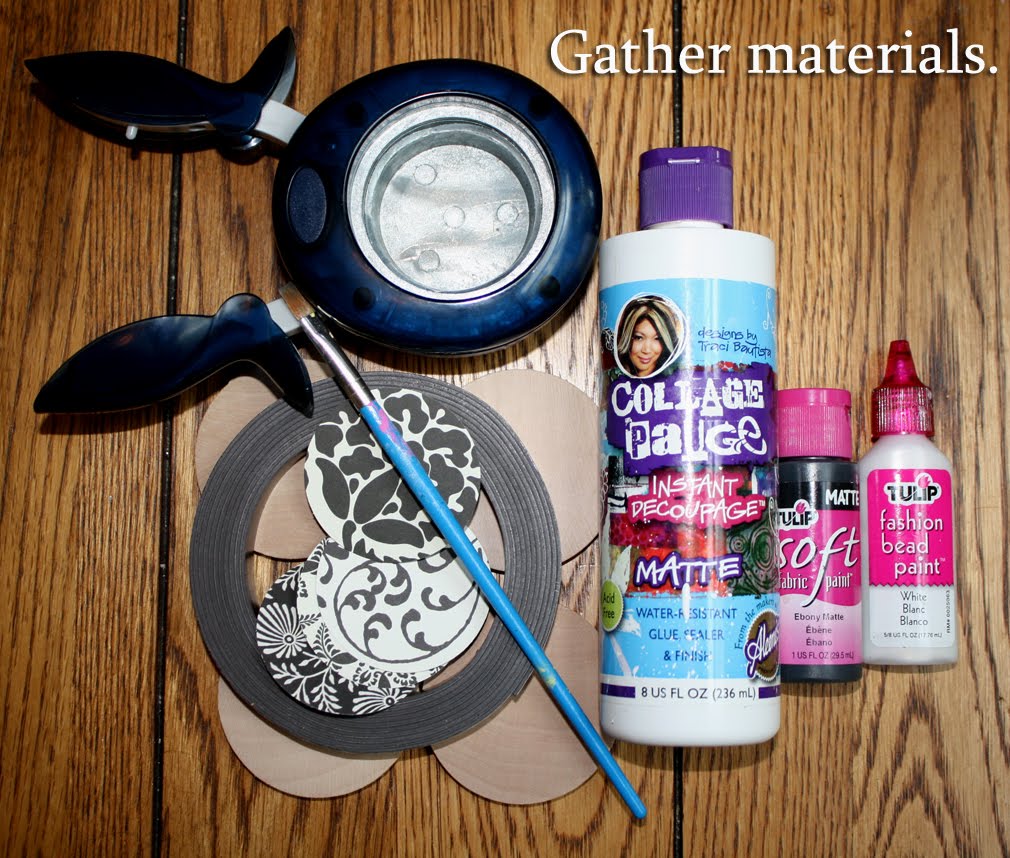
Have you seen the 'Locker Chic' accessories in the stores this season? They have everything from mini chandeliers to book shelves in an array of styles and colors all designed to work in a school locker using magnets. What fun! Avalon got this lovely damask set at a big box office store and I thought she just might need some coordinating magnets. These are so easy to make with scrapbook papers or even recycled magazine or greeting cards or printed pictures, just use some matte finish Collage Pauge and add some texture with Tulip Beads in a Bottle and attach Aleene's magnetic tape to the back and just like that, instant locker chic! Tres jolie, n'est pas?
Materials
4 2 1/4" diameter 1/4" wide wooden circles
Various coordinating scrapbook papers (or any fun papers you wish to use)
Tulip Fashion Bead Paint or Beads in a Bottle White
Tulip Soft Paint Black
Traci Bautista's Collage Pauge Matte
Aleene's Magnetic Tacky Tape
Tools
2" Circle punch
Paint brush
Sponge brush
iLoveToCreate Retrofabulous Crafts: Dazzling Dahlia Dimensional Canvas
Monday, February 13, 2012 at 5:29 AMCraft on!
iLoveToCreate Retrofabulous Crafts
Dimensional Dahlia Canvas
Margot Potter
"These are your grandmother's crafts. Ya gotta problem with that? I didn't think so."
The idea for this canvas came from a fabulous pillow project featured in this 1966 Christmas Helps magazine from Family Circle. I LOVED these pop art pillows and plan to make some of my own, but these Anna Griffin vintage patterned papers were so yummy, I thought why not make a canvas using the same idea? I am a huge fan of Lilly Pulitzer’s vintage fabrics and these papers have a very similar appeal. Think about making a series of two or three of these using the same color scheme but slightly different patterns (maybe a full flower, half flower and butterfly.) Use recycled paper or fabric remants if you like; this could be stunning using say Coca Cola can boxes or old book pages. This was super simple to create using Fiskars ShapeTemplate™ tools and the new Aleene’s Dry Adhesives! For a final touch of whimsy, I added some dimension using Tulip Beads in a Bottle. I am knee deep in the winter blahs, so this is a cheerful reminder that spring is on the way! (If you want more precision, mark and measure placement with a ruler before layering petals.)
Materials
10x10 mini canvas
Anna Griffin Carmen Collection scrapbook paper pack
Saturated pink and yellow cardstock
Aleene’s Tacky Dot runner
Tulip Beads in a Bottle sparkly pink and pale yellow
Tools
Fiskars ShapeTemplate™ Circles
Fiskars ShapeCutter™ and Mat
1. Cut out 22 patterned yellow and pink floral paper 2” circles and 11 yellow and 12 pink 2.5” paper circles using the Fiskars template, cutter and mat. You could also use circle punches or trace and cut by hand. I am impatient, so anything that makes it easier works for me!
2. Layer the patterned circles in the center of the solid color circles and adhere using Aleene’s Tacky Glue dots runner.
3. Begin on the outside, I found it helped to lay this out first and then reassemble just to get a sense of the layout before I committed to it permanently. The flowers overlap slightly and work around in a circle and repeat on the inner layer overlapping slightly.
4. Tape just the right side of your petal and start making a circle overlapping on the outside. Continue this process until you reach the final circle, which will get full tape runner coverage. Repeat for the inside layer. There are 14 petals on the outside and 8 on the inside. Finish with a large pink petal in the center.
5. Use Beads in a Bottle on the solid color edges of the petals in a color that coordinates. I used sparkly pink and pale yellow and found that the sparkly beads were a skootch less puffy than the solid color, I like the slight variation. You can take great care and put the exactly same amount of dots on each petal, but as I mentioned earlier I am impatient and simply thrilled I made it around every petal without a craftastrophe. It’s the little things.
6. Allow to dry overnight before touching or hanging!
(PS: I love this flower so much, I am going to use it on some other projects as an image! Too fun!)
Join host Tiffany Windsor for a new episode of Cool2Craft TV. This week's show theme is Last Minute Holiday. Tiffany creates a Scrapbook Paper Looped Wreath featuring Aleene's Original Tacky Glue, EcoHeidi Borchers crafts a vintage Aleene Angel of Light Candle Cover with Tulip Beads in a Bottle and Aleene's Collage Pauge and special guest Candace Jedrowicz crafts a Dollar Store Holiday Centerpiece with Aleene's Tacky Dots. It's a terrifically tacky and creatively cool show!
It’s easy to watch the Cool2Craft TV Channel right from your computer. Airing Monday December 19, 2011 9am Pacific/10am Mountain/ 11 am Central/ Noon Eastern. Go to http://cool2craft.com and find the Livestream player and chat box. See you Monday!
Visit us on Facebook!
Craft on!
Retrofabulous Craftabration: Upcycled Holiday Gift Box
Monday, November 7, 2011 at 12:01 AMCraft on!
Inspired By:
(Anyone who knows me knows that I love all things retro. I have been thrifting since I was 19 and have a rather large collection of old paper. I have post cards and magazines dating back to the Victorian age and all the way up to the 1970s. I love old fonts, ads, images...it is all intriguing and wonderful to me. I did a series on my blog called Retrofabulous Craftabration a couple of years ago and now I’m teaming back up with the folks from iLovetoCreate to bring you a dose of retrofabulosity on the first and third Monday of every month.)
Retrofabulous Craftabration: Upcycled Holiday Gift Box
Margot Potter for iLovetoCreate
This project was inspired by a 1968 McCall’s Christmas magazine. They took old shoe boxes and upcycled them into festive holiday gift packages. How funny are these?! Also, whatever happened to that awesome thick yarn?! It totally makes me want to make pom poms and hair bows! Note to self: get awesome super thick yarn....stat.
To update this idea, I used some scrapbook paper, sparkly trim, a sentiment cut from a vintage greeting card, odds and ends from the studio and a favorite vintage pic from a 1964 calendar combined with the new Aleene’s paper craft friendly dry adhesive glues to create a kitschy upcycled package. This is a great way to reuse old boxes and to give a gift a fellow crafter can use for festive storage in their studio. You can use wrapping paper, fabric, scrapbook paper, newspaper, magazines, catalogs...add paints and dimensional embellishments... I’d love to see what you do with this idea, if you make a retrofabulous inspired upcycled package leave a link in the comments here!
Materials
Image (I scanned and sized mine)
Old sturdy box
Paper or fabric (I used scrapbook paper)
Trims
Embellishments (buttons, beads, old broken jewelry bits...)
Aleene’s Tacky Line Rolls
Aleene’s Tacky Dot Singles
Aleene’s Quick Dry Tacky Glue
Aleene’s Tacky Double Stick Sheets
Tulip Beads in a Bottle Glitter Paint (I used pink to coordinate with my papers)
Double sided craft tape
Tools
Scissors
Pencil
Decorative edge punch (optional)
1. Select a box-it should be sturdy enough to be used as a gift package and later as storage. Begin by covering the box with paper or fabric. I traced the box panels on paper, cut paper and attached the sheets to each panel using Aleene’s Double Stick Tacky Sheet. Just attach sheet to back of paper, cut to fit and then peel backing off and adhere paper to panel on box. I covered the entire box.
2. To hide the corner edges where papers meet, use decorative trimp. I ran double sided tape along each edge, and attached the trim folding it along both sides of the edge.
3. Add an extra layer of trim on each side of the edges. Measure trim to fit and cut. Place along the Aleene’s Tacky Line and cut glue to fit. Peel up trim and attach to box. You will need to put trim along all of the edges on all five exposed panels. I used two styles of trim, one for the side panels and another for the top panel.
4. If you want to add more paper embellishments to the top of the box, attach them using the Aleene’s Double Stick Tacky sheets. I added an image and also a decorative trim using coordinating paper and an edge punch. This also gave me a place to tuck a sentiment that can be removed later.
5. I had some wooden scrapbook embellishments that coordinated with the project and worked perfectly to conceal the four corners where the trim met on the top of the box. You can use buttons, old jewelry components, scrapbook embellishments, bows...whatever you like. Just one Aleene’s Tacky Dot Single does the trick.
6. I like sparkle, so I used a thin schmearing of Tulip Beads in a Bottle in pink on the background paper on the top of my box. You could also use Collage Pauge in Sparkly to get the same effect. While it is drying the paper will bubble up a little, do not freak out. It will flatten again, I promise!
For Halloween: Costume-on-a-Stick!
Tuesday, October 25, 2011 at 10:49 AMevery creature was stirring--
the zombies, the mummies, the vampires, the flappers, the secret agents--
even the mouse.
But if you're the one caught without a disguise,
make a costume-on-a-stick to cover your mouth or your eyes!
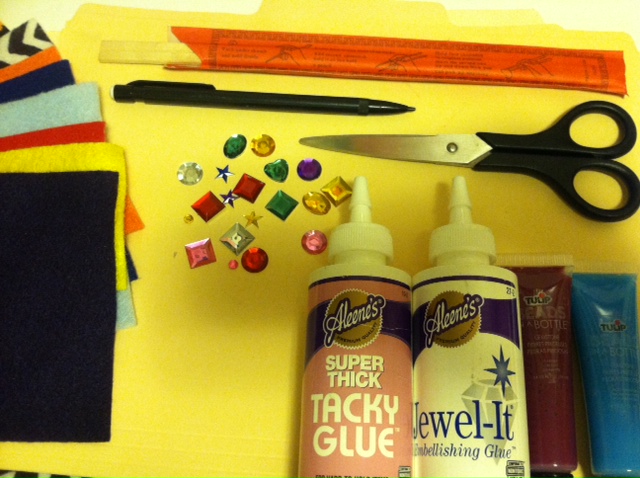
Materials:
-Pencil
-Paper (optional)
-Manila file folders
-Scissors
-Felt pieces in a variety of colors and patterns
-Aleene's Super Thick Tacky Glue
-Aleene's Jewel-It Embellishing Glue
-Fake jewels
-Tulip Beads in a Bottle
-Wooden chopsticks
Make it:
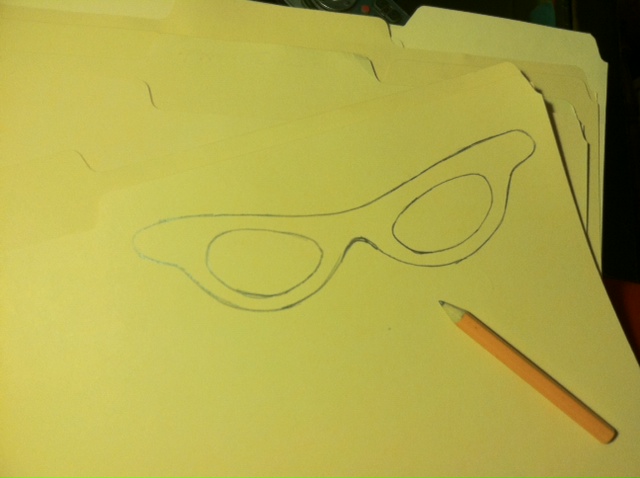
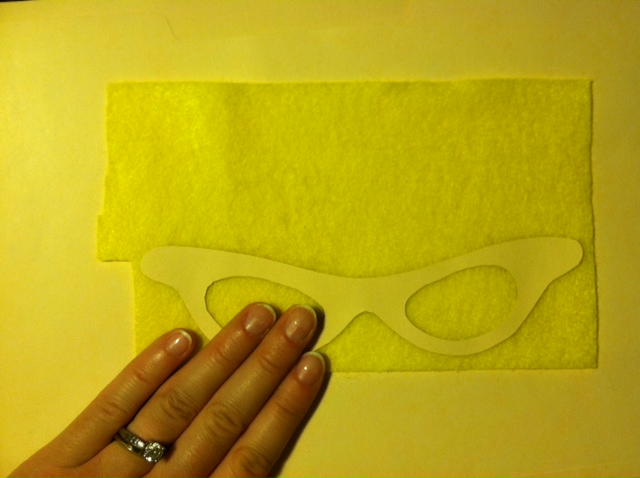
1. Draw the outline of a pair of glasses, a mustache, or other shape on a manila folder. Optional: Sketch it out on a piece of paper first to use as a template (this way, if it's a symmetrical shape, you can fold it in half to make sure both sides match), then cut it out and trace it onto the folder.
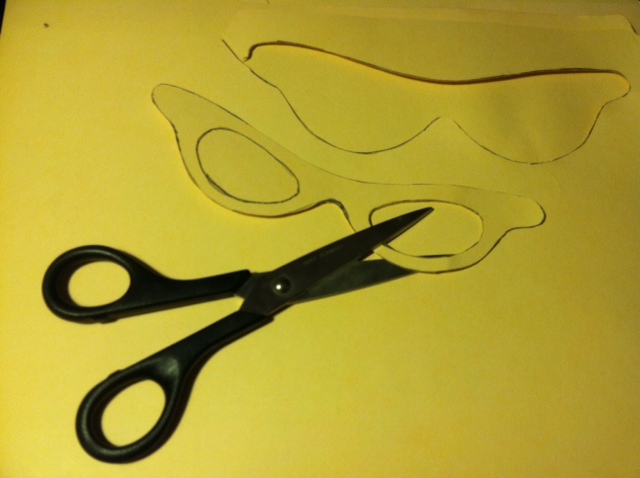
2. Use scissors to completely cut out the shape(s).
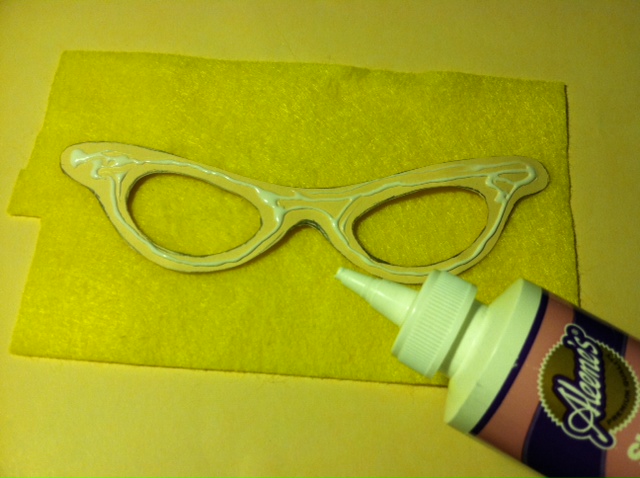
3. Spread glue generously over the back of the folder shape.
4. Press it firmly onto a piece of the desired felt color. Let the glue dry.
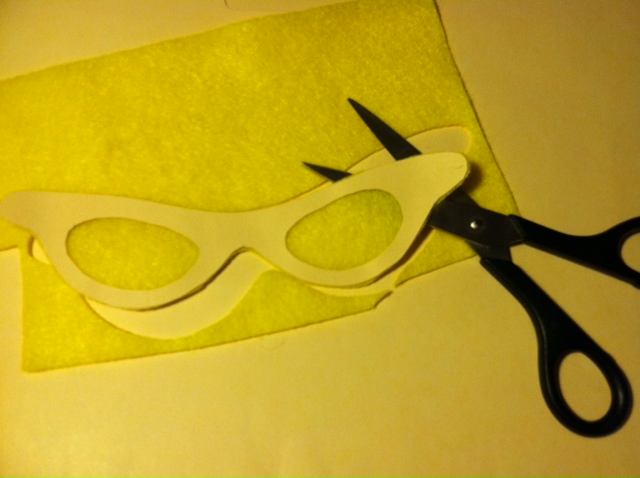
5. Cut out the felt piece, using the folder edges as your guide.
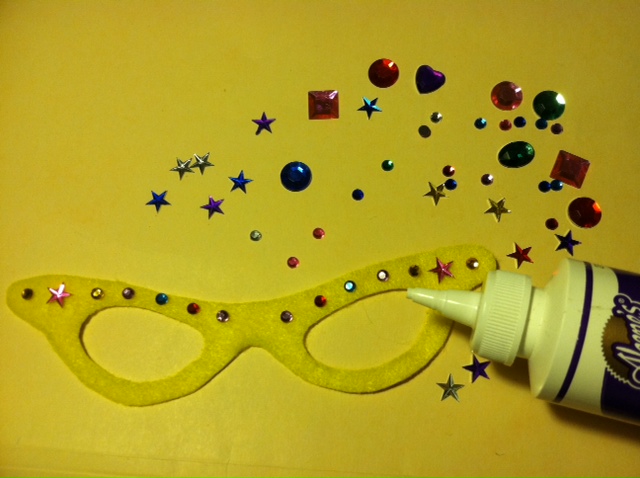
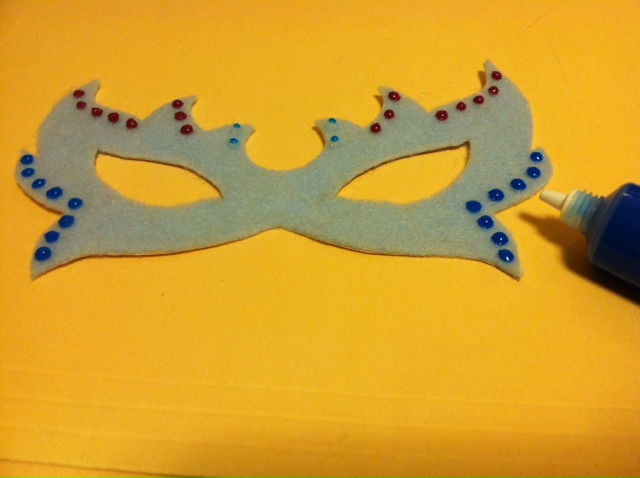
6. Use jewelry adhesive to decorate the front with fake jewels...
...or use Beads in a Bottle to create 3D embellishments! Let the embellishments dry.
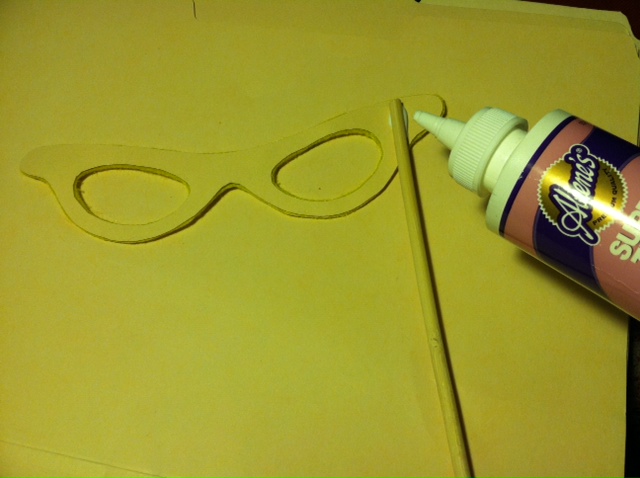
7. Flip the disguise over and squeeze a line of glue along one side. Press the top of one chopstick so it extends vertically from the bottom. Let it dry.
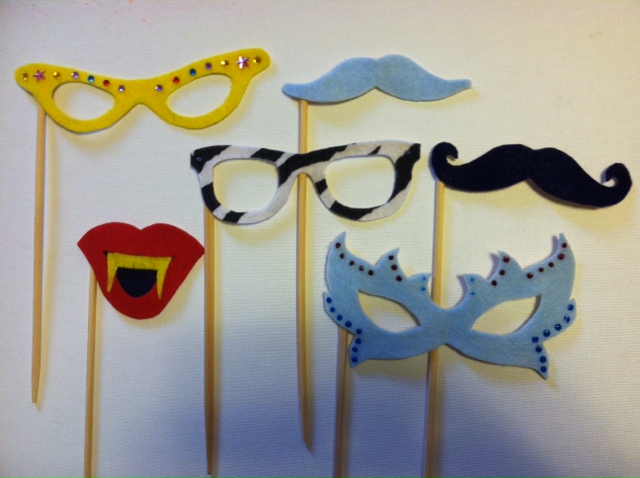
8. Repeat as many times as you like to make cat-eye glasses (shown), wayfarers, masquerade masks, vampire fangs, and mustaches galore. Now what are you waiting for? Go undercover!
Happy haunting from Generation T!
Visit us on Facebook!
Craft on!