ILovetoCreate Teen Crafts: Spring has Sprung Pop-up Card

Wednesday, April 27, 2011
Visit us on Facebook!
Craft on!Click here for today's daily giveaway!
Spring has Sprung Pop-up Card
Avalon Potter for ILovetoCreate Teen Crafts
“Teen crafted, Mom approved.


I have been noticing the subtle differences of spring appearing around me. The trees have started to regain their leaves and butterflies have started to flap their wings. My grandmother sent me a card with a spring flower and Easter treats, and my mom has been saying one of her catch phrases every day “spring has sprung!” I wanted to thank my grandmother for the wonderful card so I decided to use ILoveToCreate products to make her a three dimensional butterfly card. Before I send it to her I thought I would take a few pictures and write some instructions so you could make one too! I left one of the applique butterflies uncolored so she can iron it on something and have fun coloring it in herself!

Materials
Colored cardstock
3 Crafty Chica Iron-on Appliqués butterfly
Tulip Fabric Markers Bright
Tulip Soft Fabric Paint
3-D small square stickers

Tools
Paint brushes
Scissors

Instructions
1. Take two of the butterflies and color them in using the fabric paint or the fabric markers. (These butterflies will be used to decorate the front of the card.)

2. Cut your card stock so that both the butterflies can fit on the front.

3. Fold the longer length of card stock in half and score with bone folder. This is your card.

4. Cut a small strip from the same color paper as the card and fold in half. Use bone folder to score fold.

5. Find the center point of each length of paper from your center fold. Fold again using bone folder to score. When attached, this should form a square or rectangular shape to create your pop up feature.

6. Place two 3-D stickers on either side of the two small ends.

7. Use the 3-D stickers to attach the ends of the armature inside the center fold of the card. The two ends should meet in the center at the card fold. Place the armature directly in the middle of the card; make sure that the shape bends with the card as it closes. If it does not reposition it so that it will bend with the card. This is forming a square/rectangle that will fold with the card, when opened fully it should become a full square shape.

8. Use the 3-D stickers to attach the blank butterfly on the front of the armature. Test to make sure it still bends correctly.

9. Use the 3-D stickers again to attach the colored butterflies on the outside of the card.

10. Cut out a strip of a different color cardstock that will fit on the top of the inside of the card.

11. Use the 3-D stickers stencil and the big phat pink marker to write spring on this piece of cardstock.

12. Repeat step 10 using a different color cardstock and writing sprung instead.

13. Attach the spring cardstock to the middle of the top of the inside of the card. Use two 3-D stickers on top of each other instead of one on this.

14. Repeat step 12 with the sprung cardstock and attach to the bottom of the inside of the card. Add above sprung on the card itself not the sprung cardstock the word “has” using the yellow big phat marker and previous stencil.

15. To complete leave a note on the instructions on how to make the iron on butterflies so your friend or family member can color in and iron on the blank butterfly!

4 Ways to Spray!

Tuesday, April 26, 2011


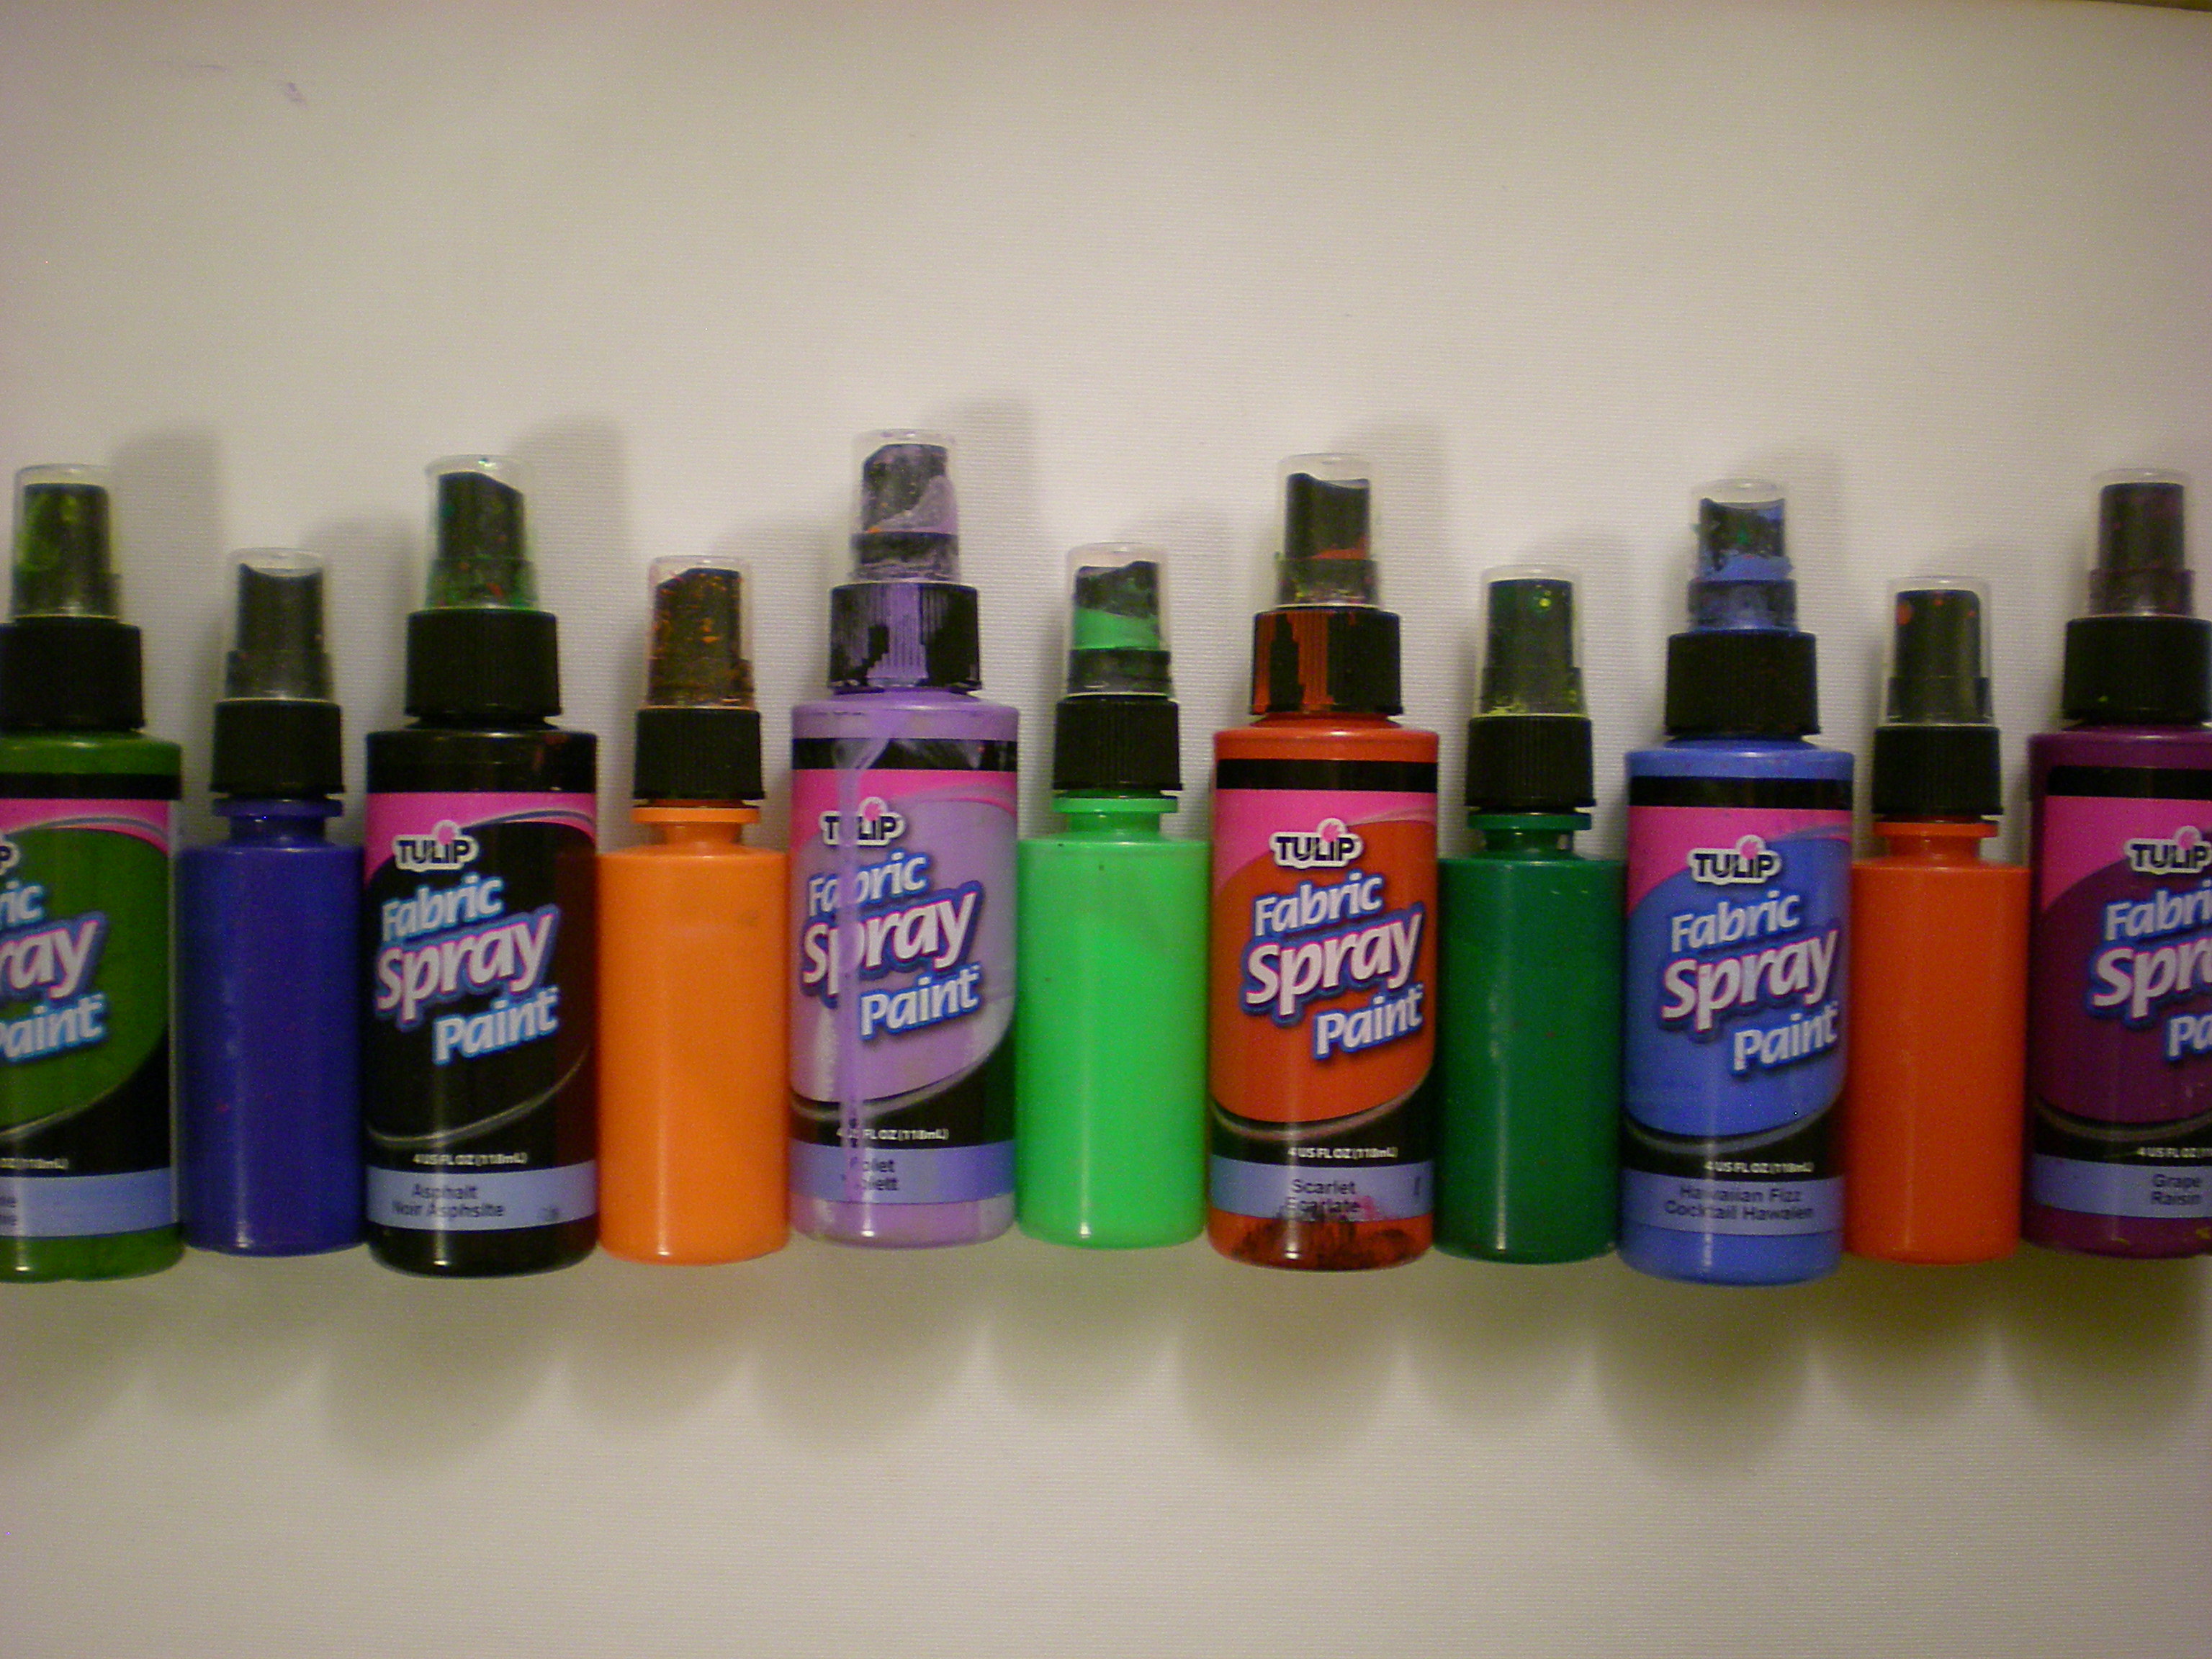
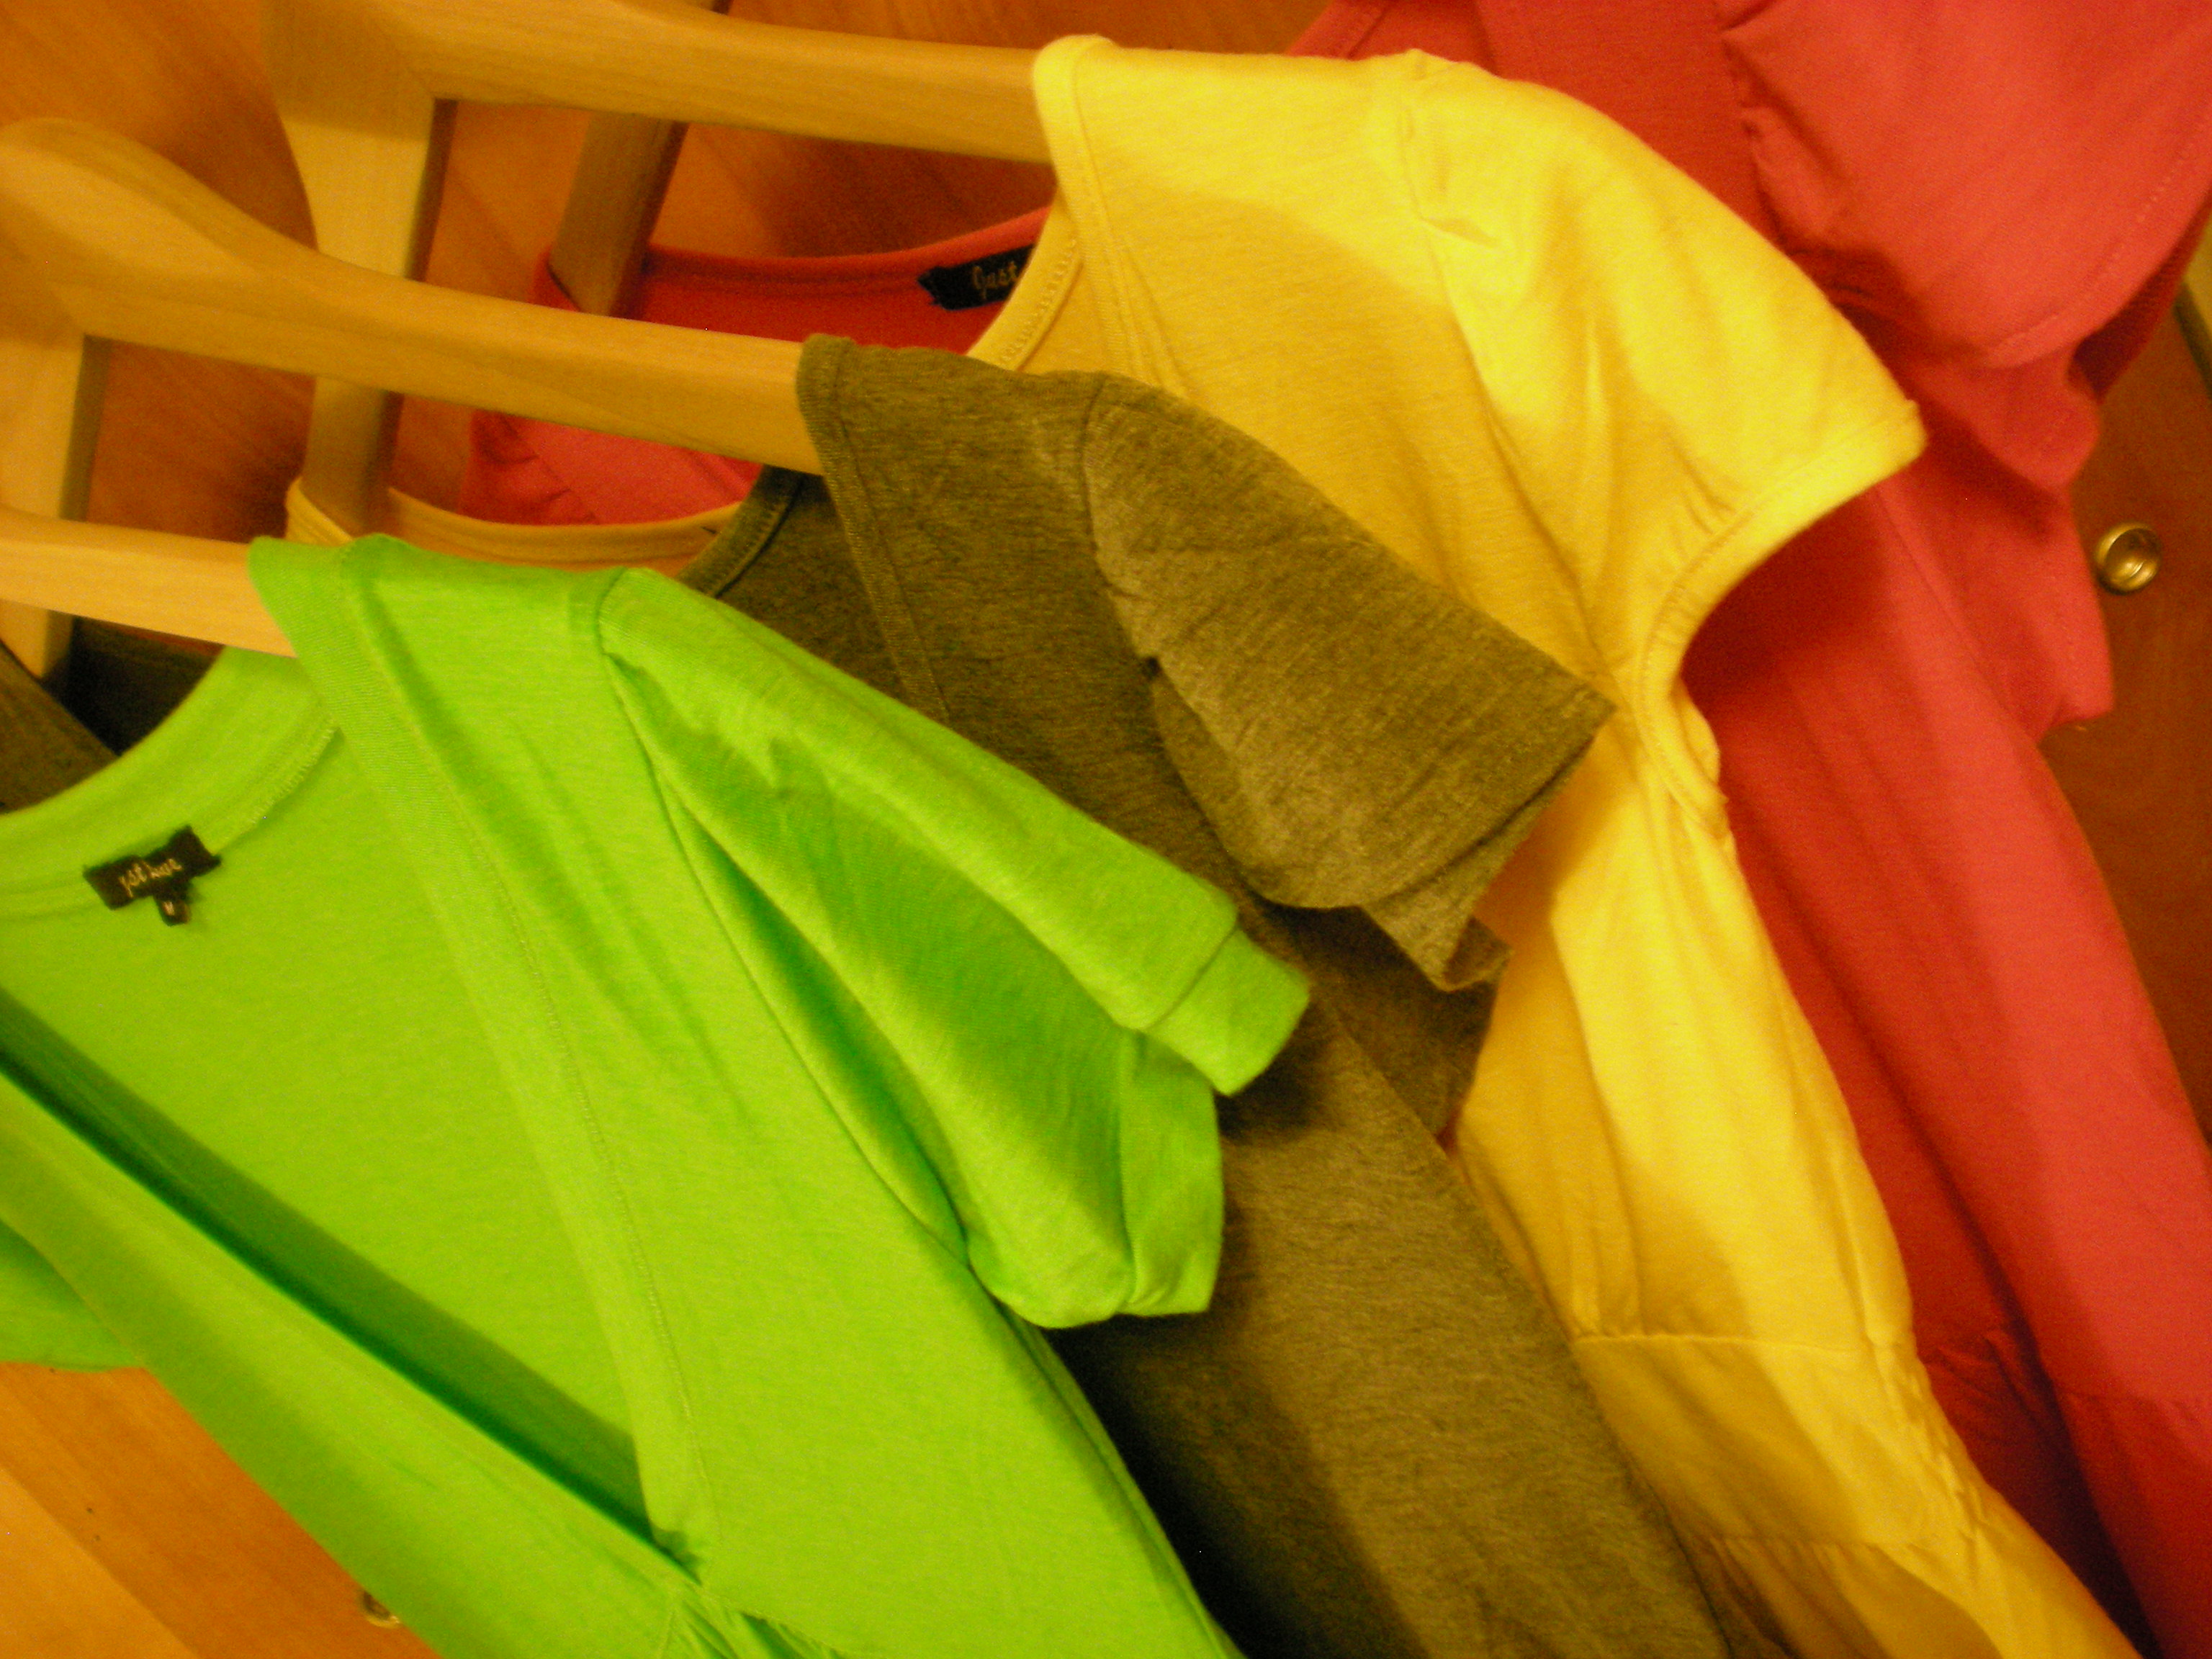
As some of you know, I've been just a little bit obsessed with my spray paints lately. And it's because they're the perfect quickie spiff-up and surface embellish for T-shirts, pillows, dresses--or any other fabric item you want to spray! Since it's spring, though, I grabbed up some plain cotton dresses to spray. Here are four different ways to pair those fabric spray paints with templates made from materials around the house including masking tape, stationery stickers, and freezer paper. Pull your spray paints from your holsters!


Once your paints are assembled, select your surfaces (in all different colors--though light colors will take the paint best).


Then introduce any number of "secret weapons from around the house" (i.e. items that can be used as templates or stencils to mask parts of the fabric (i.e. freezer paper, permanent marker, a craft knife; map dot stickers; rectangle sticker labels; masking tape) in each of the individual projects below!

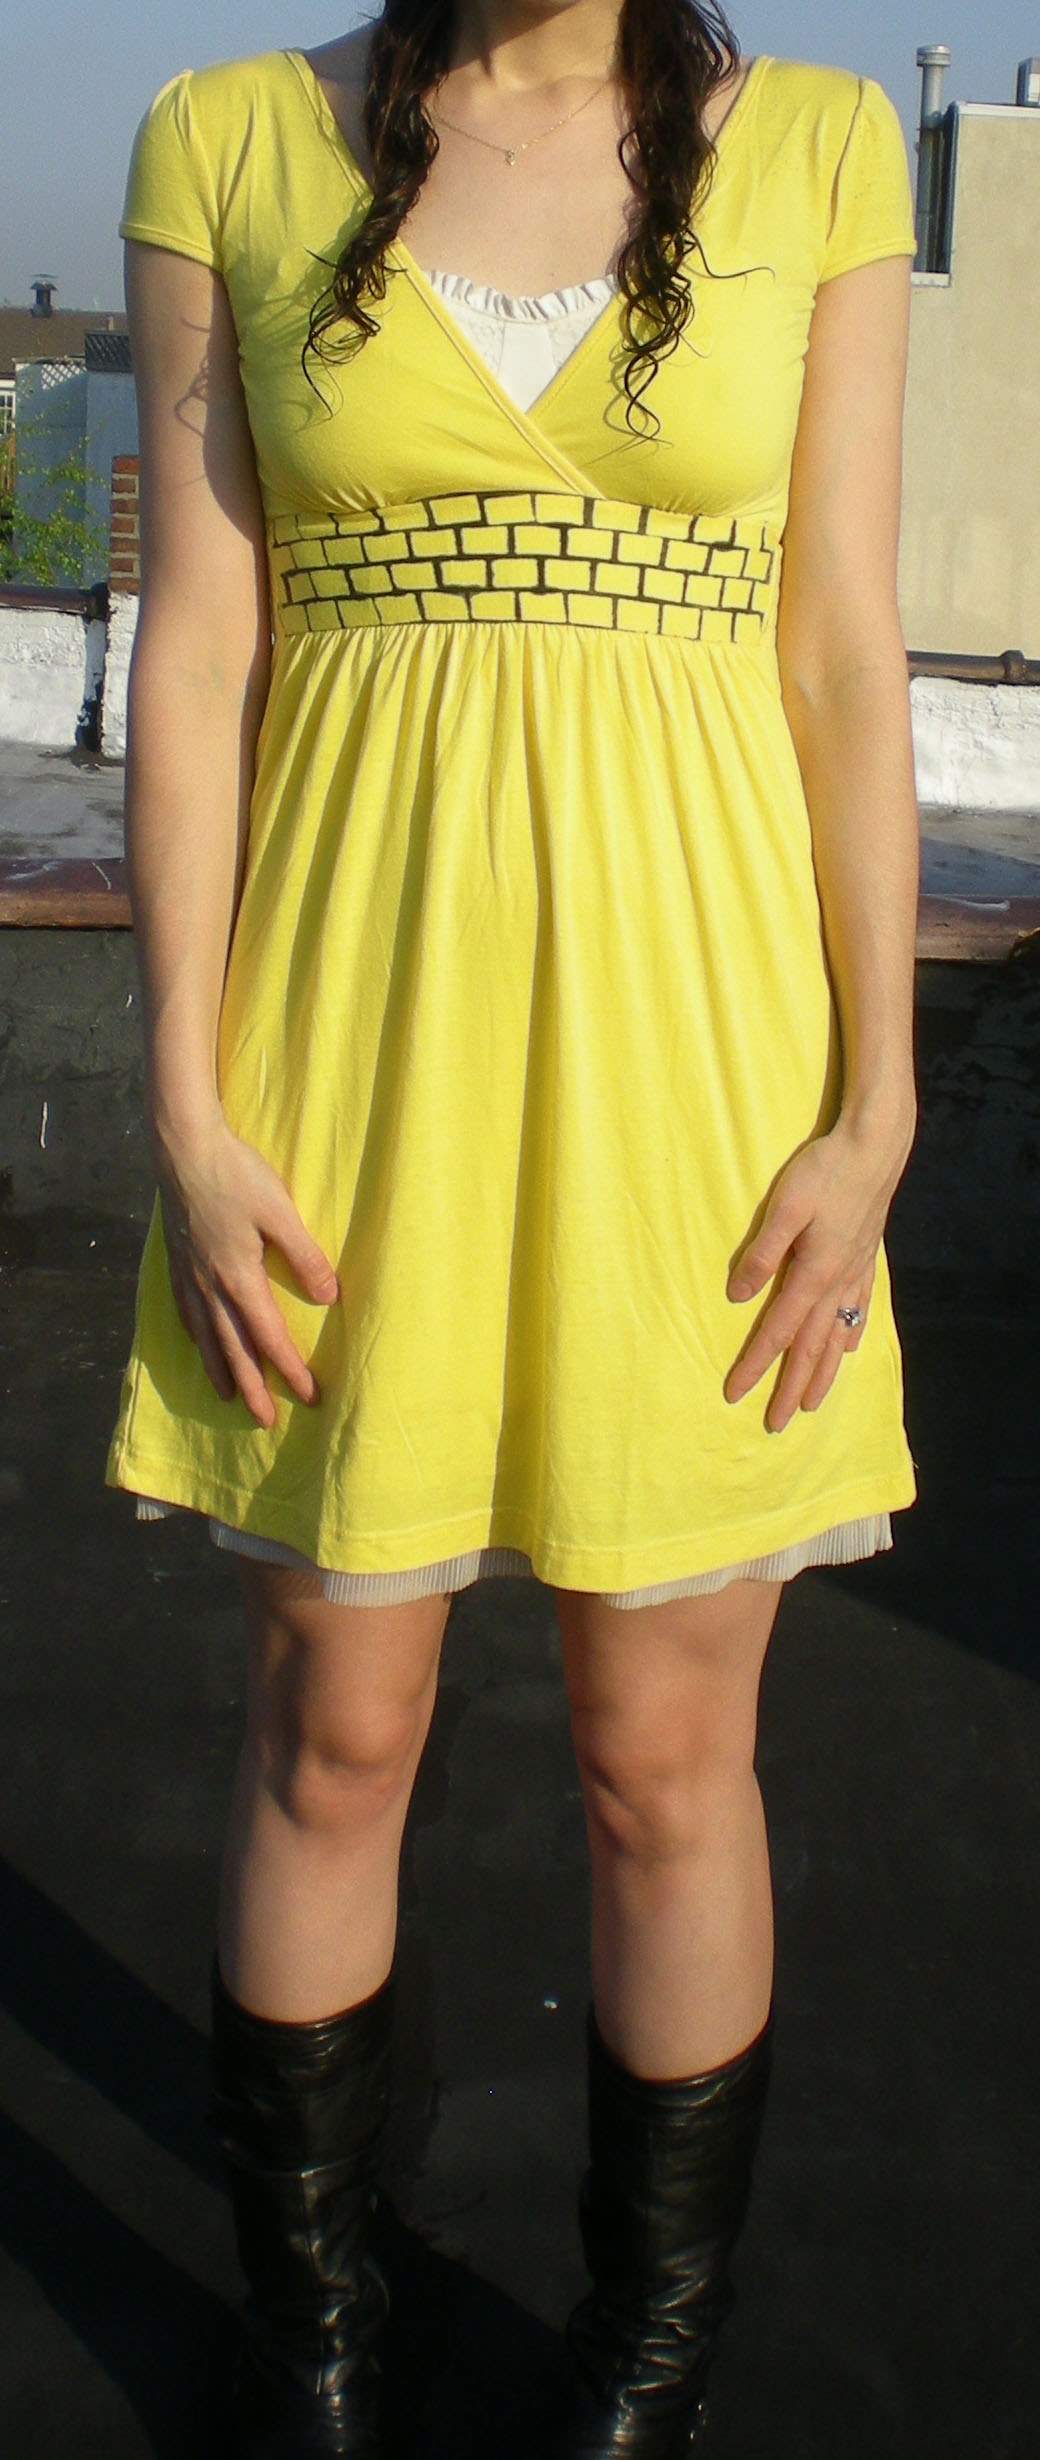
1. Yellow Brick Road

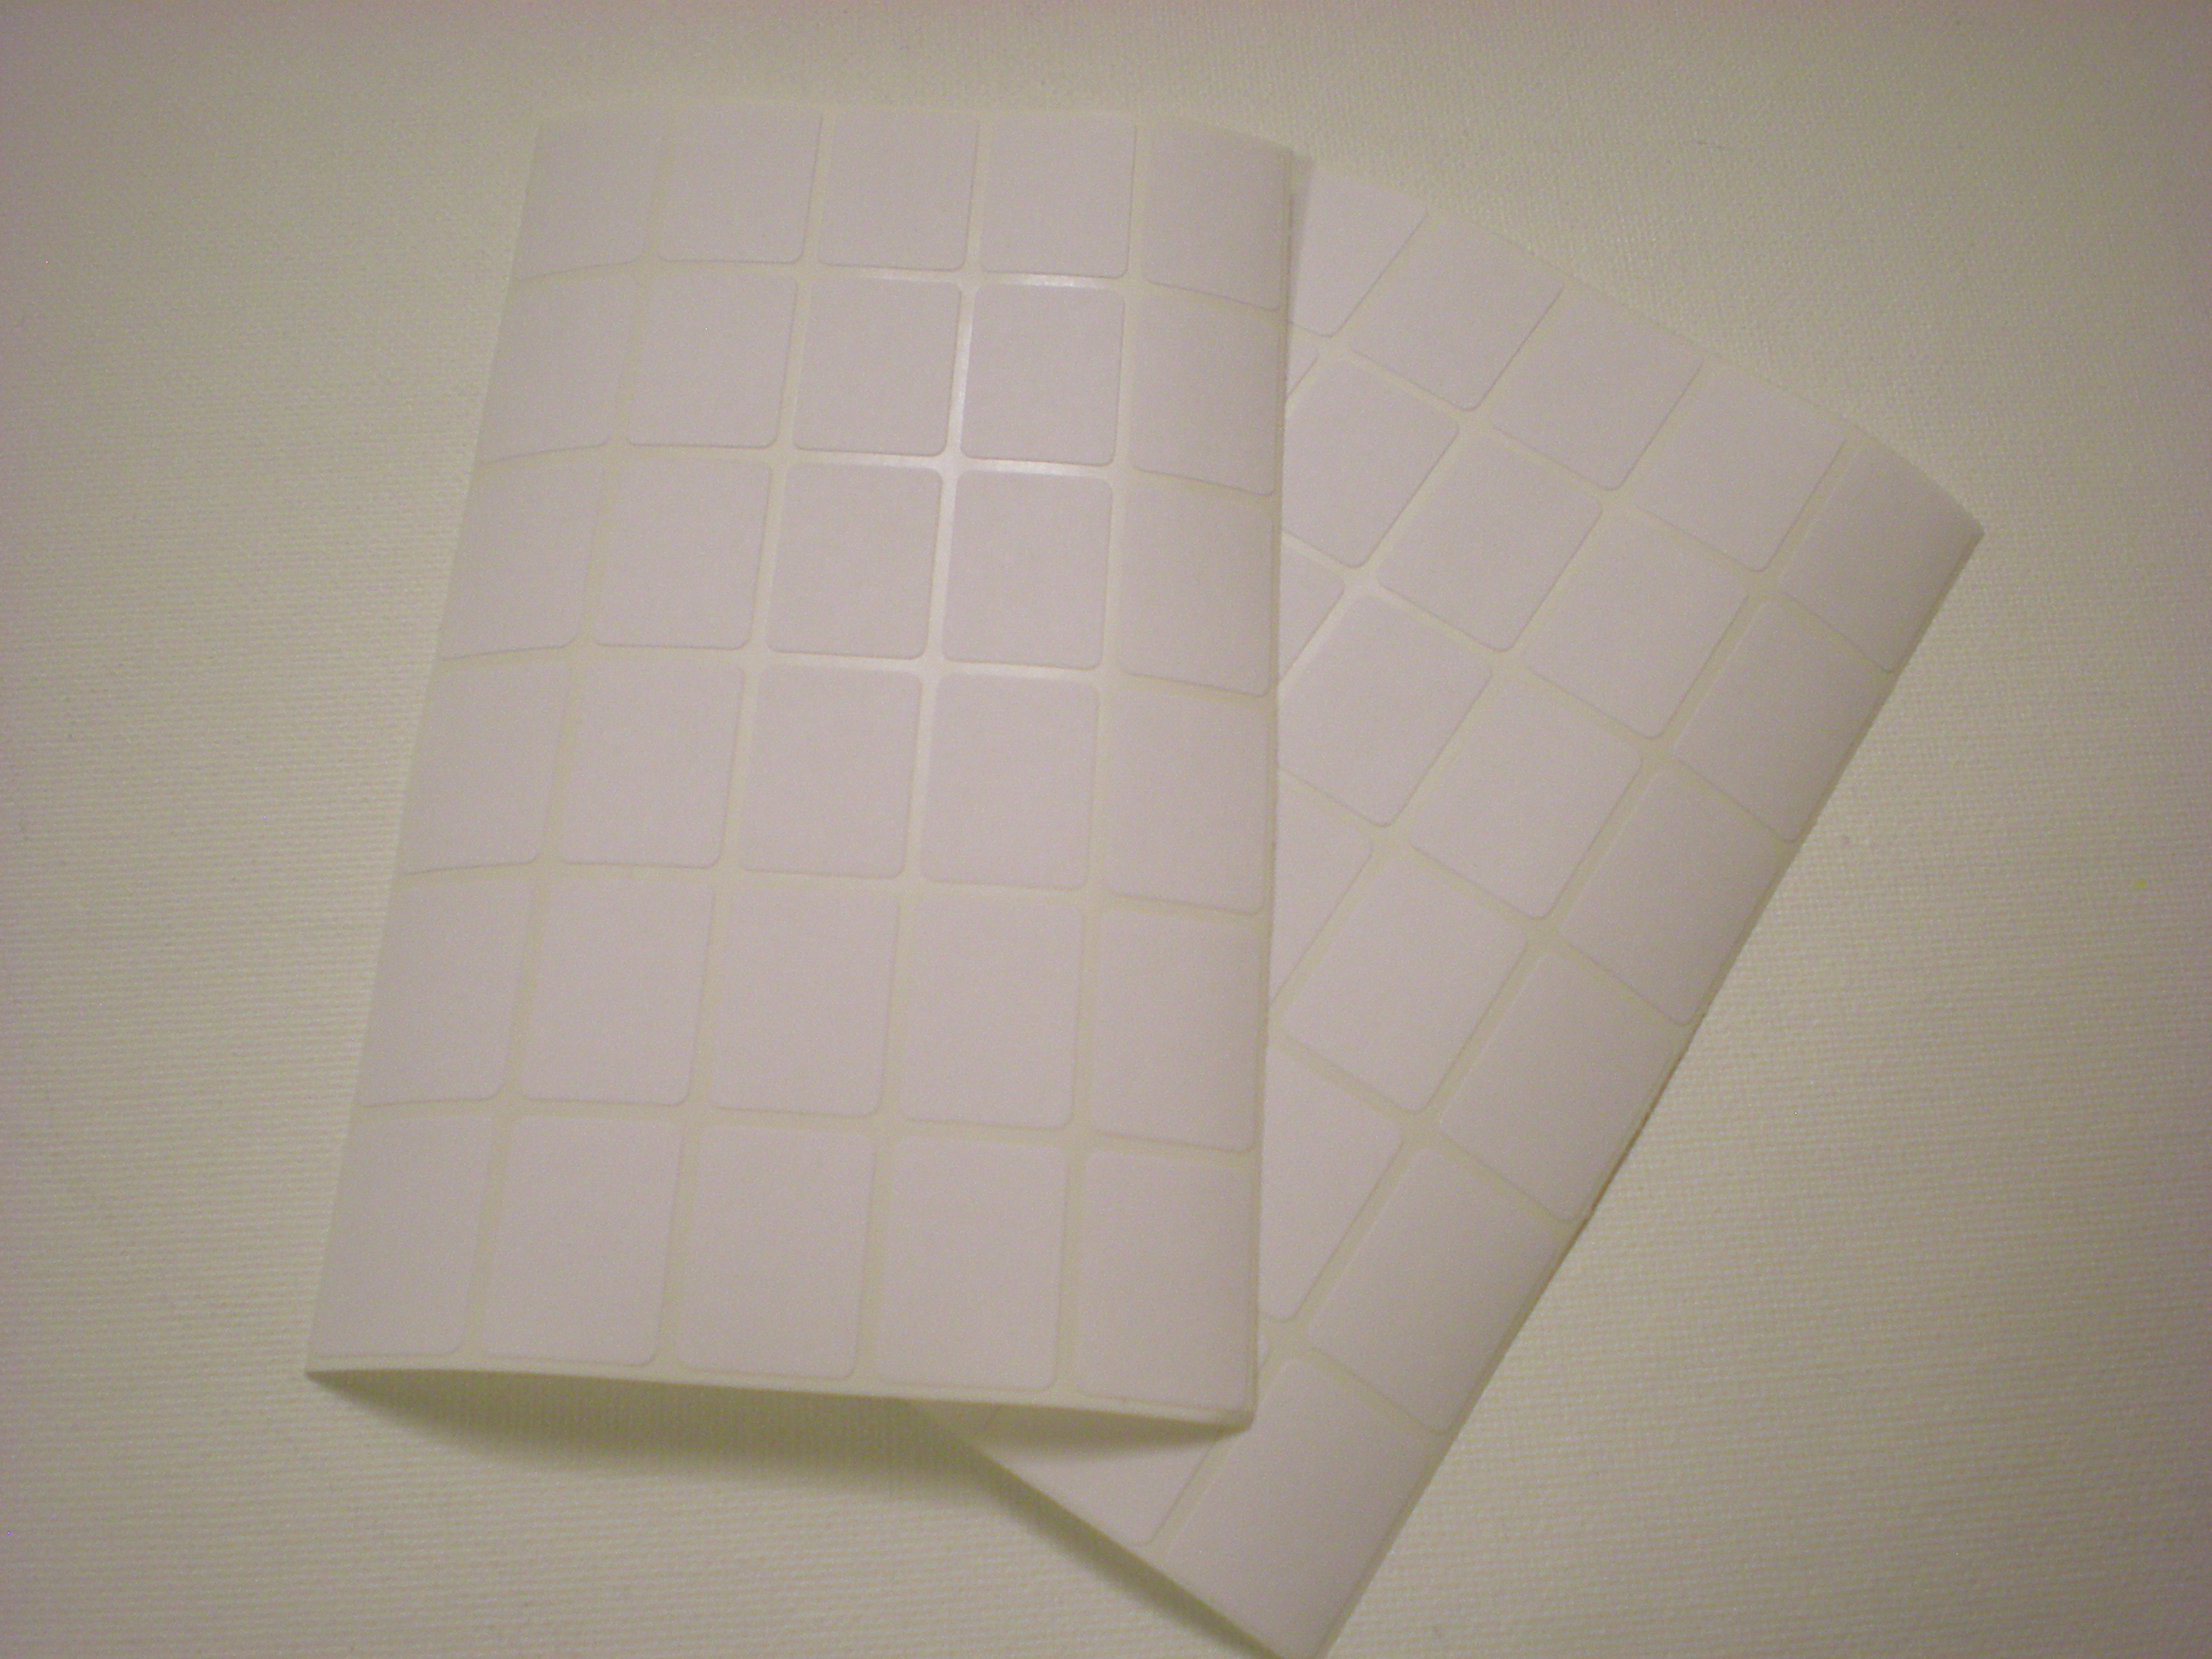
Secret weapon from around the house: Rectangle sticker labels

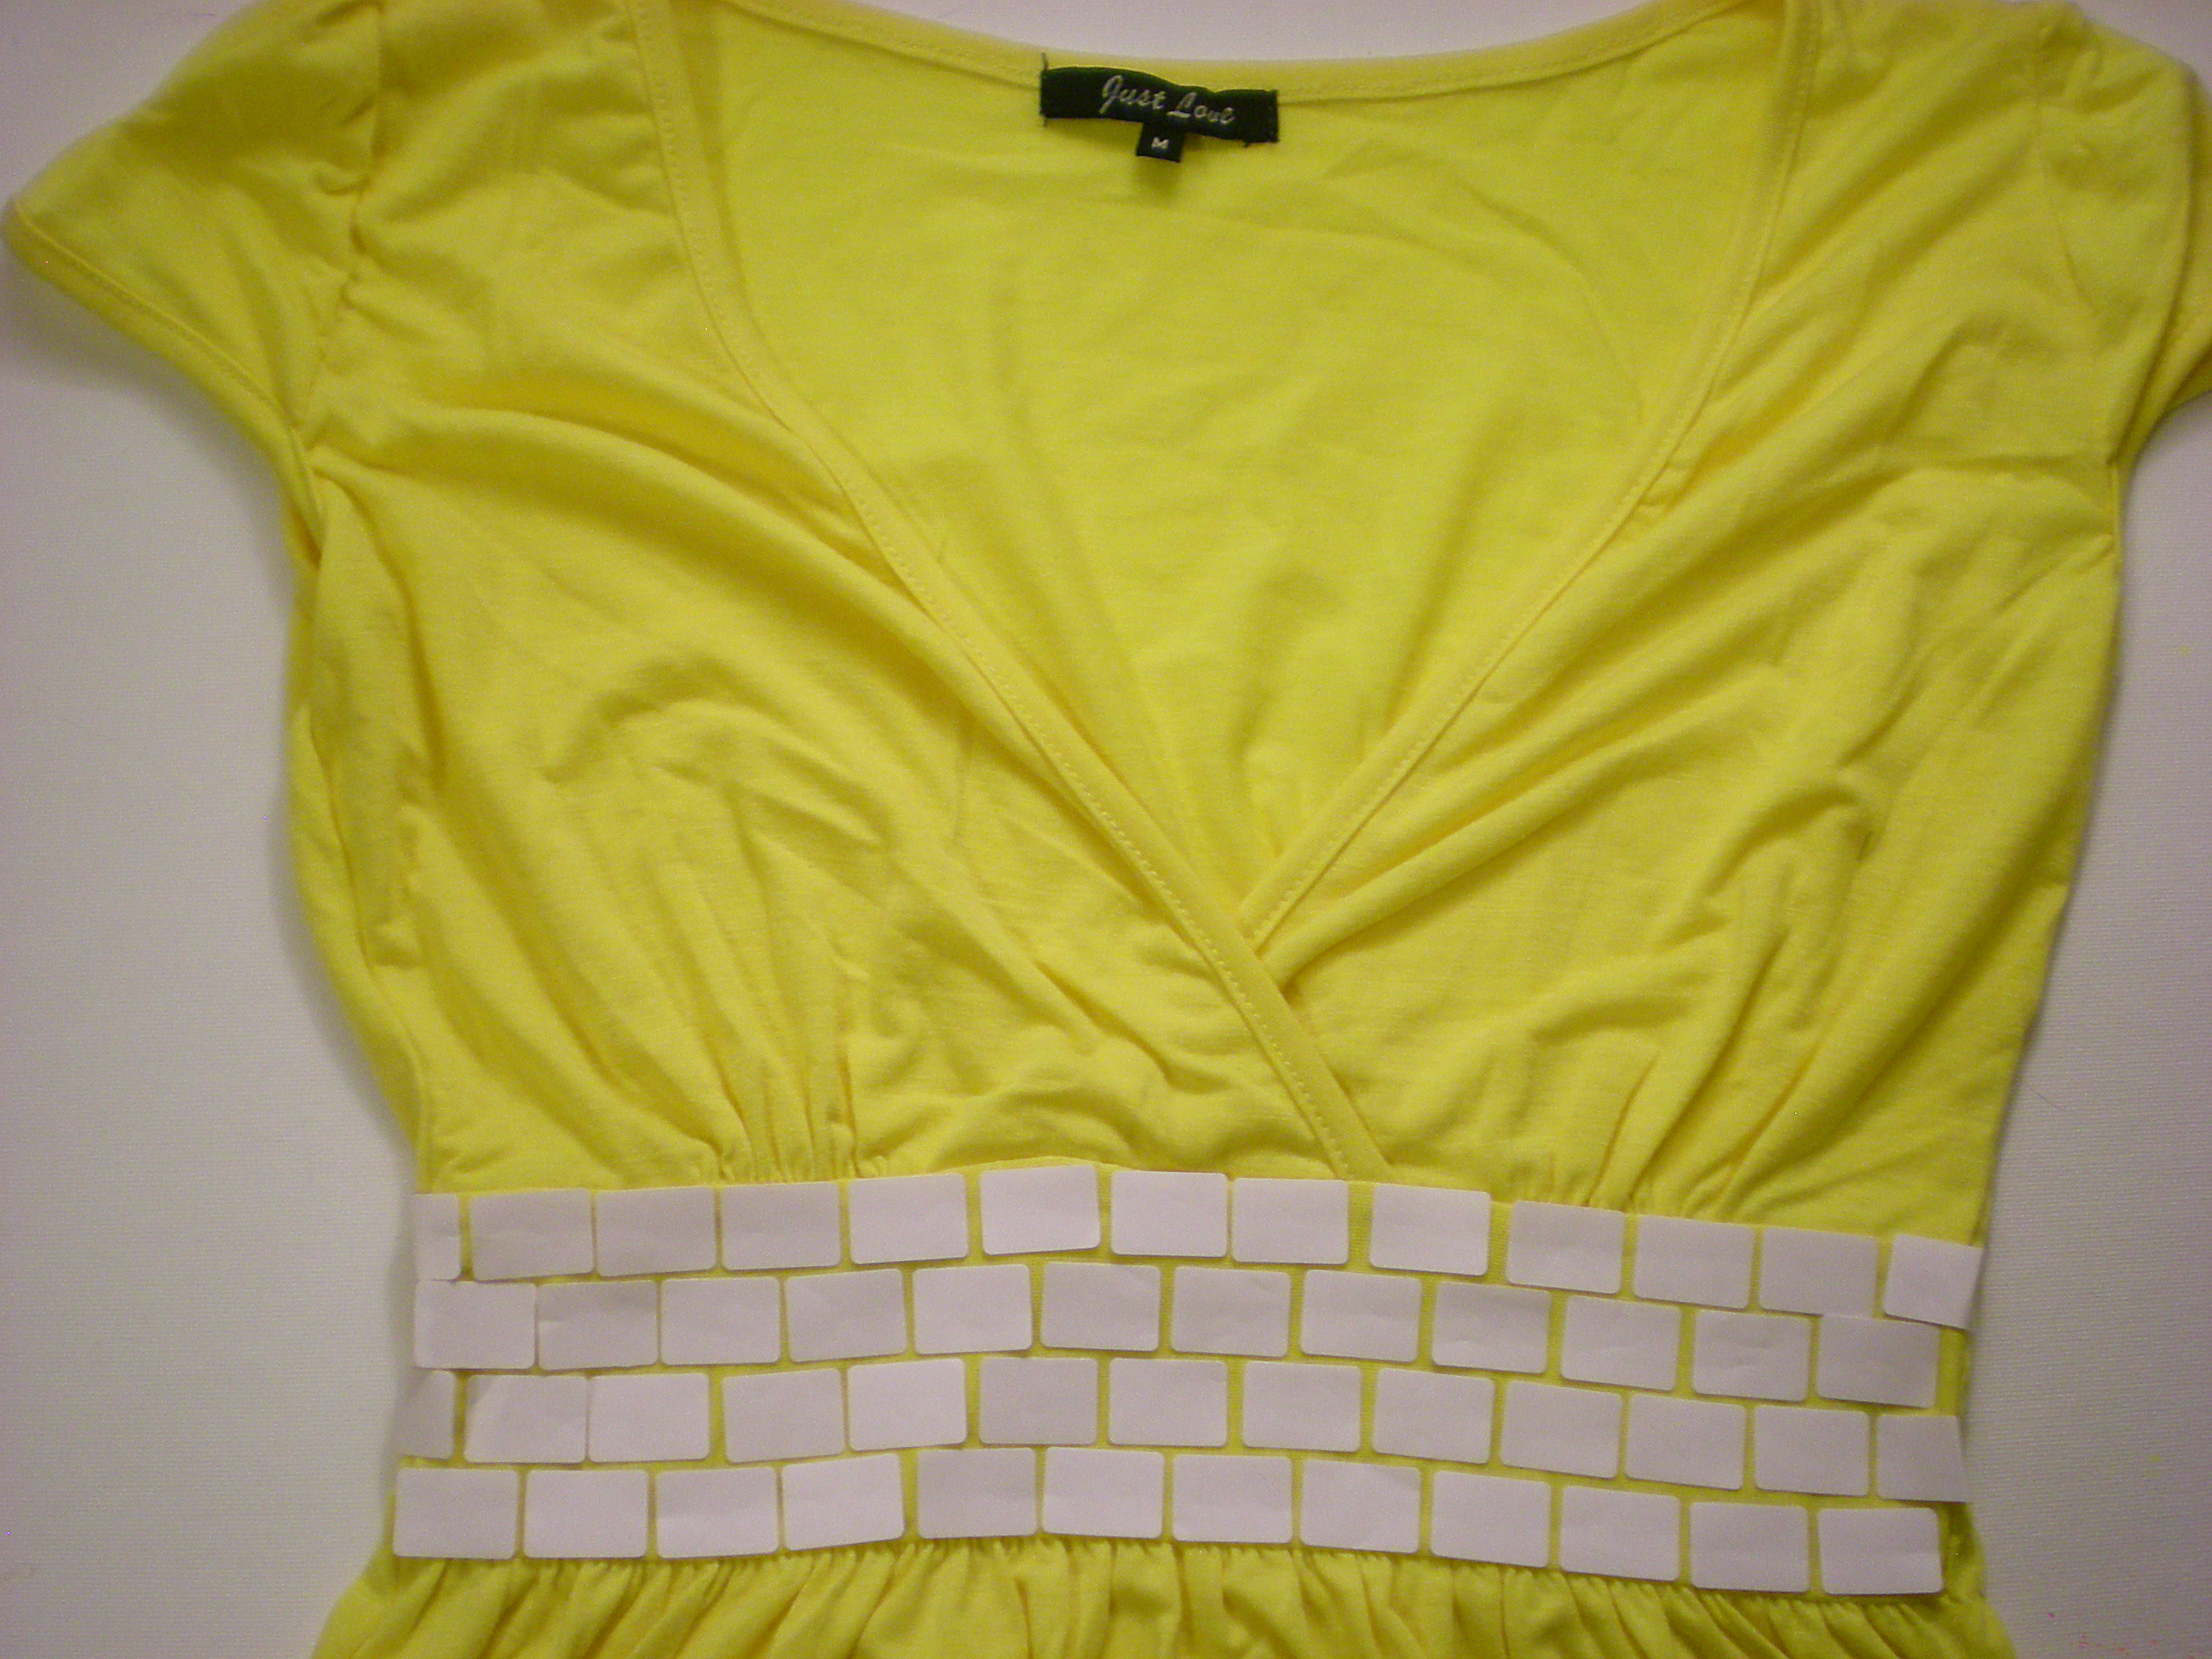
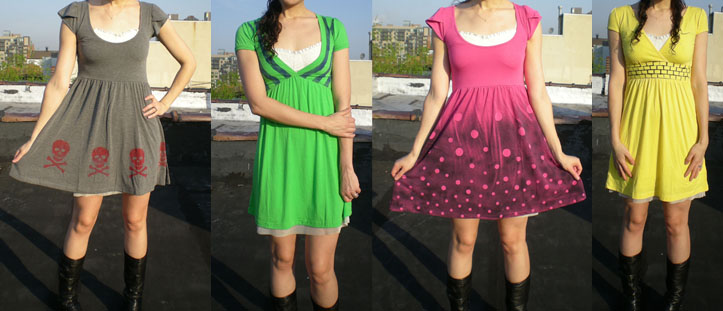
Originally, my plan was to stick on these labels in a checkerboard pattern to give the dress the feel of a racing flag. But the stickers so easily lent themselves to being bricks, that I immediately thought of the yellow brick road in the Land of Oz.


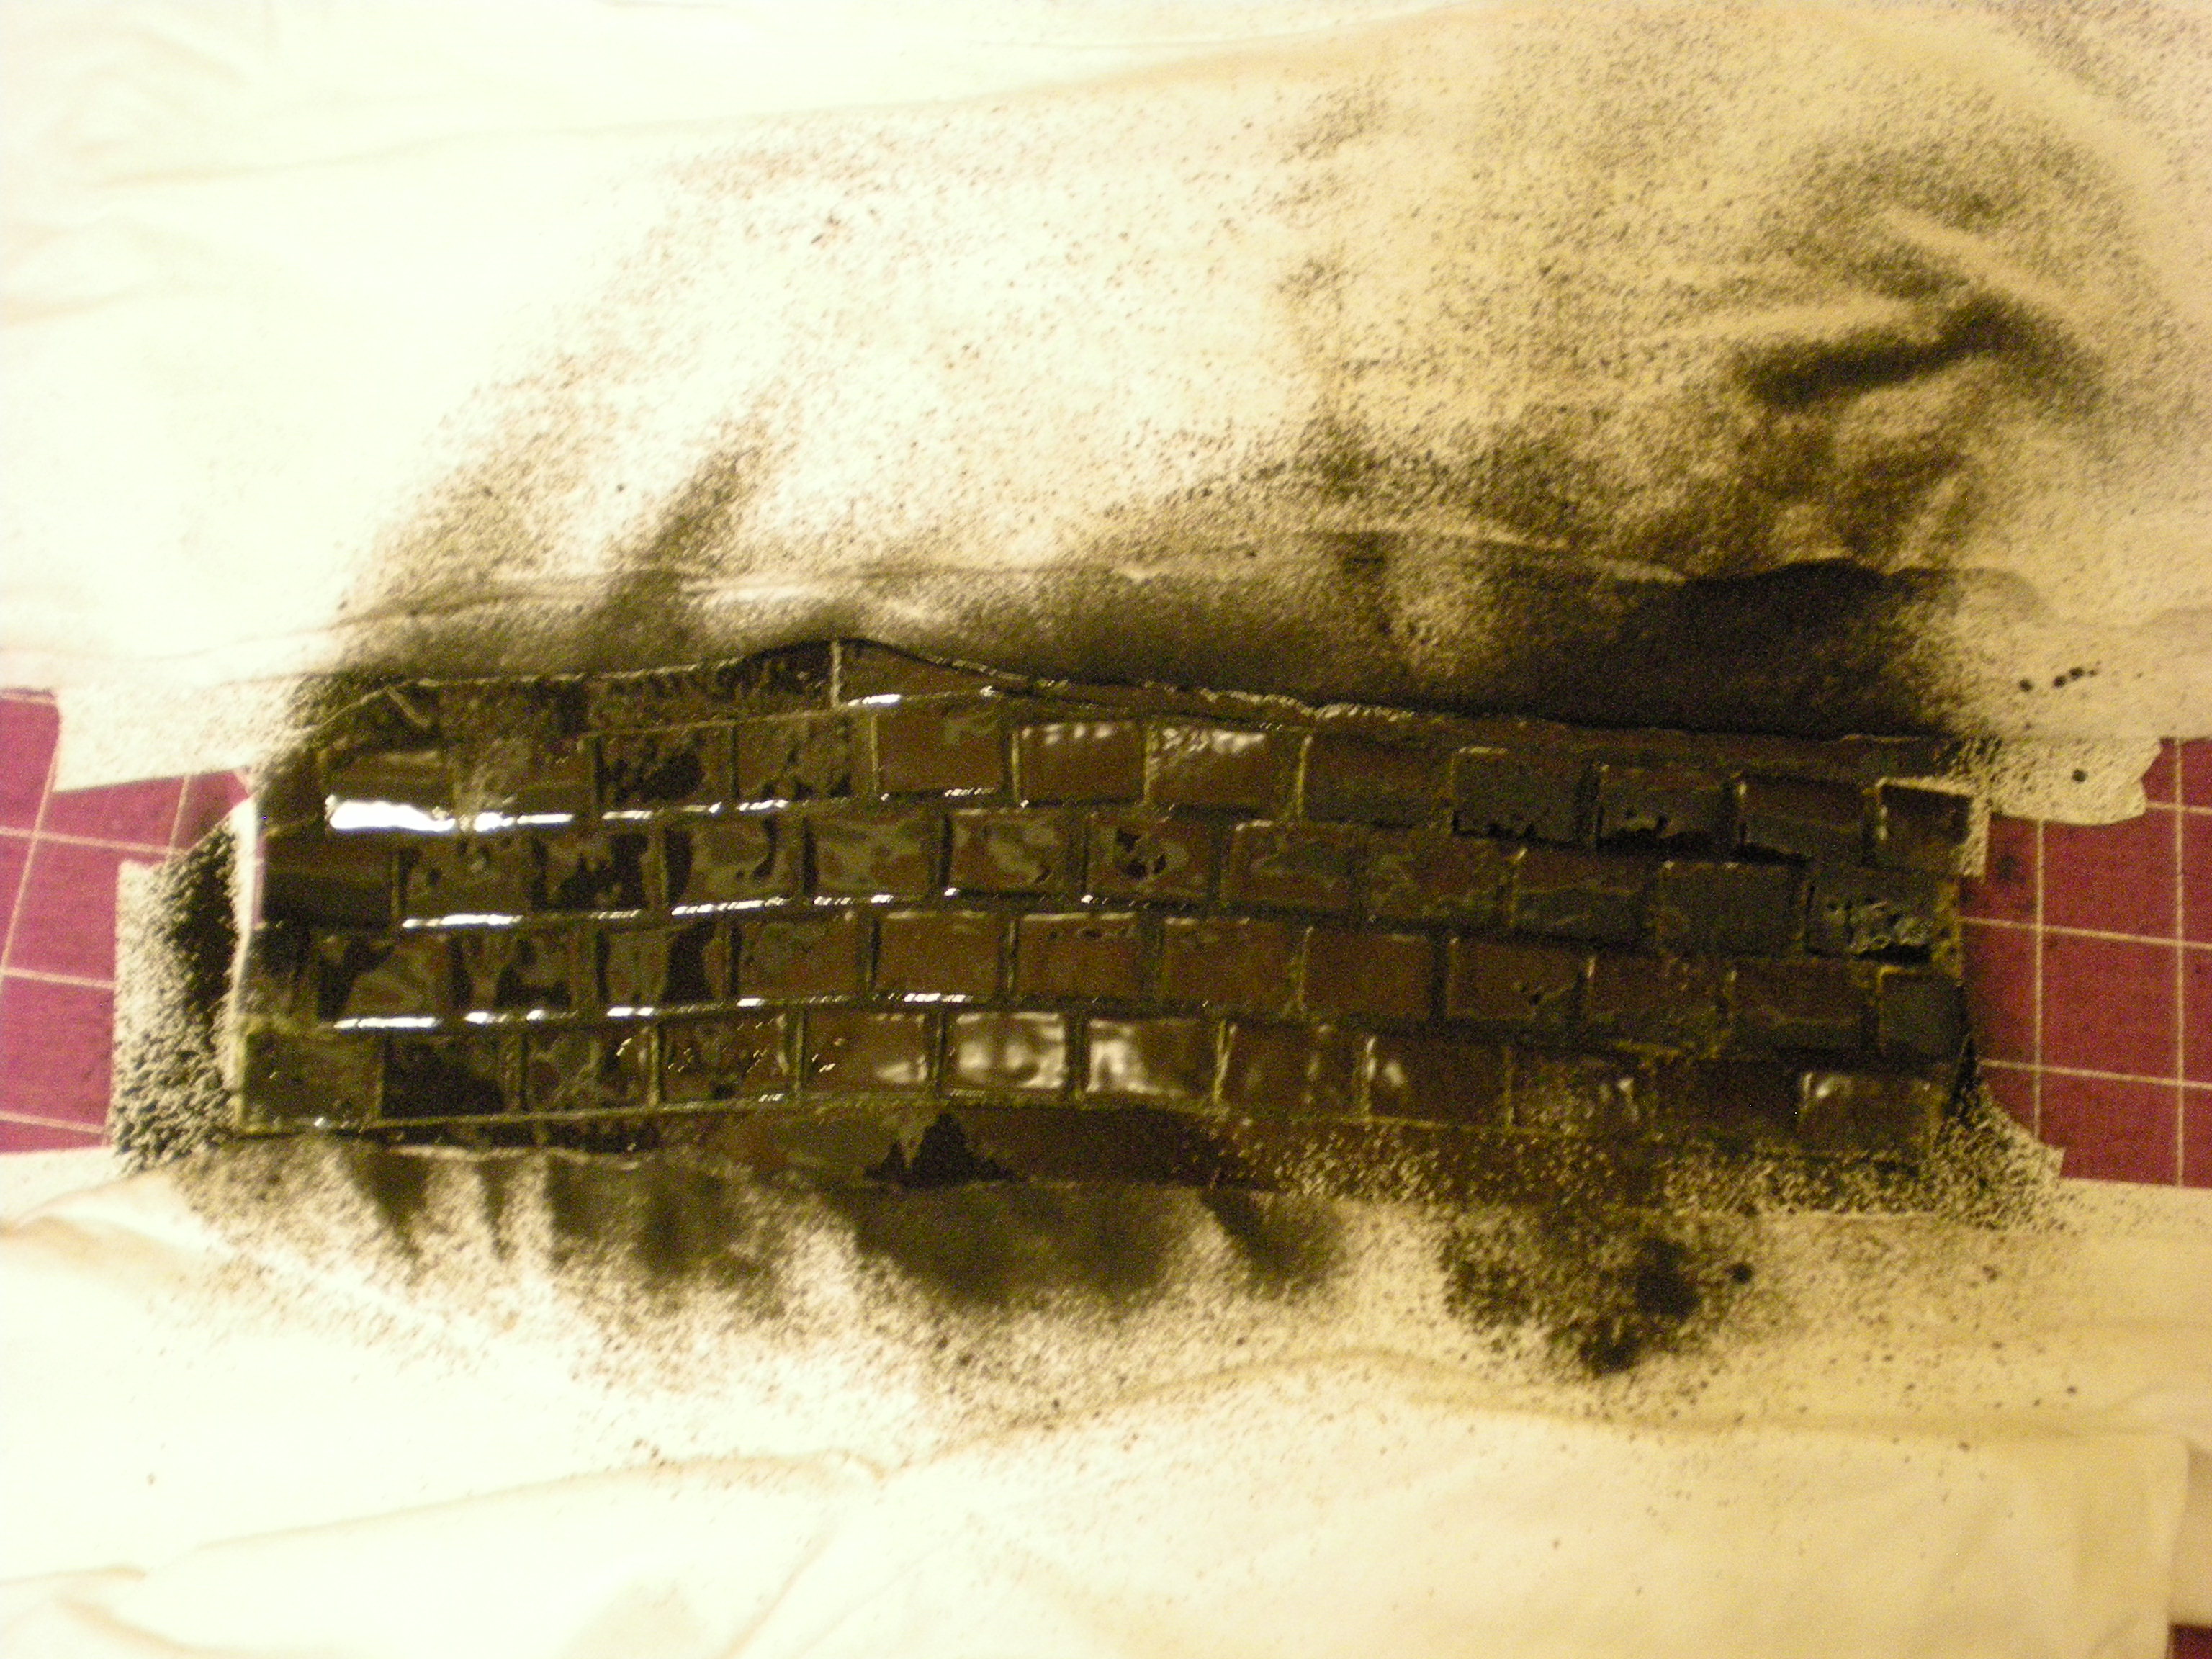
I chose to follow the yellow brick road along the waistband, but you could lay your bricks around the hem of the dress, up and over the shoulder, or a circle them all over the dress. I laid one row of bricks and then stuck down a second row, offsetting the first brick in the second row so that the rest of the stickers in that row would be slightly staggered to create the brick pattern.


Mask the rest of the garment before spraying (I used T-shirt scraps and paper from my recycling bin) so that you can contain the paint to only the area you want to color. I used black spray paint to make the yellow bricks really pop!


Let the paint dry completely before you peel off the brick stickers and try it on!


2. Skull & Bones

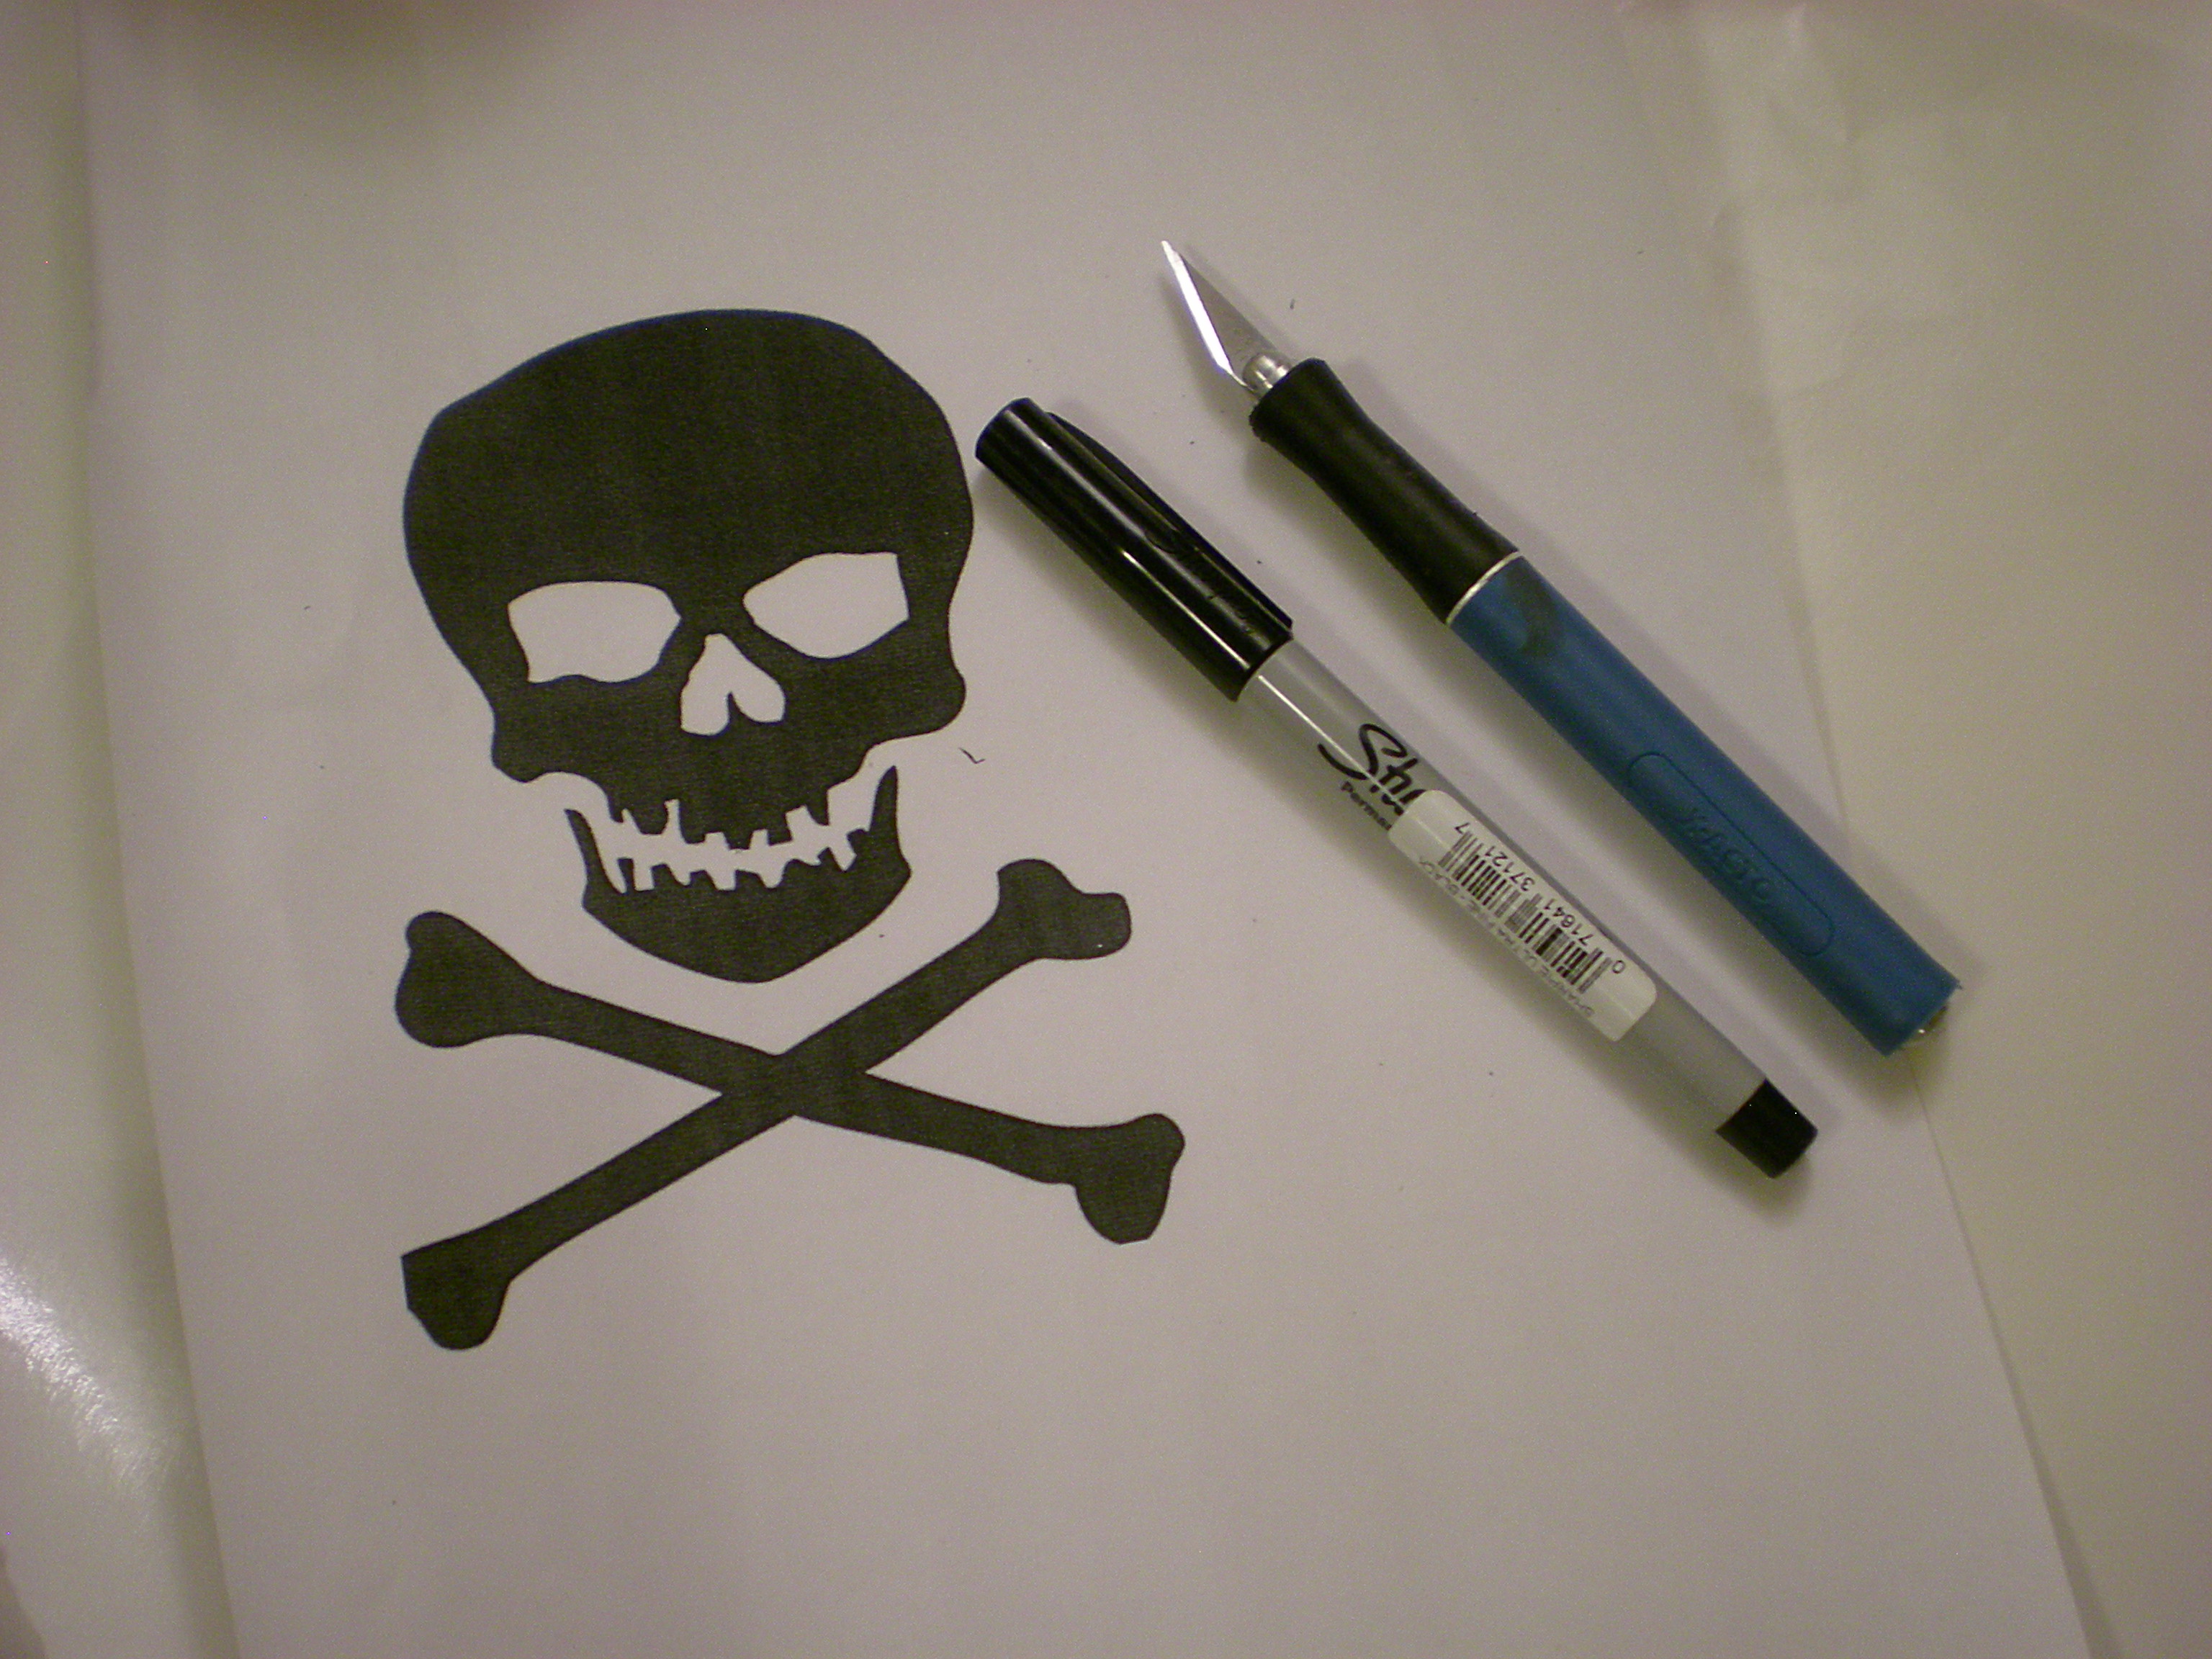
Secret weapons from around the house: Freezer paper, high-contrast image printout, marker, craft knife, and cutting mat

I chose the classic skull and crossbones as my image to download and print for creating the stencil, but any image is fair game!


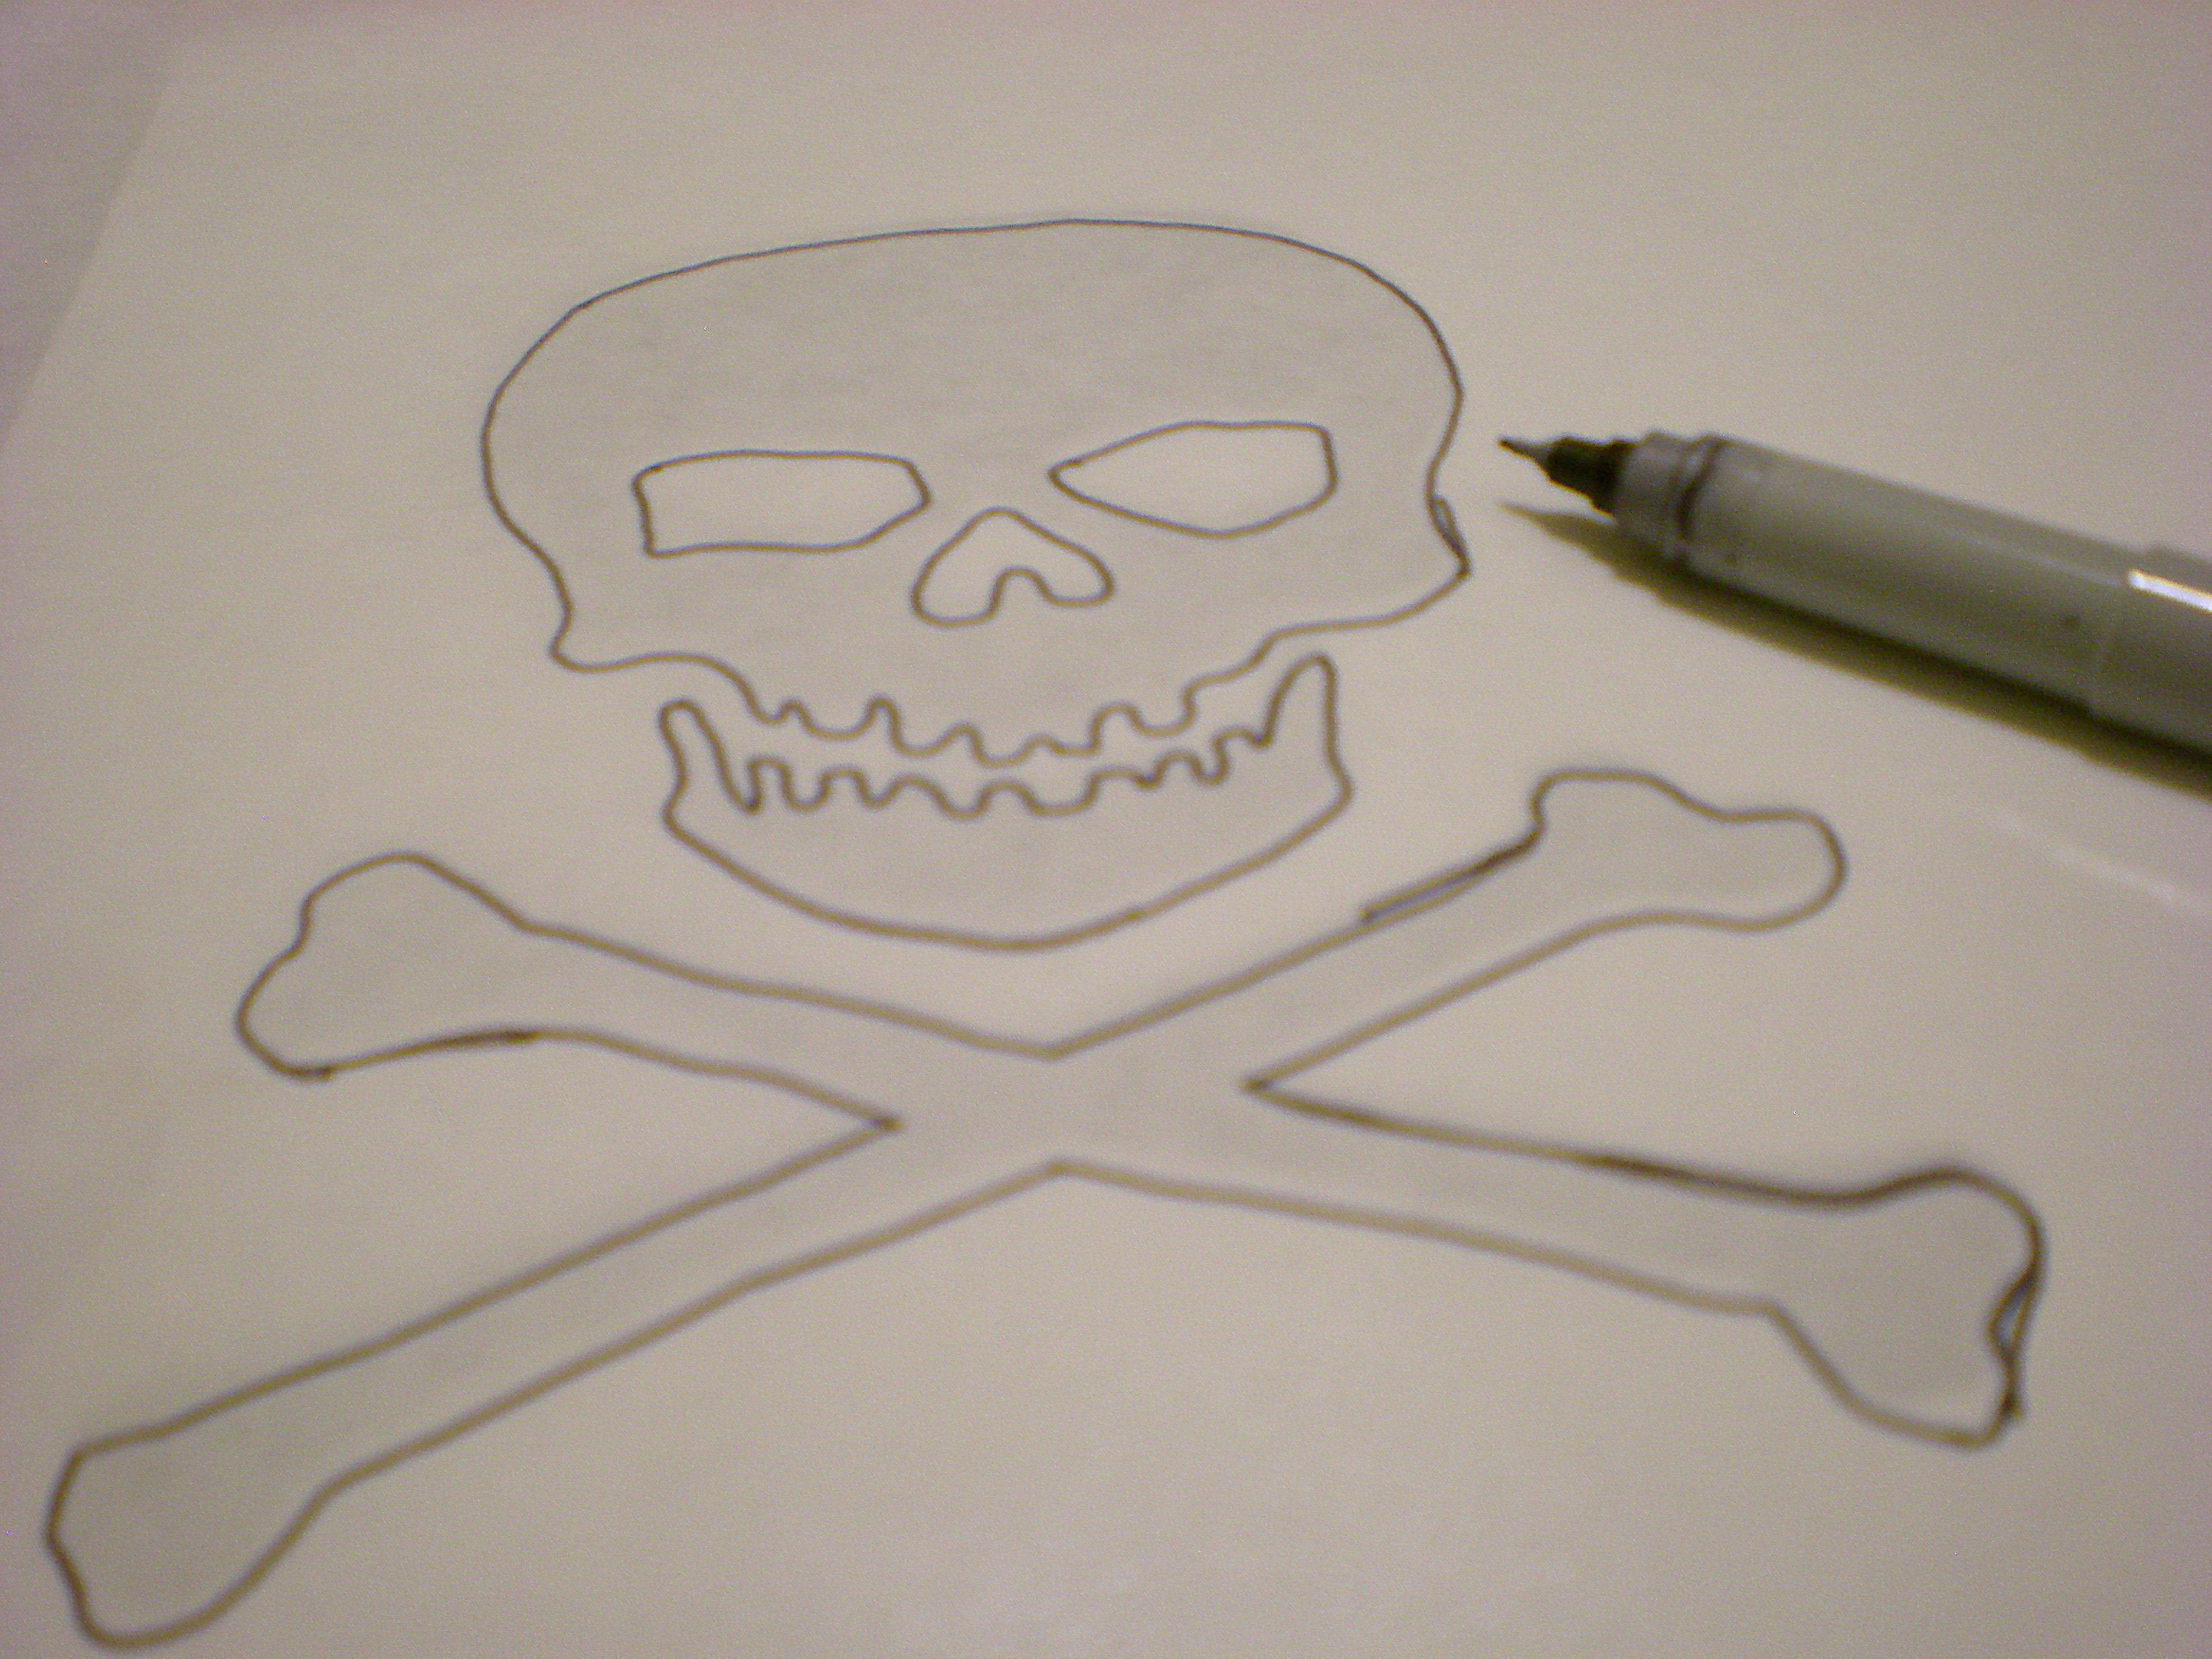
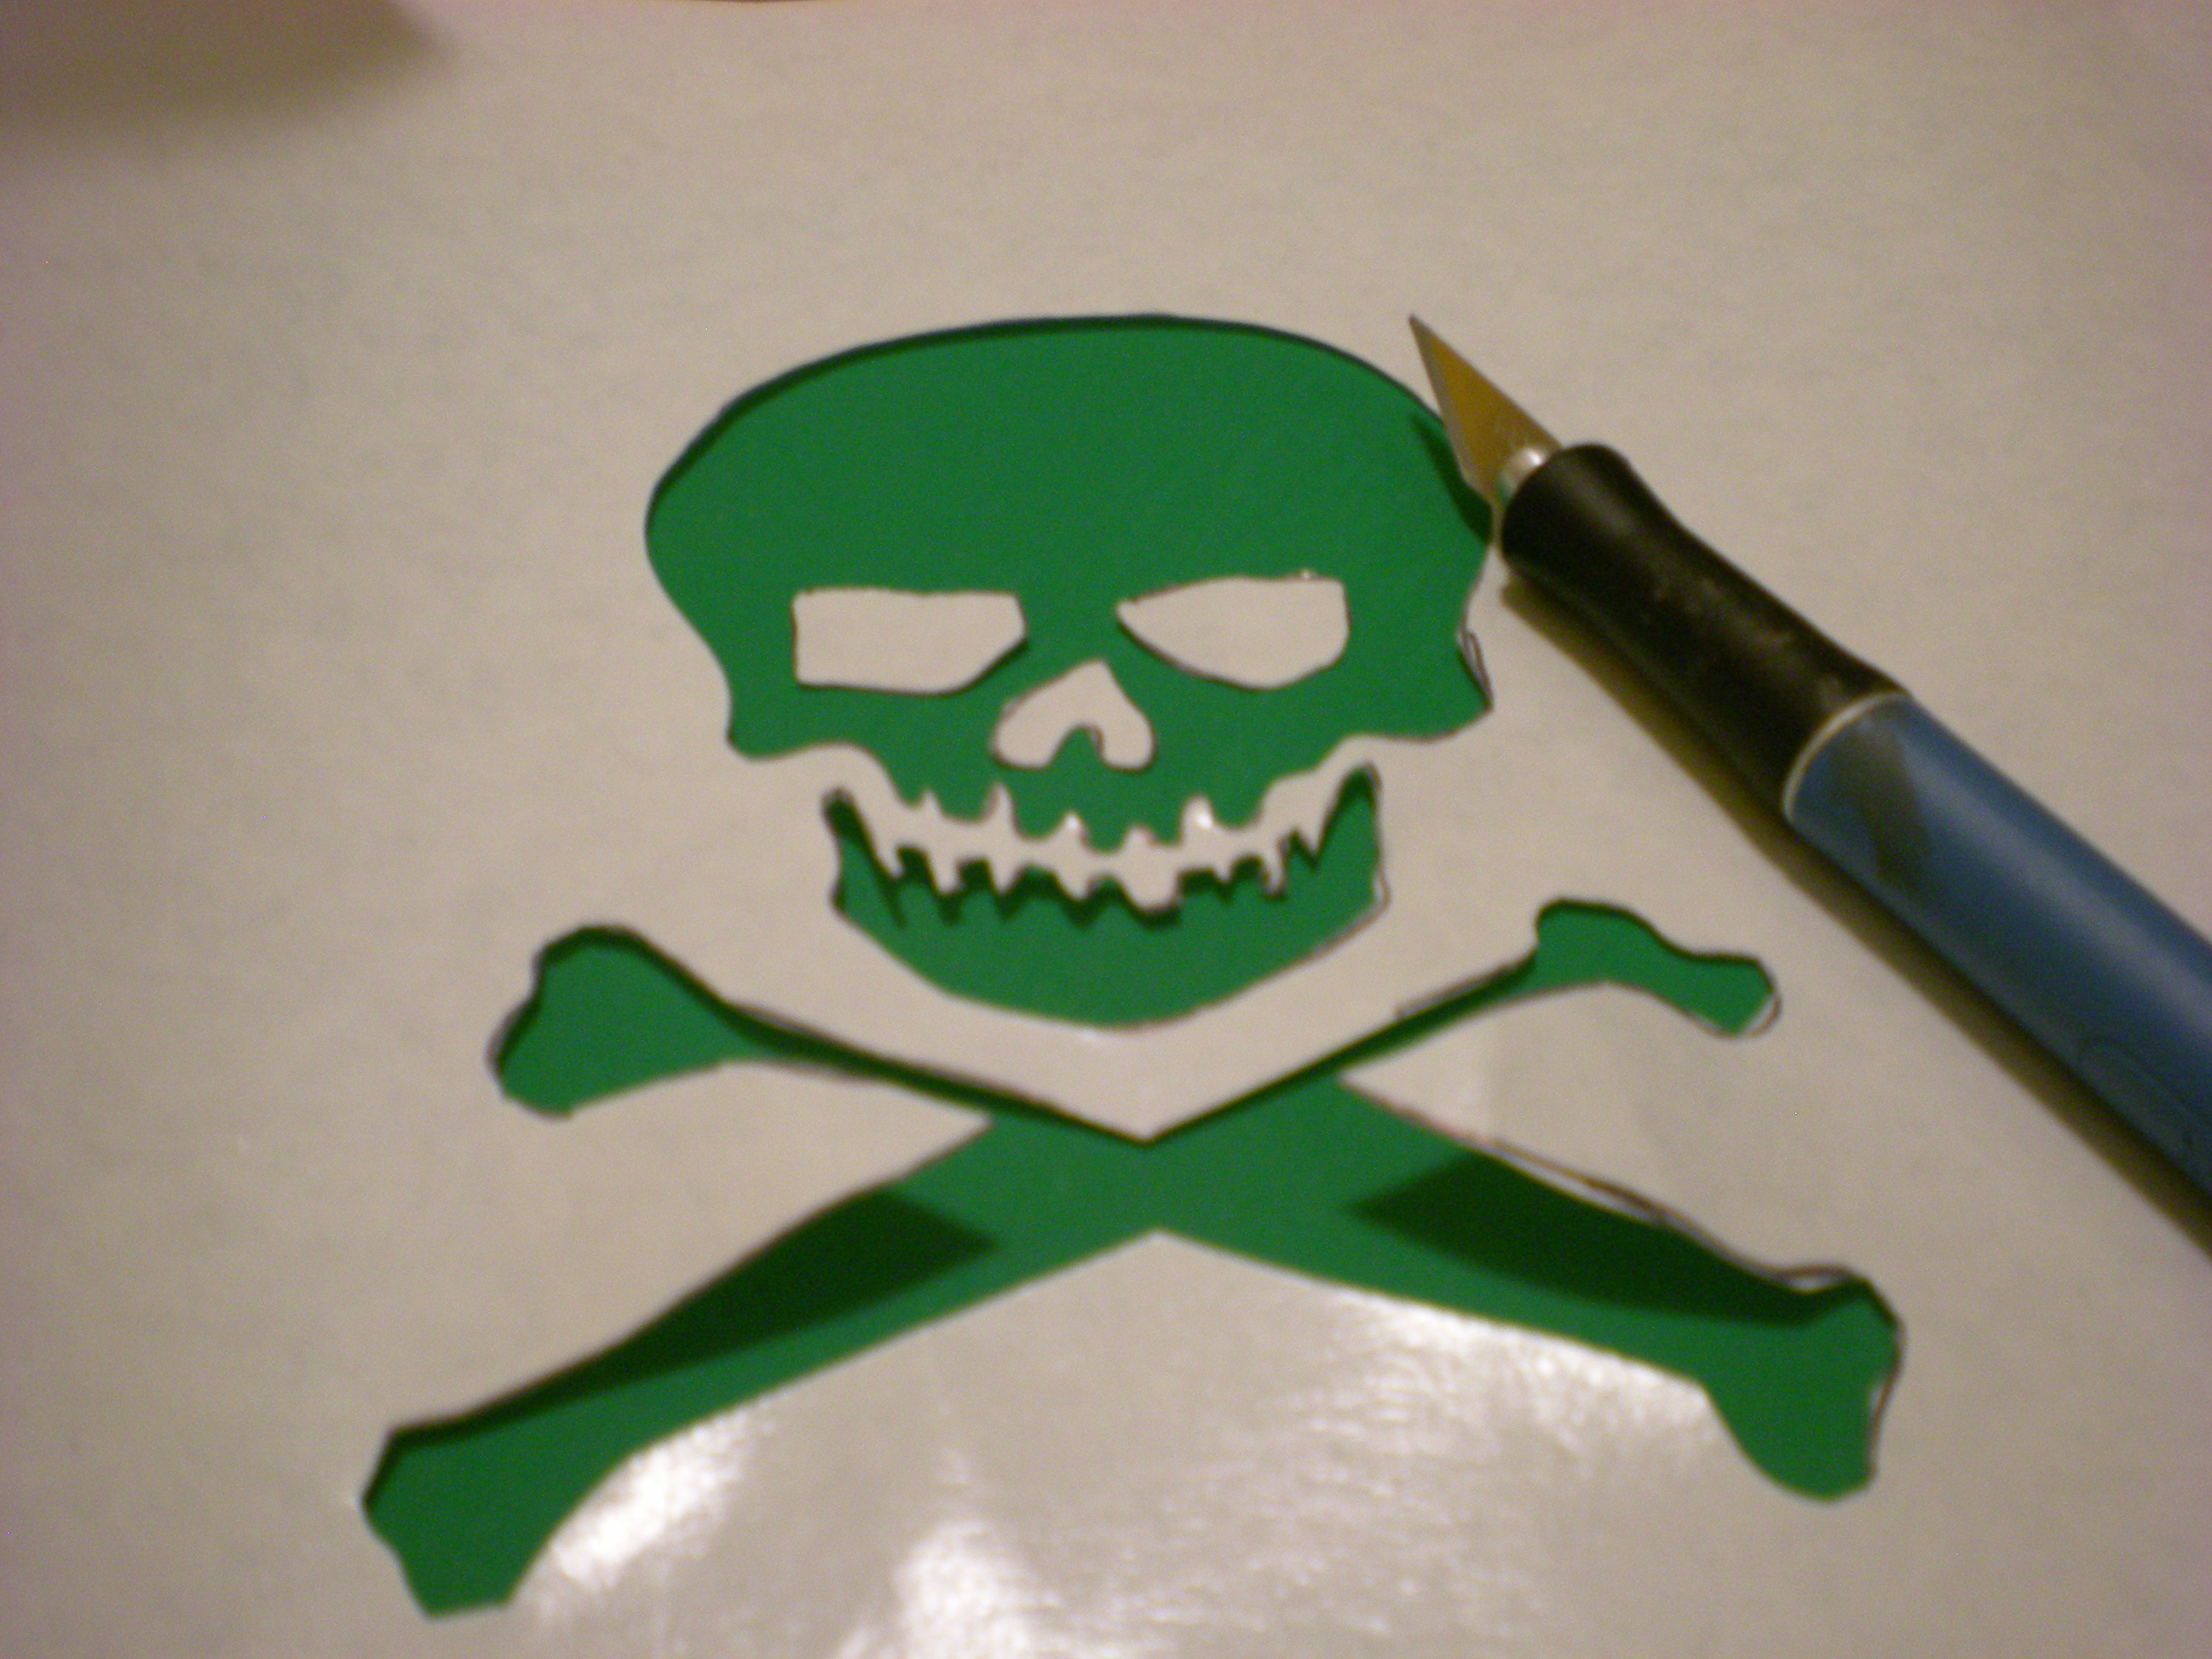
Trace the design onto a sheet of freezer paper.


Then use the craft knife to carefully cut out the shapes.


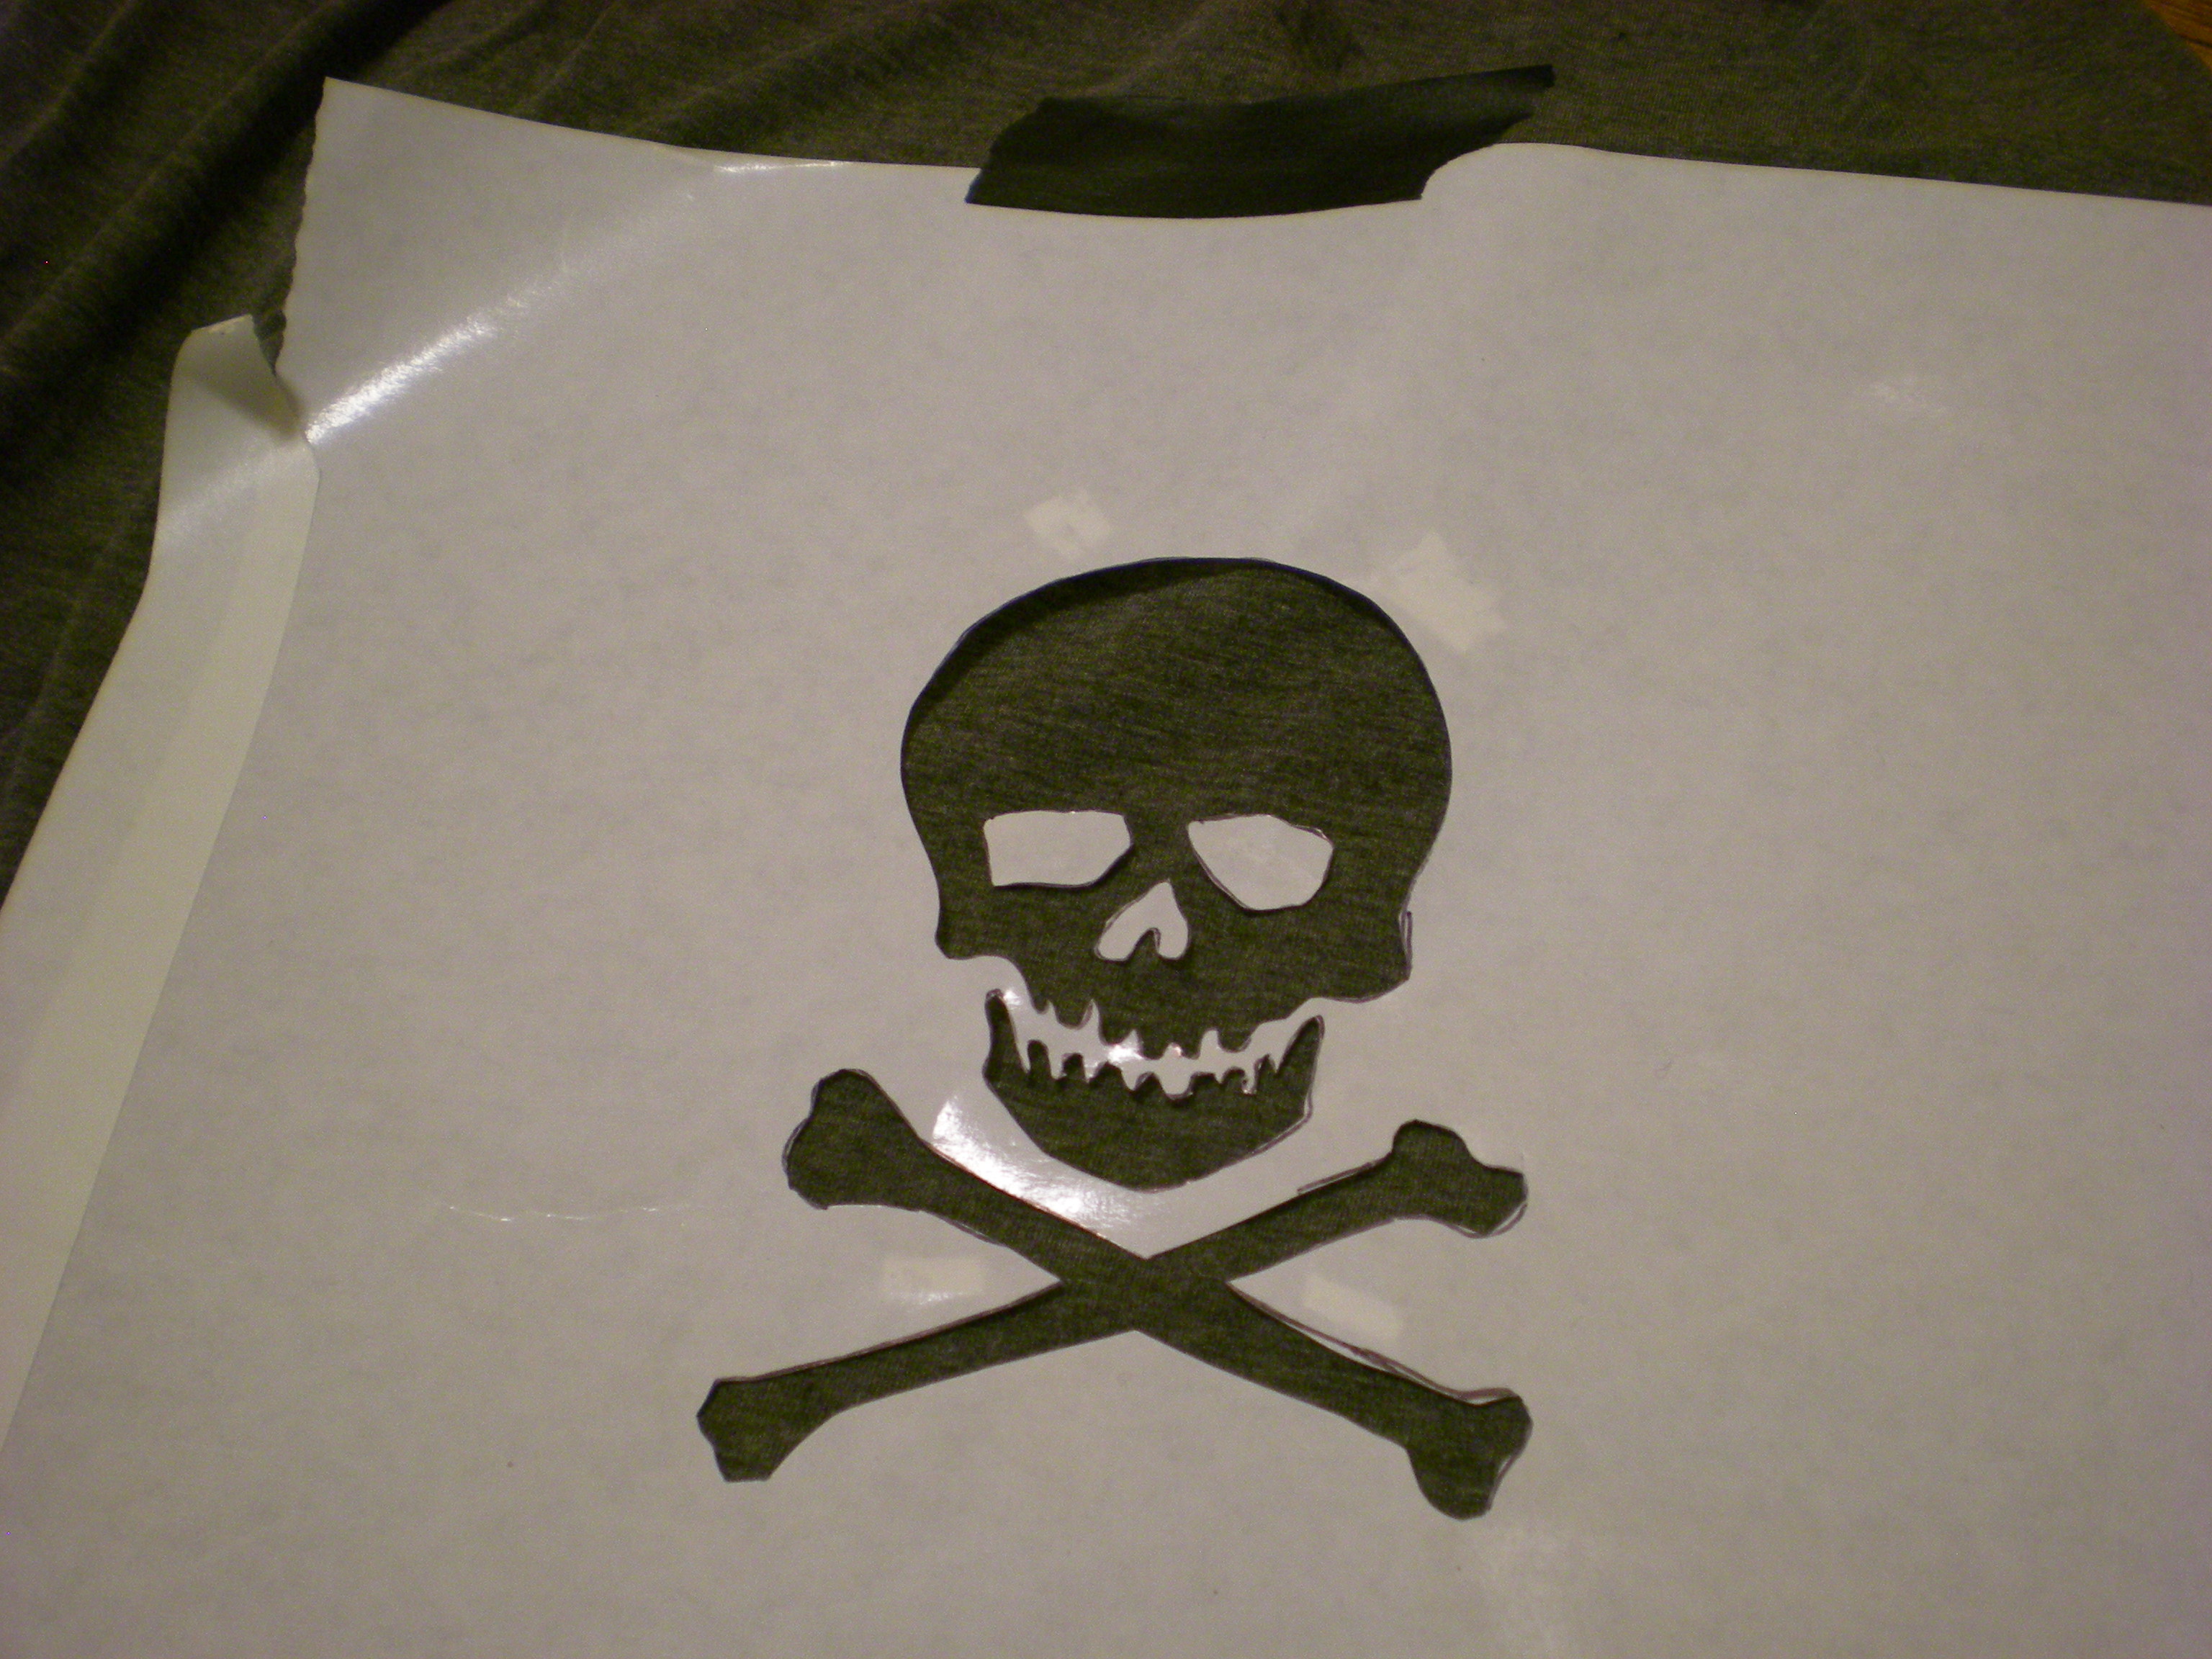
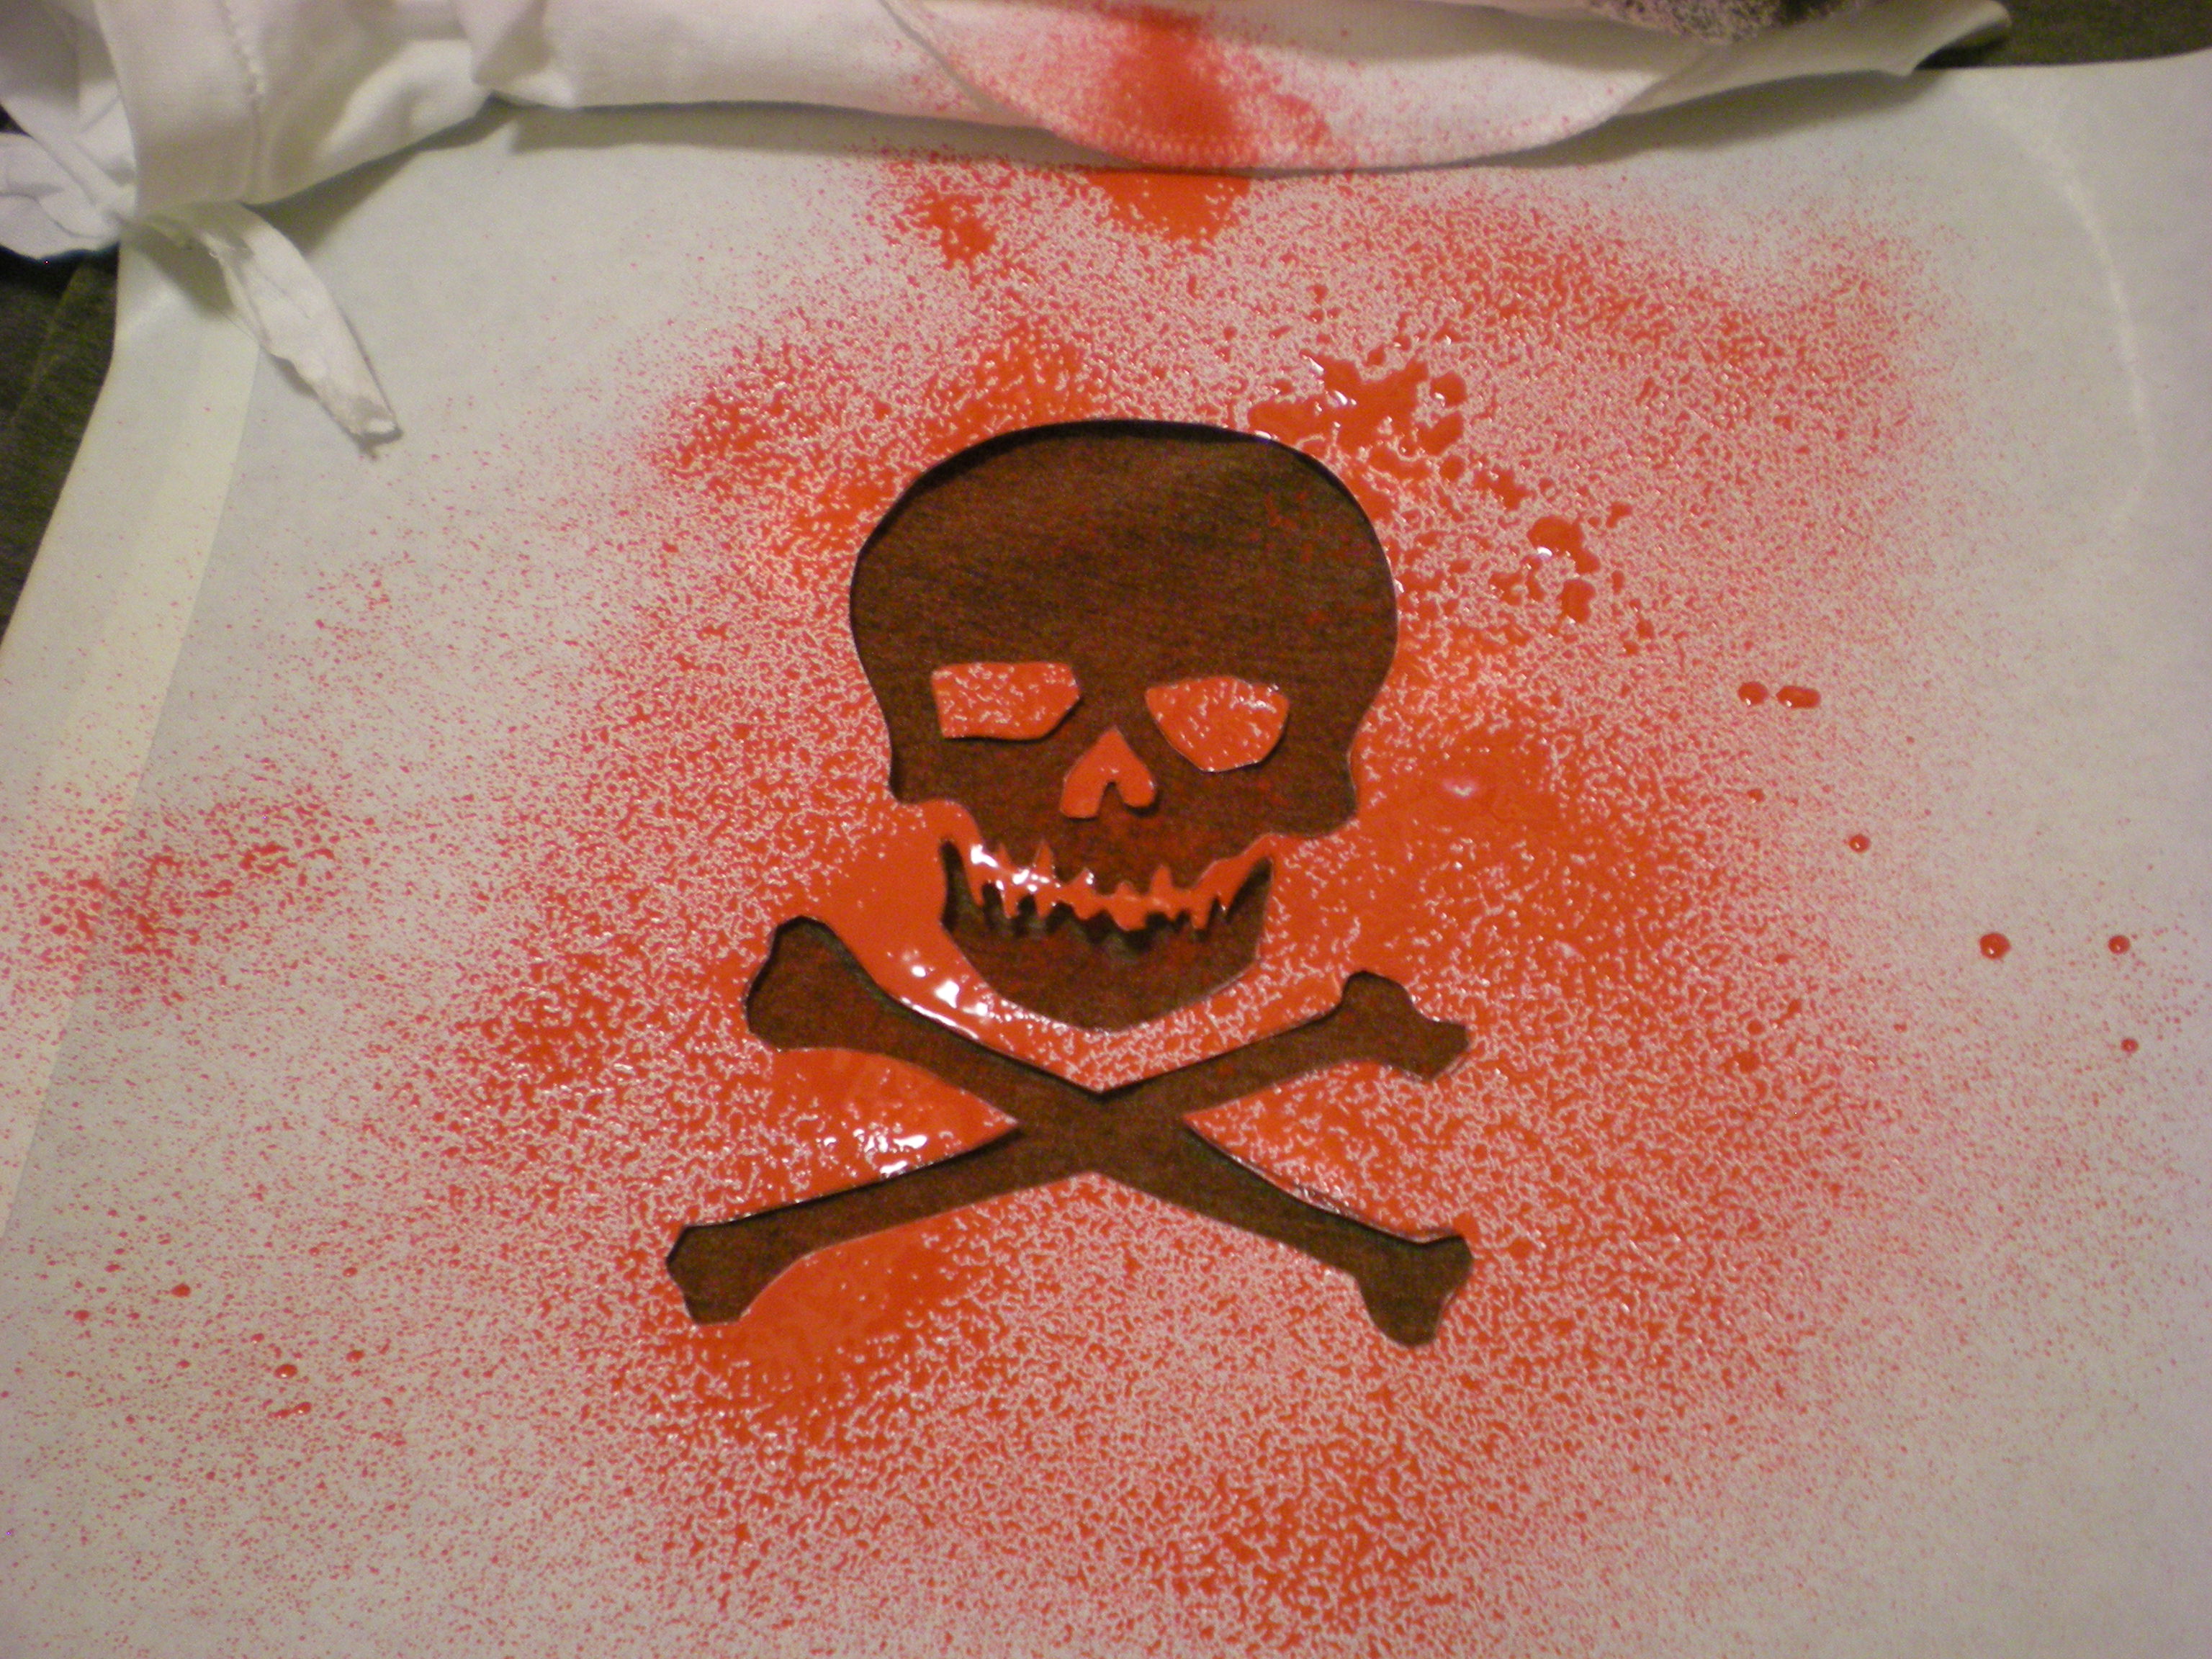
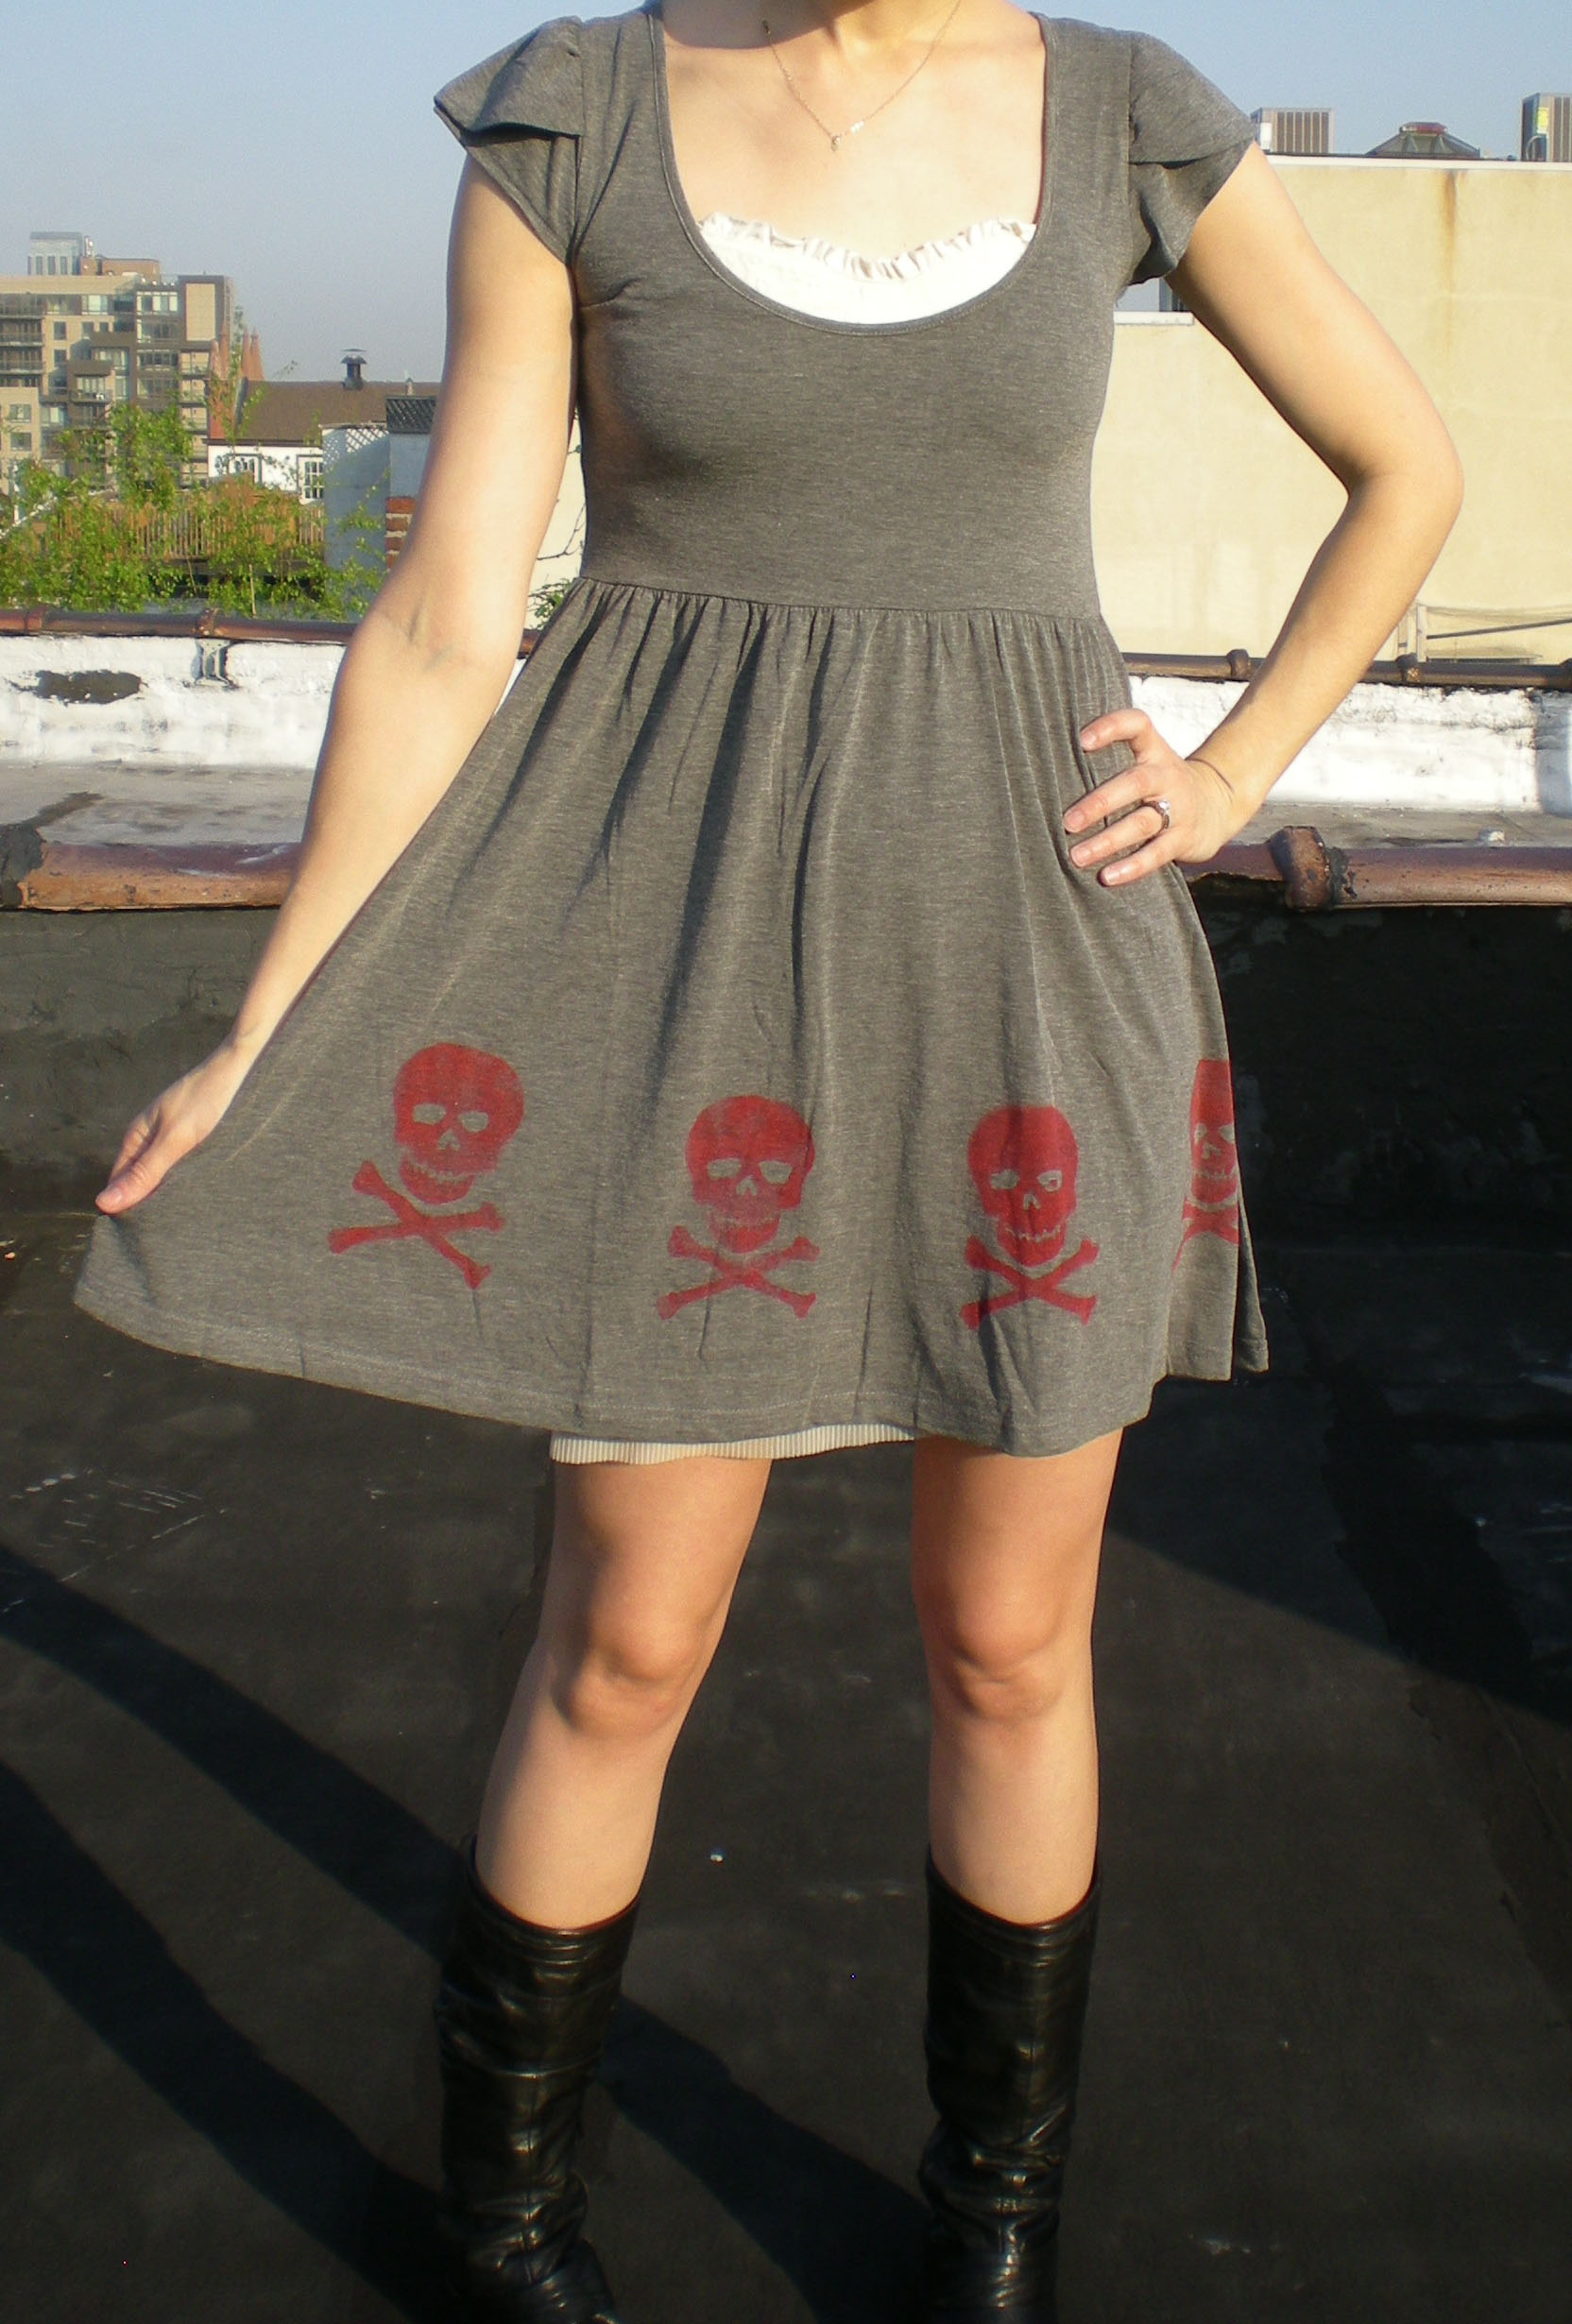
Tape the stencil onto the fabric surface (I placed it along the hem). Don't forget to place any loose pieces (in this case, the eye sockets and nose cavity!). I sprayed red spray paint on the charcoal gray surface and reused the stencil to create a pattern around the bottom of the skirt.


Let each image dry slightly before moving the stencil to another part of the fabric.


Then let the image dry completely before spraying it on the back of the garment. Let all the paint dry completely before you try it on!


3. Bubble, Bubble, Toil, and Trouble

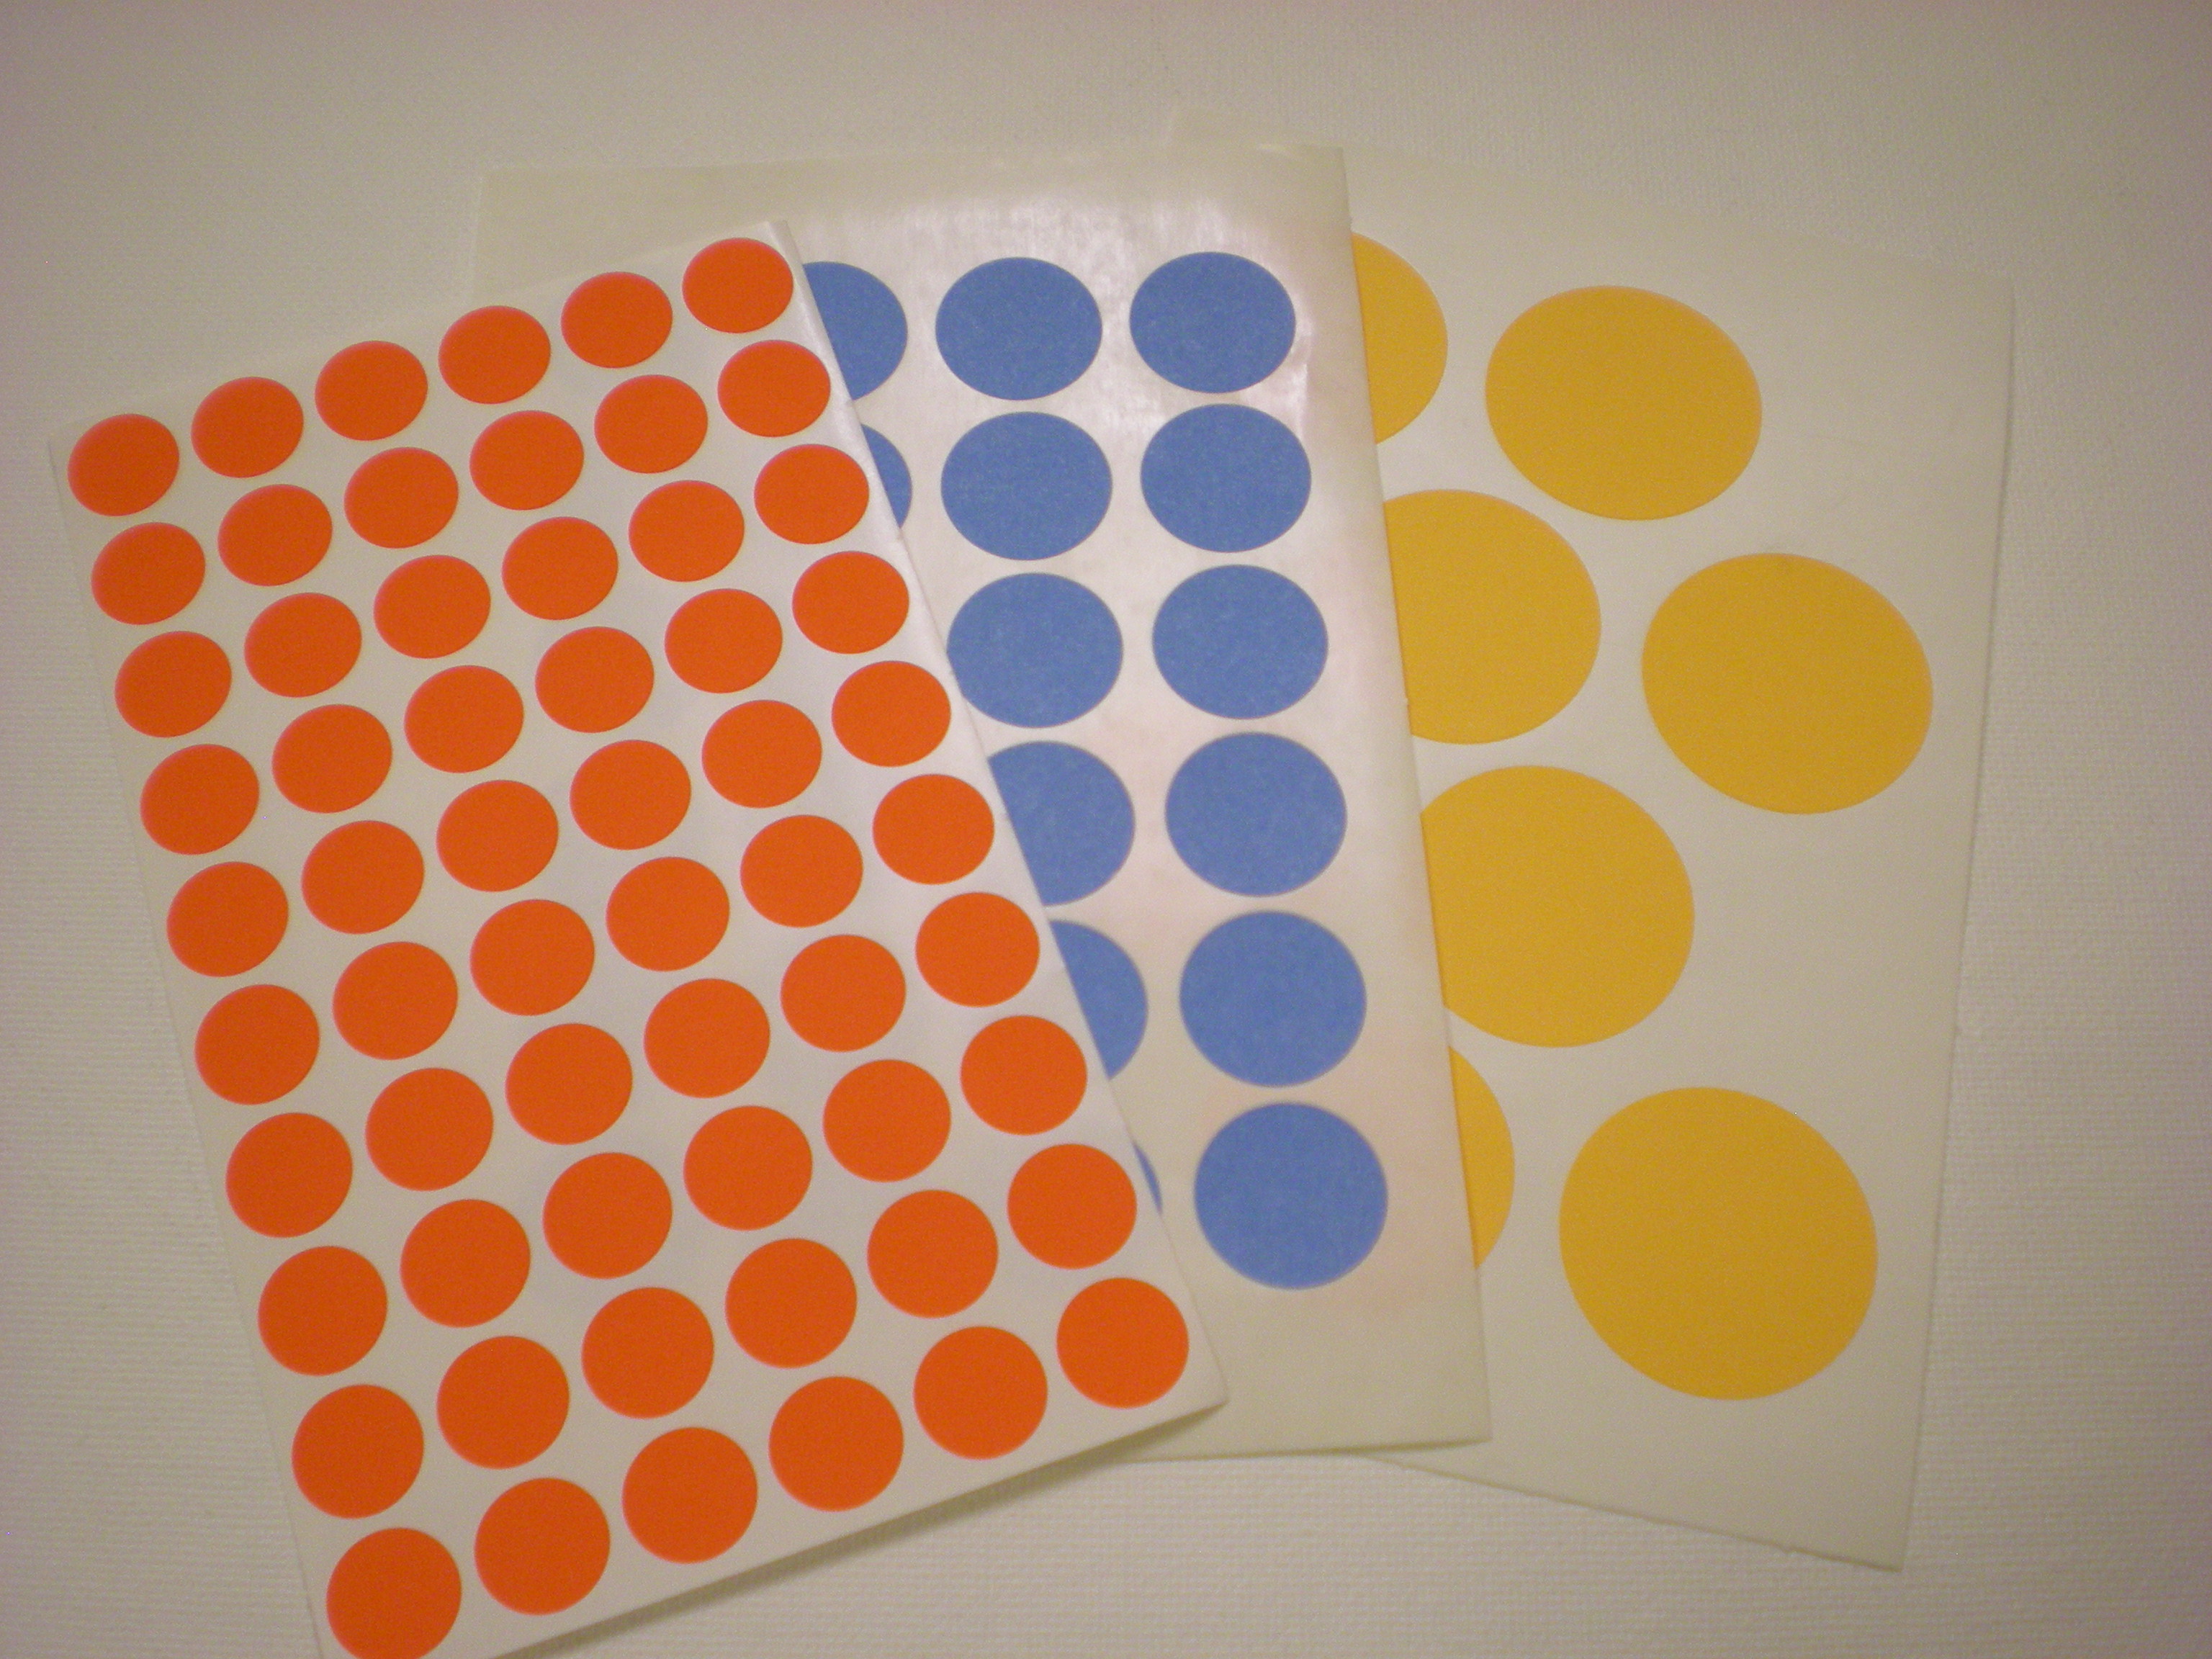
Secret weapon from around the house: Map or garage sale dot stickers in different sizes.

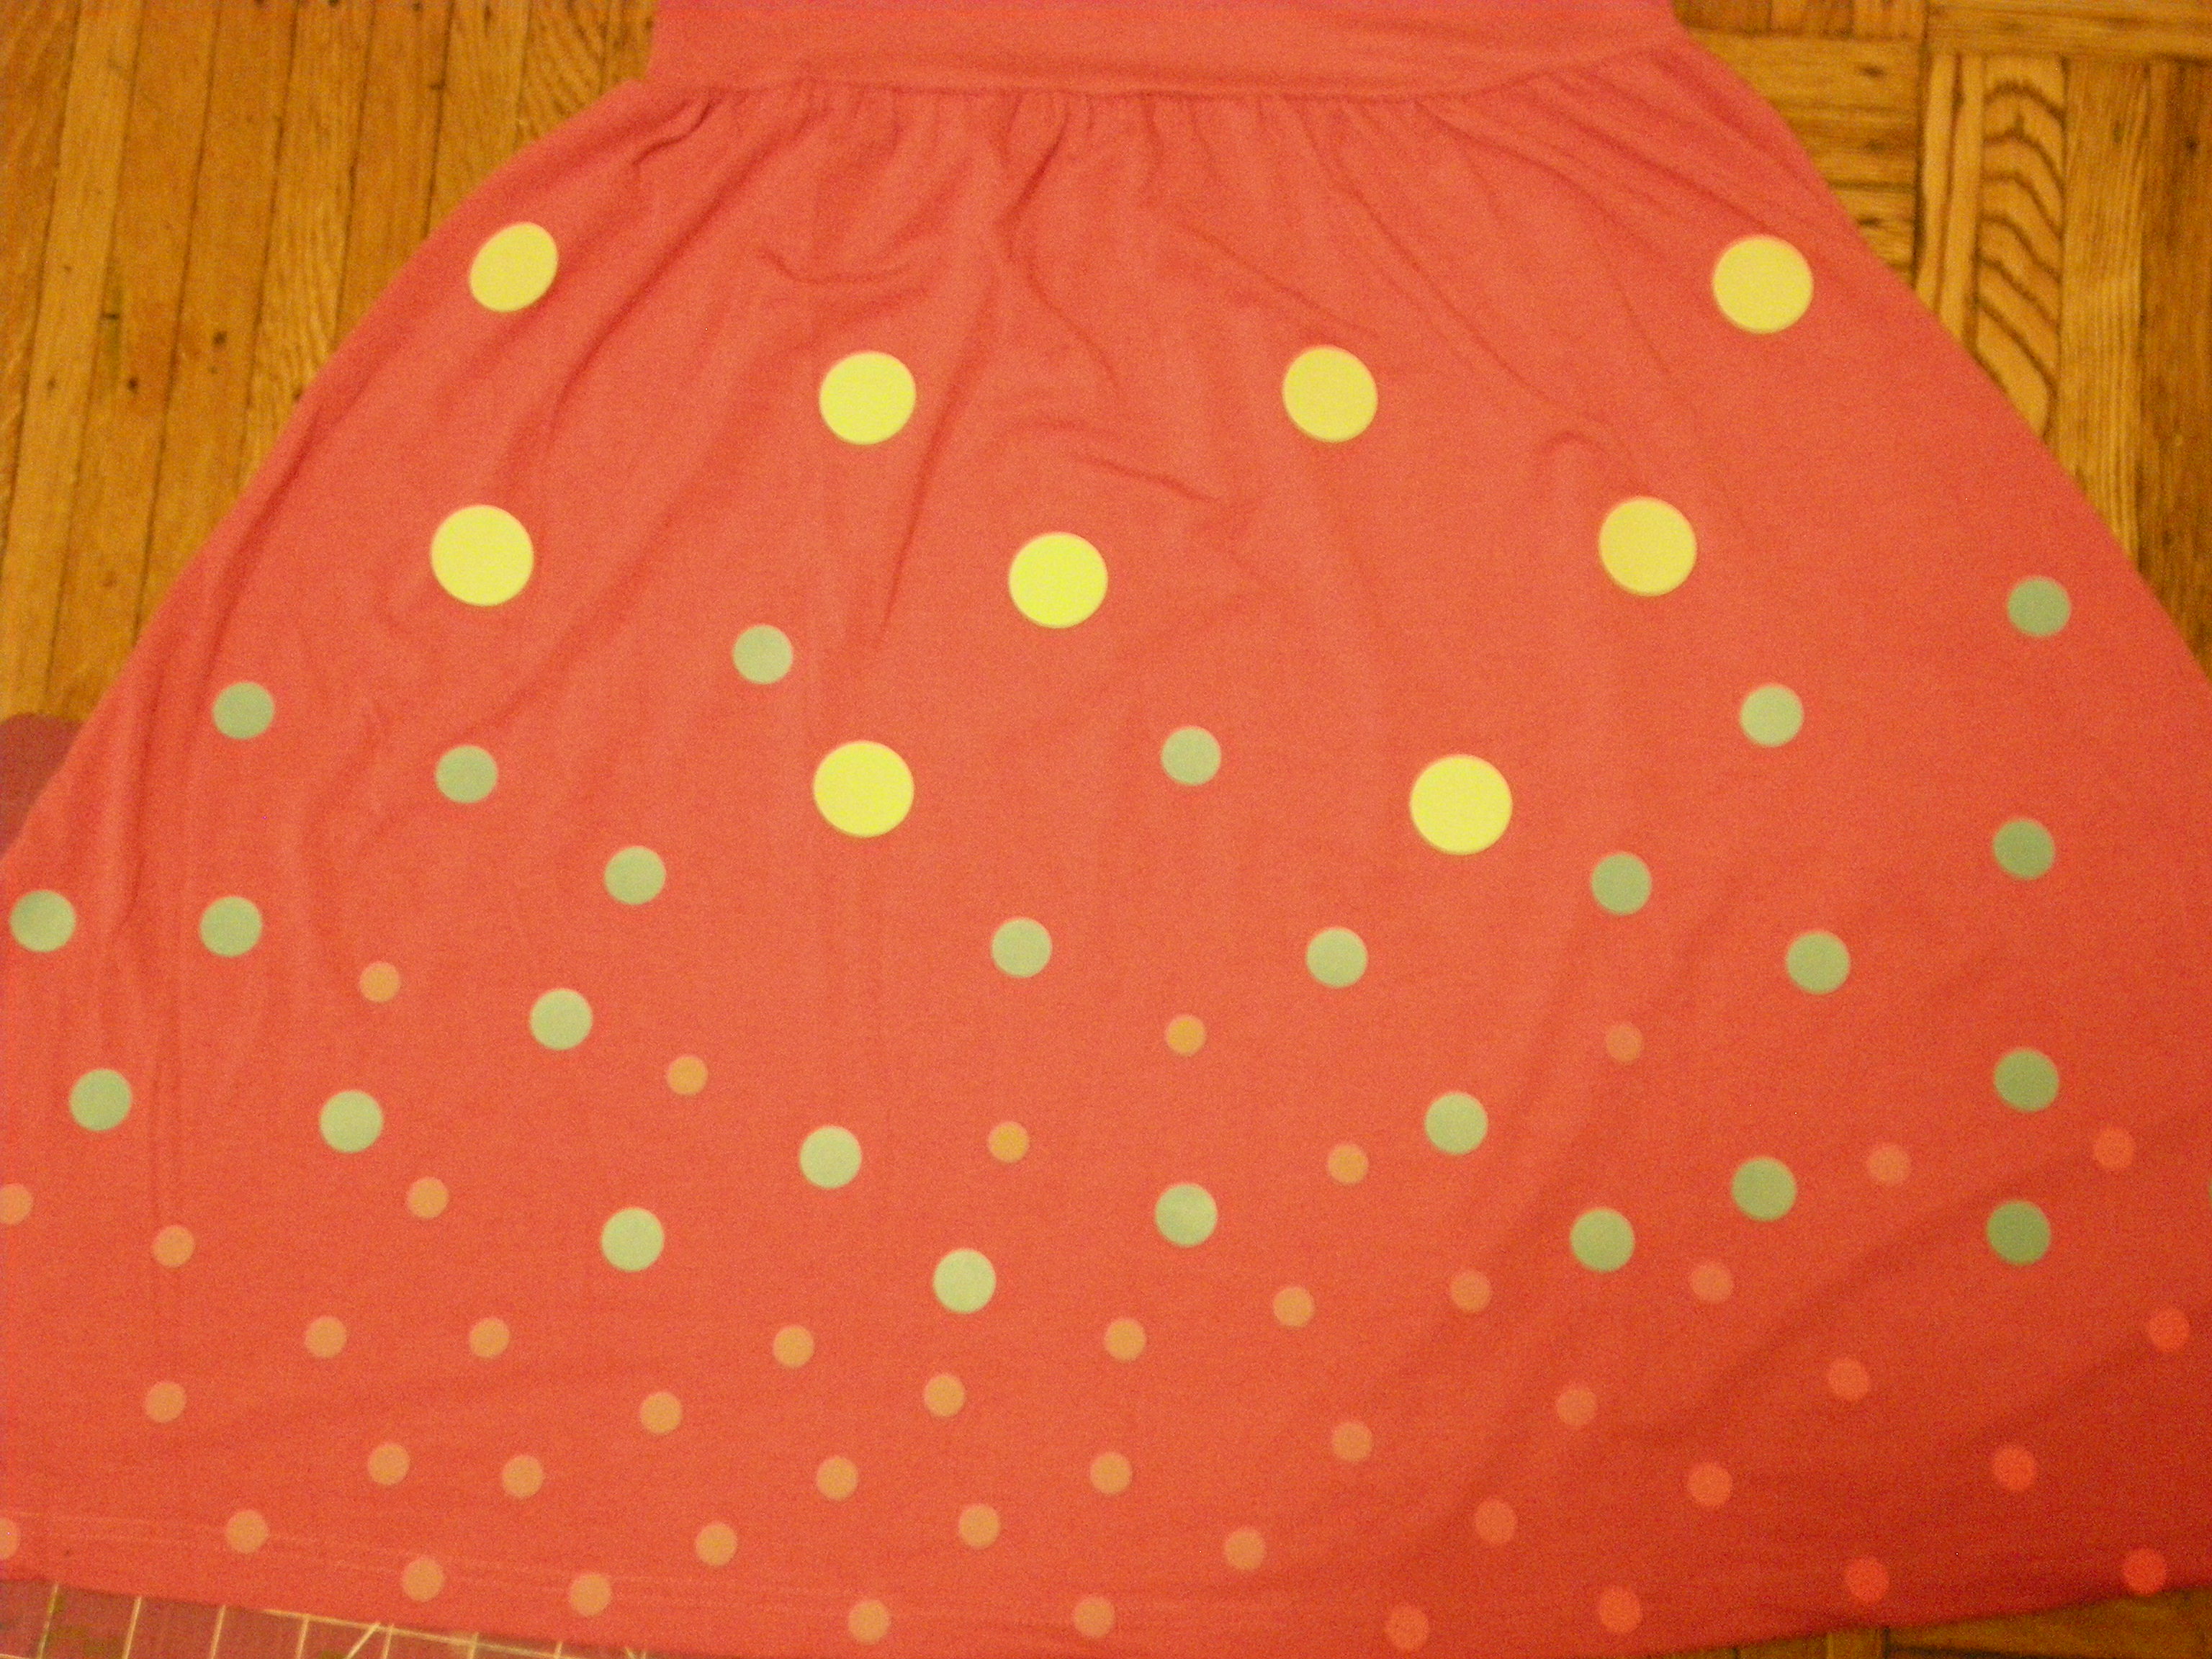
These stickers have so much potential. Beyond mixing up the sizes, you can arrange them into patterns, overlap them, use the surrounding sticker bits to create reverse dots, and so on. I used three sizes (3/4", 1 1/4", and 1 3/4").


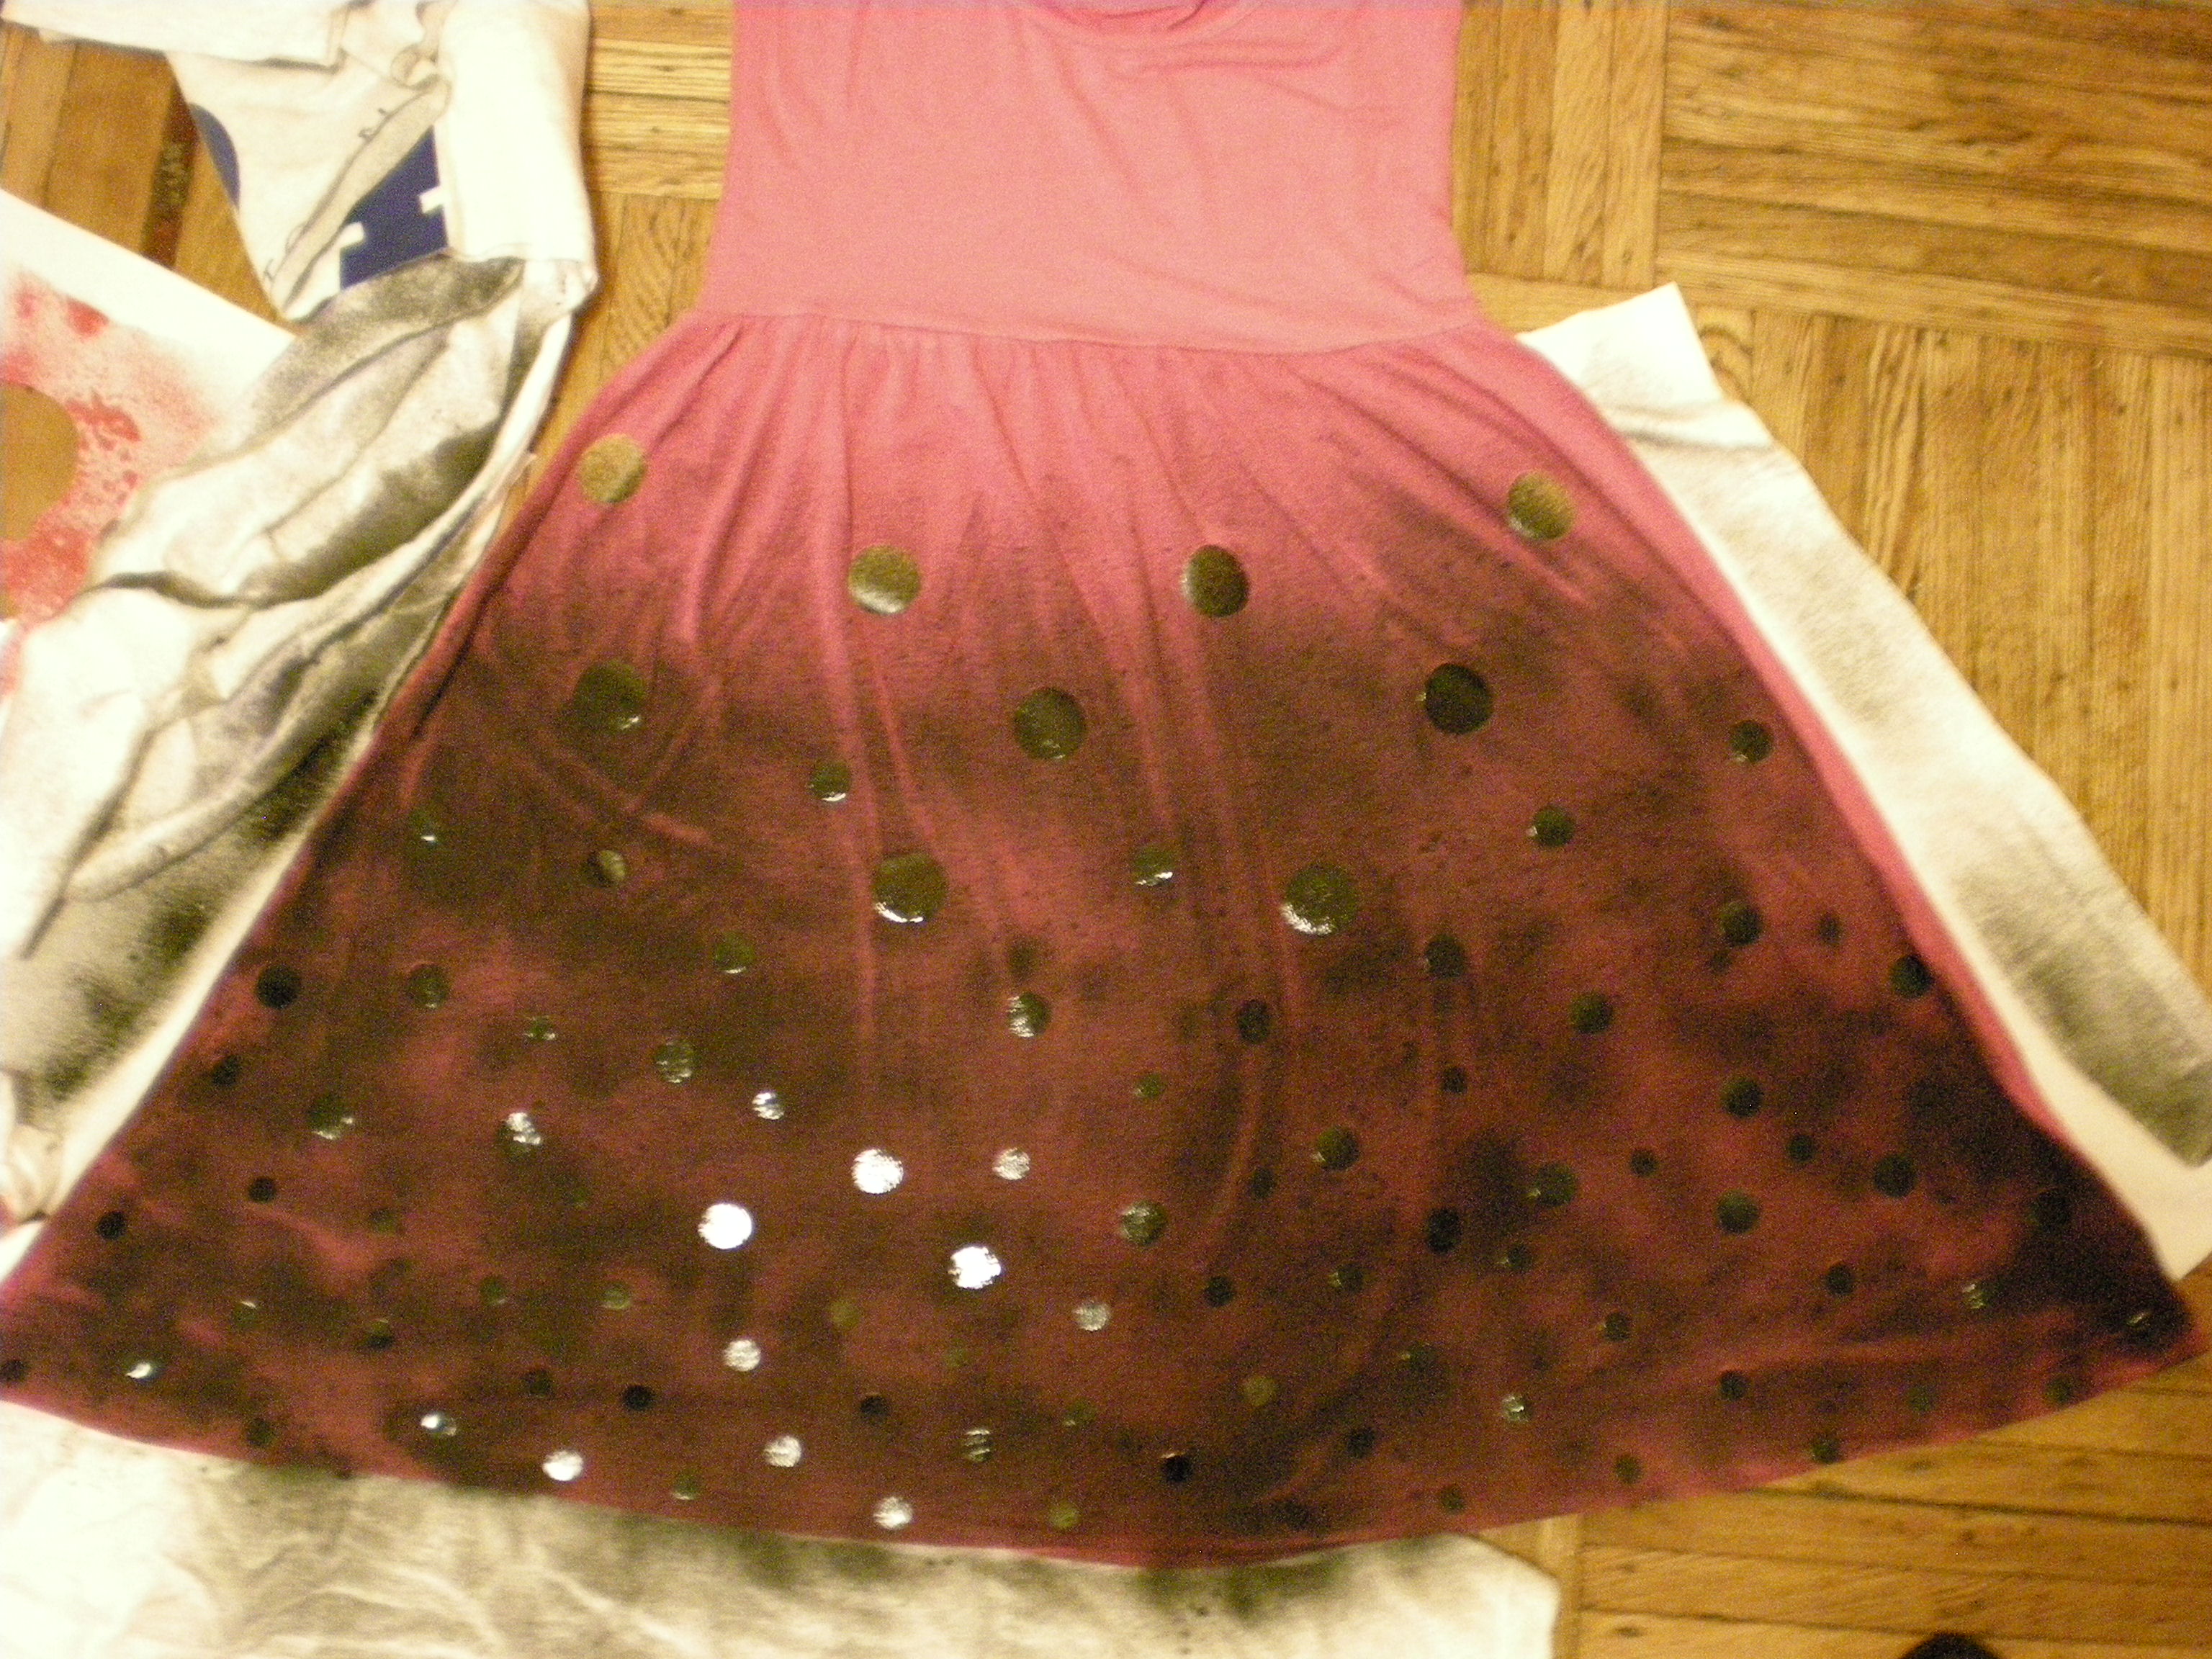
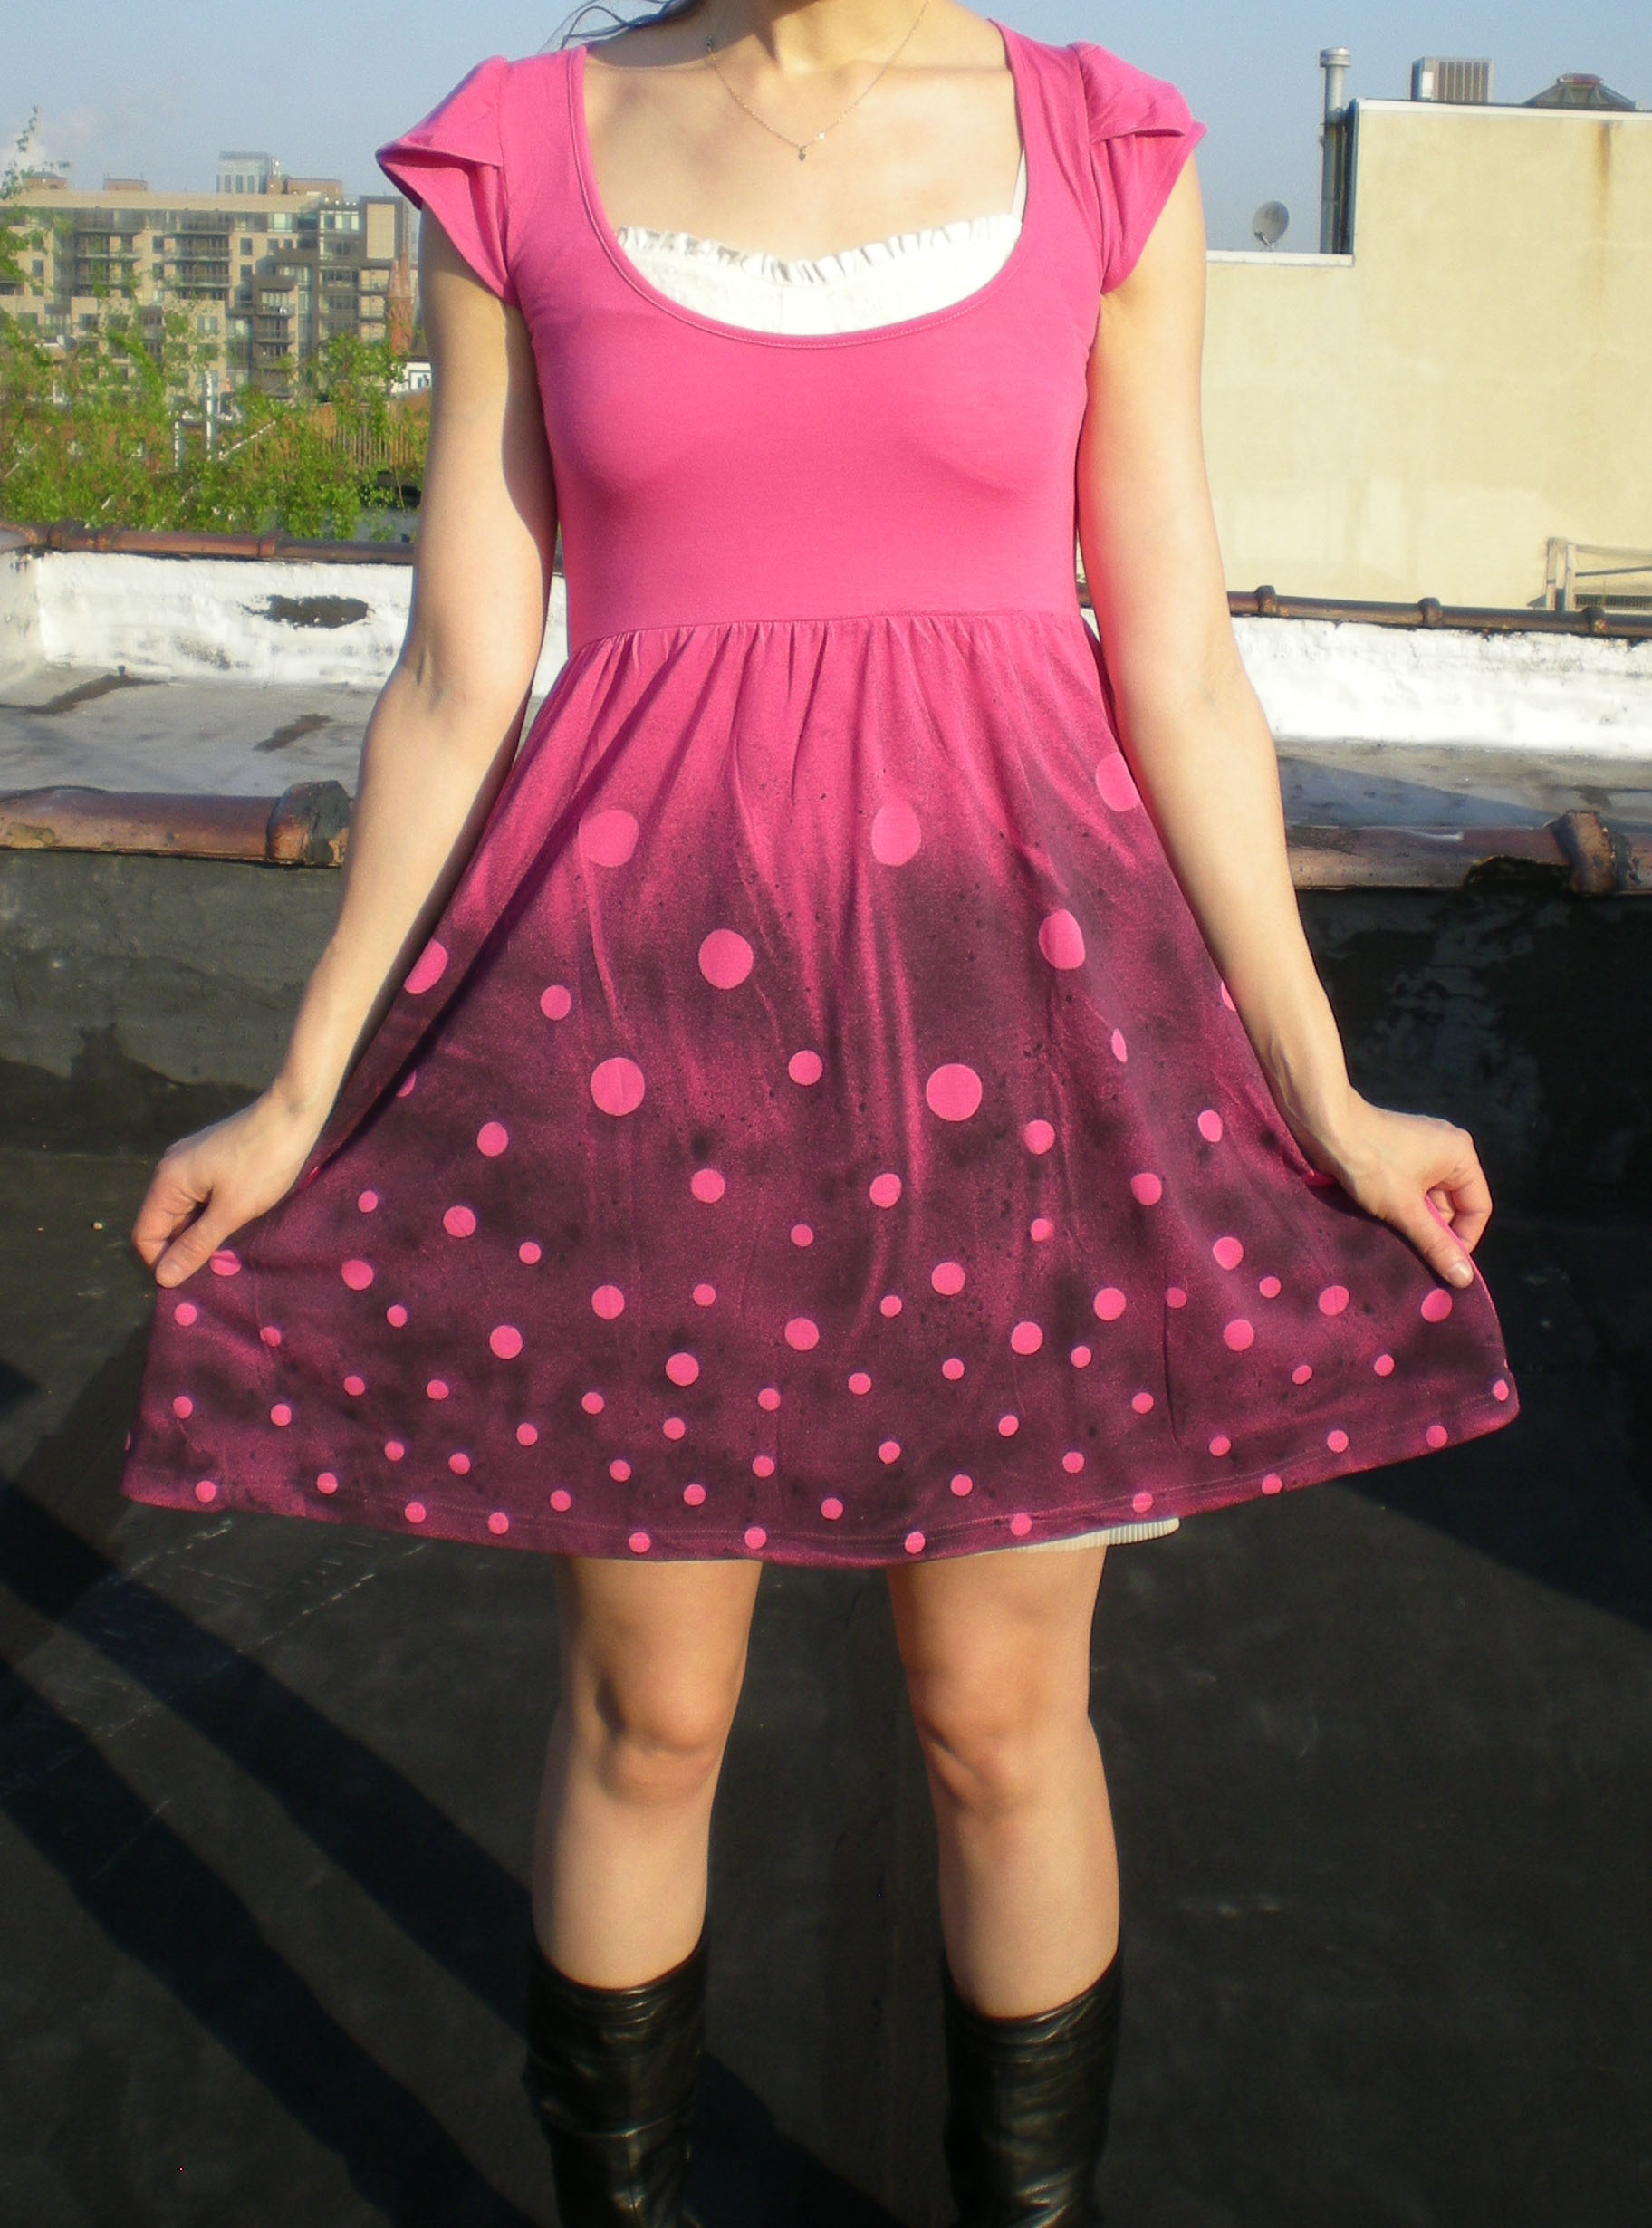
To create the appearance of bubbles rising up to the surface, I started with closely spaced small dots at the hem, then transitioned to more widely spaced medium dots, with the large dots finishing below the bodice.


Mask all the parts of the garment you don't want to color. I used black spray paint, fading out at the top, to make the pink really shine through! I also allowed the naturally occurring wrinkles caused by the gathered skirt to form "cracks" in the paint.


Let the paint dry completely before you put it on. You that you've made your bubbles, go out and make some trouble!


4. Yipes Stripes!

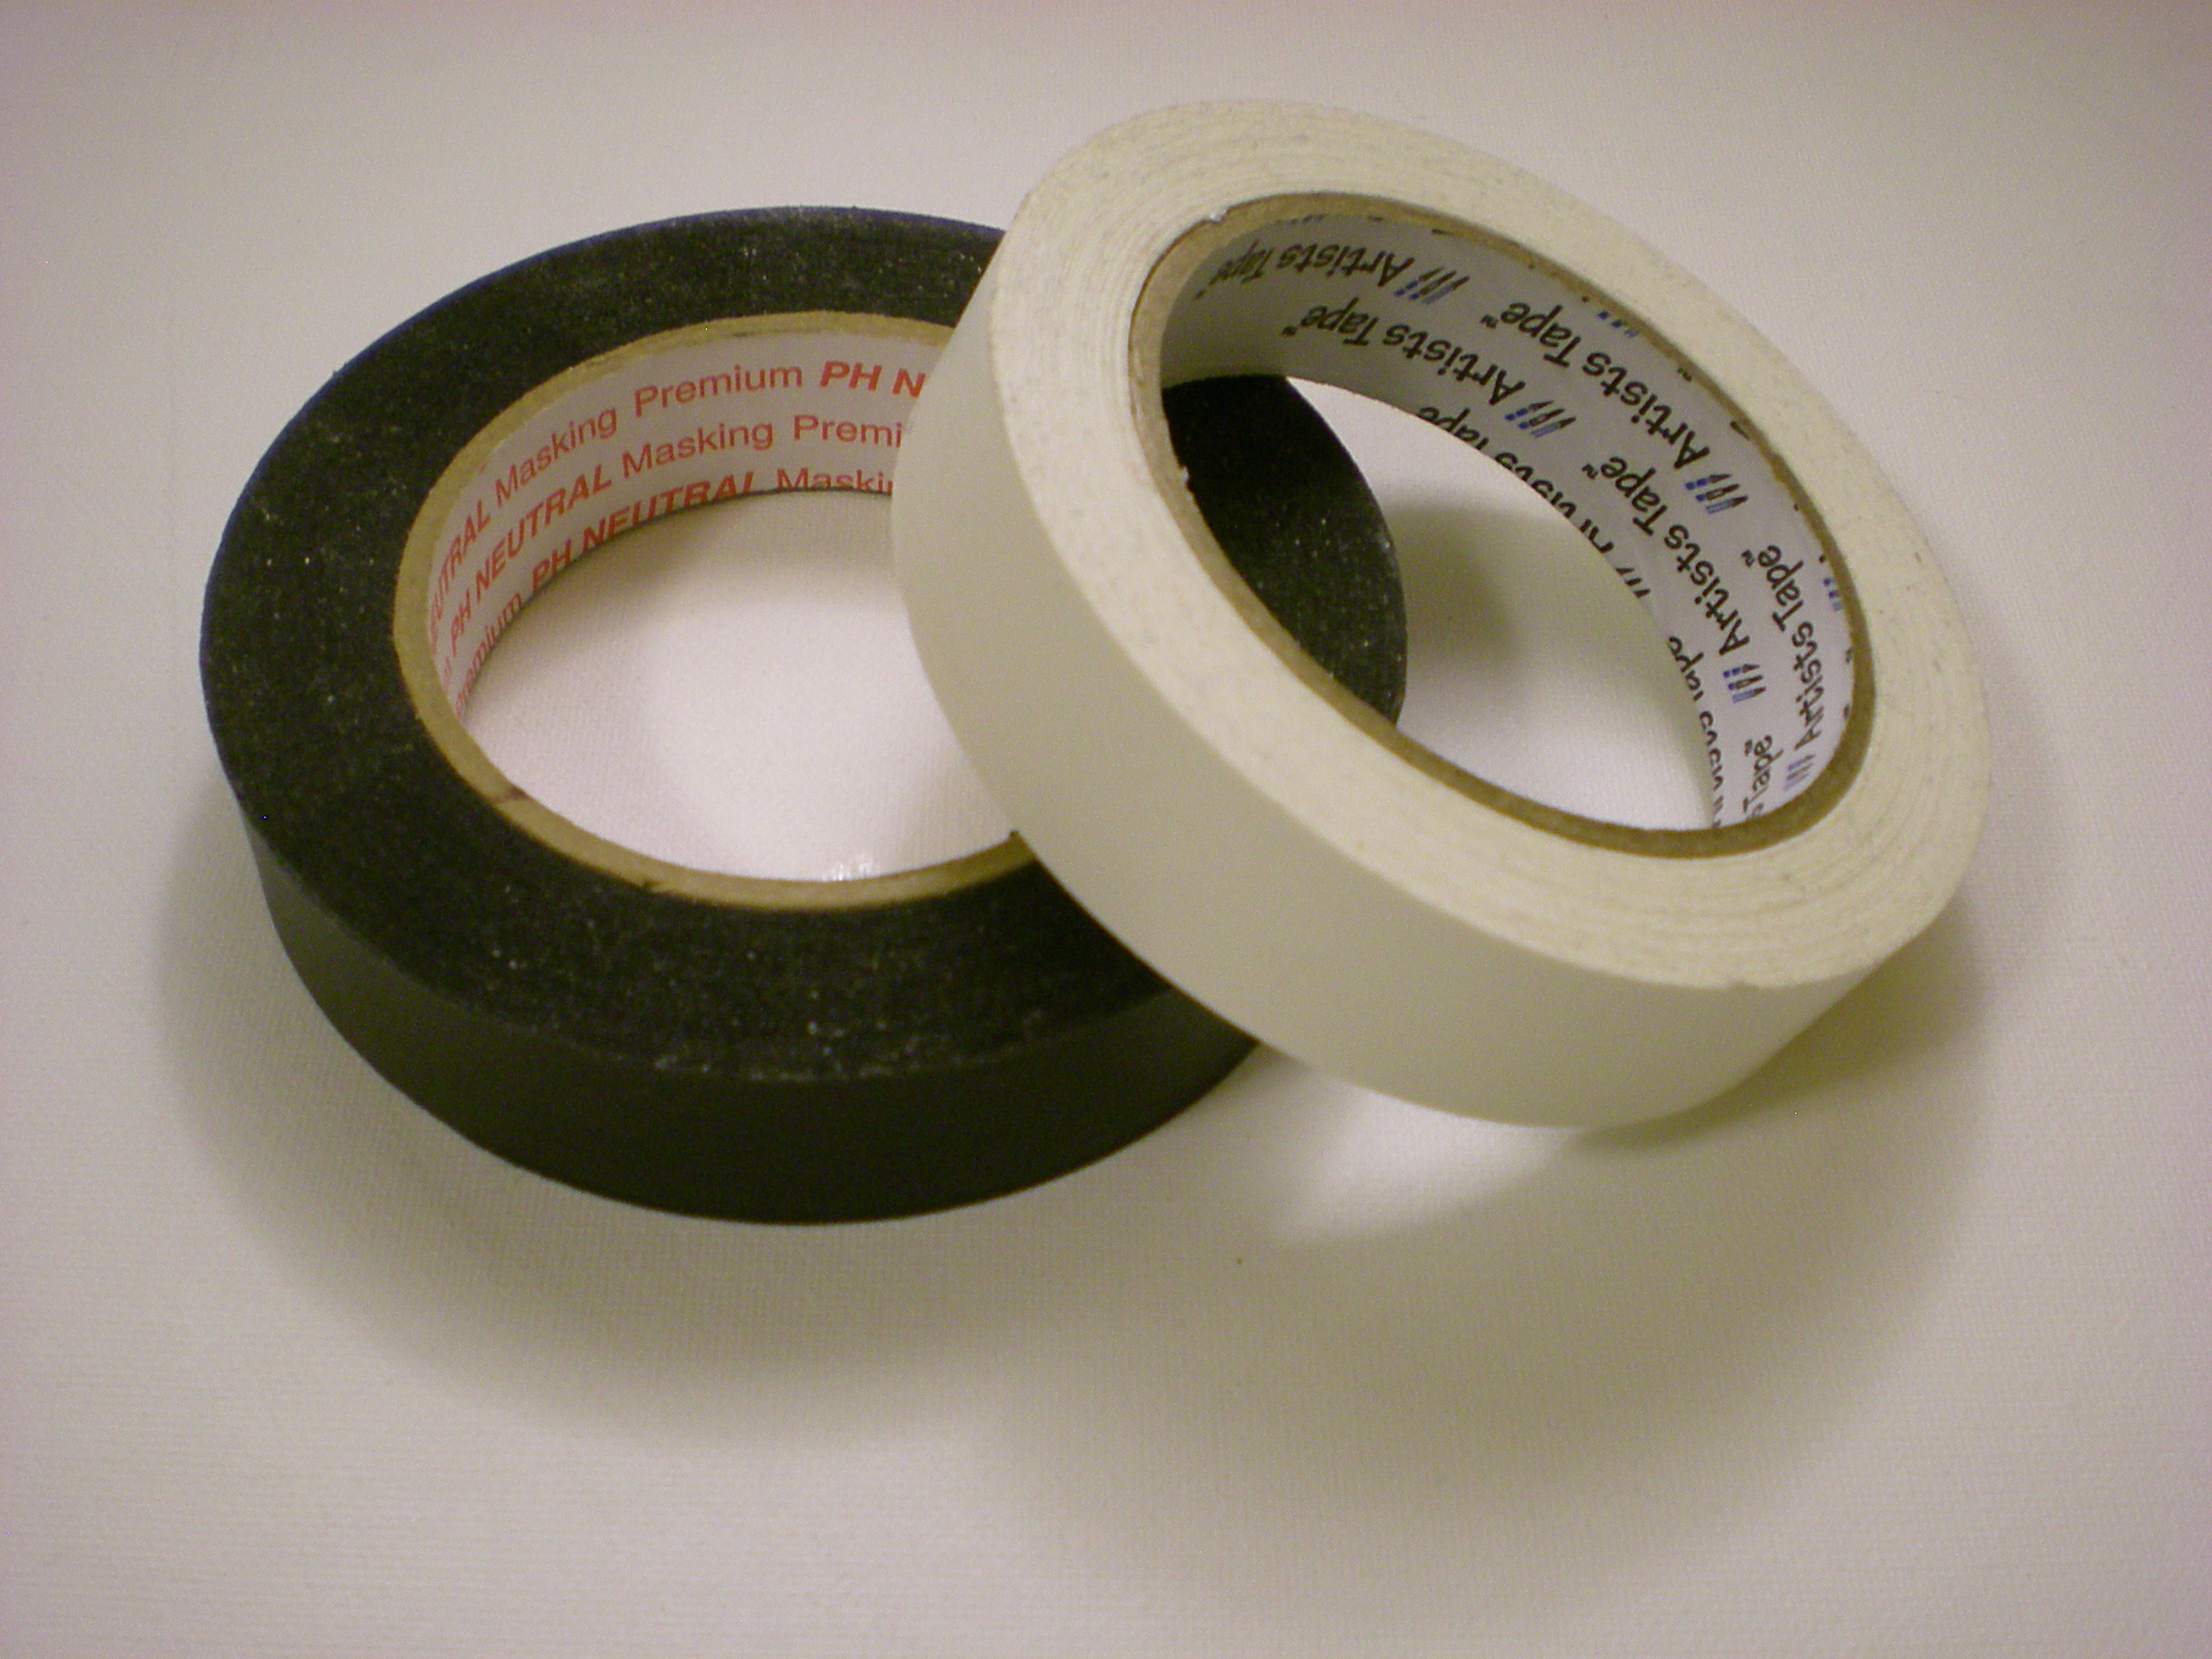
Secret weapon from around the house: Masking or Artists tape

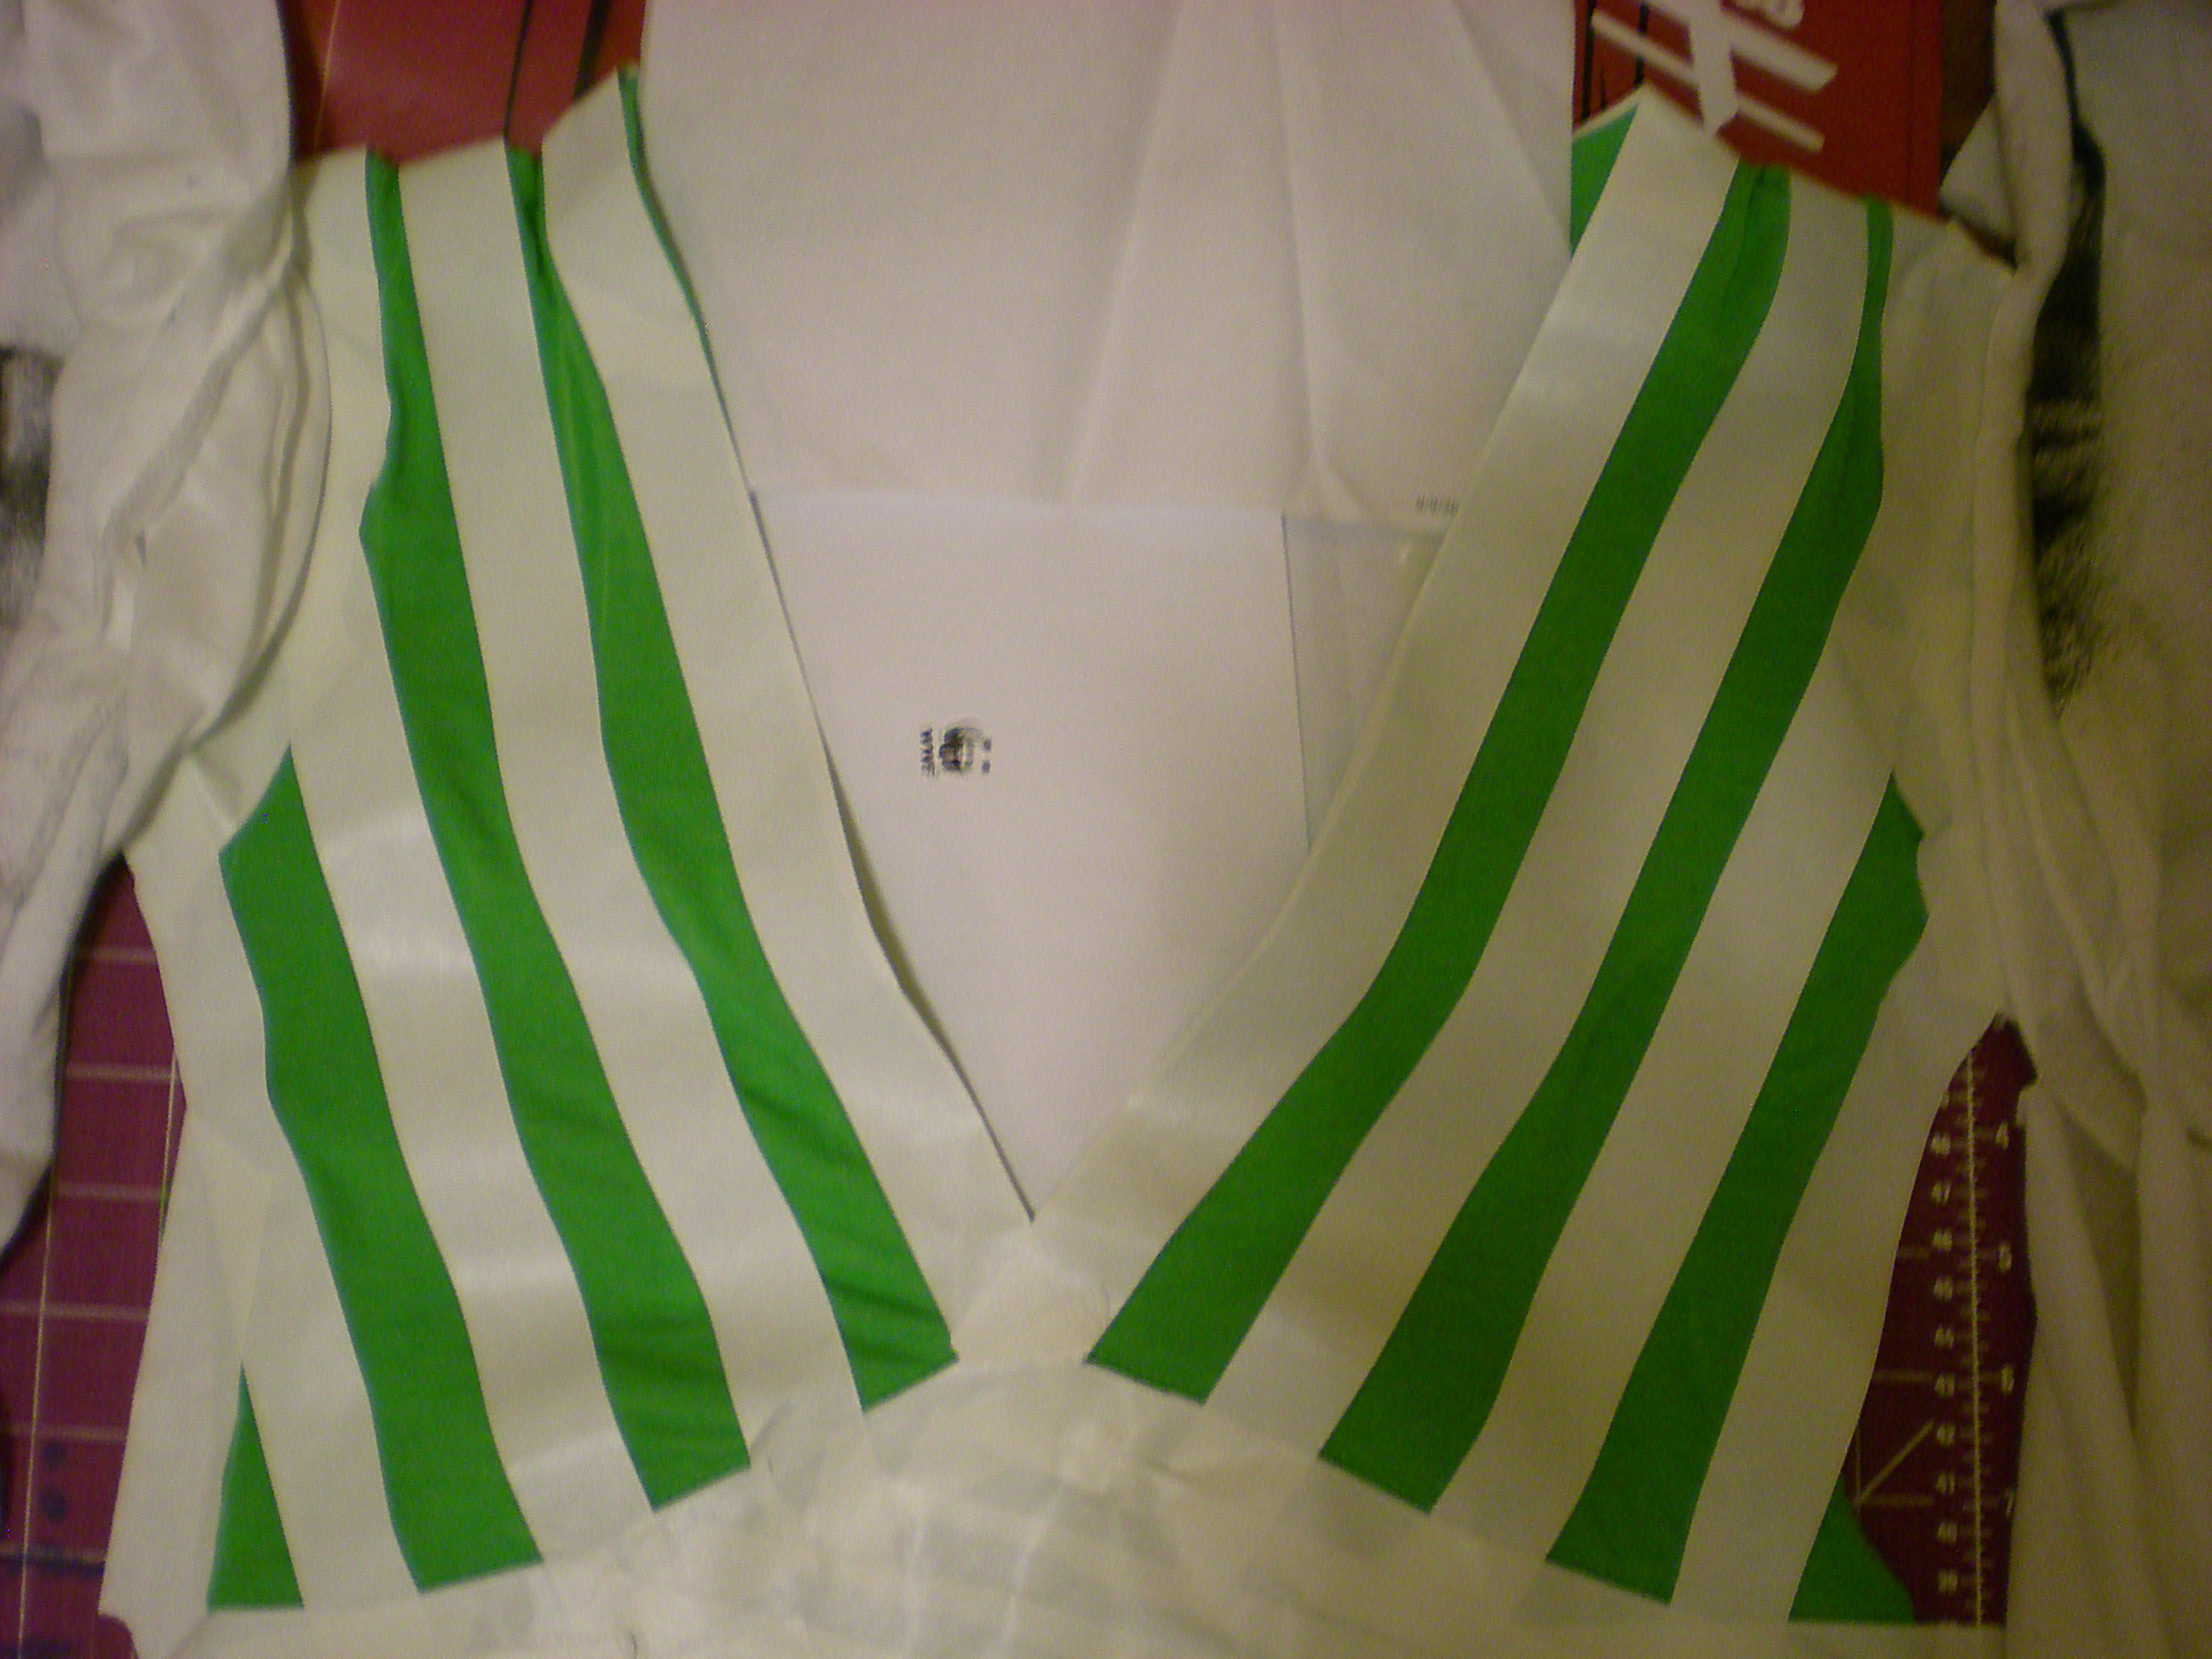
Stripes are just the beginning--you can create plaid, checkered, or gingham patterns with a roll of masking tape. Keep in mind that the width of the tape (and how closely you align them) determines the width of your stripes!


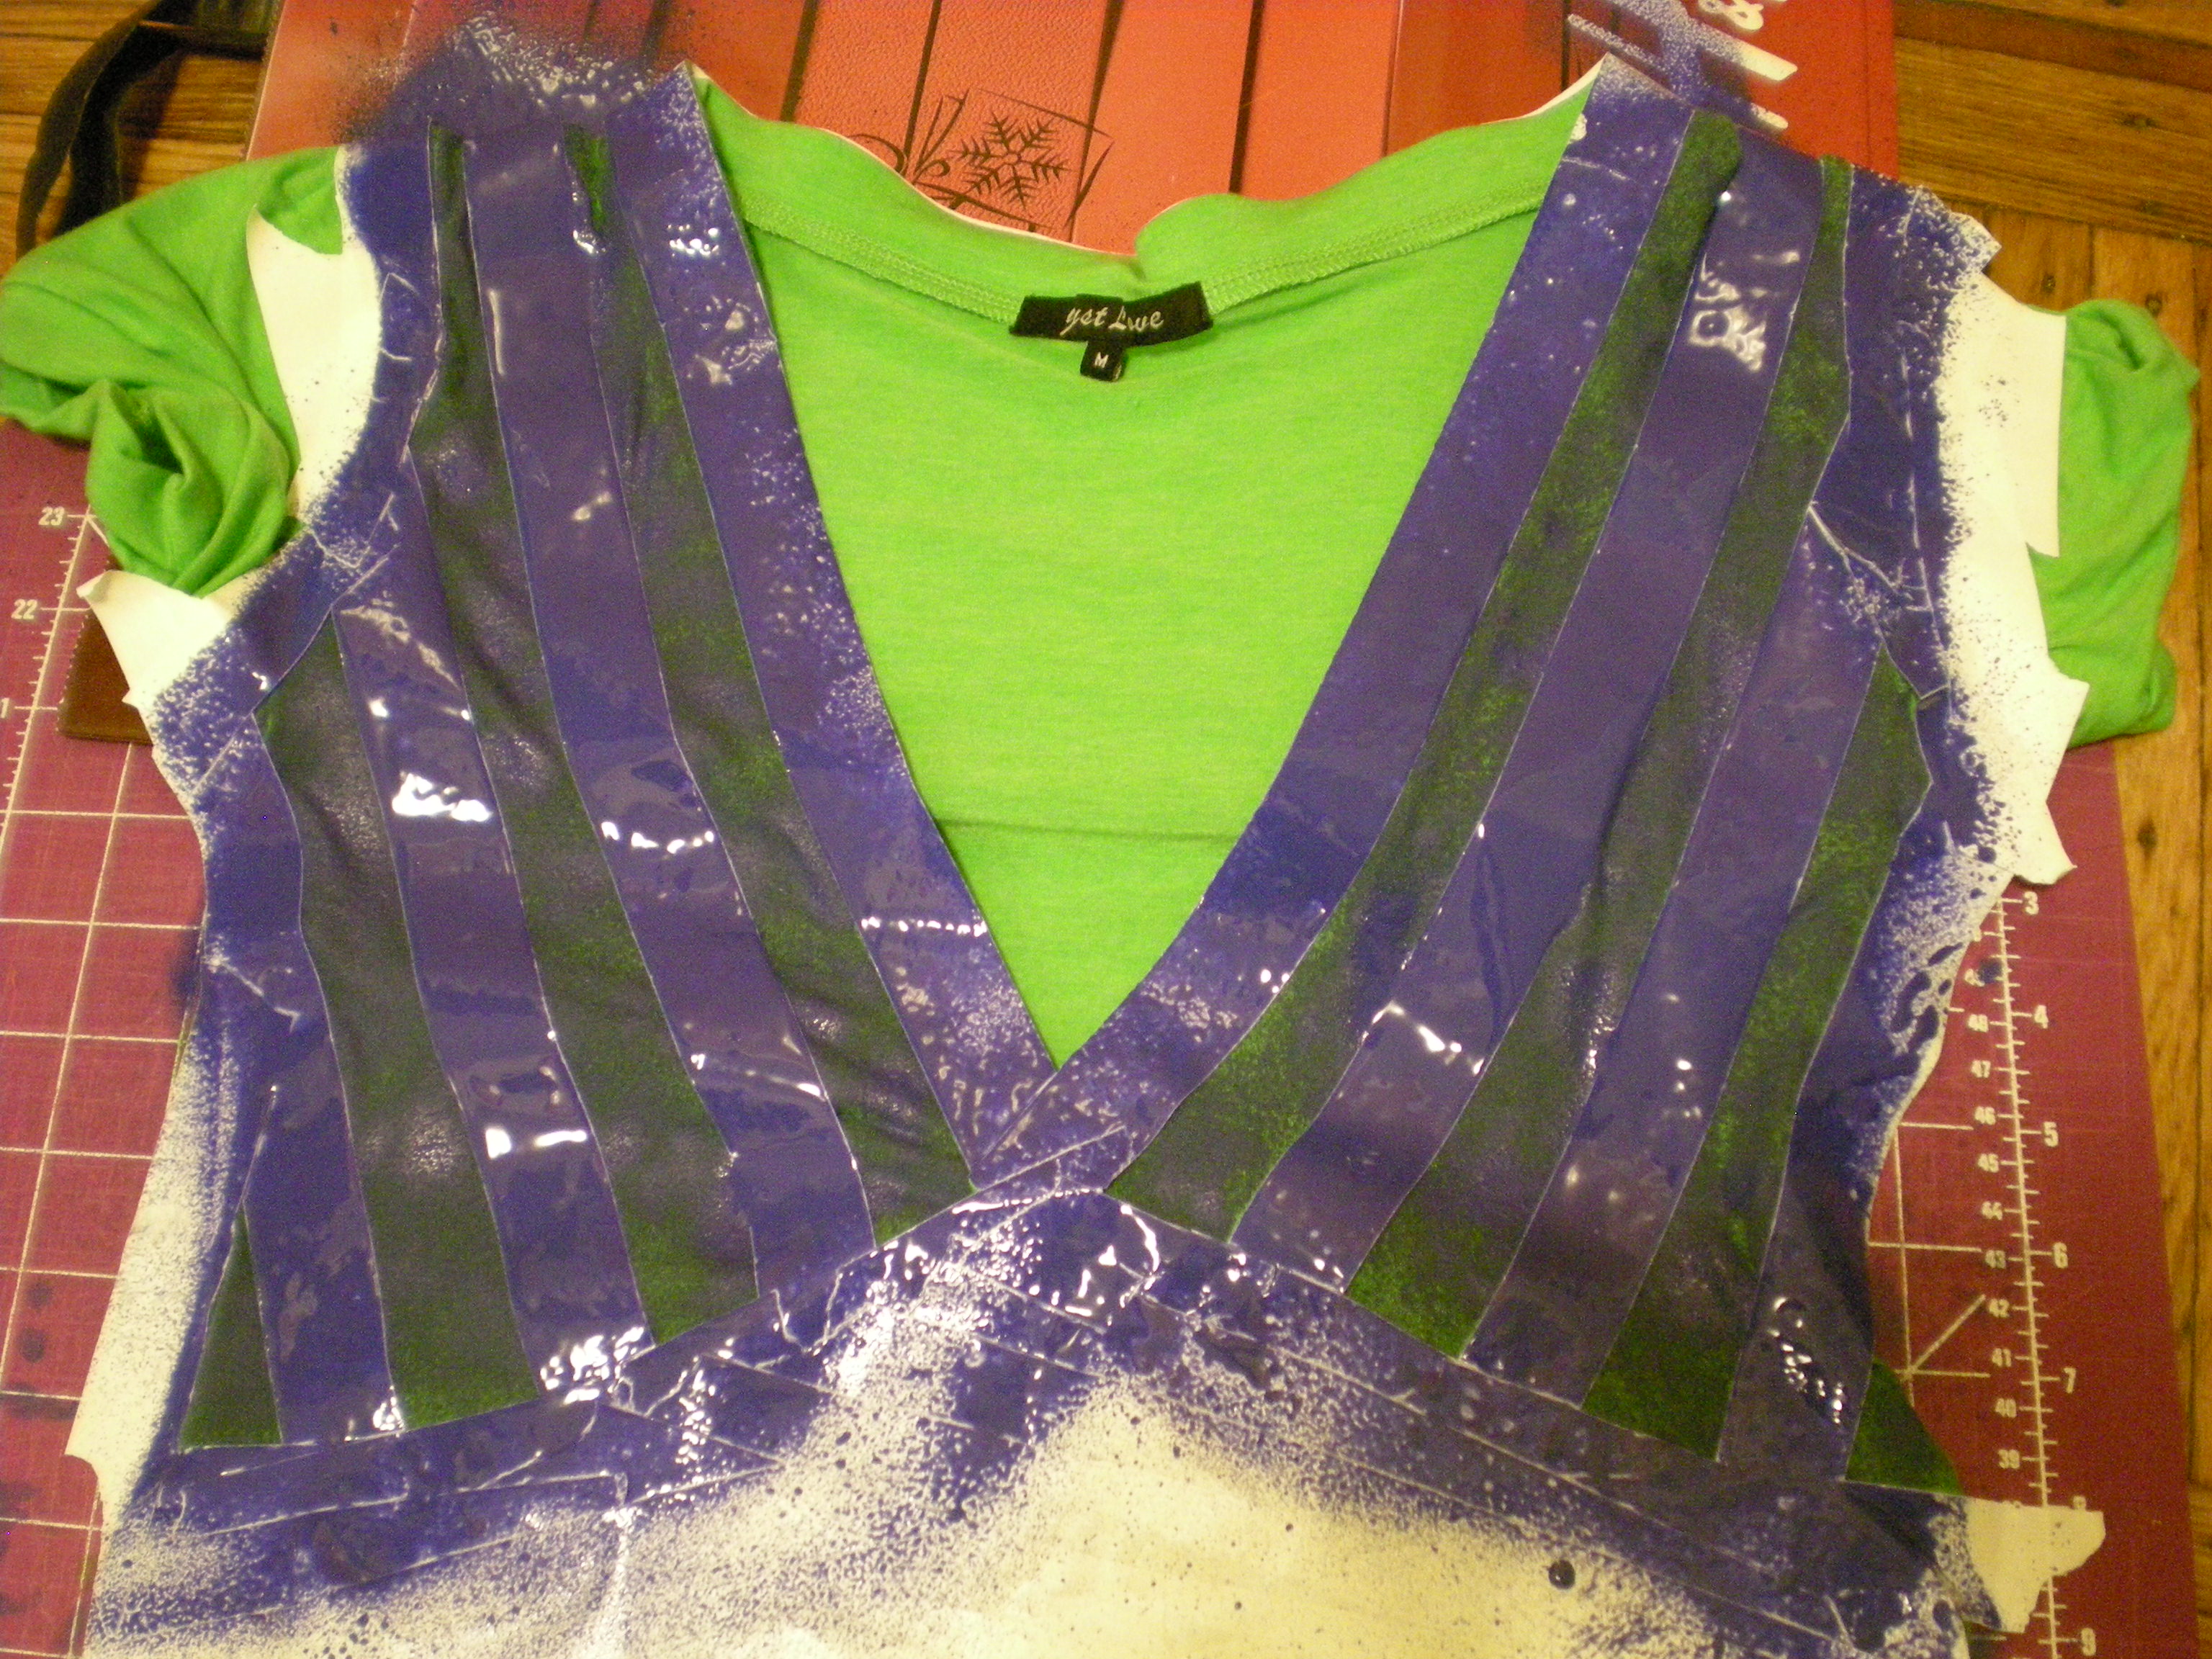
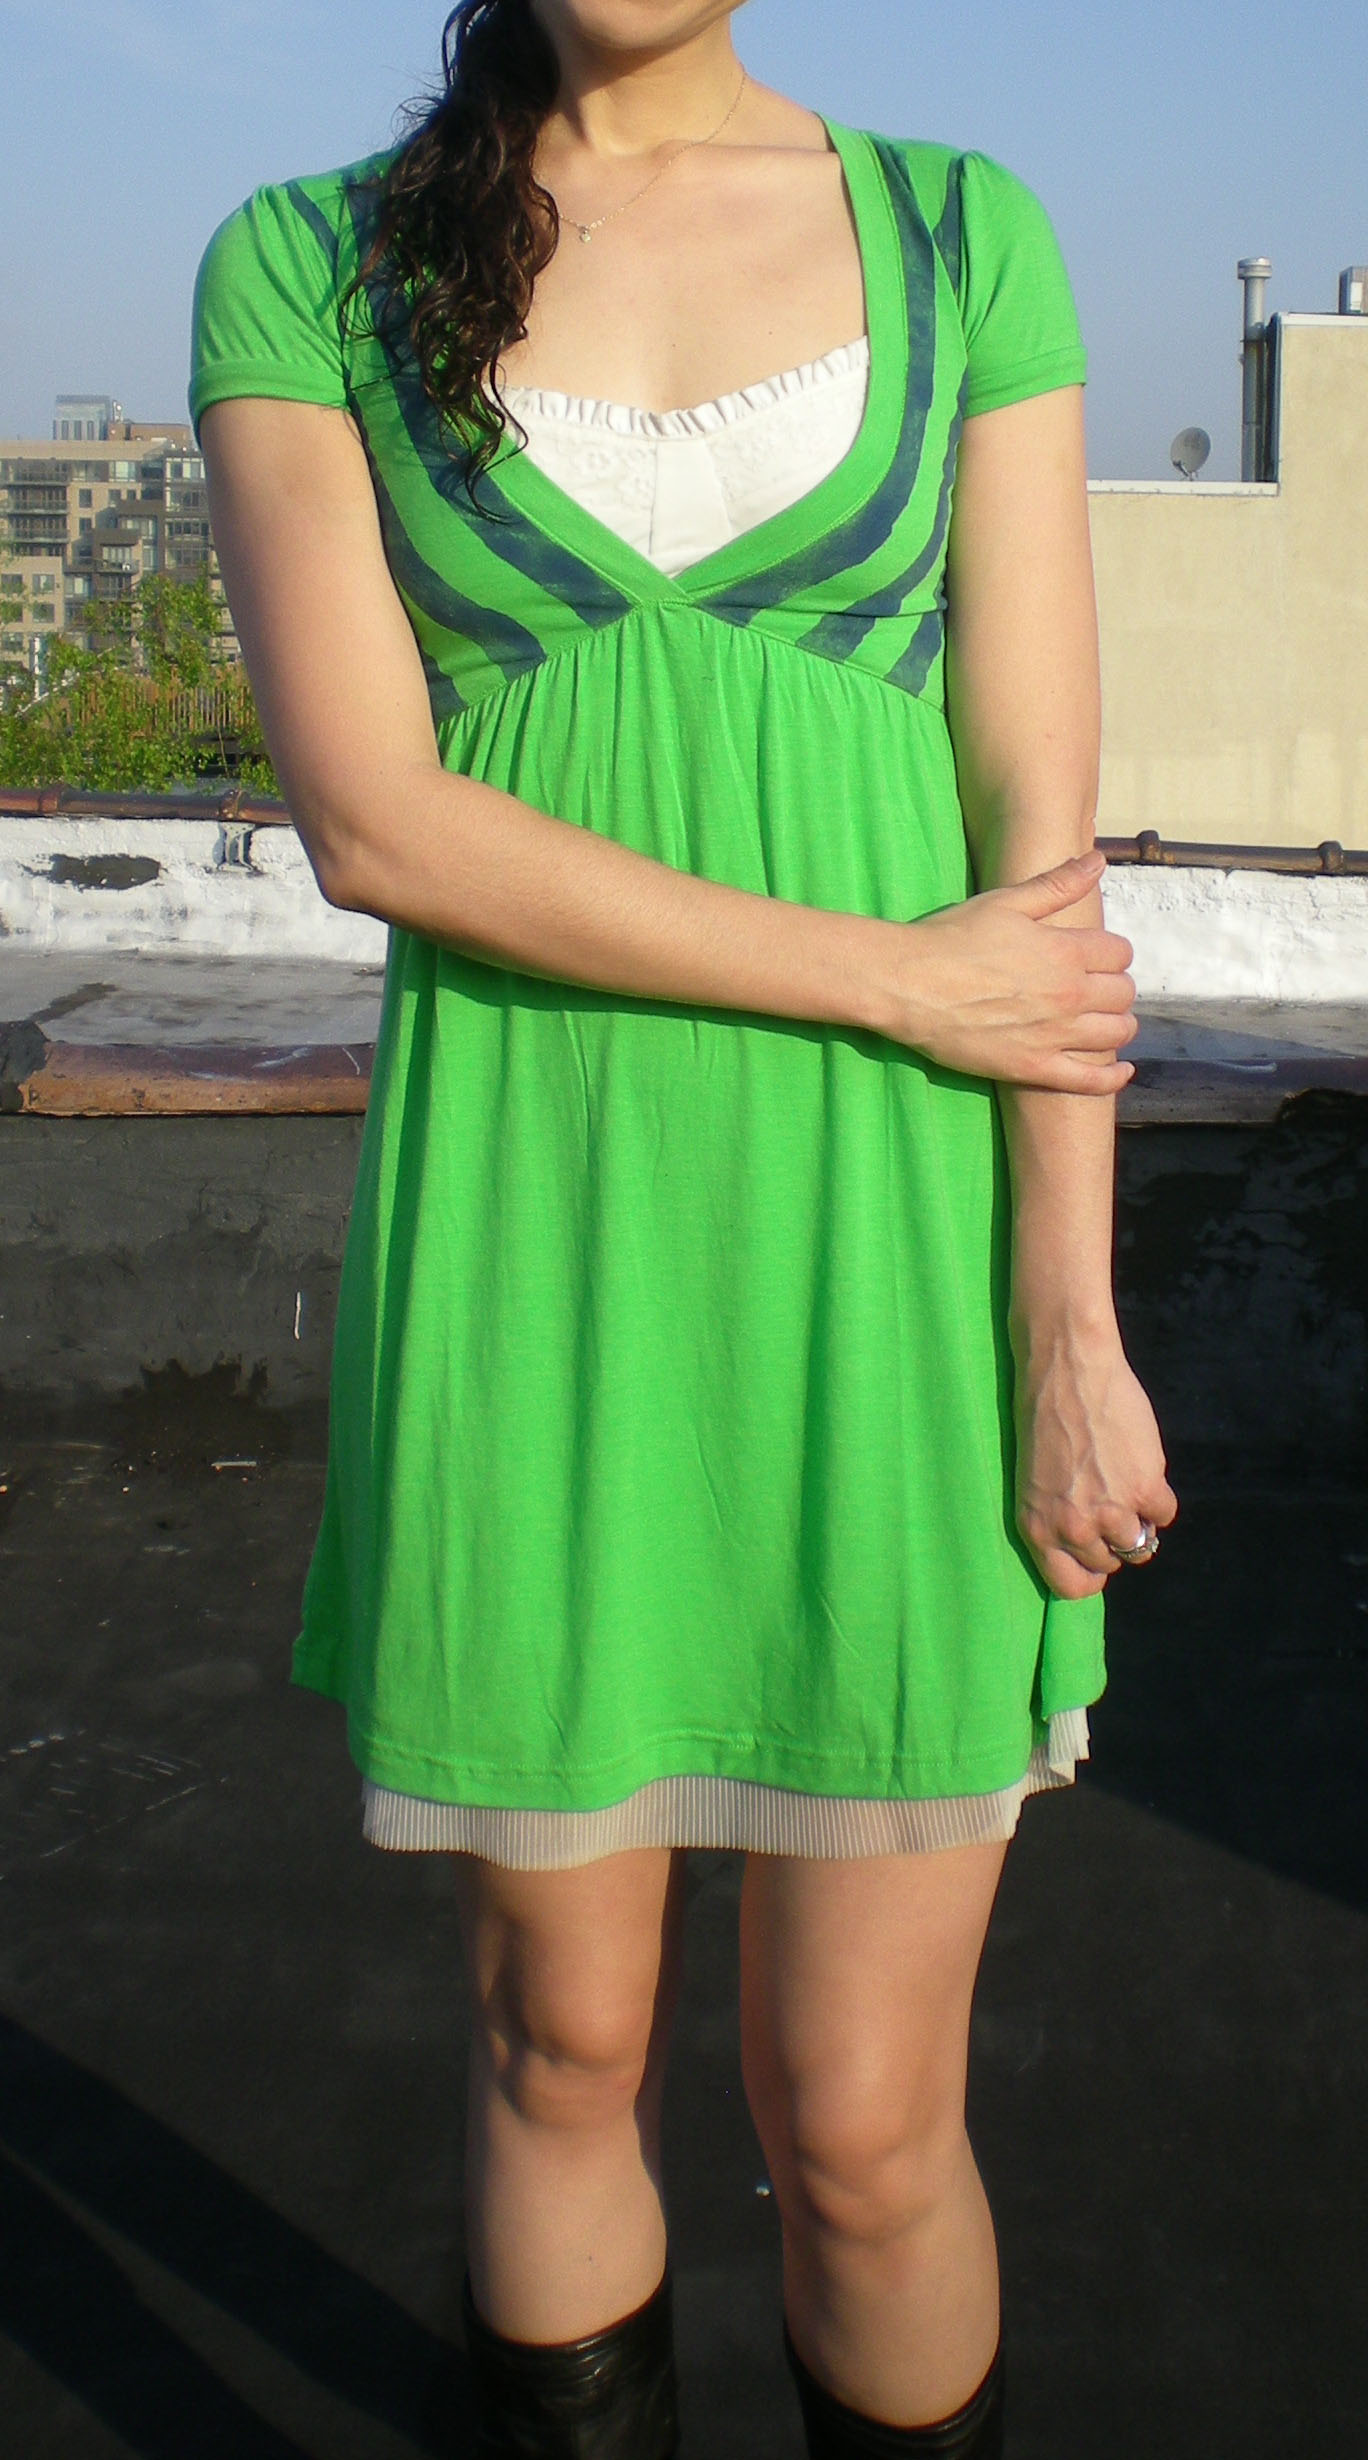
I followed the V-neck cut of the dress to create gently slanting diagonal stripes. Be careful to line up the tape strips carefully in order to keep your design symmetrical and even.


As always, mask the fabric you don't want to paint! I chose blue spray paint to pair with my bright green frock--a springtime inspiration, for sure!


Let the paint dry before peeling off the tape to reveal your sassy stripes!


One, two, three, four -- don't stop now, let's spray some more! How many more ways can you spray?


Visit us on Facebook!
Craft on!Click here for today's daily giveaway!

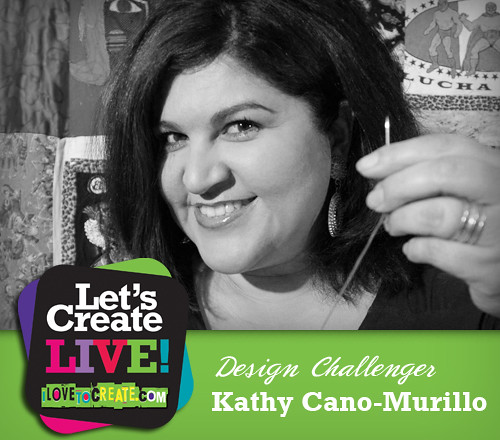
Meet a Let's Create LIVE! Design Challenger: Kathy Cano-Murillo

Monday, April 25, 2011
kathy graphic

If you've been a fan of iLoveToCreate for a while, you already know Kathy-Cano Murillo, a.k.a. Crafty Chica very well. Kathy is slated to appear this Thursday (9-11 AM PST) as a celebrity designer on our Let's Create LIVE webcast and we are so excited to see what colorful and vibrant craft she makes from the assortment of Designer Challenge goodies we sent her to play with!

Kathy has been inspiring online crafters of all backgrounds and skill levels for over 10 years. In May of 2011, she'll be celebrating her 10 year anniversary of her newly redesigned Craftychica.com! She shares all kinds of inspiring projects, articles, and products on her site. Her work has been featured in the New York Times, USA Today, and NPR.

Kathy has worn many hats during her career, she's been a handmade artist selling her custom "Chicano Pop Art" in her Crafty Chica store and to retailers. She's also been a syndicated newspaper writer for the Arizona Republic newspaper. In 2008, iLoveToCreate launched her Crafty Chica® product line, spreading her love of color and glitter to the masses!

In addition to the 7 craft tutorial books Kathy has written, Kathy has recently taken on the role of novelist. Her "Crafty Chica Novel" series debuted in March 2010 with Waking Up in the Land of Glitter (Grand Central Publishing). Her next book, Miss Scarlet's School of Patternless Sewing was released in March, 2011.

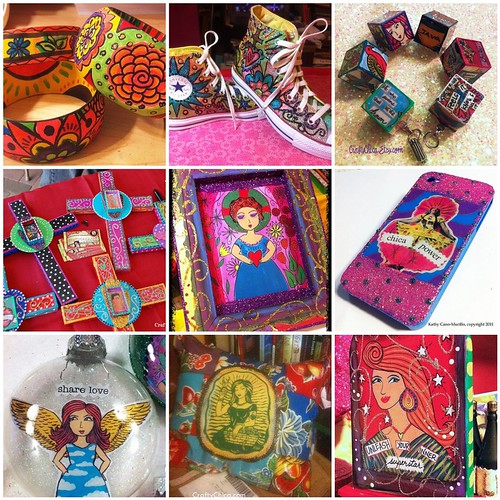
Kathy also does exclusive projects for our blog and web site. Here's just a small sampling of the many crafts she makes!! Here's a link to more Crafty Chica projects!

mosaic0262b771da28106e69560bec3aa52b6eb228f5d2

We sat down with Kathy and asked her a few fun questions. Here's her interview!

1. You are about to hit your 10th anniversary of www.craftychica.com!That’s a huge milestone! How has your site changed over the past 10 years?
Thank you! The time has passed very fast. It started as a late night hobby - and it still is a late night hobby, but on a much bigger scale. I love writing, blogging, sharing and posting ideas. Running my web site has helped me reach crazy goals and dreams. It has always been a place to "put it out there" - and then live up to it and follow through. In the early days, if you look through my posts, that's where I have the goofiest content. I shared *everything* that went on in my life, not thinking anyone would ever read it. I've grown as a person and am a little more private now. But I love looking back and reading stories about my kids and my failed craft attempts. I'm amazed at how much the online landscape has changed. I remember when I started my Diary of a Crafty Chica blog in 2003, I told an online editor at the newspaper where I worked that we should start them there - she told me that blogs were a fad and laughed it off. Look how far we've all come!

2. Is there anyone you’ve ever met that could rival your obsession with glitter?
Oh there are plenty! We are all in the Secret Society of Sparklehood! I think it is important to remind people that glitter is a state of mind and it is good to carry it with you in some way, shape or form. If you don't like the tangible loose stuff, then think of being nice to a stranger as your personal glitter. :-) Spread it far and wide!

3. You are now a successful novelist! How is writing a novel and being an author different than being a designer?
Thank you! It's actually more similar than you think! It's like one big cohesive art collection, with many small working parts that have to be embellished, make a statement, be memorable and polished. Lots of planning, yet spontaneity rules...the creative process takes over and sets you free! I compare it also to a big canvas. You have the theme, the background, the setting, color palette, focal point, the accents. However, it's very different because there are no art supplies in front of you. The Lazy Susan you spin for tool selection is in your head. The supplies are in your imagination and you have to hunt for them and sometimes be able to see and catch them when they float by in front of you. I love writing novels. I think it is a great exercise for artists to dabble in, it really exercises a new part of your creativity!

4. What words of wisdom did someone give you that you still follow and apply to your life today?
Don't do it for the money, do it because you love it - and the money will come. Stay focused on why you started your business in the first place. Sometimes I really have to check myself on that one. I started all of this because I love to create and write. But being a one-woman operation, my time is often devoted to marketing, research, assignments, appearances - and I have have NO time to do what I originally wanted to do. It's times like that that I make myself stop and go back to square one, that is where the magic lives.

5. Do you have a current guilty pleasure?
Reading books and traveling! I'm currently reading The Peach Keeper by Sarah Addison Allen. I'm also excited to get going on my next novel. Another recent guilty pleasure is traveling. I just returned from Mexico on the 5th Annual Crafty Chica Art Cruise. I'm planning the 6th, as well as a Crafty London group tour too. I also just got invited to teach on a cruise ship going to the Caribbean this fall. I love that my passion for crafting has taken me on so many awesome adventures!

Here's a fun glitter on glitter tutorial Kathy shared on her Crafty Chica YouTube channel!


Thanks Kathy for sharing your crafty spirit and inspiration with us!

Visit us on Facebook!
Craft on! Click here for today's daily giveaway!