Showing posts with label clothing. Show all posts

Old Skirt New Pockets

Thursday, August 16, 2012

If you have gone shopping anytime in the last year you might have noticed a trend towards ethnic prints. The trend is nothing new and something that seems to resurface every summer with a few tweaks. This summer I took the bait and decided to try my crafty hand at joining the trendy ethnic print party.

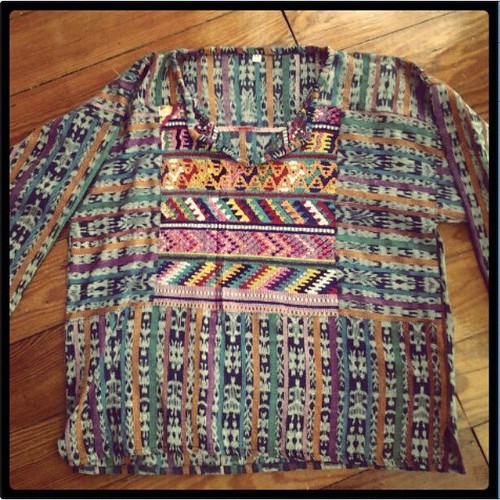
A few years ago my parents took a trip to Guatemala. My one request was for a shirt with a colorful brocade pattern. Sadly the shirt they brought me was a tad on the frumpy side and looked like something you would wear to a Phish concert. I loved the material and always knew that someway, somehow I would make that dumpy shirt wearable. Enter my new blue jean skirt from the thrift store begging for a pocket makeover.

SUPPLIES

Jean Skirt

Aleene's Fabric Fusion Glue

Pins

Sewing Machine

Scissors

Seam Ripper

Fabric to use on pockets

The first thing I did was using a seam ripper removed the pockets.

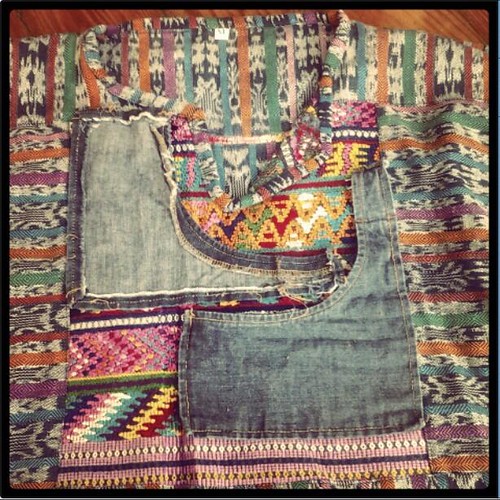
Using the old pockets as a guide I placed them on the dumpy shirt and cut out new pockets.

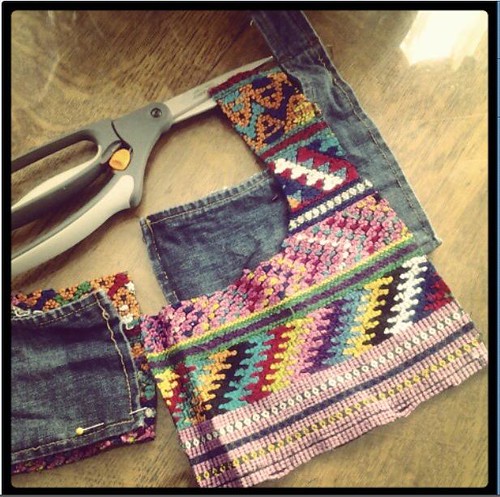
Just look at those fancy new pockets!

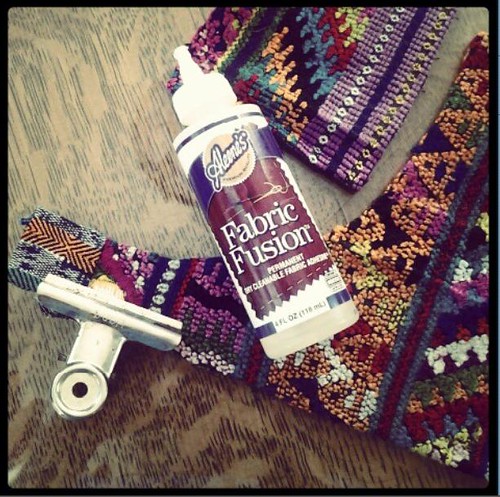
Instead of pinning the edge on the new pockets down we used Fabric Fusion glue. You might need to use clothespins to hold edges down until the glue dries.

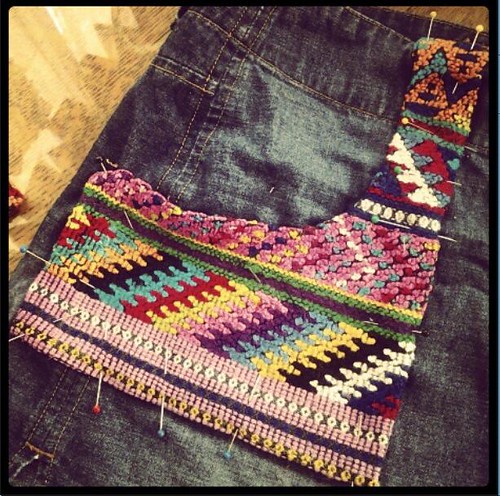
Next I handed the skirt over to my mother to sew. I was visiting her house when i made this skirt. First she sewed all the way around the edges of the pockets. Next she pinned them to the skirt where the old pockets once lived. Lastly, she reattached the pockets to the skirt making sure not to sew the belt loops and part where you put your hands in shut.

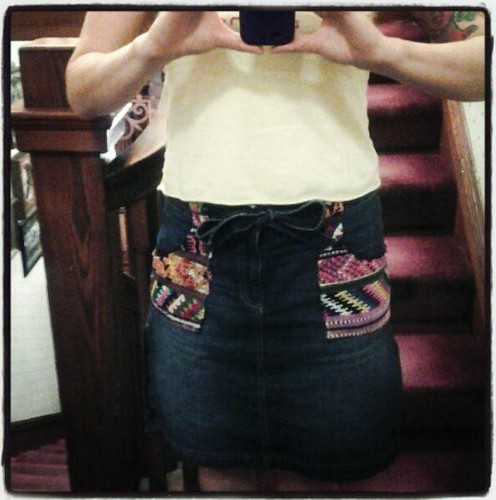
It just so happened the night I finished my skirt I had a hot date with a few of my crafty friends. My skirt was a big hit!

Sadly after all that work I learned the hard way that the zipper is broken on my new skirt. Old skirt, new pockets and a broken zipper. Maybe I'll replace the zipper with something more exciting and colorful just like I did the pockets.

How to Fix Clothing without Sewing

Tuesday, July 10, 2012
While I know a lot of you readers sew, I also know a lot of you readers don't.  So, I wanted to show you one of my secret weapons for fixing clothing when I don't want to sew it.


I am a big fan of Aleene's Fabric Fusion Peel and Stick Sheets.  I used them to fix my Toms HERE, and I used them to make no-sew headbands HERE.  Today I'm going to show you how I used it to fix issues I had with a sweater and a skirt.


I bought this skirt the other day and while I really like it, the pocket flaps always fly up.....


....like this.  I flip them down about thirty times a day.  Enter Peel and Stick Sheets.  


All I did was cut a piece of adhesive.  The adhesive is sandwiched between two papers.  I cut out a small rectangle....


 ...and then I peeled off the top paper.


I applied it to the inside of the flap.


I removed the other paper and put the flap back down.


Done.


I bought this sweater a while back and while I really liked it, the knit was crazy stretchy and the sweater always bulged open between the buttons even though it wasn't too small.  Now, I always wear my cardigans closed, so I just cut thin strips of the adhesive exactly like I did above and ran them down the sweater where it closes.  No more bulging.  I've washed the sweater at least eight times and the adhesive is working really well.


It's great to be able to fix something so quickly, too.

Thanks for reading.


Double Dipped Glitter Skirt

Tuesday, March 6, 2012
My sister will be having her first little girl this week, which gives me the opportunity to use a bit of glitter in my crafting.  I made her this tiny glitter outfit, with a little salute to her superhero-loving brothers.


I started with a plain shirt and skirt (which I got from Wal-mart).  I used my Tulip Glitter transfer sheets.  The beauty of these sheets is that you can do glitter without the mess.


I started by cutting one inch strips out of the glitter sheets.  (In hindsight, I probably should have cut the pieces a little curved rather than straight.  The ruffles on the skirt were slightly rounded.)


I peeled off the clear protective top and then ironed the strips onto the skirt.  I found it was easiest to cut the strips into smaller pieces to apply them.  The glitter sheets can overlap each other a bit and you'll never notice it.  


To apply them you place a cloth over the top and press the iron onto it for 30-45 seconds.  


I made my way around both layers of the skirt until it was finished.


For the top I made an emblem like Superman, but changed it to an "M," since her name will be Millie.  Super Millie!  I used the glitter that matched the shirt, so it wasn't too loud.


Now she'll have a glamorous girly look, with a brother-approved superhero signature.


Thanks for dropping in.


Tuesday, September 20, 2011
I started thinking the other day about how NOT every project really has to start from scratch.  Here's what I was thinking.......


So, as explained, I broke out my Tulip Glow-in-the-dark dimensional paint....


Iron Man glowing in the dark was a big hit.  It was super easy to do and it worked well.  I'm kind of wondering why I didn't do this before.  (I didn't get a good picture of it glowing the dark for you, but it glows.)


Here's the color change one when it's not in the sun...  


...and here it is in the sun.  See how the letters turn blue and the wing tips turn yellow in the sun?  It reminds be of the Hypercolor shirts that were crazy popular when I was a kid.  Cool.


So pick up a bottle of paint, find some old clothes, and give them a little new life.


The Popsicle Dress

Tuesday, July 5, 2011
Today I'm going to show you how I took an old dress and spiced it up with some dye.  I now call it my popsicle dress.  (It reminds me of those big bomber popsicles I'd buy from the drug store as a kid.  Yum!  We'd save our money and then ride our bikes there.) 

The dress was one I had purchased a while back.  It fit well, but it was cream-colored and kind of blah on me.  I never found a shirt that matched it well either.  So, I decided it was time to play with my Tulip Dye kit.  I have never dyed fabric before.  The kit made it really easy.  It has bright pink, lime green, and bright blue in it.  It also includes some fun tools and a booklet showing you some different dyeing techniques.


  I went to the garage and hung up my dress (covering the ground underneath it).  I mixed up all three colors and used the spray bottle attachment.  (Here's the dress before.)


I sprayed lime green on top.  It was a lighter lime green, so I ended up spraying blue over the green to make it darker.  Then I sprayed just blue in the middle and then bright pink at the bottom.  The colors blend well if you do it quickly while it's all still wet.


It still fits well and it's still comfortable, but now it screams of summer fun.  Woo-hoo!  Bring on the popsicles and the fun, baby!


Now I'm looking through my closet to see what else I could dye.  It's pretty fun.