Showing posts with label revamping. Show all posts

Thrifting with a Crafty First Aid Kit

Thursday, August 25, 2011

I can't tell you how many times I have seen something at a thrift store or flea market, fell in love and then realized it was damaged. Stained clothing, chipped paint or in my case peeling eye lashes *insert sound of needle scratching off a record here* yup I said peeling eyelashes. A stash of handy craft supplies is all that stands between you and perfect thrift store scores. Today for I Love to Create, I'll give you a few of my recent examples.


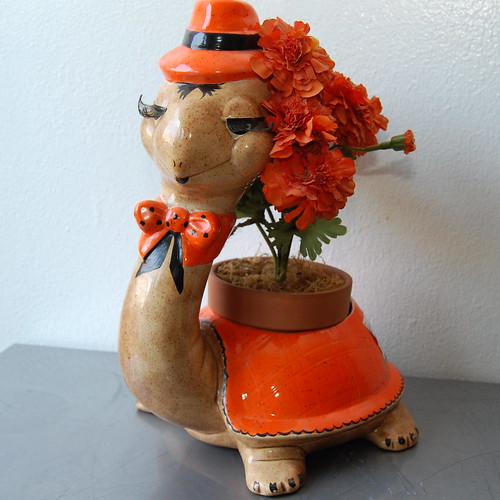
Hello Mr. Turtle Planter, when our eyes met it was kitsch love at first site. It was one of those moments where I could not grab him off the shelf quick enough for fear someone lurking nearby would swoop in and steal him from me. Needless to say there was no one around, but if there had been they would have surely wanted Terry I know it.


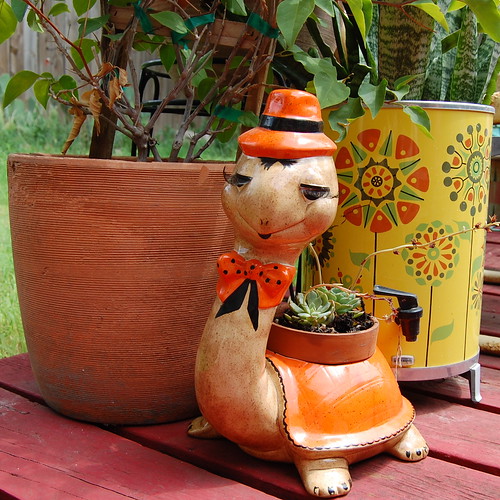
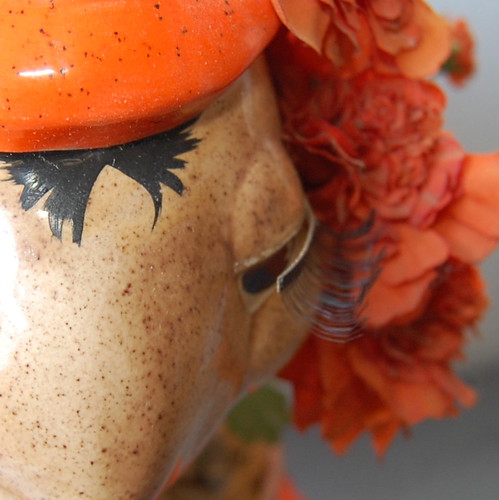
ANYWAY - Terry looks like he has had a bit of a rough night and is losing some of his eyelash glue. My first instinct was that he was damaged and I should not buy him since the lashes were one of the selling points (as if the bow time and hat were not enough). Then I thought to myself with a quick touch up using Tacky Glue Terry could be restored to his once glamourous self.


I recently started to notice that at the thrift store there is a distinct lack of clothing in 2T and 3T. Anyone who has a toddler knows why, clothing rarely makes it through toddler-hood unscathed. I can't tell you how many pieces of clothing Tallulah has ripped, stained and torn.


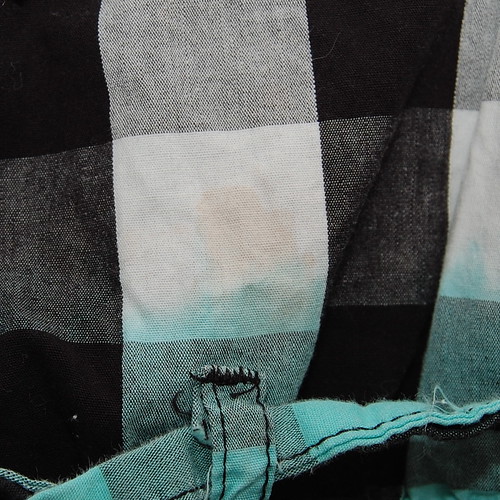
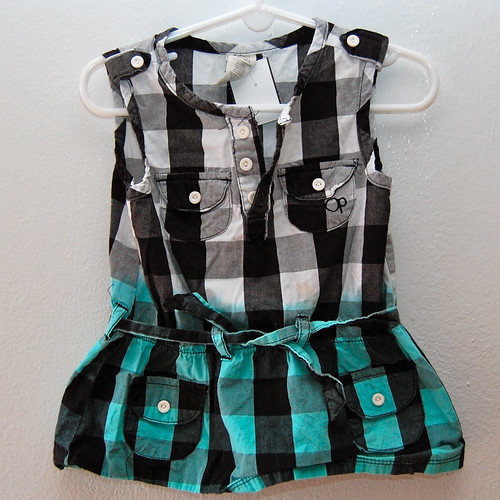
That being the case my theory is that there is hardly ever any toddler clothing worth donating to be much more than a rag. When I found this little black, white and teal top I was so excited at it's cuteness. I was not so excited about the small stains.


A few squirts of Tulip Spray Paint and I not only continued the ombre dye effect I also covered the stain and made the shirt even cuter. With Baxter venturing into the world of solid foods I expect I will be covering lot's of stained onesies with a quick dye job fix.


I love vintage glass art deco picture frames, the problem is finding them in pristine condition is not always an easy task. The frames often time are chipped and missing paint.


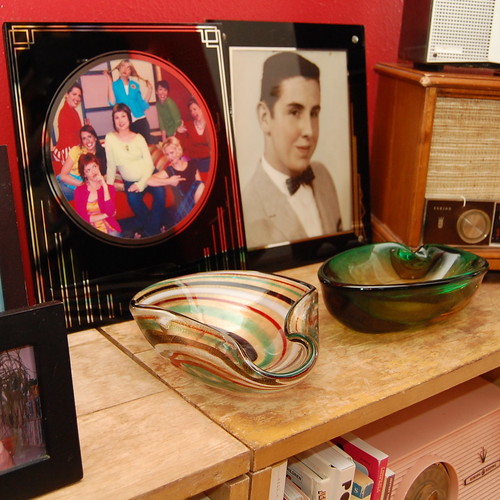
Never again should you snub a frame of any kind for a little chipped paint. All you need is a little Crafty Chica Paint and chips be gone.


Next time you find a second hand treasure that looks like it was loved a little too hard don't turn it away. Think of your crafty first aid kit and how you can easily make it new and improved!

Visit us on Facebook!
Craft on! Click here for today's daily giveaway!

Recycled Reto-Style Jewelry Box

Thursday, August 11, 2011


This is not my first time at the jewelry box re-vamping rodeo. Once upon a time I even sold them on my website. Lately, I have spotted several cute recycled jewelry boxes on Pintrest and Etsy that have my creative juices flowing. Flowing so much in fact I decided to revisit my stash of vintage jewelry boxes and see if I couldn't come up with something new and improved. My jewelry collection is always overflowing and I can never have too much cute storage for it.


SUPPLIES
Jewelry Box
Crafty Chica Paint
Scissors
Paint Brush
Aleene's Tacky Glue
Fabric
Collage Pauge
Rick Rack
Pliers


At least every other trip to the thrift store I spot an old jewelry box begging for a face lift. I happen to have a small stockpile in my studio of a few that have called my name through the years. I opted for a large dark brown dude from the 1960's to re-do.


The only priming I did was to remove the drawer pulls. I needed a pair of pliers for this.


The first thing I did was using Crafty Chica Paint and a sponge brush applied several coats of green paint. Allow your paint to dry completely between coats.


Once my paint was dry I used Collage Pauge to apply my fabric. I re-covered the drawer in my vintage fabric and added a large rectangle of fabric on the lid.


Paula Deen thinks everything is better with butter and I happen to think everything is better with rick rack. I applied the rick rick with a combo of Fabric Fusion and Quick Dry Tacky Glue depending on what surface the rick rack was touching.


My new and improved jewelry box houses my Bakelite collection perfectly. I like the idea of being able to color coordinate my jewelry with my jewelry box. Ya, I've been accused of being too matchy matchy in my day - so what.


Check out more I Love to Create posts here. Be sure to check out my series on jewelry displays and boxes - Journey Through a Jewelry Box Flickr Faves, How Ya Hanging - Jewelry Displays of Crafty Ladies, Jewelry Displays in Books and Making Your own Jewelry Display.


Visit us on Facebook!
Craft on! Click here for today's daily giveaway!

Upcycling & Revamping: It's kinda our thing

Thursday, July 29, 2010
Here at iLoveToCreate, we love creating new and fab showstoppers for our CHA Summer and Winter Shows! At the same time, we love to reinvent and use what we have on hand to revamp something old into something new again.

Case in point: Cheryl Ball created a rainbow of fab flowers for headbands last winter show using all our colors of Tulip® Fabric Spray Paint™. We wanted to reuse them once again for the summer show, so we put them on stems and arranged them in some pretty Duncan® Ceramic vases!

It was a super easy way to mix it up a bit, but not have to break the bank or put a lot of work into new samples.

So the next time you are bored with something you made, think of how you can add a little twist to it. That tie dye shirt that didn't turn out perfectly? How about cutting it up for rosettes or braiding it to make a necklace or bracelet. Instead of tossing out a ceramics piece that didn't turn out the way you wanted, try smashing it up in pieces to make a cool mosaic frame using Tacky Glue. You just have to think of how you can turn something around and reuse it in a new and creative way!