Showing posts with label valentine craft. Show all posts

CRAFTY CHICA: Glittered Kisses Shirt (Inspired by Carrie Diaries)

Friday, February 1, 2013
Are any of you watching THE CARRIE DIARIES on The CW?
The series stars teen actress AnnaSophia Robb as the teen version of the iconic Carrie Bradshaw from Sex and the City!
Photo from tv.yahoo.com
Not only am I fan of the original HBO series, I'm also in love with this version as well (yes, I was skeptical at first). The Carrie Diaries is all about high schoolers, I'm in my 40s. BUT - it takes place in NYC in 1984. Hello? some of the best times of my life were in the 80s, right?

Every week we're treated to crazy, juicy fashion, DIY ideas, pop songs and kooky-yet-self reflective Carrie-esque plot lines. The show is based on the novel by Candace Bushnell, so it has a lot of the same zingy spirit that made SATC so fun to watch.

In the first episode, Carrie's beloved purse was ruined by her sister and a rogue bottle of nail polish. But in true Carrie Bradshaw style, our girl transforms it into a splattered, personalized bag that serves as a central plot line in the story - it catches the eye of an editor from Interview Magazine and Carrie is drawn into the world of writing and fashion.

Here is the scene, and if you look on YouTube, you'll see all kinds of videos from the show's fans who have made their own bag.

Not only that, but scores of other DIY projects are popping up from other crafty fashionistas. Let's circle this back around to my project this week. On Monday's episode, Carrie wore an adorable lip-smacked sweater.
I found a cute t-shirt at Target that had the word LOVE already across the front, so I added to it by using Tulip Shimmer Sheets kisses, inspired by Carrie's sweater.

If you want the look of the sweater, you can use a fabric stamp or cut a stencil. I wanted something fun for Valentine's Day for Maya, so here is what I came up with!


Supplies:
Cotton shirt
Tulip® Fashion Glitter™ Shimmer Transfer Sheets: Hot pink, light pink and purple.
Scissors
Iron
Parchment paper
Peel off the front protective covering. Cut the sheet into squares about 2x3" in size.
Fold in half and cut lips.

Cut a lot of them in the different colors, I'd say about 15 of each in different sizes.


Sort them into piles. Set the shirt on an ironing board, heat your iron to high. Arrange the lips randomly and balanced. Set apiece of parchment paper on top and iron in place for about 30 seconds until the kisses are bonded to the fabric.

When it comes to washing, turn your shirt inside out and wash in gentle cycle, hang dry.

Heart Shaped Elbow Patch Cardigan

Thursday, February 9, 2012


Since Tallulah got a new pair of shoes for Valentines Day I thought it was only fair that I make Baxter a themed outfit. I had seen the idea of heart shaped elbow patches on the Country Living website and loved it. They took the time to hand stitch their hearts, today for I Love to Create I took the time to hand paint mine.


SUPPLIES
Tulip Soft Fabric Paint in tan
Cardigan
Tulip Slicks Fabric Paint in brown
Tulip Sticky Fabric Stencils
Tulip Stencil Brush


The first thing you need to do is determine where your child's elbows will hit on your cardigan. Once you mark the spot place your sticky back heart shaped stencil right on top. Using tan paint and a stencil brush apply a coat of paint. Notice I did not get paint in the crown portion of this stencil. Also you might want to put something between the sleeves so that the paint does not bleed through to the other side of the sleeve. Allow to dry completely.


I love the look of hand stitching, but am not a huge fan of actually doing any stitching. I love to take the quick and easy route and fake the look with some Tulip Slicks fabric paint. Just apply small dashes all around the edges of the hearts to give a sewn effect.


Next pop your kiddlet in their new sweater and beam with pride. We have been referring to Bax as Professor Baxter in his new elbow patches cardigan. Super cute, snuggly and perfect for Valentines Day!

Visit us on Facebook!
Craft on!

2nd Place Valentines Day Picture Frame

Thursday, February 2, 2012

First things first, of course I don't think my daughter is second place. I think red ribbons (2nd place) matched my frame better than blue ribbons (1st place). Ok now that we have that out of the way, let's move on.


I love me some picture frames. I've said (and made it) before and I'm sure I will say (and make it) again. Valentines Day is right around the corner so I needed something fun, festive and most importantly handmade to offset all the Target frames I currently have going on.


SUPPLIES
Picture Frame
Sparkle Collage Pauge
Scrap Fabric
Random Crafty Curios
Scissors
Liquid Fusion Glue


The first you need to do is make yourself strips of fabric. I had an old red and white western shirt that fit my color theme perfectly. You might remember seeing this shirt in an issue of Altered Couture. This thrift store baby is the gift that keeps giving. Oh and this is Toofus McBruiser, my ever present craft helper.


Next using sparkly Collage Pauge wrap your fabric strips around your frame. This will take several strips and you want to get them pretty saturated so that you can easily smooth down rough edges and bumps. Also, try not to get Collage Pauge in your baby's hair like I did. Luckily, it is bath night around here.


Once your Collage Pauge has dried completely you can embellish your frame any way your heart desires. I put together a prize ribbon and vintage Kanzashi (Japanese hair flower). Using Liquid Fusion glue attach your adornments to the frame.


All that is left to do is fill your frame and set it out proudly!

Further Reading...
More Valentines Day projects
5 Kitschy Up-cyled Picture Frames
Terrarium Picture Frame
Wee Witch Shrine
Cafeteria Tray Picture Frame
Television Picture Frame
Milk Bone Memorial Picture Frame
5 More Kitschy Up-cycled Picture Frames

Visit us on Facebook!
Craft on!

Be My Valentine Felt Wreath

Wednesday, January 18, 2012


What better way to celebrate your love for Valentine wreath than a cute felt wreath in pinks and reds! This is a fun project that will get you lots of oohs and ahhs to guests that arrive at your door! You might just want to make one in colors for every season of the year!


Be My Valentine Felt Wreath

by Cheryl Ball


Materials

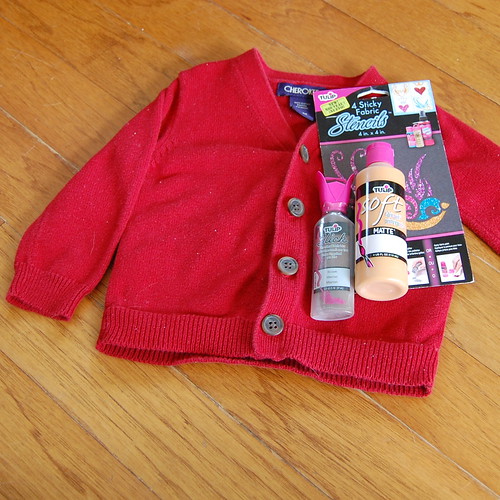
Aleene's® Fabric Fusion® Permanent Dry Cleanable Fabric Adhesive

Tulip® One-Step Dye™ (Red & Fuchsia)

Tulip® Cordless Heat Setting Tool™

Tulip® Glam-It-Up!™ Iron-On Crystals™ (300 Clear Pack)

– Plastic Disposable tablecloth or large plastic garbage bag

– Floral and Craft Ring,12” flat compressed wood

– Cutting mat

– Ribbon, 2” wide coordinating color and ¼” wide for hanger

– Wool Felt, white ¾ yd. 18” wide

– Rotary Cutter

- Rotary Cutter Clear Ruler

- Fabric, cotton scrap of coordinating solid color


Instructions

1. Wet the felt with water and spin on gentle in the washer to remove excess water.

2. Cover work surface with plastic.

3. Wearing rubber gloves, add water to the top of the dye bottles. Replace cap tightly. Shake until dye is dissolved.

4. Place damp felt on plastic. Squeeze the Red dye onto about half of the felt.

5. Starting on the edge of the Red and overlapping an inch or so, squeeze the Fuchsia dye onto half of the remaining area of the felt but saving about 1” of dye in the bottle. Add water to the dye in the bottle to make a light pink and squeeze onto the remaining felt. The felt should be saturated in dye. Wearing gloves, press down with fingertips to push the dye into areas that are lighter.

6. Cover felt with plastic. Let sit 4-6 hours. Wash in a large load of water with a small amount of laundry soap on a gentle cycle. Line dry.

7. Using a cutting mat and rotary cutter, cut ½” strips from every section of color. Where the dye over lapped it will be a little different color and this is desirable so cut those areas also.

8. Make a snip in the end of the cotton coordinating fabric and tear 2” strips. Glue the end of a strip to the craft ring with Fabric Fusion and start wrapping around the ring. Proceed by adding another strip, gluing as needed while wrapping to keep in place until it is completely covered.

9. Feeling through the fabric, find one of the small holes and push a pencil or sharp object through to the back. Run the small piece of ribbon through and tie in a knot to use as a hanger.

10. Starting with the lightest color of felt, add a small amount of Fabric Fusion and roll into a pinwheel continuing by adding another color with glue ending with the Red felt. Change the order of color to make all of the pinwheels unique and ranging in size from 3” to 2 ¼”. Refer to photo.

11. Arrange the pinwheels on the ring until they fit all the way around while touching each other. Squeeze out Fabric Fusion onto the ring under the area where each pinwheel will sit pressing pinwheel into the glue.

12. Cut ¼” strips of the red felt and roll into small 1” pinwheels and glue on top of each intersection where the large pinwheels meet. Glue in place and press down with fingertips. Let dry flat.

13. Attach the red and pink crystals with the heat tool. Scatter them over the large and small pinwheels. Pressure is not needed when attaching the crystals as long as the tip of the tool is touching the crystal.

14. Tie the 2” ribbon into a bow and glue the backside of the loops at the top, onto the pinwheels.


Visit us on Facebook!

Craft on!