Decoupage Clipboard Art Frame and more! Cool2Craft TV

Saturday, December 29, 2012

Cool2Craft TV December 31, 2012 - the Cool2Craft girls are sharing some super cool mixed media projects! Tiffany is crafting a Decoupage Clipboard Art Frame with Aleene's Matte Decoupage and Aleene's Tacky Glue and Heidi is creating a Mixed Media Pop Open Journal.
 
Learn new techniques, chat with us while watching the show and ask questions about all your favorite Aleene's products! Drop by our chat room during Monday's show and mention that you saw this post on the iLovetoCreate blog for your chance to win Aleene's Tacky Glue!

Airing Monday December 31, 2012 9am Pacific/10 am Mountain/11 am Central/Noon Eastern. Go to Cool2Craft.com and you'll see the link to the Livestream player and chat box where you can join right in. See you Monday!

Visit us on Facebook! Watch our video tutorial archives on YouTube! Get creative! Get inspired! Be cool!

CRYSTAL DIY: 13 Ways to Bling in 2013!

Friday, December 28, 2012
Sparkle and New Year's go together like cake and frosting - there can't be one without the other.

Since it the weekend, and New Year's Eve is on Monday, there is plenty of time to embellish something fabulous, festive, and best of all fashionable!

First of all, you'll need to stock up on supplies. Visit your local craft store, go to the fashion art aisle and pick up:

Tulip Glam It Up Crystals
Tulip Crystal Heatsetting Tool
Tulip Tweezers

Once you have those, you're set to crystal up anything and everything. Here are some ideas!

1. Evening Clutch by PattieWack. Take a plain black clutch, pin on a brooch or silk flower and add crystals at random!

2. Shoes! Use a pair from your closet archives or buy a new pair. Here are directions for these!

Photo credit: Cat Morley.
3. Name choker. This is from the wonderful Cat Morley at Cut Out + Keep. to make this, you'll need some wood or acrylic letters, glue them together, or if you're lucky, find a name pendant ready-to-go.

4. Sculptural choker. Use stuff felt to cut out a sculptural choker design and then accent it with crystals and micro glitter! This one is by yours truly!

5. Knitted Earrings by Vickie Howell. What a clever way to liven up an old pair of hoops!


6.  Crystal Ribbon Headband by Gabriela Delworth! This has to be the easiest and fastest way to brighten up your outfit - in a boho glamor kind of way!

7. New Year's Eve Sparkle Mittens by MayaInTheMoment. Anything goes, right? You can pick up a pair of gloves at most any department store. An hour of gluing and you're ready to rock!

8. Frilly Feather Sparkle Earrings! Take a pair of store bought feather earrings or make your own and add a row of tiny crystals!

Other ideas to add crystals: :
9. To the top of a black sweater.
10. To a pair of black or white leggings.
11. A headband.
12. A scarf.
13. A fabric wristcuff.
Happy New Year!!


New Year's Resolution - Get the Kids Crafting

Thursday, December 27, 2012

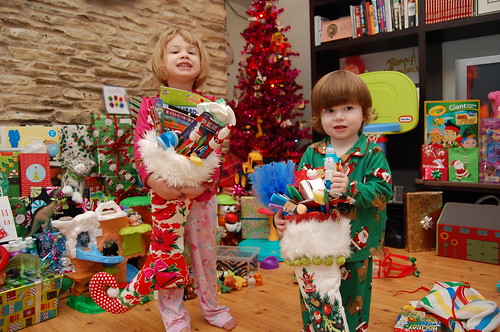
I hope Santa was good to everyone. Around here we are up to our ears with blocks, pirates, puzzles and more. Santa also replenished the kids craft stash. Using a holiday or a birthday as an excuse to load the kids up with craft supplies is always one of my favorite ploys. Just because Christmas is over does not mean you are too late on this gift idea. Spend the money Aunt Gertrude sent on a slew of paint and glue and make it your New Year’s Resolution to get your kids crafting.
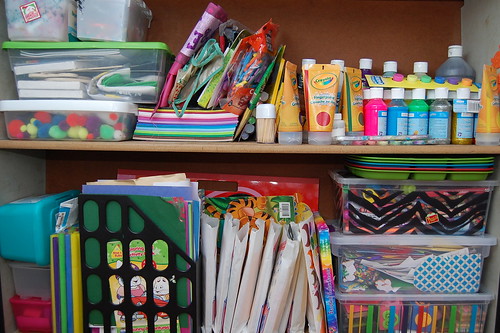
Looking for a little inspiration? Here is a list of what Santa brought my kids....
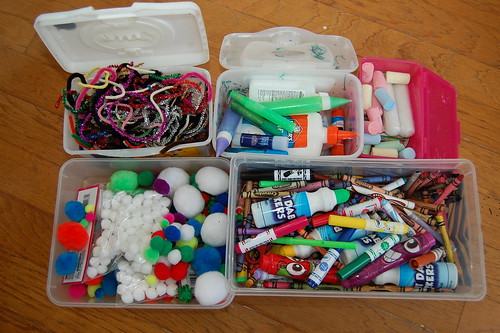
PAINT

Finger Paints

Paint Dot Markers

Glitter Poster Paint

Neon Poster Paint

Pack of Paint Brushes (be sure to include round sponge brushes and a roller brush)
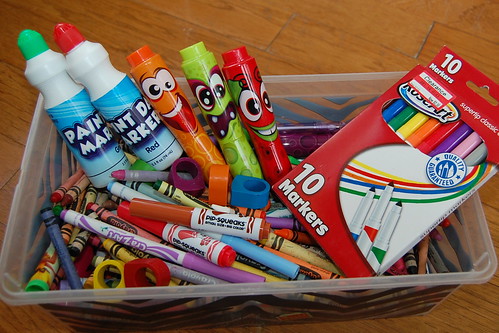
DRAWING

Crayon Rings

Plain Markers

Plain Crayons

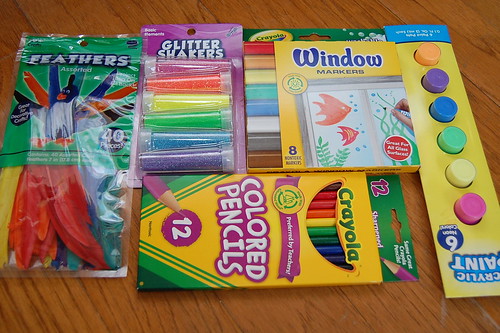
Window Markers

Colored Pencils

Scented Markers

Fabric Markers

THINGS TO PAINT

Small canvases

Wooden Frames

Paint with water books

Jumbo sized coloring books

Blank canvas tote bag
PAPER CRAFTS

Toddler Scissors

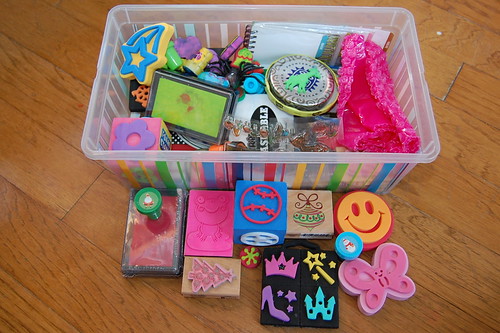
Array of foam stamps

Scented stamp pads

Stickers (TONS of stickers)

Construction paper

Craft Glue

Glue Sticks

Glitter Glue

Blank Cards

Pre-inked stamps
BLING

Glitter

Colored Sand

Pom Poms

Feathers
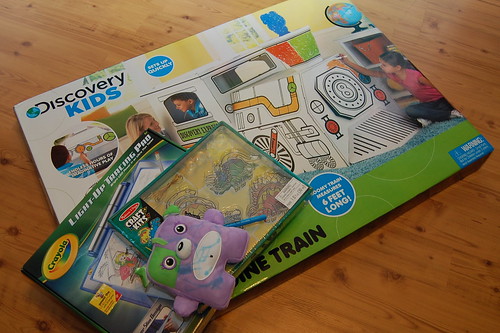
Santa also brought a few things that are not exactly craft supplies, but are intended to spark creativity...

Tallulah asked for a Doodle Bear. This is a stuffed animal that comes with a washable fabric marker. Doodle the bear, wash and repeat.

Santa wanted to have the elves make a light table for the kids, but alas it was cost prohibitive. Instead a small table top version was delievered that is actually a light tracing box. Sure we will trace, but we are also doing things like playing with our Magna Tiles on top.

Choo-Choo's are big around these parts. Santa brought a giant cardboard train to paint, color and adorn on a rainy day.
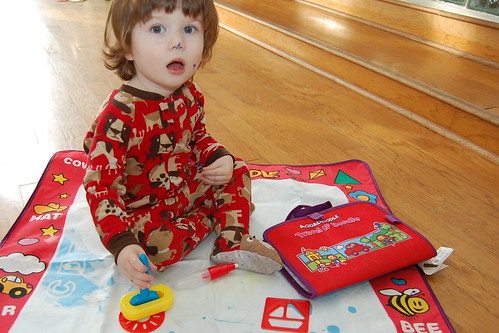
Aqua Doodle is a big hit with Baxter. We received a small lap top shaped mat for our birthday last year and I found a giant floor mat at a thrift store this summer. Santa brought a variety pack of sponge brushes, sponge tipped pens and stencils especially made for Aquadoodle. Not familiar with this toy? It is a piece of fabric that changes color with water. Let the fabric dry and start all over.
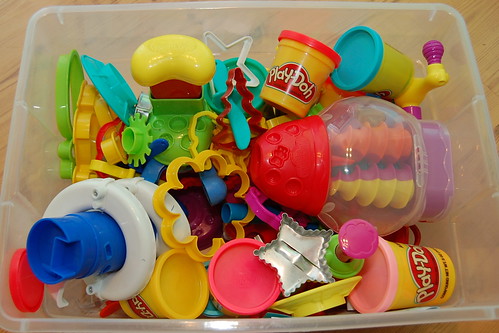
Play Doh. Last year I made my own, this year Santa brought the real stuff. Two kits were also stuffed down the chimney. One makes Play Doh candy and another makes Play Doh jewelry.
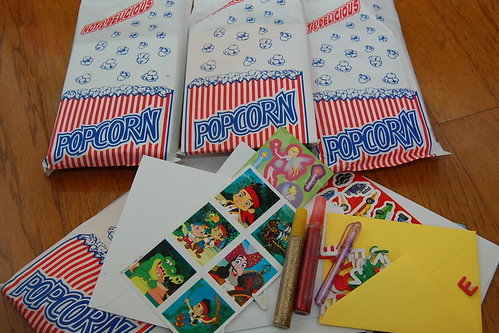
Pre-assembled card making kits. Tallulah loves to decorate cards. Santa stuffed 10 popcorn bags with a random assortment of stickers, blank cards, colored pens, stamps and more. This is much easier than handing over a giant box of stickers and paper that Baxter inevitably dumps all over the floor. I keep the finished cards to send for holidays and thank yous.

So what crafting supplies did your kid’s get from Santa? More importantly how do you plan to store it all? Do you keep it tucked away and get it out when the kid’s ask or do you have it accessible for them to get to on their own?

Butterfly Kisses DIY Silk Pouch

Wednesday, December 26, 2012

Butterfly Kisses DIY Silk Pouch
Margot Potter for iLovetoCreate

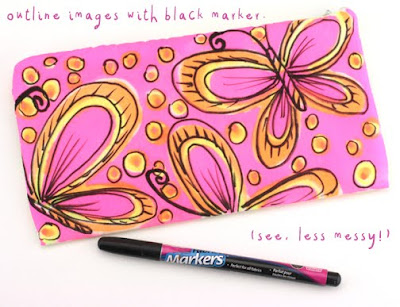
The fabulous Miss Crafty Chica shared this technique with me this past summer and I absolutely love it!  All you need is a silk pouch, Tulip Fabric Markers, Tulip Glam-it-up iron-on studs and Tulip cordless heat setting tool and your imagination.  The design is done in layers, let the colored part dry before you add black outlines. Let the black layer dry before you add your crystal accents.  The silk fibers allow the markers to bleed, which gives this a pretty watercolor appeal.  Embellish both sides, and then make a bunch of these!  You can do this with silk scarves or ties too...or make your own one of a kind fabrics! It's a breeze using products from iLoveToCreate!


(Click on images to see close up and read text.)

Aleene's Bottle Cap Birdie and more! Cool2Craft TV

Saturday, December 22, 2012

Cool2Craft TV December 24, 2012 - the Cool2Craft girls are sharing some of their fave ideas from this year! Heidi is making a whimsical birdie from bottle caps and Aleene's Tacky Glue and Tiffany is transforming a Mini Art Canvas with Aleene's Tacky Dot Singles.  
 
Learn new techniques, chat with us while watching the show and ask questions about all your favorite Aleene's products! Drop by our chat room during Monday's show and mention that you saw this post on the iLovetoCreate blog for your chance to win Aleene's Tacky Glue!

Airing Monday December 24, 2012 9am Pacific/10 am Mountain/11 am Central/Noon Eastern. Go to Cool2Craft.com and you'll see the link to the Livestream player and chat box where you can join right in. See you Monday!

Visit us on Facebook! Watch our video tutorial archives on YouTube! Get creative! Get inspired! Be cool!
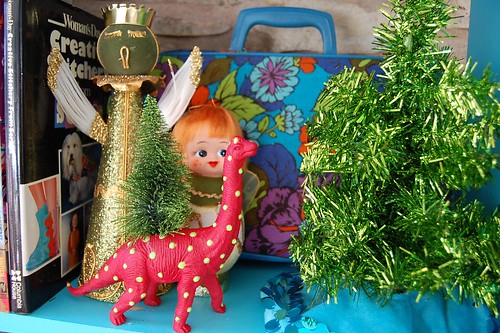


A Christmasaurus Centerpiece for the Kids Table

Friday, December 21, 2012

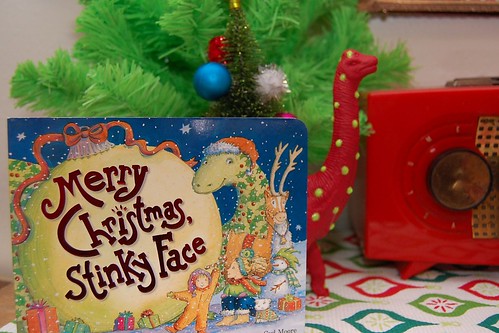
My daughter's favorite Christmas book this year is called Merry Christmas Stinky Face by Lisa McCourt. We read it daily even though we have 20+ books about the holidays currently floating around. In the book the worried little child asks his mother question after question including one about a Christmasaurus.

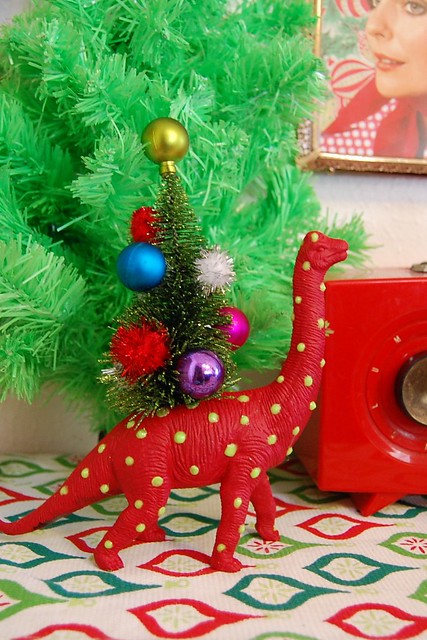
After a trip to the Blue Genie Christmas Bazaar where I made a couple of purchases from a vendor by the name of Plaid Pigeon an idea was born. Today for I Love to Create I'm going to show you how to make a quick and fun centerpiece for the kids table. Usually kids dream of the day they will be upgraded to sitting with the adults, but with a Christmasaurus as the centerpiece they are never going to want to leave.

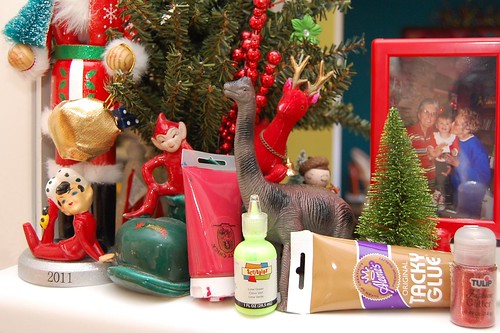
SUPPLIES

Plastic dinosaur

Crafty Chica Paint red

Scissors

Scribbles Paint in green

Small bottle brush tree

Aleene's Tacky Glue

Paint brush

Pom Poms

Small Ornaments

Glue gun

When your kids are not looking steal the plastic dinosaur toy that has been floating at the bottom of the toy box untouched for months. Using scissors or a knife cut a small hole in his back. It does not matter if the hole is rough looking the tree will cover it.

Once you have your hole paint your dinosaur. Mine needed two coats of red paint. Allow to dry completely in-between coats. Next go in an embellish with polka dots. I used Scribbles paint because I wanted shiny puffy spots.

When your polka dots are dry shove the base of your tree in the hole and adjust. From here squirt a whole bunch of Aleene's Tacky Glue inside to hold in place.

Decorate the tree with what you have on hand. In my case it was some pom poms I stole from my kid's craft pile and some tiny rogue ornaments that never made it on one of my 38 Christmas trees. I used a hot glue gun to attach. All that is left to do is display your new Christmasaurus.

CRAFTY CHICA: How To Apply A Crystal Monogram Using Tape

LINK

Last week I was at the iLoveToCreate headquarters in Fresno, CA hung out in the design studio all week. It's a crafter's paradise, let me tell you! Product everywhere, finished pieces all around, designers working on new projects, brainstorming meetings, product development think tanks - it is creative stimulation overload and I love every second of it!

Whenever I'm in town, my desk is next to that of Lauri Eaton's. She is a recent grad from FIDM, and is teeming with techniques and ideas. She was working on some ornaments and needed a quick way to make monograms using our Tulip Glam It up Crystals...her brilliant idea? Well, just watch the video to see for yourself!

MAYA IN THE MOMENT: Holiday Press-On Nails!

Wednesday, December 19, 2012
 
I've been wanting to try all kinds of nail art but the problem is that I can't grow my nails long! I was looking on Pinterest the other day and saw that a lot of people are buying the press-on nails and decorating them. You can buy a set of 100 nails for under $6 at the grocery store, that is right in my price range!

What I like best about this method is that you can decorate the nails on a table instead of on your fingers, which gives you more control. And you can pop them on and off as you like. Think of them as jewelry that you can make and switch in and out as you wish.

You'll need blank nails, nail glue, plus nail polish. Then get some Puffy Paint, Tulip Tweezers and Tulip Glam It Up Crystals.

Here is something I didn't think of - I bought the loose nails as opposed to the ones connected to a strip of plastic. No prob, I just used a strip of Aleene's® Fabric Fusion® Peel and Stick Tape™
to hold down the nails as I painted them. Choose the nails by trying them on your finger to get the right size, trim with scissors if needed.
Paint the base coat with nail polish, then clear polish and let dry. Add a tiny dot of Puffy Paint, then use the tweezers to pick up a crystal and drop in the center of the paint. Do this for all the nails and let dry.
When they're dry, simply pop them off, add the nail glue and press on your fingertips. I decorated two sets and mixed and matched them. It's addicting! And you can do a set to give as a gift for Christmas.
I love my nails! I'm excited to make more!

Thanks for checking out my project! Come visit me on my Facebook page! http://facebook.com/mayainthemoment

And here is a Christmas song for you too. :-)