Peppermint Poodle Lamp Shade

Thursday, December 3, 2009

When decorating for the holidays, no matter what holiday, don't be afraid to do a little rearranging. Those pictures are not glued to the wall, switch em' out every so often. Your kitschy trinkets are not bolted to the shelf try rotating them with some seasonal goodies. In the case of today's I Love to Create post I am further proving this point by showing you that there is no good reason why you should not swap lamp shades from time to time.
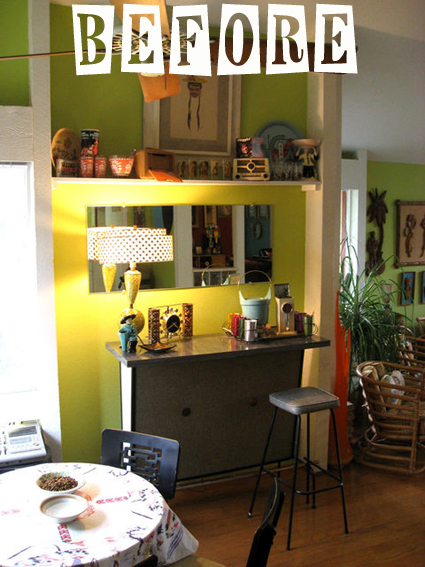


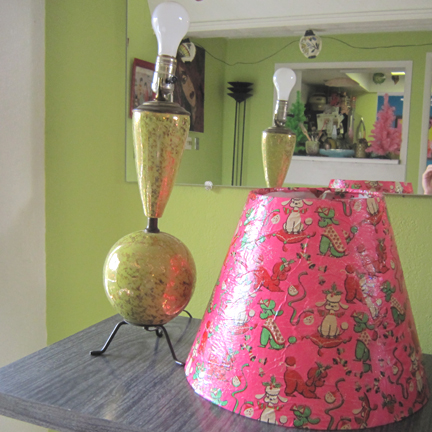
It all started when my mother recently gave me a new batch of vintage wrapping paper, which I collect and adore. This particular batch had some that was neon pink with lime green poodles and my knees about buckled. This wrapping paper needed to be displayed, adorned, worshiped and admired. What better way to showcase these pepperminty poodles than by covering a lampshade with them!


SUPPLIES
Lamp Shade
Collage Pauge Instant Decoupage Medium
Liquid Fusion Glue
Ball Fringe
Clothes Pins
Wrapping Paper
Scissors


CUTTING YOUR PAPER
Now I could have gotten all professional and measured my lampshade and cut the wrapping paper accordingly, but we all know I am not that kind of crafter. Instead I eyeballed it and cut my wrapping paper into strips a little bit longer than the length of the shade.


DECOUPAGE
I opted for Sparkle Collage Pauge, because after all everything is better with sparkle. I used a copious amount underneath and on top of my wrapping paper to adhere the paper to the lampshade. I intentionally made the paper longer than the shade so that I could fold the edges over into the inside of the shade giving myself a nice finished looking edge.

As with any time you are trying to cover something round there were a few spaces where the edges did not meet up and I had to do a bit of patchwork with the paper. Luckily the wrapping paper was such a busy pattern you can not tell.


BALL FRINGE
Using Liquid Fusion Glue I attached ball fringe to the bottom of my lamp. I used clothes pins to hold the fringe in place as it dried.


LIGHTS, CAMERA, ACTION
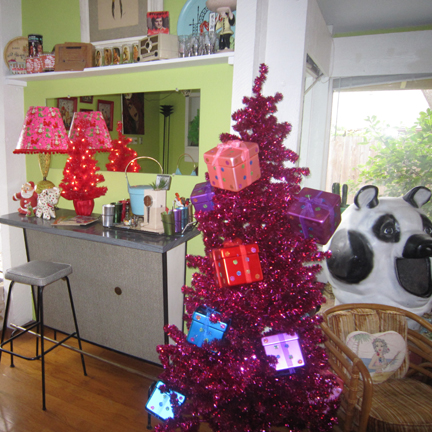
All that was left to do was to put my usual lamp shade in the attic for a winter's rest and put out my new poodlerific shade to shine. I think my new shade makes the bar look that much more inviting and a peppermint schnapps taste that much yummier!


P.S. Read more fun bloggy goodness about wrapping paper here, here and here.

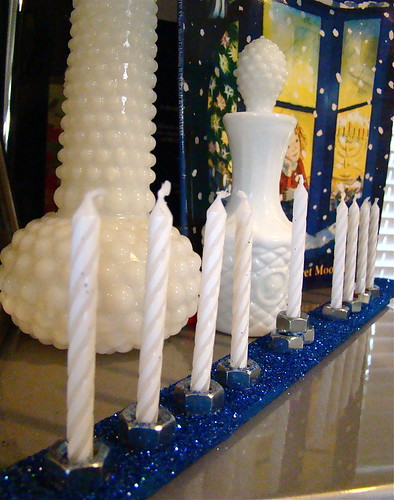
Kid Friendly, Hardware Store Menorah

Wednesday, December 2, 2009

DSC04230

Growing up in Southern California then working in Hollywood, made having friends who went to temple almost as common as those who went to mass. When I moved to Austin however, I was surprised not only by the fact that there were so few Jewish people but also, by the lack of awareness about holidays like Hanukkah. I was thrilled years ago though when my youngest son came home from a Mother's Day Out program with a paint stirrer Menorah that he'd made in class. He loved it and the tiny dreidel he received on the same day (both thanks to a fellow student's mother) so much! I thought it was such a cool (yet really inexpensive) way to teach children about a tradition that may not be their own or if it is, then to celebrate it even further.
This week on I Love to Create, I revive that pre-school project--my version of course, with a little added, razzle dazzle.

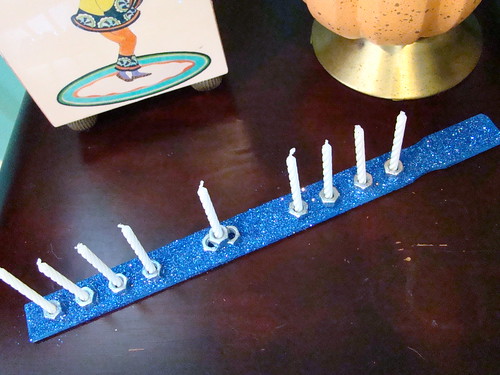
Here's how you and your kidlets can make a Hardware Store Menorah this Hanukkah season!

Materials
Wooden Paint Stirrer
11 Nuts (Sized to fit candles)
9 Candles (I just used the cheapie, birthday type.)
Blue, Crafty Chica Craft Paint (From the same pack you may have bought for last week's Knit-Print Wrapping Paper!)
Crafty Chica Glitter in Color: Nova
Sponge Brush

How-To
  • Paint both sides of stirrer. Apply a 2nd coat.
  • Before 2nd coat dries, cover top of stirrer with glitter. Once dried, shake excess glitter off.
  • Adhere nuts to stirrer with Tacky Glue so that there's a center pyramid stack with 4 individuals on each side. Let dry.
  • Insert candles in each of the nuts. If necessary, add a dab of Tacky Glue to the bottom of all candles EXCEPT for the center one; that one's used for lighting.
Hardware Store Menorah

The Basics of Practicing the Festival of Lights
Each of the 8 side candles represents a day of Hanukkah; the center candle is called, the "Shamash". After nightfall of each day of Hanukkah, use the Shamash to light the candles (lighting an additional one as each day passes.)

This year Hanukkah begins at sundown on December 11th. To read more about the symbolism and traditions surrounding the Menorah, check out this website.

(Holiday)Craft.Rock.Love,

iLoveToCreate Teen: Recycled Christmas Cards

Tuesday, December 1, 2009

iLoveToCreate Recycled Christmas Cards
Teen Holiday Craft Project
Created by Margot Potter for iLoveToCreate
“Mom crafted, kid approved.”


It’s tough to throw pretty holiday cards away, but eventually our coffers get full. Rather than spend beaucoup bucks on new cards, why not upcycle some oldies but goodies? I have a collection of fun vintage cards, but many of them are already used. I love repurposing them in my design work. (You don’t have to use vintage cards, any used holiday cards will do.) You need cards with figural images you can frame with dimensional paint and then cut out in silhouette. It’s easy to give old cards new life with Tulip dimensional paints and glitters! Teens will love this project and it’s a great way to get them excited about upcycling and handmade holidays. Miss Avalon just loved this snowman.

Gather up dimensional paints and glitters and make an afternoon out of creating your own wonderful, heartfelt and handcrafted creations with your teen.

Materials
Used holiday cards with bold figural images
Heavy duty cardstock
Tulip Dimensional Fabric Paint in silver
Tulip Dimensional Fabric Paint with silver glitter
Tulip Fashion Glitter in White Pearl

Ranger Adirondack Pigment stamp pad in snow cap
Small clear snowflake stamp (I used a clear stamp from Inkadinado for EK Success)
Clear stamp base
Scissors
Bone Folder
Paper cutter
Ruler


1. Select a card with a figural image. Select areas you’d like to glitter and spread Tulip dimensional glitter paint thinly across areas with fingertips. Before it dries, sprinkle with Tulip Fashion glitter and shake off excess on scrap paper. Bend paper and dump any excess glitter back into jar.

2. Use Tulip dimensional fabric paint in silver to frame your image. I was envisioning a soldered effect here. Allow card to dry.

3. Cut out figure with scissors.

4. Use a ruler to measure a card background that fits your image with a little excess around the edges. Each card will be unique to the image you select. Cut with a paper cutter or scissors, fold in half and use a bone folder to get a clean crease on the edge of your card.

5. Stamp front of card with pigment pad and snowflake stamp in a repetitive pattern. Before the pigment dries sprinkle a layer of Tulip Fashion Glitter on and shake off on to scrap paper. Dump excess glitter back into jar. Allow to dry.

6. Use foam stickers to attach your image to the front of the card. Cut out and attach the sentiment from the original card inside of your creation.

BONUS IDEA: Take the image off of the foam stickers, punch holes on both sides at the top and add some tinsel wire and VOILA instant Christmas decoration!


Disclosure: Most of the materials used in this project were donated for use in my work.