Tiger Art on the Walls & My Neck!

Thursday, November 12, 2009


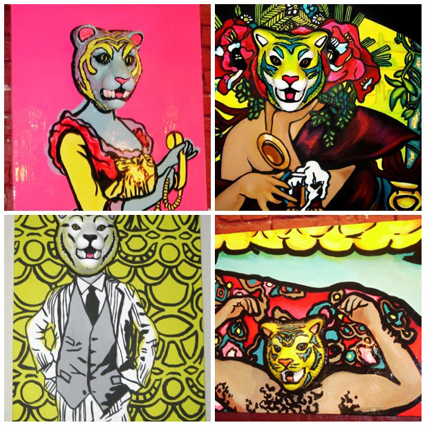
Lord knows I love a good theme. I'm one of those people that is likely to read Memoirs of a Geisha, while eating sushi and wear a kimono while doing it. Tonight my amazingly talented sister Hope Perkins (check out her I Love to Create interview about glitter) is having an art opening and you bet your bottom dollar I am working a theme with my outfit. You can look at the walls or my neck to see the art.

SUPPLIES
Cast resin cabochons of paintings
Wooden drops
Dremel
Crafty Chica Little Chica Paint Pack
Sponge Brush
Head Pins
Decorative Paper
Collage Pauge Instant Decoupage
Plastic Flower Petals
Jewelry Wire
Pliers
Beads
Crimp Beads
Liquid Fusion Glue
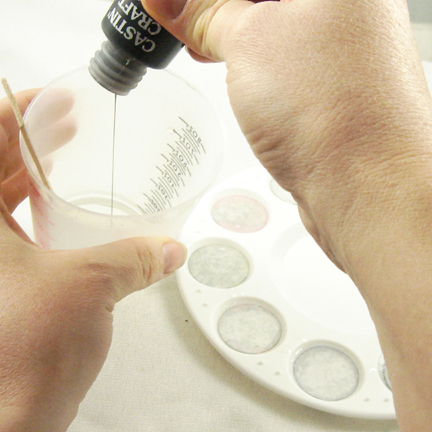

Casting Resin
I won't go into all the details of how to cast resin, you can get all the info in my book The Naughty Secretary Club: The Working Girls Guide to Handmade Jewelry and all the supplies from ETI. In a nut shell choose the pictures you want to use, print out on photo paper and cast images in resin using a plastic painters palette as your mold.
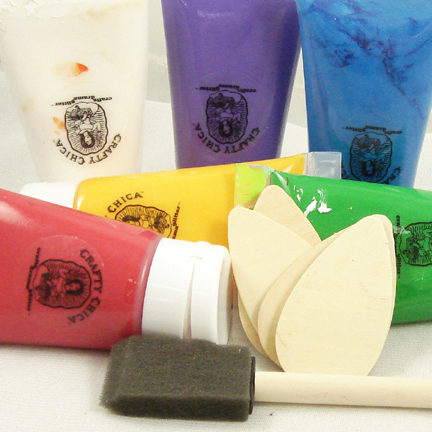

Paint
The raw wood aisle at the craft store is always one of my faves. I found these rain drop shaped wooden discs that work perfectly for necklaces. Mix Crafty Chica Paint to get desired shade and use a sponge brush to apply two coats. Allow to dry completely.
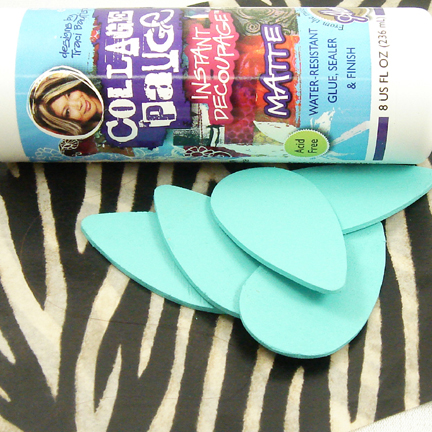

Collage
Once your paint has dried add decorative papers to the wood to add interest. I used Collage Pauge and zebra print Decopatch paper. Allow to dry.


Glue
Once my custom resin cabochons had set up and been sanded I used Liquid Fusion Glue to attach them to my wooden rain drops.
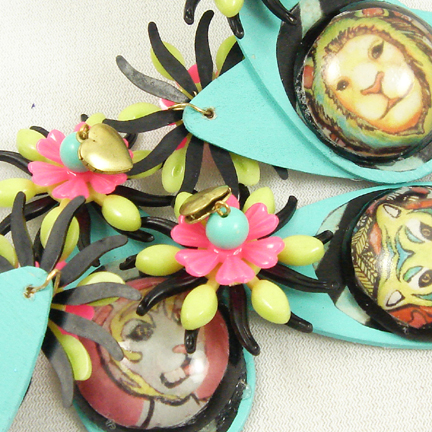

Drill
Using a Dremel I drilled holes at the tops of all my wooden drops. Next using an eye pin, plastic flower petals, small heart shaped lockets and beads I did some wire wrapping. The wrapping not only adorned my pendants with funky flowers it also gave them loops at the top for hanging.


String
Using jewelry wire and beads string your necklace into desired pattern. Finish the ends with crimp beads and clasp.

If you can't make it out to the Austin Art Garage tonight, never fear the art will be up all month long. If you don't live in Austin check out art by Hope Perkins and Cory Ryan online!

Stenciled Wall Art

Wednesday, November 11, 2009

I'm a big fan of Ed Roth--and not just because he's one of the featured designers whose story's included in my upcoming book, Craft Corps (which incidentally, is now available for pre-order in my shop). His stencils are modern, sleek and often, have a sense of humor about them. I like them so much, I used many from his first book (Stencil 101) to decorate bibs with at my baby shower !

Now Ed's got a new book/kit out, Stencil 101 Decor, that speaks not only to the stencil enthusiast but also to those of us with a penchant for decorating. With 10 plastic stencils and step-by-step instructions (on painting anything from a wall to a fridge) included, no surface in your house will be safe from Stencil 101's charms. Dip your toe into D.I.Y. decor first though, by dabbling in wall art that's perfect in a kids' room, teen's dorm or hipster's loft.

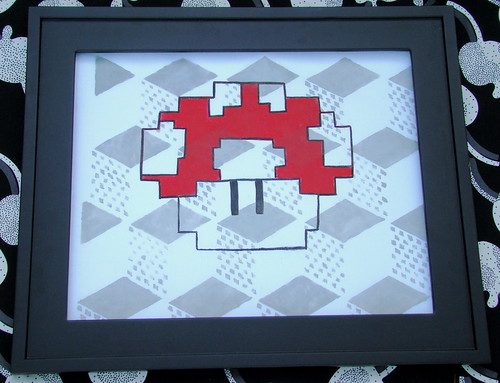
In our house, two very different little boys share one room. What to do to keep a little design synergy without squelching their individual interests? Easy. Start with a basic, coordinating geometric theme, then add a simple graphic symbol that expresses each kids' interest. Here's how I used Ed's stencils to do just that.

Game Boy Wall Art
Materials
Stencil 101 Decor Stencils
16"x20" Buckram or other Stiff Fabric
Tulip Slick Fabric Paints in Desired Background & Contrasting Colors
Sponge or Stencil Brushes
Foil or Bowl
Fabric Pencil & Eraser

Stencil Wall Art How-To

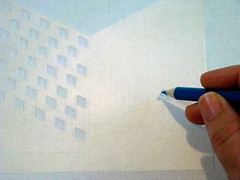
  • Lay stencil down on fabric; mark registration points at the given triangles (this will ensure an even pattern repeat.)
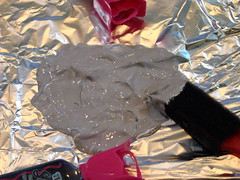
  • Squirt paint onto foil piece--I mixed two colors, black & white, to get the shade of grey I wanted.
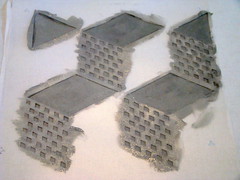
  • Lightly paint (either brushing or pouncing) over stencil. Too much paint on the brush will cause bleeding under the stencil. Ed's Tip: "Remember, stenciling is a "dry" brush technique."
  • Move stencil to next blank area on fabric, using registration marks as a guide. Repeat last step as many times as necessary to cover fabric.
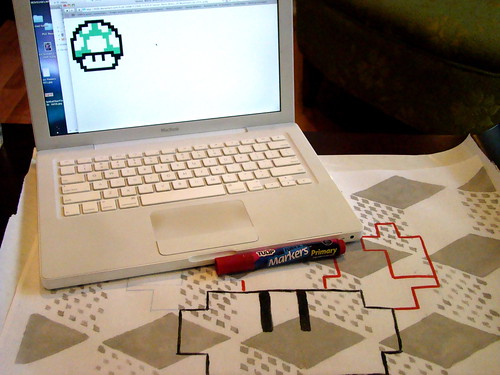
  • Do an internet search for the type of image you want to place on top of the patterned background. In this case, I chose a mushroom from Super Mario Bros.
  • Using the web image as a general guide, sketch onto fabric
  • Using fabric markers, outline image. Fill in desired areas with fabric paint. The result: a perfect picture for my littler gamer!
Sporty Spice Wall Art

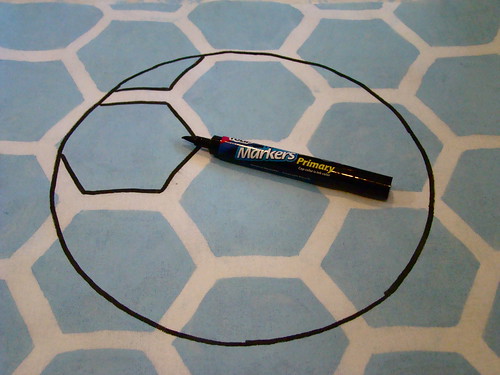
If free-handing an image isn't you gig, give utilizing the stenciled background a try! For the 2nd piece I made, I began with Ed's hexagon pattern in a lighter color then used a dinner plate to draw a ball shape on top of it and filled in selected pieces with dark, fabric paint. Voila, a soccer ball for my all-American boy!


Craft.Rock.Love,
Vickie

iLoveToCreate Teen Room Decor: Patchwork Paper Wall Letters

Tuesday, November 10, 2009


iLoveToCreate Teen Room Décor
Mixed Media Patchwork Paper Wall Letters
Margot Potter Teen Crafts
“Mom crafted, teen approved.”


Teens love to personalize their rooms and this is a fun and easy way to do that in a flash. You can make an entire word to fill a wall or just an initial like I’ve done here for a door. I really fell for these retro themed papers, but you can use any papers you like including recycled scrap stash papers, wrapping paper and magazine pages. You don’t have to save this idea just for your teen’s room; these would be adorable anywhere in your home. I love the idea of seasonally themed words done in this patchwork style. Avalon squealed when she saw this, so I'm pretty sure it’s a winner!

Materials
Wood letter or letters
K&Company Carolyn Gavin Scrapbook paper (or other paper of your choice)
Liquid Fusion Glue
Traci Bautista’s Collage Pauge medium in matte finish
Vintage or new coordinating button
Tulip clear crystal to fit inside of button
Wired tinsel

Tools
Paint brush
Scissors
Exacto knife
Pencil


1. Select your papers. Place your letter on the paper, hold it down firmly, trace and cut with your Exacto knife. (If there’s a little overlap you can trim it later.)


2. Cut the accent papers (I made a small border with a coordinating paper and cut out a coordinating paper flower.)


3. Adhere the papers using an even coat of decoupage medium and paint a coat of medium on top. I love using a brush because it gives you texture, but you can opt for a foam brush if you prefer. If you get bubbles, wet your fingers and gently work them out. (Don’t fret, they will deflate when the medium dries. I promise!) Allow medium to dry.

4. Paint a second coat of decoupage medium over surface and allow to dry.

5. Run a thick bead of Liquid Fusion along the edge of the letter and above your borders and adhere the tinsel wire. IMPORTANT: Do not smash the wire into the glue or it will flatten and lose its dimension and sparkle. Just gently lay it into the glue bead. For the longer pieces you can place something small (like small glue bottles) on each end and the center until they’ve tacked into place and then remove them and allow the tinsel to dry overnight. This is kind of like using hot glue without worrying about the heat melting the tinsel or burning your fingers.

6. Attach a button to the center of your flower using Liquid Fusion. Attach a Tulip crystal to the center of the button with Liquid Fusion. Allow to dry.