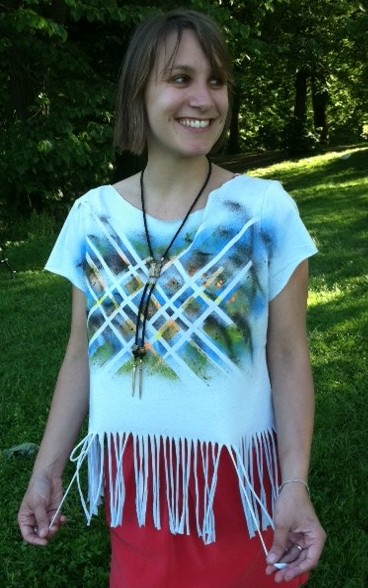
I-Love-the-'80s Fringe Fabulous T-shirt

Tuesday, May 22, 2012


It's springtime, which means one thing to me: T-shirt weather! It's an exciting time over in the Land of Generation T, because as many of you know, it only gets better: After spring comes summer, which means we all get a little more scantily clad -- T-shirts turn into tank tops and tube tops and ooh-la-la! So grab your scissors (to cut away some of that extra fabric, of course), dial up the color (bring on those fabric spray paints), and hop in your fabulous fashion time machine, because fringe is enjoying a bit of a renaissance this season. Last weekend, I dialed back the decades and dug into my craft stash to make some classic '80s-inspired geometric tees.

Materials:
-light-colored T-shirt (I used a light blue one)
-ruler

-masking tape
-fabric scissors
-fabric spray paint (variety of colors)
-scrap newsprint paper
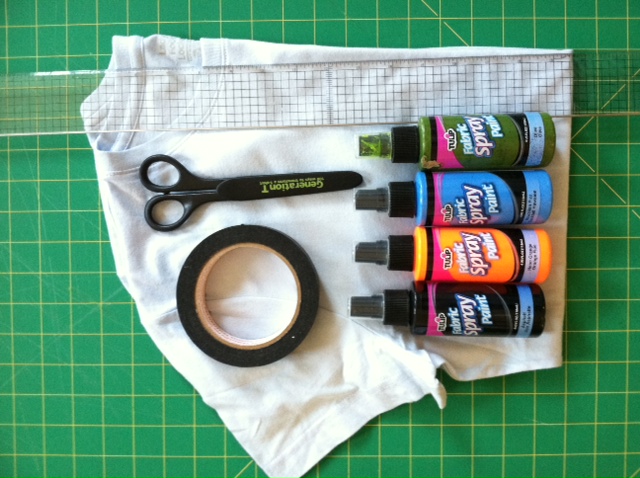


Make it:
1. Lay the T-shirt flat. Use masking tape to mark a horizontal line about 8" up from the bottom of the shirt. Find the vertical center of the shirt and apply tape to the chest-region of the T-shirt to create a crisscrossing geometric pattern.


2. Insert the newsprint paper between the layers of the T-shirt to prevent the paint from bleeding through. Then apply fabric spray paint over the taped area. Apply another color or two, then let dry.
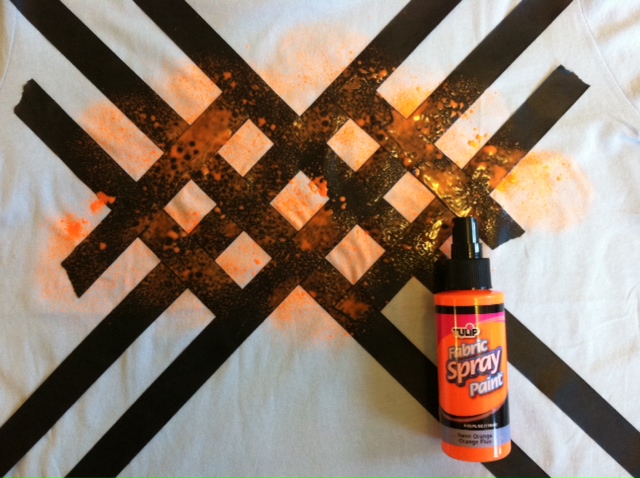

3. Peel back the tape, and then lay down more tape (I cut the tape strips in half, thirds, and quarters to make thinner lines) across your pattern to create a modified plaid pattern. Then spray paint more color!
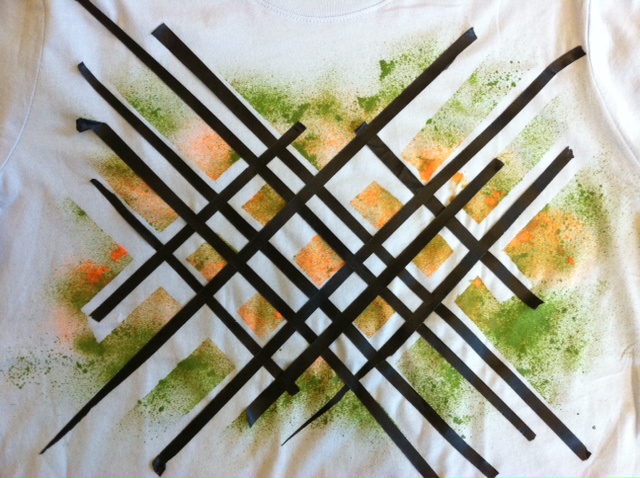

4. Let dry completely before peeling off the tape to reveal your design.
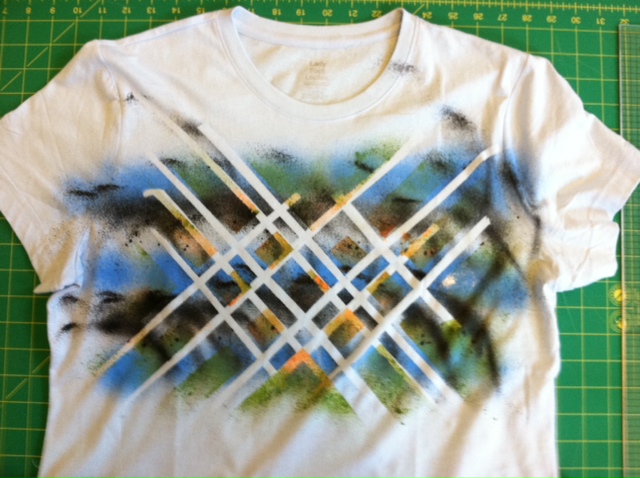

5. Cut off the bottom hem of the T-shirt, just above the stitching. Then, using the tape marker you pressed down in step 1 as your guide, cut 1/3"- to 1/2"-wide fringe from the bottom edge of the shirt.
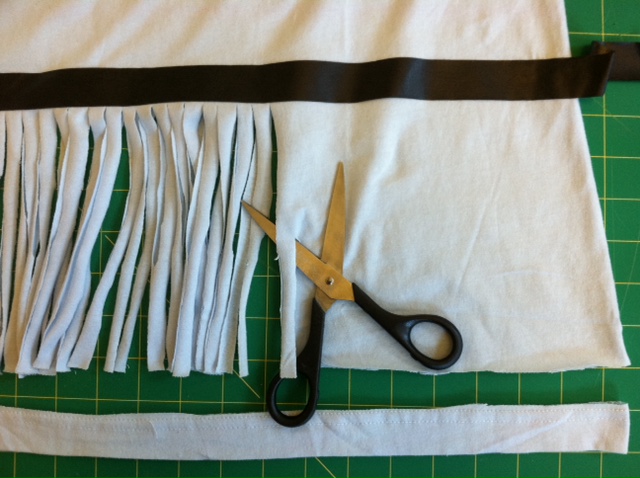

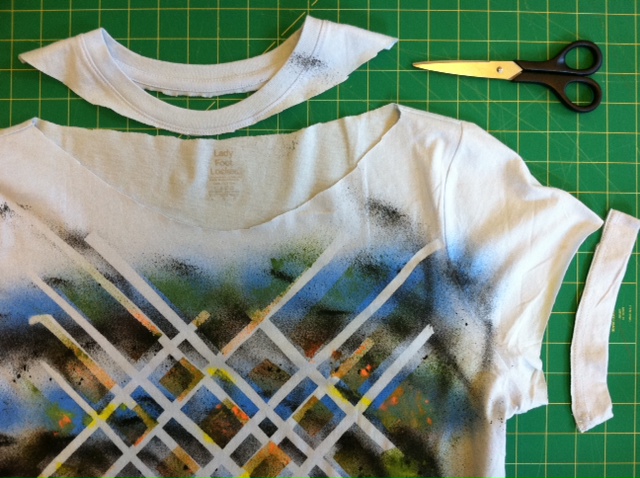
6. Cut off the sleeve hems, just above the stitching, and cut out the neckband, just below the neckband edge in the front and the back, and about 2" wider on the sides.

7. Gently tug on the fringe to stretch it out (the fabric edges will curl in). Try it on!
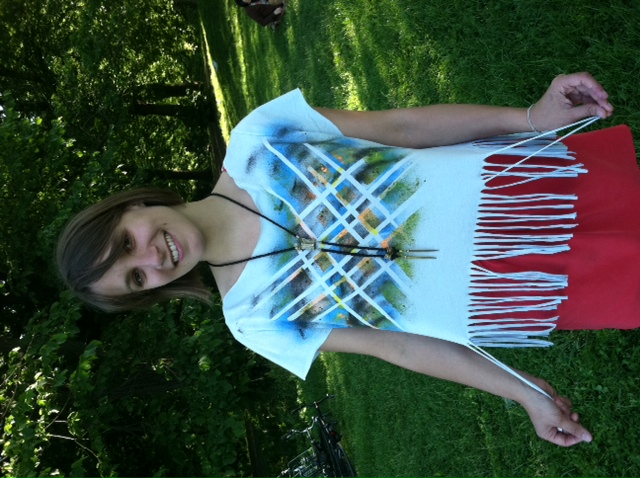

8. Grab up additional T-shirts and experiment with your paint patterns and fringe -- cut it on a diagonal, in a chevron-inspired V-shape, make it long or short!
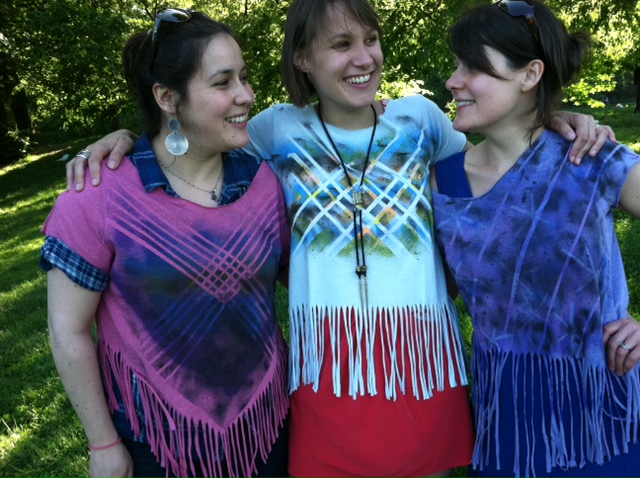

Then pack a picnic, sling your boombox over your shoulder, and crank up any of the decade's Billboard hits!



Visit us on Facebook!
Craft on!

Altered Couture project with Vintage Jeans

Monday, May 21, 2012


Altered Couture Magazine is one of my favorite publications because it shows how to turn ordinary clothing into NEW fashions.  Not only is it smart on the budget, but it's FUN to see what you can do with thrift store finds or something from last year that you no longer care to wear.


How cool, to open it up and find that they used my design in the contents pages, thanks to Managing Editor, Beth Livesay.  And yes, I'm doing the Happpppy Dance!


As Lead Designer for iLoveToCreate, it's always fabulous to use new products, and I'm in love with our new Tulip Beads In A Bottle, because it worked beautifully with my design, and was so easy!


As you'll see when you pick up your magazine, the step-outs are great.  Check out the moth-eaten vintage sweater I found at the thrift store and cut up into gorgeous appliques that I glued onto some of my old jeans with Aleene's Fabric Fusion, then embellished with hundreds of faux beads with Tulip Beads In A Bottle.  
What do you think??


Visit us on Facebook!
Craft on!

iLoveToCreate Retrofabulous Crafts: Cheers Cocktail Coasters


iLoveToCreateRetrofabulous Crafts: Cheers! Cork Coasters
Margot Potter
“These are your grandmother’s crafts.  Ya gotta problem with that?”

Nothing says retro like cocktail parties, a delightful custom that is rapidly disappearing.  What could be more festive than a few friends, some fondue, hors d’oevres and a litany of libations?  What indeed.  Whatever your poison, be it leaded or ‘un’, these perky little coasters will turn any occasion from drab to fab in seconds flat!  Cheers!

Materials
Conversation bubble stencil (I used a Shape Template from Fiskars)
Fine tipped black marker
Tulip sponge pouncer
Small flat paintbrush
Small tipped paintbrush

Trace conversation bubble on front of coasters using a fine tipped black marker.

Carefully paint black edges around bubble.  A flat brush is the best choice for this task.'
 

Paint the inside of the bubble white, use flat brush for larger sections and small brush to get into smaller spots.  Allow paint to dry.

Use a foam pouncer to apply a small amount of paint to letter stamp, be careful not to get paint on stamp edge.  Stamp words on each coaster, these can be a little wonky as this is a cocktail accessory! After dry, spray with two coats of matte acrylic sealer. 

Cheers, clink, sip and savor...the four components of a successful toast!

Visit us on Facebook!
Craft on!