I'm sure you've been seeing all the ombre shirts on the runway and in the stores as of late. Ombre is the best thing to happen to tie dye since Jerry Garcia! You would think this technique would be super difficult, but it's not as hard as you might think. Check out our designer Lauri in her "DIY NEVER DIES" video where she shows you step by step how to get the look! You're going to be so excited to see how it's done!
Ombre Tie Dye Shirt DIY + Video
Friday, October 26, 2012 at 9:35 AMI'm sure you've been seeing all the ombre shirts on the runway and in the stores as of late. Ombre is the best thing to happen to tie dye since Jerry Garcia! You would think this technique would be super difficult, but it's not as hard as you might think. Check out our designer Lauri in her "DIY NEVER DIES" video where she shows you step by step how to get the look! You're going to be so excited to see how it's done!
The Cool2Craft girls are sharing a winter wonderland of creative ideas. Tiffany Windsor is creating Vintage Inspired Holiday Art Canvases with Aleene's Super Thick Tacky Glue and Aleene's Matte Decoupage and EcoHeidi is creating Cereal Box Button Snowflake Ornaments with Aleene's Original Tacky Glue, plus more!
Learn new techniques, chat with us while watching the show and ask questions about all your favorite Aleene's products! Drop by our chat room during Monday's show and mention that you saw this post on the iLovetoCreate blog for your chance to win Aleene's Tacky Glue!
Airing Monday October 29, 2012 9am Pacific/11 am Central/Noon Eastern. Go to Cool2Craft.com and you'll see the Livestream player and chat box where you can join right in. See you Monday!
Visit us on Facebook! Get creative! Get inspired! Be cool!
Hooty Owl Hallowe'en Cards
Wednesday, October 24, 2012 at 11:21 AMHooty Owl Hallowe'en Cards
Margot Potter for iLoveToCreate
Avalon has been busy as a little bee getting straight A's in her honors classes! Can you say proud mama? I can! Go Avalon! So I stepped in to whip up some fun and festive Hooty Owl Halloween cards today.
These are so easy to make and you can layer them however you please with whatever papers and embellishments you have at hand. The lenticular owl came off a panel on a Puff's tissue box, which I simply could not throw away! The other owl is a permission free Art Deco era image from Dover to which I've added text and is here for you to download if you'd like to use it. I can't resist the urge to add googly eyes whenever possible. Teens can use these for party invitations or greeting cards or even frame them for room or locker decor. Fun, fast...and fabulous!
Materials Hooty Owl Upcycled Hallowe'en Card
Lenticular owl image from Puff's tissue box
Cardstock
Patterned coordinating papers
Jute or hemp twine
Clear acrylic tile
Large orange rick rack or other ribbon trim
Glam-it-Up crystals
Googly eyes
Tulip fabric marker in black
Aleene's Tacky Glue
Aleene's Tacky Dot Runner
Aleene's Jewel It Glue
Tools
Paper trimmer
Scissors
Bone folder
Remove image from tissue box. Create a frame for image out of patterned scrapbook paper using paper trimmer or scissors. Cut cardstock with a small border around edge of framed image, fold and crease with bone folder, marker or scissor handle. Adhere image and frame to front of card using tape runner. Cut rick rack to fit along the bottom edge of framed window. Adhere with tape runner. Cut twine to fit edges of frame, adhere with Tacky Glue. Attach patterned paper behind acrylic tile using tape runner. Cut a small piece of paper to fit center of tile and adhere to front of tile with tape runner. Write Boo! on front of paper with marker. Use Jewel-It glue to attach crystals to right edge of tile. Attach googly eyes to owl's eyes using Jewel-It glue. Use marker to add details to frame.
Materials Hoot Hoot Card
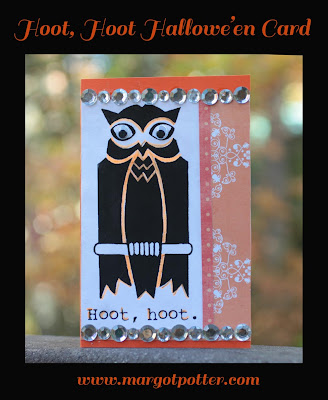
Hoot, hoot owl printed on white paper
Coordinating scrapbook papers
Orange cardstock
Plastic rhinestone accents
Googly eyes
Aleene's Tacky Dot Runner
Aleene's Tacky Glue
Tulip fabric marker in neon orange
Tools
Paper trimmer
Scissors
Bone folder
FREE DOWNLOAD! |
Print owl image. Cut, fold and crease cardstock. Cut coordinating scrapbook papers for background and right edge of image. Use marker to add orange accents to owl image. Adhere paper layers to card with Tacky Dot Runner. Use Tacky Glue to adhere faux rhinestones on bottom and top edge of owl image. Attach googly eyes to center of owl's eyes with Tacky Glue.
10 Quick & Easy T-shirt Halloween Costume Ideas!
Tuesday, October 23, 2012 at 8:01 PMFollowing up last year's popular list of 10 Quick & Easy T-shirt Halloween Costumes, here is another collection of ten DIY costumes on the fly. From the cinematic to the everyday, from the historical to the commercial, from the sweet to the oh-so-punny (scroll down to #10).... But let's start with a classic.
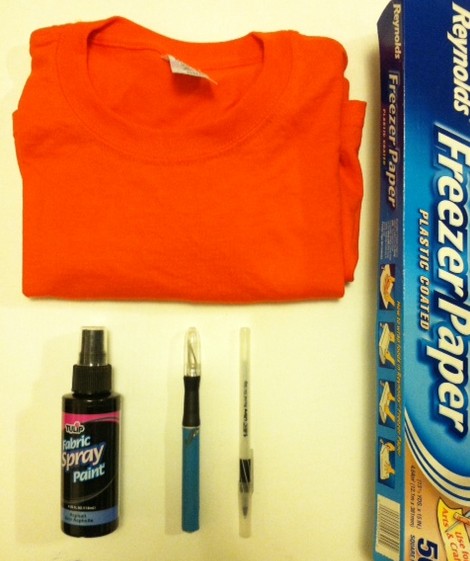
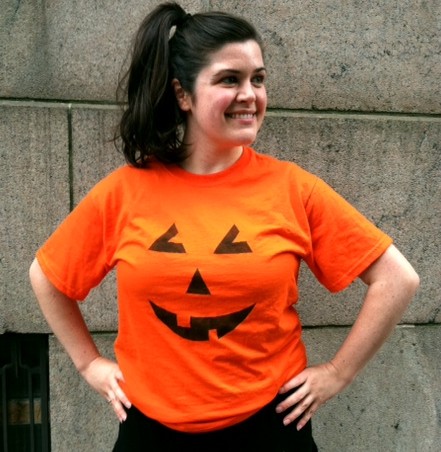
JACK-O-LANTERN T-SHIRT COSTUME
Materials:
-Orange T-shirt
-Tulip Fabric Spray Paint (in black)
-Pen
-Freezer Paper
-Craft knife and cutting mat
-Warm iron
-Newsprint paper
Make it:
1. Use the pen to sketch out jack-o-lantern features on a sheet of freezer paper.
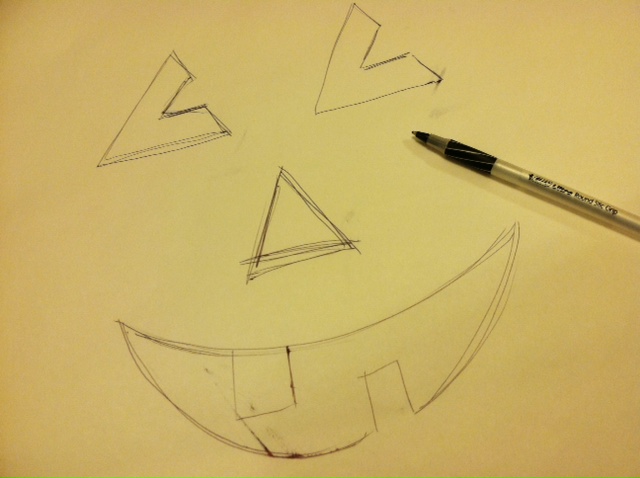
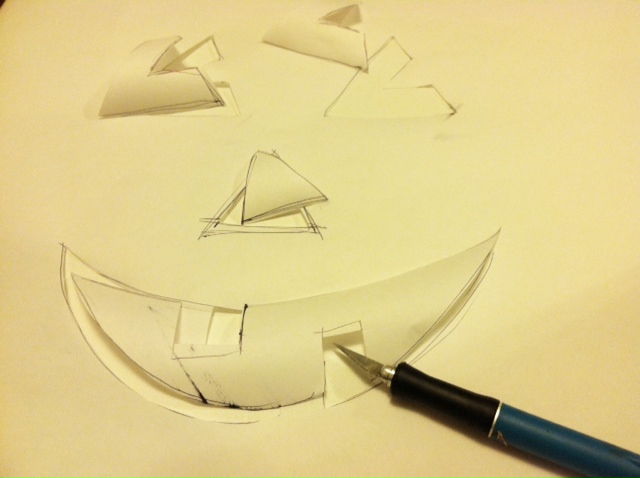
2. Use the craft knife and cutting mat to cut out the features.
3. Iron the freezer paper stencil onto the front of the T-shirt. Insert a sheet of newsprint between the layers of the shirt to prevent the paint from bleeding through.
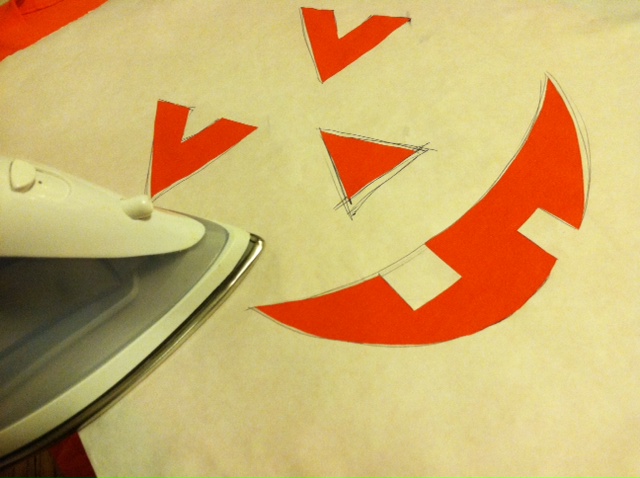
4. Mask the parts of the T-shirt that are still visible, and spray over the stencil with black paint.
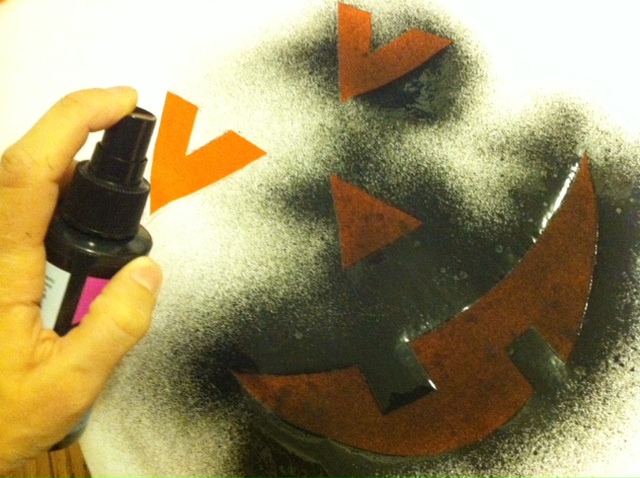
5. Let the paint dry briefly, then peel up the stencil.
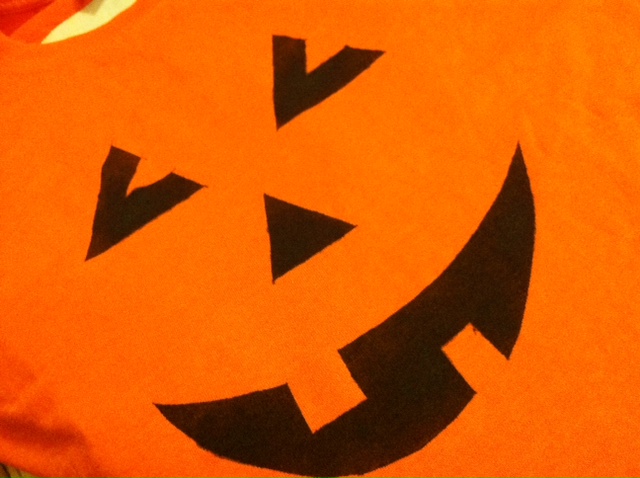
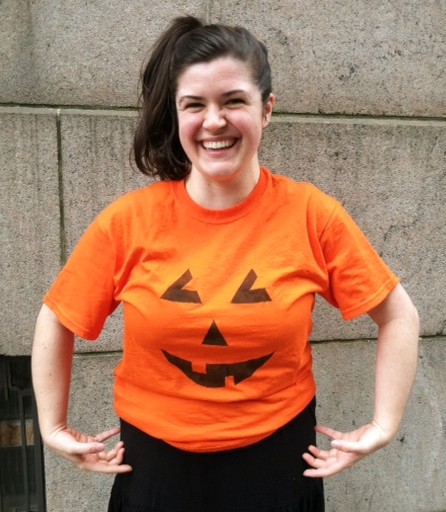
6. Let the paint dry completely, then try on the T-shirt and go find a pumpkin patch to haunt!
---
WITHOUT FURTHER ADO, HERE ARE 10 COSTUMES TO MAKE WITH T-SHIRTS (including the JACK-O-LANTERN!)
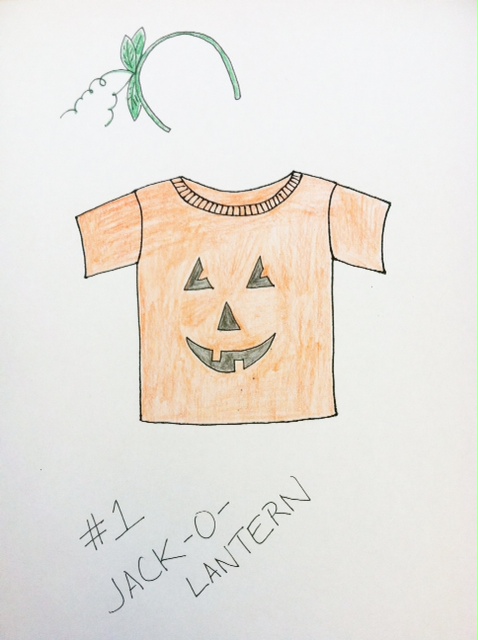
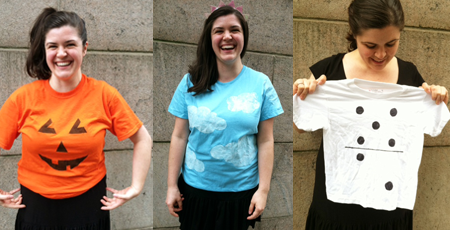
#1 Jack-o-lantern. As shown above, that pumpkin patch classic. Black paint on an orange T-shirt. Optional: Accessorize with a green vine and leaves headband.
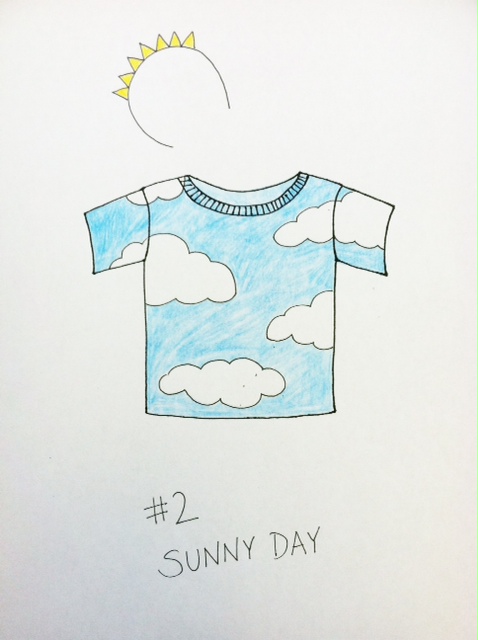
#2 Sunny day. Paint white clouds on a pastel blue T-shirt, or stick pillow stuffing on the T-shirt. Inspired by one of our readers, Emily A. (not to be confused with Emily P., our model for this post!), who used a variation of the Mohawk Mo' Rock hat (from Generation T: Beyond Fashion) as the headpiece. We used this more recent accessory. And hey, you can always use the costume to moonlight in Ben & Jerry land.
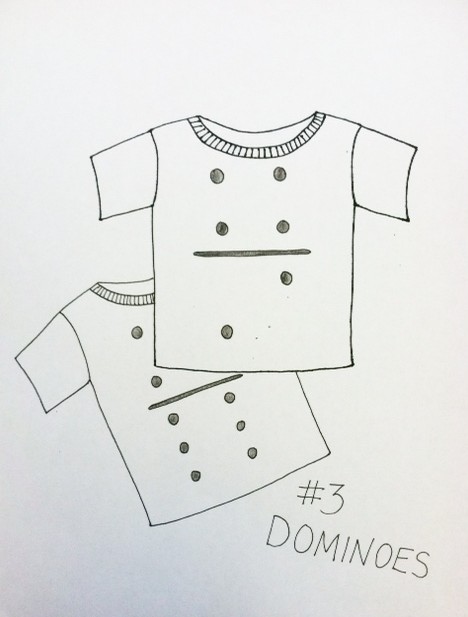
#3 Dominoes. A fun and very easy group costume (just leave the ears and tail at home so you don't get mistaken for a dalmatian) -- use black fabric paint or black permanent marker on a white T-shirt. And if you get tired at any point while wearing the costume, simply lie down adjacent or end-to-end with a matching number on a friend's shirt!
#4 Strawberry. Paint yellow seeds on a red shirt, and use green T-shirt scraps to fashion a stem with leaves to sit a top your head. Go solo or meet up with friends to make blueberries, watermelon -- a whole fruit salad!
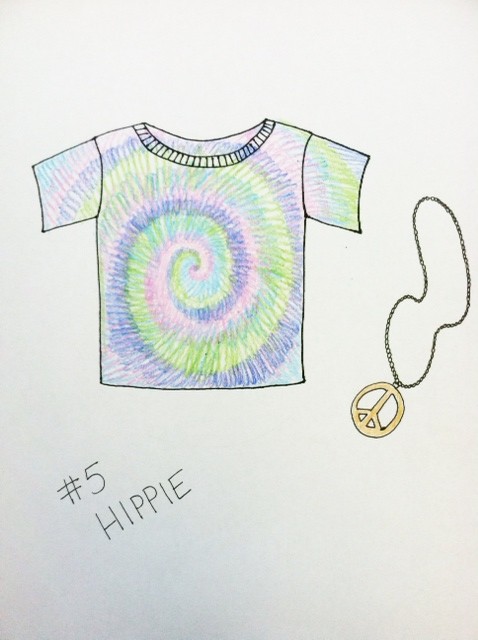
#5 Hippie. Tie-dye a T-shirt, then pair it with bell-bottom jeans, a headband, and any other . (Note: You have to schedule in additional drying time with this one.)
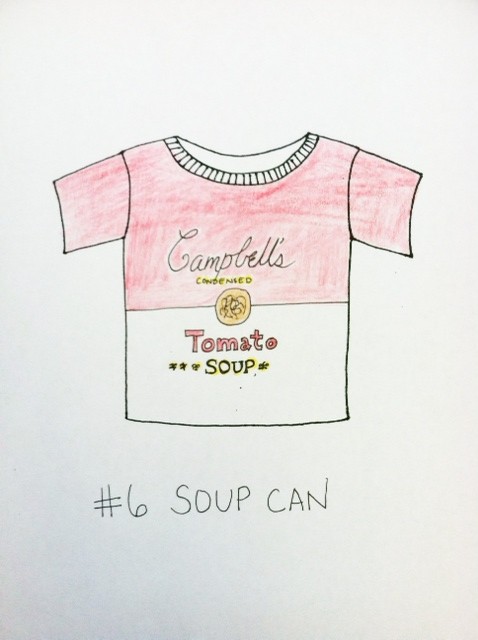
#6 Soup can. Start with a plain white T-shirt and use a black permanent marker, stencils, and red and yellow paint to embellish it. Then convince a pal to go as Andy Warhol!
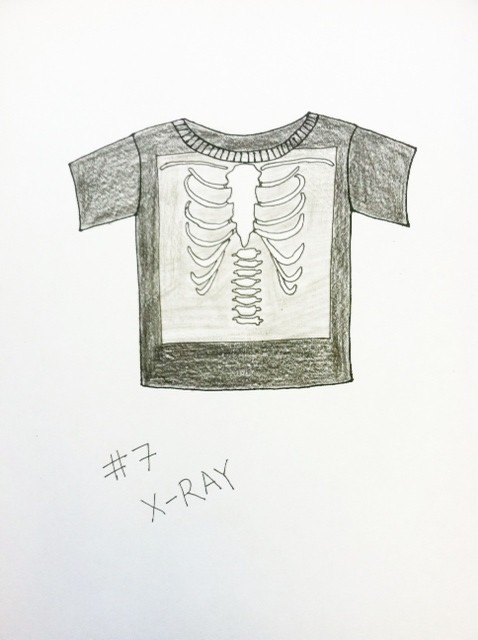
#7 X-ray. A great way to show some skeleton on Halloween, use white paint on a black T-shirt (and the painted parts will show up gray.
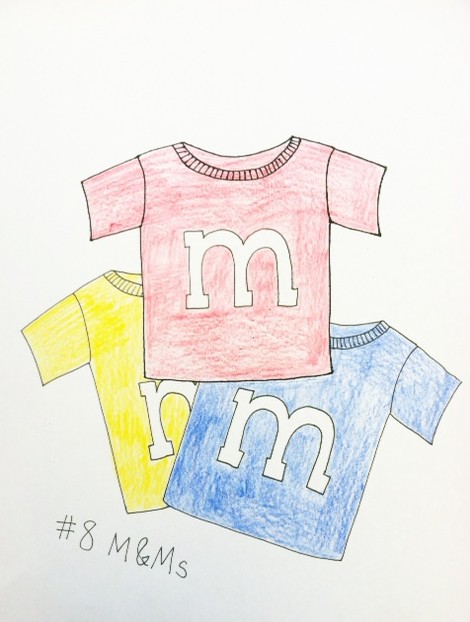
#8 M&M candies. Paint white lowercase 'm's onto red, yellow, blue, green, orange, and/or brown T-shirts. Then really go the extra mile and wear white gloves and white sneakers. Gather up a group of friends for a whole handful of candies. Note: This approach also works for Skittles!'
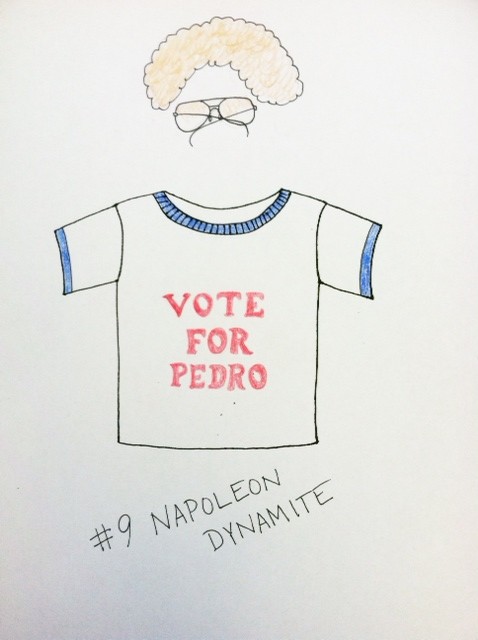
#9 Napoleon Dynamite. Based on the indie hit, paint blue edges on a white T-shirt to mimic a ringer tee; paint or iron on letters to spell "Vote for Pedro." Top off with some wiry glasses and a curly wig.
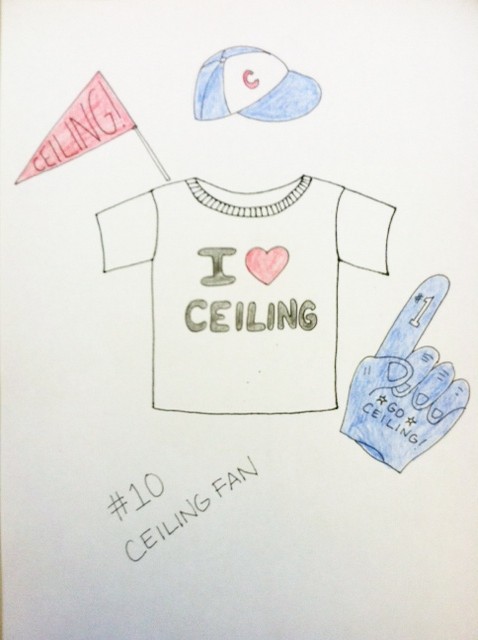
#10 Ceiling fan. Heh. Number 1 fan of the ceiling. Get it? Get it? Use fabric markers or paints on a white T-shirt -- and plenty of props!
---
Happy trick-or-treating everyone! Here's to last-minute costumes that are as easy as 1, 2, 3.
Cool2Craft TV: Restyled Jewelry Ideas
Sunday, October 21, 2012 at 9:35 AMHey Aleene's fans! Watch Monday's Cool2Craft TV with us! Cool2Craft TV October 22, 2012: Restyled Jewelry
The Cool2Craft girls are digging into their jewelry boxes this week to create restyled jewelry projects. Tiffany Windsor is restyling costume jewelry into blinged ornaments featuring Aleene's Super Thick Tacky Glue and EcoHeidi is upcycling water bottles into funky and fun pendants using Aleene's Original Tacky Glue, plus more!
Learn new techniques, chat with us while watching the show and ask questions about all your favorite Aleene's products! Drop by our chat room during Monday's show and mention that you saw this post on the iLovetoCreate blog for your chance to win Aleene's Tacky Glue!
Airing Monday October 22, 2012 9am Pacific/11 am Central/Noon Eastern. Go to Cool2Craft.com and you'll see the Livestream player and chat box where you can join right in. See you Monday!
Visit us on Facebook! Get creative! Get inspired! Be cool!
Make polka dot framed pumpkin wall art
Friday, October 19, 2012 at 5:08 PM– Tulip Fashion Glitter in black
– Medium to large foam pumpkin
– craft knife
1. Remove the insert from your frame and tack out the paper/cardboard sheet. Cut a piece of fabric larger than the sheet and wrap it around. Use your Tacky Tape to hold it in place.
2. Put your fabric-wrapped cardboard back into the frame and secure.
3. Use a craft knife to cut the pumpkin in half. It's really easy to do, the foam pumpkin cuts like buttah!
4. Open up the large Tacky Dots and remove from inbetween the plastic sheets they are seperated by. Apply randomly all over pumpkin.
5. Pour the glitter all over Tacky Dots and shake off onto a sheet of scrap paper.
6. Use a large brush to remove any excess glitter. Don't the dots look great?
7. I chose to further embllish the stripes with some random Tacky Dots using the Tacky Dot Dotter. I sprinkled on and shook off the glitter as I went. I went back in and used the brush to remove glitter when I was done.
Now frame and enjoy your creation! I actually did 2 framed pumpkins with my two halves. They looked perfect with the Halloween table we set up!!
Melted Crayon Halloween Picture Frame
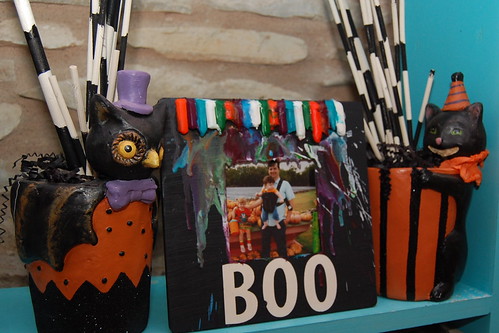
Thursday, October 18, 2012 at 6:22 PMI have a thing for seasonal picture frames. It is kind of an addiction. When Target puts their seasonal picture frames out I am the first in line. I decided to add to my collection this year by making one of my very own.
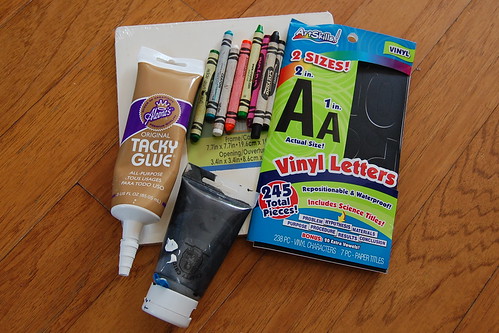
SUPPLIES
Blank Picture Frame
Black Crafty Chica Paint
Halloween Colored Crayons
Vinyl Letter Stickers
Aleene's Tacky Glue
Hairdryer
Craft Knife
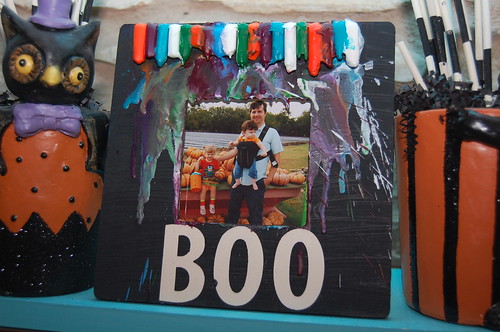
Pardon my lack of step out pictures, I had an anxious toddler as my co-crafter on this project. The first thing I did was spell out the word boo on my blank frame with vinyl letters.
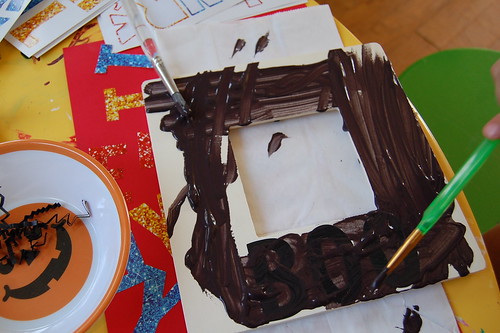
Next I painted the frame black. Tallulah did a base coat with her kid paint and then I followed up with some Crafty Chica Paint. I set my frame in the sun to dry.
Using a craft knife I slit the paper on the Crayons. Tallulah was in charge of unwrapping and breaking. I chose Halloween colors. Yes, in my world teal is a Halloween color.
When my frame was dry I used Aleene's Tacky Glue to attach my broken crayons along the top of the frame.
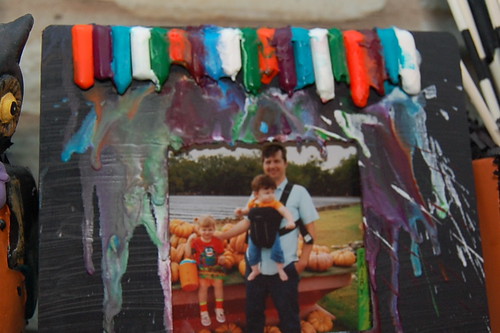
When my glue was dry I headed outside with my hairdryer to melt the crayons. In a perfect world the wax would have made it down over the words Boo, but alas they did not.
The heat from the hairdryer helped my stickers to peel up at the ages. Tallulah helped me peel up the letters to reveal the words BOO! All that was left to do was add a fun photo of the fam at the pumpkin patch last year and display.
More Puffy Paint Pumpkin Painting Fun
at 11:55 AMWe love us some Puffy Paint Pumpkins! After all, we are the makers of Tulip 3D Fashion Paint and Scribbles 3D Paint. We know you guys affectionately refer to it as puffy paint though! Last year, we shared a puffy paint pumpkin ideas roundup and we're back with several more fun ideas like the Sugar Skull Dia De Los Muertos pumpkin above from The Swell Life! Check out these fun ideas. People just love to create with puffy paint. We LOVE it!
Mix puffy paint push pin mini pumpkins with First Home Love Life. Make Mexi Pumpkins with Crafty Chica! Loving the purple tone on tone! Create fun flowery doodled pumpkins with Many Makings. Black paint makes for lovely doodled pumpkins with Alisa Burke.
Make colorful un-scary pumpkins with Papery and Cakery. Create sophisticated gold and black pumpkins with Lacquer and Linen. Sprinkle glitter on top of puffy paint for this frosted pumpkin from BHG. These cross-stitch pumpkins are so cool from Aesthetic Outburst! Which of these pumpkins do you want to make?