Paper Press T-Shirt Technique

Thursday, January 31, 2013
Looking for a look for Valentine's day?  Or any day for that matter!  Here's a cute look from Pattiewack showing you how to use Scribbles Dimensional Fabric Paint or "Puffy Paint" as a lot of you may affectionately refer to it as. You don't have to have drawing skills to do this project, just know a little cursive writing.  Let's show you how to make it!
What you need:
Scribbles 3D Fabric Paint in Glittering Silver, Pink Surprise and Wild Raspberry
– Pink T-shirt
– Freezer paper
– Chalk pencil (optional)

Before you begin:  You'll want to wash your tee (without fabric softener) and dry. Now place a sheet of freezer paper inside the layers of the shirt to keep paint from seeping through to the back of shirt.
Write the word “Lovely” with Wild Raspberry on the front of your shirt.  If you are unsure of your freehand writing skills, draw the word on using a chalk pencil, so it will give you a guide to go by.
Go over the word again using Glittering Silver leaving a little space between the colors.
Trace again with Pink Surprise.
Carefully lay paper side of another piece of freezer paper over the wet paint.

Lightly press paper into the paint with your fingertips, being careful not to flatten completely.
  Carefully peel off freezer paper from the shirt and throw away. Let dry.
This is a really quick project to make. For that reason, it was a design chosen to appear in store displays.  This is our design studio setup during the process of mass production.  We actually did 36 of this one shirt. Cool, huh?  It's all in a day's work!

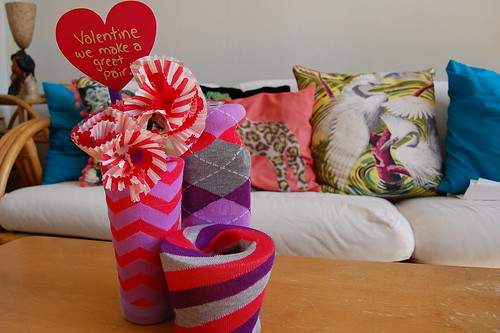
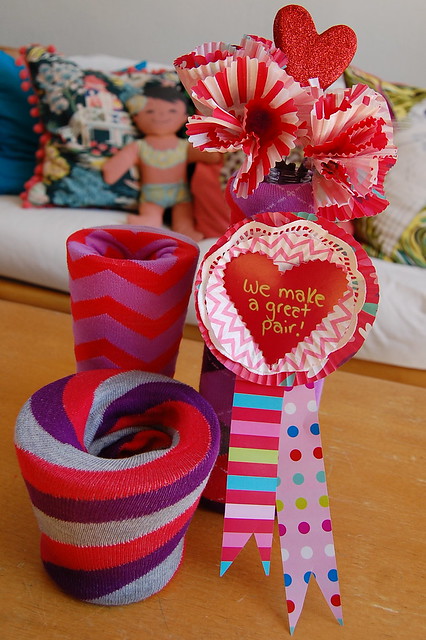
Sock Covered Valentine's Vase with Cupcake Wrapper Flowers


I love socks, especially kooky knee high ones. If you want to know the way to my heart buy me some socks. Nothing says I love you and Happy Valentine's Day like toasty toes. The trick is how to give a pair of socks and make it look cute and festive. Today for I Love to Create I'm gonna show you how to do just that.

SUPPLIES
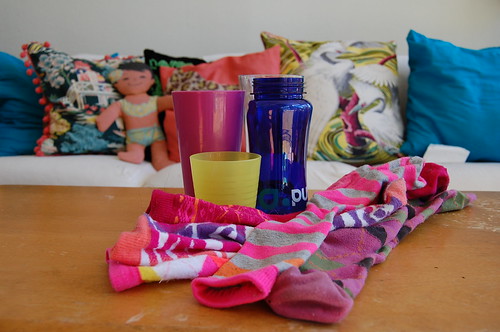
Cute socks
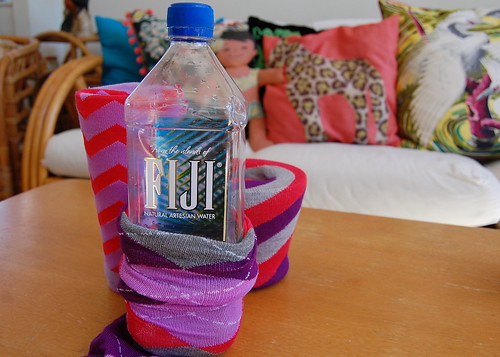
Glasses and bottles

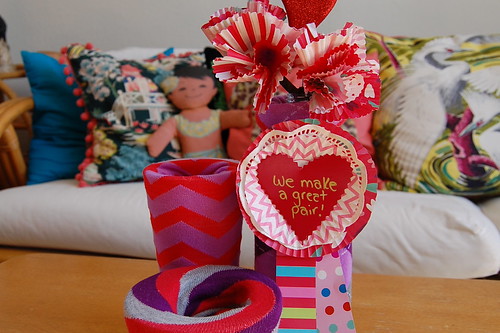
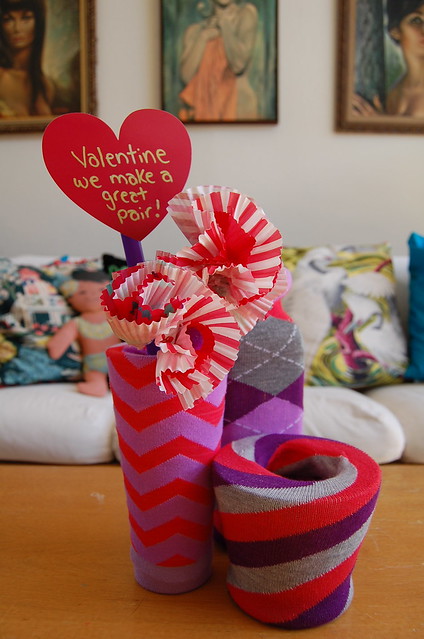
This part is super easy. Roll your sock over your glass or bottle. Thanks Design Sponge for the great idea! At this point you can fill your vase with anything you want. Lollipops, roses or cupcake liner flowers. Lemme show you what I did.

SUPPLIES
Aleene's Tacky Glue
Sticks
Cupcake liners
Pen

Baxter, my right hand crafty man and I gathered up our supplies and got busy. There are a million tutorials online for making flowers out of cupcake liners. I just sorted twisted and glued to the top of my stick. I added the occasional pom pom for good measure.

Make a little card or floral pick that says something catchy like "Valentine - We Make a Great Pair!". Give to your loved one and watch their heart melt and feet warm up

MAYAINTHEMOMENT TEEN CRAFT: No-Sew Recycled T-shirt Bag

Wednesday, January 30, 2013

 Hey everyone! So I went to CHA and at the iLoveToCreate booth one of the many awesome projects was this cute no-sew t-shirt bag! I LOVE this project because it requires absolutely no sewing what so ever. If you have old shirts you don't want, this is the perfect project! (Plus I need a bag to carry my books!!)

SUPPLIES:


First, Cut the sleeves off. This is going to be the holes for your arms, and depending on how "baggy" you want it, will depend on the cut. I wanted it fairly baggy, thus I cut as close to the sleeves as I could get. This is an XL shirt, so I didn't need to cut that much off. Next, cut off the collar(same as the sleeves), then turn it inside out.
  place tape along the bottom of the shirt on one side. To seal the tape, rub over it a few times. Next peel the waxy part off, and you should have a very sticky line of tape. After this, take the other part of the bottom, line it up with the tape, and rub it to stick. To double secure it, place tape on both sides of the bottom.

 I used this lace I found in my stencil box to create a design with the spray paint.You could also scrunch it, tie it, or add regular tape for stripes!After this, let it set for a couple minutes to dry.

All done! I LOVE In-n-Out. Do you think they'd give me a free burger with this bag?! Think of how many burgers I could fit in this bag...Worth a shot!!!  :)

Love, Mayainthemoment.com


Anything Goes! Fun Kitchen Foil Earrings on Cool2Craft TV

Sunday, January 27, 2013


Join us for a new episode of Cool2Craft TV January 28, 2013 - the Cool2Craft team is sharing some super cool and unique projects! Tiffany is digging into her recycle bin to create Kitchen Foil Earrings with Aleene's Tacky Double Stick Sheets.

Learn new techniques, chat with us while watching the show and ask questions about all your favorite Aleene's products!
Airing Monday January 28, 2013 9 am Pacific/10 am Mountain/11 am Central/Noon Eastern.

How do you join us? Go to Cool2Craft.com and you'll see the link to the Livestream player and chat box where you can join right in. See you in the chatroom on Monday or drop by anytime this week to watch these cool video tutorials!

Visit us on Facebook! Watch our video tutorial archives on YouTube! Get creative! Get inspired! Be cool!

How to Flock With Sand

Thursday, January 24, 2013

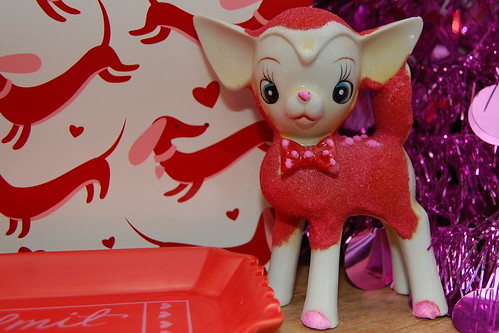
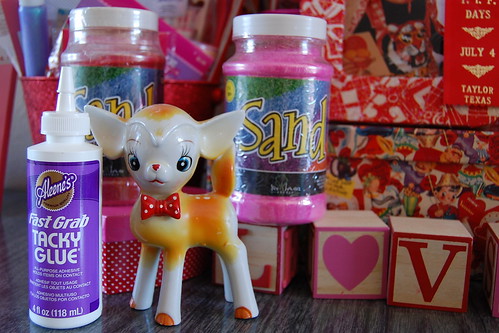
I love flocking. From fabric with texture to nodding chihuahuas in a rear window - flocking makes my heart flutter. The kids and I have been dabbling in sand art lately and that is when I had the idea to flock with sand. I have Valentine's Day tunnel vision so today for I Love to Create I grabbed a kitschy deer I had on hand and got to flocking.

SUPPLIES

Craft Sand

Figurine

Aleene's Tacky Glue

Paint Brush

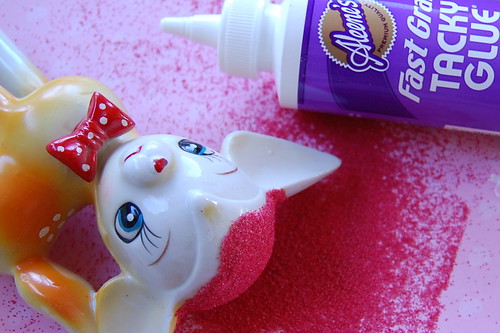
This project is super easy. First up paint your figurine with glue. While the glue is still wet sprinkle on your sand.

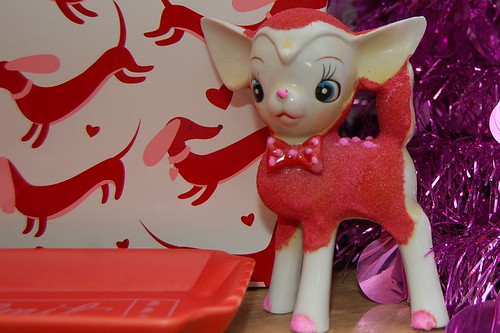
Once your glue is dry shake off your excess sand. I went in and added glue polka dots that I sprinkled with hot pink sand.

When your glue is dry display with pride! I can't wait to flock more figurines!

Pop over to BlogHer to read all about how to make a terrarium with sand art.

What will you Cre8time for?

Wednesday, January 23, 2013
Last week, at the Craft and Hobby Association Tradeshow, we had a super fun time meeting with bloggers and designers and having them personalize their hands with our Tulip Body Art to help celebrate the launch of the Cre8time movement! Our friend Margot Potter (above) obliged and is going to Cre8time for making the world a craftier place. Don't you just love that?

What's Cre8time? Cre8time is a creative movement for positive social change that let's people reclaim their creativity!  It's designed to help people recover eight hours a month and devote it to their particular craft, and to create a place for them to share their experiences - the joys, lessons, and results – with the creative community at large!

We could tell you more, but we think this video below does a nice job of explaining what the movement is all about!


Now back to the fun we had with our craft and blogger friends!
  Our friend Angie from the Country Chic Cottage is going to add more creativity to her life!
Crafty Chica Kathy Cano-Murillo is going to Cre8time more time for her motto "Peace, Love, & Glitter"
 Jeshua, the Boi from Ipanema, is going to Cre8time for following his dreams in the year ahead!
 The Zen of Making's Haley Pierson-Cox is going to sew for the Cre8time movement.  We've seen her amazing projects and think this is a great idea!
 Blogger Heather Mann of Dollar Store Crafts is going to Cre8time for...you guessed it, DOLLAR STORE CRAFTS!
 Louisiana gal Jade Harrington of the Jaderbomb blog is going to work on developing her brand this year!
 We love Jen Hadfield's site, Tatertots and Jello, so it's great to see she's going to Cre8time for even more creativity in the upcoming year.
Blogger and designer Jennifer Priest of Hydrangea Hippo is a paper maven, so crafting with paper is the perfect project for her to Cre8time for.
Blogger and author Marisa Lynch of New Dress a Day is spending more time to promoting her site and new book New Dress a Day.
 Denise of PearMama is giving back to others with her creativity by making it a point to inspire others!
Beckie Farrant of Infarrantly Creative made the goal to build creativity into her children! So cool that she's instilling creativity in her kids. It's so important.
Tanner Bell of Tanner Bell Designs is going to work on more craft tutorials.  We wanna take his advice on our own blog too.
Designer and author Sonya Nimri is making more time for feathers and rhinestones.  Sounds like fun to us!
 And Tauni Everett of the Snap Conference will Cre8time 4 her love. What's better than that goal?

Let's give all our friends "a hand" (pun intended) for helping us out with this fun project.  Now, go check out their sites and get insanely inspired to Cre8time for your own personal artistic passion.

Now here's some fun ways for you to spread the word about the Cre8time movement!

 1. Make the Cre8time declaration on your hands and have someone snap a pic!  Post your pic on the Cre8time Facebook page and on your own Facebook page wall.  Instagram or blog it as well.  And be sure to share the Cre8time.org web page with your friends when you show it off.

2. Cre8te a project and upload it to the Cre8time gallery.

3.  Tell your friends and family about the movement and organize a family craft night.  We can learn so much more about each other through creativity! It's super powerful.

DIY Cupcake Wrapper Flower Valentine's Wreath


iLoveToCreate DIY Cupcake Wrapper Flower Valentine's Wreath
Isn't it Romantic?
Margot Potter

Miss Avalon was recovering from being sick and catching up on a mountain of homework, so with her approval and input, Miss Margot made a cupcake wrapper flower Valentine's wreath! I'm feeling the love for Valentine's Day this year, how about you?  Taking the holiday decor down is horribly depressing, but how about cheering things up with a festive 'Isn't It Romantic' DIY Valentine's Wreath? 

What say you?  Shall we? 

Making these cupcake wrapper peonies is so fun and they're so pretty, you can hardly tell they started out as cupcake wrappers!  The key is using white glassine cupcake wrappers, the non-stick coating and translucence make them easy to scrunch and form and with a little scrunching and effort, they take to dyes and inks and glitter beautifully.  I have only just begun making these flowers, and now you can too!

I used some yummy Red Heart Rigoletto yarn in cream to wrap my Styrofoam wreath base.  This yarn has sequins in it for a little subtle sparkle.  Wrap your entire wreath and then tie a knot.  Cut off the excess yarn.
You'll need 12 wrappers for each flower, head pins, SWAROVSKI ELEMENTS or other faceted sparkly crystal beads, Aleene's Tacky Glue and a pair of chain nose pliers.
Dip the head pin in glue after you've inserted through into the center of your bead and cupcake wrapper layers.  I suggest pre-punching the hole with a pin to make it easy to get the head pin through them.  Insert this into your styrofoam wreath using the chain nose pliers to really get it in there!
Now comes the fun part.  Once the glue on the five flowers is dry, you need to scrunch the layers to make them look like poppies.  I do it one layer at a time, scrunching and squishing, then once you've scrunched all twelve layers, open them up to expose the crystal center.  Keep scrunching, separating and opening until you are satisfied with the results.

I loved these flowers, but they needed just a skootch more sparkle.  I wanted subtle...so after some experimenting I came up with a mix of Tulip Glitter Bond and Tulip Fashion Glitter.  (My studio was cold, your adhesive should be more runny and less chunky! Dip your pouncer in the Glitter Bond, then into the glitter and gently dab on the edges of your Peonies.  Allow this to dry!

I used some wired pom pom trim I scored at Michaels on clearance recently to add some interest to the center of the wreath.  If you can't find this exact trim, use sparkling thread and glue the pom poms and the hearts on, or thread pom poms on thin wire.  Or use a thin sparkling ribbon and glue pom poms on the front.    Wrap wire around edges, use "u" pins made from 20 gauge craft wire or bent head pins to secure.  Dab glue on wire before inserting into back of wreath with chain nose pliers.

I wanted just a little pop of red, I tried ribbons and a variety of other approaches but it all looked ticky tacky. Avalon remembered I had some red felt hearts! Perfect! You can punch some red paper hearts out if you can't find felt.

You can hang your wreath with a large ribbon bow or you can add a hanger to the back using 16 gauge copper craft wire.  Just form a "u" bend wire arms down with chain nose pliers, add Tacky Glue and insert into top back of wreath using chain nose pliers.  I love this hung inside of an empty large gold frame...or of course, on a door!