Showing posts with label Pattie Wilkinson. Show all posts

Meet our Let's Create Live Host: Pattie Wilkinson

Tuesday, April 12, 2011
pattie-pic

With only a few weeks away to our Let's Create Live event, we plan on bringing you fun tidbits, interviews, and details about the live show!

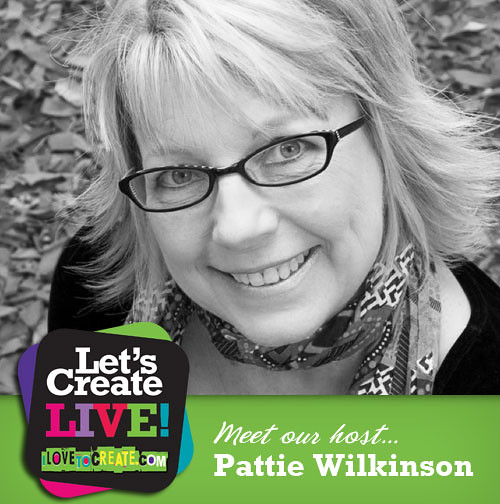
First up, we wanted to introduce you to our beloved hostess with the mostest for the event...Pattie Wilkinson! Pattie is a lead designer and spokesperson here at iLoveToCreate and can churn out sketches and projects like it's no one's business! If you are a DIY/craft show fan, you may remember Pattie as a co-host on the TNN show, Aleene's Creative Living! So hosting is second nature for Pattie! Not only is Pattie a fab host and designer, she's worked all over the craft industry developing in-store merchandising, products, tools and more for major companies and retail chains.

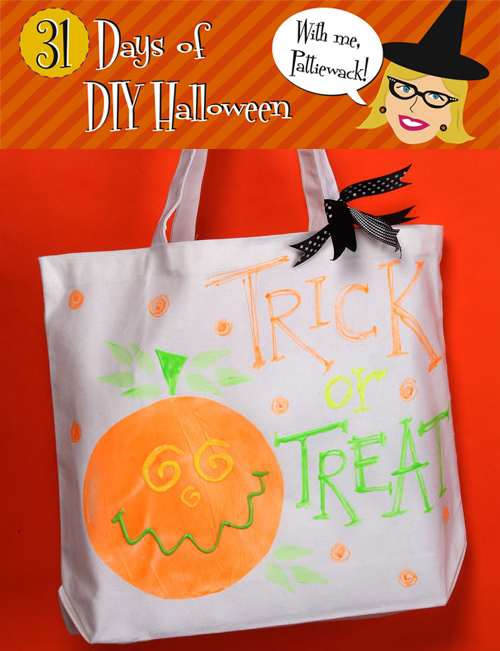
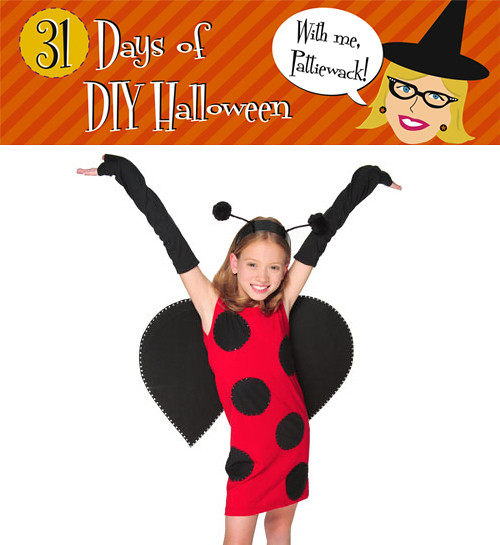
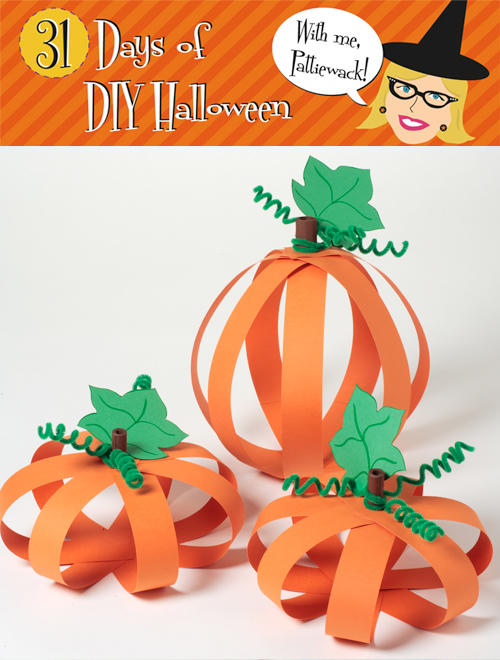
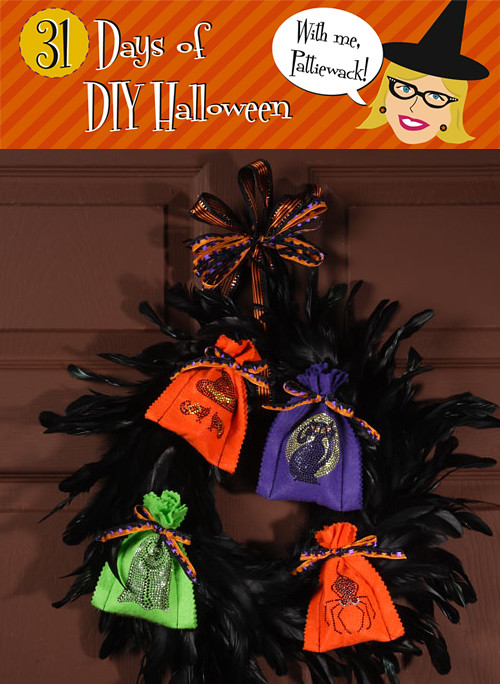
You can peek into Pattie's crafty mind by some of these projects she's created!
mosaicec7f464296bd2e5694ccc90679bf46f31279548d

We wanted to find out more about Pattie, so we asked her 5 fun questions! This crafty lady didn't disappoint!

1. Having been raised in rural Oklahoma, what were the kinds of crafts you made as a kid? Being a preacher’s kid, my mom was always coming up with Bible School and Church Bazaar projects for us to make. Did you do a lot of repurposing? We didn’t throw anything away! I could make anything from a makeup bag out of a bleach bottle and some fabric remnants, to a wreath out of egg cartons.

2. You’ve been the host of TV shows and many video demos, but not a lot of them have been live. Are you prepared for the unexpected at “Let’s Create Live”? There’s nothing like a LIVE show, as I’ve experienced many times on QVC and HSN where thousands of people are watching. The worst thing that ever happened to me was when the thread broke as I was demonstrating a quilting attachment and I had to rethread the sewing machine right then and there. I just kept talking and smiling!

3. In your many hosting experiences, do you have a most embarrassing moment? Please share it with us. We’re dying to know! Well, I’ve told this story before, but my friend Darsee and I were doing a live show at Universal Studios one time for the Home Show, and we thought it would be fun to blow eggs and decorate them for Easter. There we were with our big hair, dressed up all fancy, blowing eggs, AND not realizing how ridiculous we looked. Of course, being LIVE, we didn’t stop and watch play-back. But, imagine our bewilderment that night when we ended up on Talk Soup for everyone to laugh at!

4. Your motto is, “If I can’t glue it, I don’t do it!” What would you say is the biggest glue project you’ve ever tackled? Wow, that’s a hard question, since I’ve done lots of BIG things, like a room divider covered with fabric swatches, and a lazy boy with repurposed jeans glued over it entirely.

5. You recently moved to a new home, what kind of crafty remodeling projects are you looking forward to? There are dozens! But, I think my first project is to cover a ghastly mural on one wall that has white cranes and cattails on it… maybe a decoupage project? And I’ve got the local thrift store holding some huge chairs that I’m going to recover with Marimekko textiles. You’ll have to check my blog and facebook page to watch the progress. It’s going to be so much fun!

Pattie is a regular contributor to our blog and you can find many of her behind the scenes projects here. Also visit her web site at Pattiewack.com for crafty projects, books, videos and more!

You can also find Pattie in various videos on our Youtube page! She's always caught on the spot at her desk in impromptu videos!


Visit us on Facebook!
Craft on!Click here for today's daily giveaway!

PATTIE WACK VIDEO: Dazzling Dessert Cover!

Monday, November 22, 2010
OK, the holiday season doesn't officially kick off until Friday, but here at iLoveToCreate, we cannot wait for the red and green glitter to fly! So here is a little jump start on the season!


LINK


Check out our new Facebook page and give us some LIKEy love!!
Craft on! Click here for today's daily giveaway!

31 Days of DIY Halloween - Luminous Loot Tote Bag

Sunday, October 24, 2010
tote bag

Glow in the dark crafts are so much fun for the kiddos. You can pick up a fist full of Tulip® 3D glow paints and a pack of canvas bags to keep the kids busy creating their own version to hold all their loot. And when the lights are out, they'll still be able to find their candy stash!

Materials:
Tulip® Sponge Brushes™
Tulip® 3D Fashion Paint™
65175 Yellow Glow
65176 Orange Glow
65177 Green Glow
– Self-adhesive shelf paper
– Paper towels
– Iron
– Cardboard cut to fit inside tote
– Light colored chalk sharpened to a point
– Permanent felt pen
– Scissors
– Ribbon – black, orange – 12” each
– Foil
– Scissors
– White Tote Bag
– Patterns (click here for patterns)

Instructions:
1. Iron bag smooth then insert cardboard.
2. Place shelf paper, shiny side up, over pumpkin pattern then use felt pen to trace onto paper.
3. To create stencil, use scissors to cut out inner circle, leaving edges intact. Peel paper backing from stencil, position in place on tote then press to secure. Run a finger along inside cut edges to prevent seepage.
4. Shake bottle of Orange Glow 3D Fashion Paint. Squeeze a large puddle into center of circle. Using 1 ¾” Sponge Brush, lightly spread paint in an even layer, adding more paint as needed. Carefully remove stencil. Let dry.
5. Test flow of Green Glow paint on paper towel, using an even pressure on bottle for a smooth line. Add stem to pumpkin where shown.
6. Squeeze a puddle of Green Glow onto foil. Use the side of 1¾” sponge brush to paint leaves of pumpkin. Dip side of brush into paint then tap onto foil making sure paint is even on side. Position side of brush on tote then slightly wiggle to release paint. Repeat step dipping into paint for each leaf. Let dry.
7. Loosely cut apart words. Turn pattern over, hold up to window then trace over words with chalk on back of pattern. Position word on tote, chalk side down, hold in place with hand firmly run fingers over lines to transfer chalk to fabric. Repeat with remaining words.
8. Paint over words with Glow paint using color shown, adding several lines for each letter.
9. Detail pumpkin with Yellow swirl eyes and nose and a wavy Green line for mouth. Add random Orange dots on remainder of bag.

Craft on! Click here for today's daily giveaway!

31 Days of DIY Halloween – Little Ladybug Costume

Saturday, October 23, 2010
ladybug costume
This is absolutely darling, and believe it or not, it’s just t-shirts!! A couple snips, a few quick stitches and you can make your little lady the cutest little bug on Halloween night!

Little Ladybug Costume

Materials:

Tulip® Glam-It-Up!™ Fashion Art Tweezers™
Tulip® Cordless Heat Setting Tool™
– Tulip® Glam-It-Up!™ Iron-On Crystals™
23123 300 Clear Pack
25621 Red
– 1 T-shirt, black
– 2 Pom Poms, 2” black
– 2 sheets Felt, stiff black
– Scissors
– 1 Headband, black
– Straight pins
– Tailor’s chalk
– Sewing machine /matching thread
– 1 T-shirt, red
– 2 Pipe cleaners, black
– pattern (click here for pattern)

Instructions:
1. Cut sleeves off red shirt, using scissors.
2. Place plate on black T-shirt. Trace six circles with tailor’s chalk. Cut out and pin circles on red shirt.
3. Thread sewing machine with black thread. Sew on all circles.
4. Place wing pattern on stiff felt. Trace around with chalk. Cut out two.
5. Flip red shirt to back. Place wings in center top of shirt. Refer to photo. Pin in place.
6. Sew only center edge of wings on shirt. Refer to photo.
7. Place red Crystals around inner edge of each circle, using Tweezers.
8. Heat Heat-Setting Tool following package instructions. Gently place tip of Tool on top of Crystal. Hold for about 5 to 6 seconds. Repeat for all Crystals.
9. Outline wings with clear Crystals. Refer to photo.
10. Tip: If you have some black t-shirt leftover, make long armbands.
11. Twist one end of a pipe cleaner around a pom pom. Repeat with other pom pom and pipe cleaner. Wrap other end of pipe cleaner around headband.

Craft on! Click here for today's daily giveaway!

31 Days of DIY Halloween – Paper Pumpkins

Tuesday, October 19, 2010
paper-pumpkins

You know, sometime simple is good, and these are SO simple and fun to make. Put the supplies for this cute craft in a box and save it for an after school project for the kids when it’s too wet or cold outside. And if you make a ton of them, they would be terrific to scatter down the middle of a party table, or to take to the office to sneak onto your co-workers’ desks for a nice surprise!

Paper Pumpkins

Materials List:
– Aleene’s® Crystal Clear Tacky Spray™
– Scissors
– 12” square paper, 4 orange
– Permanent marker, green
– Personal paper cutter
– 12” square paper, green
– Pencil
– Hole punch, large
– 12” square paper, brown
– Pipe cleaners, 9 green
– Patterns (click here for pattern)

Instructions:
1. Cut orange paper into 1-1/2” wide strips, using paper cutter.
2. Arrange seven strips in an asterisk shape with ends slightly overlapping in center, making sure they are even width apart. 3. Apply Tacky Spray on one end at time and press together. Let dry.
3. Pull up other ends to middle. Apply Tacky Spray on ends and place together. Let dry.
4. Trace leaf pattern on green paper. Cut out with scissors.
5. Use green marker to draw veins.
6. Punch a hole at center bottom of leaf. Place a pipe cleaner through hole and twist end around pipe cleaner.
7. Curl end of pipe cleaner around pencil. Remove pencil, leaving a curly-q. Repeat with other pipe cleaners, using three per pumpkin.
8. Cut a 1” wide strip of brown paper and roll on pencil. Apply Tacky Spray on end of roll to adhere.
9. Spray one end with glue and press on top of pumpkin. Refer to photo.
10. Wrap pipe cleaners and leaf around stem. Repeat all steps to make other pumpkins.

Craft on! Click here for today's daily giveaway!

31 Days of DIY Halloween – Spooky Wreath

Sunday, October 10, 2010
spooky wreath

Craft on! Click here for today's daily giveaway!

Have you decorated your door for Halloween yet? I spotted these black feather wreaths at the craft store and went crazy! Then I knew I had to use our sparkly spooky iron-on designs to decorate treat bags for it. It seriously only took me about an hour to complete the project, and it looks great to greet my guests!

Aleene's® Fabric Fusion® Permanent Dry Cleanable Fabric Adhesive
Tulip® Glam-It-Up!™ Iron-On Fashion Designs™
Cat in Moon
Ghost
Purple Spider
Witch Accessories

– Pinking scissors
– Purple craft felt square
– Optional: Sewing machine and black thread
– Corsage pins
– (1) Yard 5/8” Halloween ribbon
– Green craft felt square
– Iron
– Thin cloth
– (2) Yards orange/black 1” ribbon
– Black feather wreath
– (2) Orange craft felt squares


Instructions:
1. Cut one purple, one green and two orange felt pieces into 5 ”x10” rectangles.
2. Preheat dry iron to wool setting. Fold pieces in half and iron.
3. Peel paper backing from design.
4. Position design on bottom of folded edge of felt, plastic side up. Cover with thin cloth.
5. Press and hold iron over design for 30 seconds. Let cool.
6. Carefully remove plastic.
7. Turn felt over. Place iron on back of felt for 15-20 seconds.
8. Glue sides of bags together with Fabric Fusion. Let dry.
9. Optional: Using sewing machine to sew decorative stitches on sides of bags.
10. Fill bags with candy and tie tops with 5/8” ribbon.
11. Attach to wreath with corsage pins.
12. Make large loopy bow with 1” orange/black ribbon to hang wreath.

Behind the Scenes Photo Shoot

Sunday, November 8, 2009


One of the things that happens on a daily basis here at iLoveToCreate, are the photo shoots with models, products, and projects. Scott, our photography/videographer (and my hubby) set up a shoot for our December t-shirt of the month in the manufacturing/bottling facilities this week.

Our models were perfect with their houndstooth pattern t-shirts with gradient dye, up against the black drums. I designed the shirts and thought it would be great to have an edgy background for the shoot. I loved it!

After Megumi (one of the models) changed clothes, we discovered that in the storage area was a poster she had modeled for 6 years ago! She flipped out, and I couldn't wait to get a cute pic of her posing with the poster. Too funny!

As you can see in these pics, our plant is huge, and we have to wear protective glasses and closed toed shoes to walk around.

Check this out. It's one of the glue vats being mixed with a humungous mixer about the size of my little car.

We have tons of mannequins awaiting another trade show, and big drums of paint.

The bottling area was humming away, and there were rows of plaster waiting to become bisque pieces for our ceramics division of products.

I'm fascinated by the conveyor belts of bottles, and huge drums of paint and glue being pumped into spray bottles and squeeze bottles before it gets labels and shipped to the stores.

Alexa, aka Swell Designer, is pretty fascinated too, I might say.... heehee.

But alas, it's just another day behind the scenes at iLoveToCreate!

Sassy Tote Bag for the Sewing Expo Tour!

Sunday, September 27, 2009


I'm flying to D.C. on Wednesday to the Sewing Expo for Hancock Fabrics to demonstrate The Tulip® Dye Techniques Kit™ and the Tulip® Cordless Heat Setting Tool™ with the Tulip® Glam-It-Up!™ Iron-On Crystals™ combined to create a cute and sassy quilted tote bag and a mini quilt wall hanging.
The Sewing Expo is part of a national campaign to bring inspiration, motivation, education and personal satisfaction to everyone who enjoys sewing, quilt making, embroidery, embellishment and related needle arts. I can't believe I get to be a part of this amazing event.

So, to design the sassiest little bag with dyed fabric, I first have to grab my supplies at the iLoveToCreate design studio and dye my little heart out. I decided to create 3 of the 5 techniques in the kit for my projects.

Our house in Clovis has a darling patio out back with a ceiling fan, and it's just begging to have a little dye party, so I got the fan buzzing, and laid out my kit. I grabbed 2 kits, because I needed 12 yards of fabric for the tote, the quilt, and the demo swatches.

First step? I washed and dried all the 100% cotton fabric to take out the sizing and prepare it for the dye.

My steel sink is perfect for mixing the dyes. They're great because all I have to do is put on my gloves and then fill all the bottles with water (the dye is already in there) and shake.

Scott set up a table cover with plastic trash bags. Of course he used bungies to hold it down. I call him Bungy Man. (When I'm not calling him Zip-tie Man.)

I started with the shibori technique and since my project is so humongus, I taped the 2 tubes together that come in the kits.

Then I laid it under the fabric and scrunched it up. The shibori tube holds the fabric up so that you get that cool look, and keeps it from puddling. You'll see!

Now, the dying begins. I squirted it onto the fabric along the top of the tube. Then, I moved the tube over about 8 inches and repeated until I was at the end of the fabric.

Voila! I hung it on the clothesline and replaced the trash bag with a new one for the next color.

Woohoo, the brush technique was amazing. I simply poured my dye out of the bottle and into a disposable bowl, dipped my brush from the kit into the dye, and made crisscross strokes all the way across. Loved it.

After changing the trash bag on the table again, I was ready for the spray technique. This was soooo easy and fast. I made little hills and valleys with the fabric, then used the spray top from the kit to spray away.

I don't know what the neighbors think, but it sure gave them a colorful view while the dye set for 4 hours. Last step, wash and dry the fabric separately and then make my little tote bag.

I love how the cotton dyed fabric turned out and it feels good, not crunchy. I'll be posting the project at iLoveToCreate.com with all the instructions right away.

The crystals were uber easy to apply with the heating tool, and I think they added a little sparkle-farkle to the bag. Like I said, super fun, and a little bit sassy with the crystals and in bright, happy colors.

Come see me at the Sewing Expo in Chantilly, VA! I'll be there Thursday, Friday and Saturday in the Hancock Fabrics booth. Look for the gal with the bright green tablecloth and the happy smile.... I'll show you how to dye fabrics for your quilting and sewing projects, and our cute little cordless heating tool for jazzin' up your projects.

See you there!
Pattiewack

Love that Fast Grab Tacky Spray!

Monday, September 14, 2009


Here's the solution to the rough shelves in your studio/craft space. Aleene's® Fast Grab Tacky Spray™!


I needed the rough MDF covered with something because it kept snagging the garments and projects I store in my project cabinet until they go to photography. I had tried just laying down the rubber shelf liner onto the shelves, but every time I shoved something in there, it got all sloppy and moved around.

Soooooo....here's the PERFECT solution.

  1. Clean out the cabinet totally.
  2. Cut the rubber shelf liner to size.
  3. Lightly spray the Aleene's® Fast Grab Tacky Spray™ across the shelf.
  4. Step back for 60 seconds.
  5. Lay the rubber shelf liner in place and press with your fingers.
  6. Repeat on the remaining shelves.

Voila! Happy shelves for happy craft projects.