Showing posts with label dog crafts. Show all posts

Wee Weenie Dog Outfits

Friday, May 13, 2011

Remember a few weeks ago when I told you about the Buda Weenie Dog Races? At the time I was questioning whether or not I had the time to pull together matching weenie outfits for the kids. Never one to let an occasion to dress in theme pass my by I made weenie outfit magic happen. Got a pair of kids and a love of dachshund? If you answered yes, today's I Love to Create post was made for you.


SUPPLIES
Cotton Fabric
Ribbon
Yellow Onesie
Yellow T-shirt
Aleene's Fabric Fusion Glue
Sewing Machine
Silhouette of a Weenie Dog
Thread
Aleene's Tack It Over and Over


Using the silhouette of the weenie dog I printed out I traced it onto cotton fabric. I cut the weenie dog out and cut it in half. Using Aleene's Tack It Over and Over half of the dog went on the onesie and the other on the T-shirt. I then stitched the dog halves onto the shirt and onesie.


Using Fabric Fusion Glue and ribbon I made Tallulah's side of the shirt a little more feminine with a few bows.


The trickiest part of this otherwise super easy project was getting a picture of my kids side by side so you got the effect. I knew and they looked cute and that is all that matters to me.


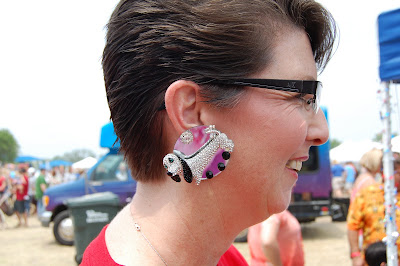
I also had to share an amazing pair of handmade weenie dog earrings I spotted at the races. Pretty much the second cutest crafty thing there.


Check out more I Love to Create projects by Jennifer Perkins right here.

Visit us on Facebook!
Craft on! Click here for today's daily giveaway!

Milk Bone Memorial Frame

Thursday, March 10, 2011

This January we lost our dog Lucy to old age.  We had Lucy for almost 10 years after we found her late one night on the side of the road in Corpus Christie.  We tried taking her to the pound when we found her and they were full.  We went door to door and the only thing anyone knew was that lot's of people dropped dogs off in the area where we found her.  We put an ad in the paper and no one claimed her.  It was a sign that Lucy was meant to be our dog.  We were so sad when she passed away, but I was so happy that I thought of a crafty way to immortalize her.


SUPPLIES
Milk Bones
Scissors
Dog Food
Empty Cardboard Box

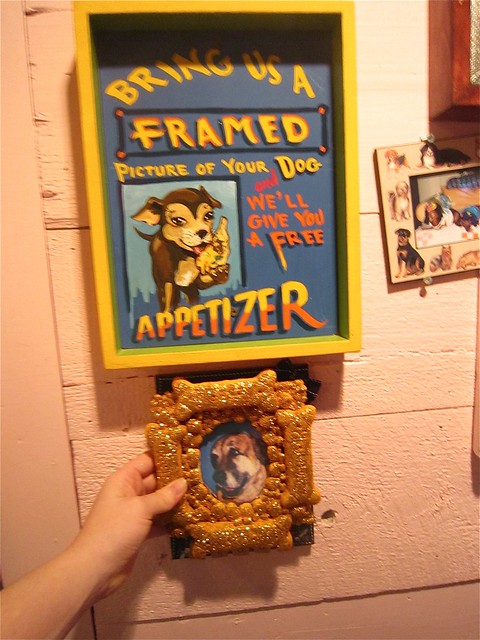
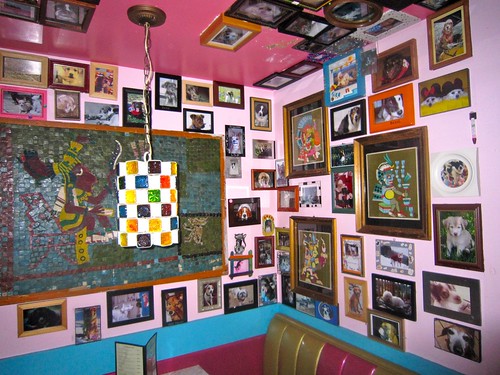
I wanted to make a very special picture frame for Lucy.  Not one that would just sit on a shelf in my own house, one that would be in public for others to enjoy and bask in Lucy's glory!  We have a local chain of restaurants here in Austin called Chuy's.  The location closest to our house has a deal that if you bring them a framed picture of your dog not only will they hang it up you also get a free bowl of queso!  It was a win win situation. 


This is far from the first time Lucy has been in the crafty spotlight.  She was the star of my first TV craft project on Crafters Coast to Coast when I made a resin necklace with her picture.  Later she appeared on episodes of Craft Lab when I made poppets with Claudine Hellmuth.  She has even acted as a model for a few craft projects on the blog like New Years Eve Tiaras.

The first thing I did was cut the base of my frame out of a piece of cardboard.  It was an empty Milk Bone Box actually.


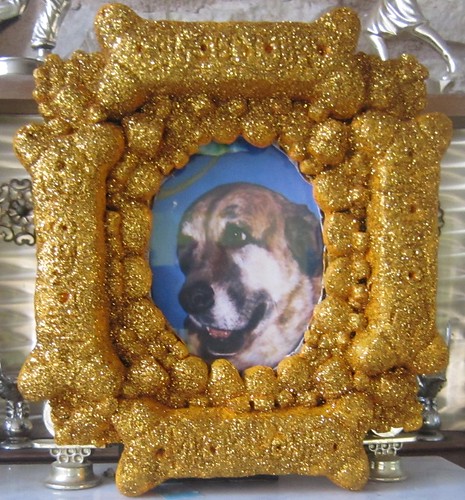
After the base of the frame was made I covered it with Milk Bones and Dog Food.  I threw in a little cat food too since it was smaller and filled in some of the smaller spaces nicely.  I used Liquid Fusion Glue to hold everything in place.


When all the glue had dried i painted all the food with Crafty Chica paint.  It took a few coats to get the golden sheen I was hoping for.  This also helped seal in the smell.


While my second coat of paint was still wet I added a thick coat of Tulip Glitter in gold.

When the frame was a glittery as I wanted I coated the whole thing with some Aleene's Sealer.  Not only did I not want any glitter falling off I also didn't want my frame to smell like dog food since it was going to be hanging in a restaurant.


When I was finished decorating the frame I printed out a portrait of Lucy we had done years ago.  The artist added a halo to the portrait apporiatly enough.  I glued a print out of the picture into the frame and then added a card board backing.


All that was left to do was hang the picture at Chuy's and score my free queso.  Lucy had been my right hand crafting dog for almost 10 years it was only right that she have one last glittery crafty send off.  If you ever visit the Chuy's at Arbor Trails look for Lucy.  Every Chuy's location has an Elvis shrine, but this is the only one with a Lucy shrine.


Visit us on Facebook!
Craft on! Click here for today's daily giveaway!

Decopauged Delights

Wednesday, July 7, 2010
Get the whole family together for an activity that’s full of colorful fun fit for a storybook! Give these little “pets” lots of personality with bright fabrics, tissue papers and Collage Pauge™ Instant Decoupage.

Supplies:
Collage Pauge® Instant Decoupage
– Decorative edge scissors
– Tissue paper in various colors
– Foil
– Foam brush
– Hole punch
– Small to medium-sized cat and dog figurines
– Fabric of your choice

Instructions:
Dog
1. Using decorative edge scissors, cut fabric of your choice into 2” x 2” squares.
2. Squeeze a large puddle of Matte Collage Pauge™ onto foil. Dip dry foam brush into adhesive and working in small sections at a time, apply evenly onto dog figurine. Immediately place a fabric square into adhesive on dog then brush a coat of adhesive over top of fabric piece.
3. Repeat step until entire dog is covered, overlapping fabric squares as shown. Make sure to secure fabric around curves and features of figurine to preserve details. Let dry completely.

Cat

1. Tear tissue paper into 2” x 2” pieces.
2. Using hole punch, punch out circles from a contrasting color of tissue paper.
3. Squeeze a large puddle of Sparkle Collage Pauge™ onto foil. Dip dry foam brush into adhesive and working in small sections at a time, brush an even coat onto cat figurine. Slightly crumple tissue strip and place into adhesive on cat. Use foam brush to add more adhesive over top of tissue piece. Place another piece of tissue in place, slightly overlapping the first, then brush over with adhesive.
4. Repeat steps over remainder of cat, working on and around any curves and features to preserve details. Add several layers of Collage Pauge™. Let dry.
5. When adhesive on cat is dry, randomly place punched dots on surface. Add another coat of Glossy Collage Pauge™ over top of dots. Let dry.

Also check out the instructions for this cute genie bottle seen below on iLoveToCreate's web site!